
User Manual


7
Editing a Sound (Program)
Initializing a Sound (Init)
Here’s how to initialize the settings of a program, part, partial, or pattern.
1.
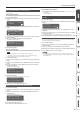
Hold down the [Shift] button and press the [Program Select/Init] button.
The INIT screen appears.
2.
Use the cursor [K] [J] buttons and the [-] [+] buttons to specify what you
want to initialize.
Settings to
initialize
[-] [+]
Explanation
PROGRAM Program settings
PART Part settings (including MFX, the MIDI channel)
PARTIAL Partial settings (if a digital part is selected)
PATTERN Pattern
3.
Press the [Enter] button.
A conrmation message appears.
If you decide to cancel, press the [Exit] button.
4.
Press the [Enter] button.
The screen indicates “Completed!” and initialization is executed.
Copying a Sound or Pattern (Copy)
Here’s how to copy settings from a part, partial, or pattern that’s saved in another
program, or from an INTEGRA-7 or FA-06/08 tone.
1.
Hold down the [Shift] button and press the [Bank] (Copy) button.
The COPY screen appears.
2.
Use the cursor [K] [J] buttons to select the data that you want to copy, and
press the [Enter] button.
Settings to copy
Cursor [
K
] [
J
]
Explanation
Part Part settings (including MFX, excluding the MIDI channel)
Partial Partial settings (only if a digital part is selected)
Pattern Pattern
Tone
Tone (only if a USB ash drive is connected)
Copying tone settings
“SuperNATURAL synth tones” from the INTEGRA-7 or FA-06/08 can be used by
a digital part of the JD-XA.
Export/save the “SuperNATURAL synth tone” data from an INTEGRA-7 or FA-
06/08 to your USB ash drive.
Importing that data into the JD-XA is referred to as copying the tone settings.
The data to be imported must be saved to the IMPORT folder of the USB ash
drive.
&
For details, refer to “The folder structure of a USB ash drive” (p. 14).
NOTE
If “Part” is selected as the data to copy, the MIDI channel is not copied.
3.
Use the [-] [+] buttons to select the copy-source data, and then press the
[Enter] button (select Source).
The parameters dier depending on the copy-source you selected.
Repeat this procedure as many times as needed.
MEMO
Depending on the parameters, you can also use [Bank], [01]–[16], and each part’s
Select [01]–[04] and Partial [01]–[03] buttons.
4.
Use the [-] [+] buttons to select the copy-destination, and then press the
[Enter] button (select Destination).
The parameters dier depending on what you’re copying.
Repeat this procedure as many times as needed.
MEMO
Depending on the parameters, you can also use each part’s On [01]–[04] and
Partial [01]–[03] buttons.
5.
Press the [Enter] button.
A conrmation message appears.
If you decide to cancel, press the [Exit] button.
6.
Press the [Enter] button.
The screen indicates “Completed!” and the copy is executed.
Saving a Program (Write)
A sound that you create will loose if you move the knobs or if you select a dierent
program. It will also be lost if you power-o the JD-XA.
When you’ve created a sound that you like, you should save it as a program.
1.
Press the [Write] button.
2.
Use the Cursor [K] [J] buttons to select “PROGRAM,” and then press the
[Enter] button.
The name input screen appears.
PROG NAME: [Ent]
INIT PROGRAM
3.
Use the cursor [K] [J] buttons and [-] [+] buttons to edit the characters.
4.
When you’ve nished specifying the name, press the [Enter] button.
5.
Use the [-] [+] buttons to select the save-destination.
If you want to save to a USB ash drive, press the [USB Memory] button to make it
light.
You can also use the [Bank] and [01]–[16] buttons to select the save-destination.
* If you specify a number in which data is already saved, the program name is shown in the
lower line. If you save to this number, the previous data is erased and overwritten by the new
program.
6.
Press the [Enter] button.
A conrmation message appears.
If you decide to cancel, press the [Exit] button.
7.
Press the [Enter] button.
A screen indicating “Completed!” appears, and the data is saved.
* NEVER turn the power o while you are saving settings.
Using Favorite Sounds (Programs) (Favorite)
Controller Explanation
[Favorite] button Use these button to register and recall your favorite sounds (programs).
[01]–[16] buttons Use these buttons to select Favorite 01–16.
[Bank] button Use this button to select the Favorite bank (A–P).
Selecting a Favorite
1.
Press the [Favorite] button so it’s lit.
The [01]–[16] buttons become the Favorite select buttons.
2.
Press one of the [01]–[16] buttons to select a favorite sound.
If you press a button in which nothing is registered, the screen indicates “Not
Registered!”
Switching the Favorite bank
1.
When the [Favorite] button is lit, press the [Bank] button.
The [01] (A)–[16] (P) button corresponding to the currently selected bank number
(A–P) blinks.
2.
Press one of the [01] (A)–[16] (P) buttons.
The bank is switched, and the [Bank] button goes dark.
3.
Use the [01]–[16] buttons to select a favorite.
Registering a Favorite
1.
Select a program that you want to register as a favorite.
2.
Press the [Favorite] button so it’s lit.
3.
Select the bank in which you want to register the favorite.
&
“Switching the Favorite bank” (p. 7)
4.
Hold down the [Favorite] button and press the favorite number ([01]–[16]
buttons) that you want to register.
The currently selected program is registered to that button.
While you hold down the [Favorite] button, the [01]–[16] buttons in which you
saved favorites are lit; buttons in which you did not save favorites are blinking.
NOTE
If you’ve edited a program, save that program rst before registering it as a
favorite.
&
“Saving a Program (Write)” (p. 7)
Deleting a Favorite
1.
In the Menu screen, choose “FAVORITE UTIL” and press the [Enter] button.
The FAVORITE UTIL screen also appears if you hold down the [Shift] button and
press the [Favorite] button.
2.
Use the cursor [K] [J] buttons to select a favorite bank.
3.
Use the
[-] [+]
buttons to select the favorite that you want to delete.
You can also use the [01]–[16] buttons to select a favorite to delete.
4.
Press the [Enter] button to delete the favorite that is shown.