
User Manual


12
Overall Settings for the JD-XA
Accessing the Menu Screens
1.
Press the [Menu] button.
2.
Use the Cursor [K] [J] buttons to select the item that you want to edit, and
press the [Enter] button.
The corresponding edit screen appears.
3.
Use the Cursor [K] [J] buttons to select the parameter that you want to edit,
and then use the [-] [+] buttons to edit the setting of that parameter.
4.
Press the [Exit] button several times to return to the program select screen.
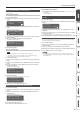
Editable items
Menu
Cursor [
K
] [
J
]
Explanation
SYSTEM Make settings of the entire JD-XA.
PROGRAM EDIT Access the program parameter screen.
PART EDIT Access the part parameter screen.
TONE EDIT Access the TONE EDIT screen of the currently selected part.
EFFECTS EDIT Access the eect edit screen.
MIC EDIT Access the mic edit screen.
LED CUSTOMIZE
Access a screen where you can specify how the top panel LEDs are
illuminated.
PATTERN UTIL Access the pattern utility and settings screen.
FAVORITE UTIL Access a screen where you can view or delete favorite registrations.
UTILITY Access the utility menu.
VERSION INFO View the software version.
&
For details on the parameters, refer to “Parameter Guide (English)” (PDF).
Making System Settings (SYSTEM)
Here’s how to make overall settings for the JD-XA itself.
1.
Press the [Menu] button.
2.
Use the Cursor [K] [J] buttons to select “SYSTEM,” and then press the [Enter]
button.
GENERAL:
LCD Contrast 10
3.
Hold down the [Shift] button and use the Cursor [K] [J] buttons to select
the menu item that you want to edit.
4.
Use the Cursor [K] [J] buttons to select the parameter that you want to edit,
and then use the [-] [+] buttons to edit the setting of that parameter.
5.
Press the [Exit] button several times to return to the program select screen.
Menu
[Shift]+
Cursor [
K
] [
J
]
Parameter
Cursor [
K
] [
J
]
Value
[-] [+]
Explanation
GENERAL
LCD Contrast 1–10 Adjusts the contrast of the display.
Auto O
OFF, 30 min,
240 min
Species whether the unit will turn o
automatically after a certain time has
elapsed.
If you don’t want the unit to turn o
automatically, choose “OFF” setting.
StartPrg
INT:A01–
USB:P16
Species the program number that is
selected at startup.
Knob Mode DIRECT, CATCH
When you operate a knob, this
setting species whether control data
corresponding to the knob’s position is
always transmitted (DIRECT) or whether
control data is transmitted only after the
knob passes through the current value of
the parameter (CATCH).
LED Demo
OFF, 1 min–60
min
Species the time (minutes) until the LED
demo is shown.
USB Drv
VENDOR,
GENERIC
Use the dedicated driver provided by
Roland. MIDI and audio are available
(VENDOR).
Use the default driver provided by the
operating system. Only MIDI is available
(GENERIC).
Menu
[Shift]+
Cursor [
K
] [
J
]
Parameter
Cursor [
K
] [
J
]
Value
[-] [+]
Explanation
KEY TOUCH
Velocity
REAL
The transmitted velocity value will
correspond to the force with which you
strike the key.
1–127
The transmitted velocity value will be xed,
regardless of the force with which you strike
the key.
Velo Crv
LIGHT
The keyboard will have a lighter-feeling
touch. Since you’ll be able to reach
fortissimo ( ) without having to play as
strongly as with the “MEDIUM” setting, the
keyboard will feel lighter. This setting makes
it easier for people with reduced nger
strength to play the keyboard.
MEDIUM This is the standard keyboard touch setting.
HEAVY
The key will have a heavier-feeling touch.
Since you’ll need to play more strongly than
with the “MEDIUM” setting in order to reach
fortissimo (), the keyboard will feel heavier.
This setting allows you to use your playing
dynamics to add more expression to your
performances.
Velo Oset -10–+9
Adjusts the keyboard velocity curve.
Lower values make the keyboard feel lighter.
Higher values make the keyboard feel
heavier.
After Sens 0–100
Species the aftertouch sensitivity.
Increasing this value makes it easier to apply
aftertouch. Normally you should leave this
set at “100.”
PEDAL1
PEDAL2
Asgn Src
SYSTEM,
PROGRAM
Species whether the function controlled
by the pedal is determined by the system
setting (SYSTEM) or the settings of the
program (PROGRAM).
Asgn
OFF No function is assigned.
CC01–31, 33–95 Controller number 1–31, 33–95
BEND-DOWN
The same eect as moving the pitch bend
lever to the left.
BEND-UP
The same eect as moving the pitch bend
lever to the right.
AFT Aftertouch
START/STOP
Start/stop the pattern.
TAP-TEMPO
The same eect as pressing the panel [Tap]
button.
PROG-DOWN Switch the program to the previous number.
PROG-UP Switch the program to the next number.
FAV-DOWN Switch the favorite to the previous number.
FAV-UP Switch the favorite to the next number.
PANEL-DEC
The same eect as pressing the panel [-]
button.
PANEL-INC
The same eect as pressing the panel [+]
button.
Dest
PART-Select,
PART-On
Species whether the part to which the
eect applies is determined by the PART
Select setting or by the PART On setting
(when CC, BEND, or AFT is selected).
Polarity STD, RVS
Selects the polarity of the pedals.
Depending on the model of pedal, the result
of depressing or releasing the pedal might
be the opposite of what you expect. If so,
choose the “RVS” setting. If you’re using a
Roland pedal (that has no polarity switch),
choose the “STD” setting.
HOLD PEDAL
Polarity STD, RVS
Selects the polarity of the pedal.
Depending on the model of pedal, the result
of depressing or releasing the pedal might
be the opposite of what you expect. If so,
choose the “RVS” setting. If you’re using a
Roland pedal (that has no polarity switch),
choose the “STD” setting.
Cont Hold OFF, ON
If this is ON, the HOLD jack will support half-
pedaling.
WHEEL1
WHEEL2
Asgn Src
SYSTEM,
PROGRAM
Species whether the function controlled
by the wheel is determined by the system
setting (SYSTEM) or by the settings of the
program (PROGRAM).
Asgn
OFF No function is assigned.
CC Controller number 1–31, 33–95
BEND
Moving the wheel upward raises the pitch,
and moving it downward lowers the pitch.
When the wheel is in the center, there is no
pitch change.
BEND-DOWN
The same eect as moving the pitch bend
lever to the left.
BEND-UP
The same eect as moving the pitch bend
lever to the right.
AFT Aftertouch
Dest
PART-Select,
PART-On
Species whether the part to which the
eect applies is determined by the PART
Select setting or by the PART On setting.