
User Manual


10
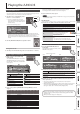
Editing Sounds
MEMO
For details on the parameters that you can edit, refer to “Parameter Guide (English)” (PDF).
Editing a Patch/Drum Kit
1.
Select a patch or drum kit that you want to edit.
2.
Press the [SAMPLE IMPORT] button and [DAW CONTROL] button
simultaneously.
The EDIT MENU screen appears.
3.
Move the cursor to “PATCH EDIT” or “DRUM KIT EDIT,” and press the [ENTER]
button.
The PATCH EDIT or DRUM KIT EDIT screen appears.
4.
Move the cursor to tab, and use the [K] [J] buttons to switch the pages.
5.
Move the cursor to the parameter that you want to edit, and use the value
dial to change the value.
6.
To save the edited settings, perform the operation “Saving Your Settings
(Write).”
Editing a Performance
1.
Press the [PATCH/PERFORM] button to make it light.
2.
Select a performance that you want to edit.
3.
Press the [SAMPLE IMPORT] button and [DAW CONTROL] button
simultaneously.
The EDIT MENU screen appears.
4.
Move the cursor to “PERFORMANCE EDIT” or “PART EDIT,” and press the
[ENTER] button.
The PERFORM EDIT or PART EDIT screen appears.
MEMO
“PERFORMANCE EDIT” lets you edit while viewing a list of the settings of all parts,
and “PART EDIT” lets you edit each part of the performance individually.
* PERFORMANCE EDIT and PART EDIT have the same parameters in common.
5.
Move the cursor to tab, and use the [K] [J] buttons to switch the pages.
6.
Move the cursor to the parameter that you want to edit, and use the value
dial to change the value.
7.
To save the edited settings, perform the operation “Saving Your Settings
(Write).”
Editing the Eects
You can make dierent eect settings independently for Patch mode and
Performance mode.
Patch mode
You can use multi-eect (MFX), chorus, and reverb for each patch.
Performance mode
For each setting, you can use a maximum of three multi-eects (MFX1, MFX2,
MFX3), one chorus, and one reverb.
For each of the three MFX, the chorus, and the reverb, you can specify whether it
will operate according to the eect settings of the performance, or according to the
eect settings of the patch or drum kit assigned to the part you specify.
1.
Press the [SAMPLE IMPORT] button and [DAW CONTROL] button
simultaneously.
The EDIT MENU screen appears.
2.
Move the cursor to “EFFECTS EDIT,” and press the [ENTER] button.
The EFFECTS EDIT screen appears.
3.
Move the cursor to the parameter that you want to edit, and use the value
dial to change the value.
4.
To save the edited settings, perform the operation “Saving Your Settings
(Write).”
MEMO
When you edit the eect settings, an “*” is shown by the patch/performance
name. When you save the patch or performance, the “*” disappears.
Saving Your Settings (Write)
If ou turn the power o or select another tone, the changed settings are lost.
If you want to keep the changes you made, perform the Write operation.
NOTE
When you save, the data that was previously in the save-destination is
overwritten.
1.
Press the [WRITE] button to make it light.
The WRITE MENU screen appears.
5
In Patch mode, you can long-press the [WRITE] button to access the name input
screen.
5
Depending on the state before you pressed the button, either PATCH WRITE or
PERFORMANCE WRITE is automatically selected.
NOTE
In Performance mode, if an “*” symbol is shown for both Patch and Performance,
rst save the patch and then save the performance. Be aware that if you save the
performance rst, the edited patch data is lost.
2.
Press the [ENTER] button.
The name input screen appears.
3.
Assign a name to the data that you’re saving.
Operation Explanation
[
K
] [
J
] buttons Move the cursor.
Value dial, [–] [+] buttons Select the character.
[
I
] [
H
] buttons Switch between uppercase and lowercase.
Inserting/ Deleting Characters
1.
While entering a name, press the [MENU] button.
The NAME MENU window appears. The window closes if you press the button
once again.
2.
Move the cursor to “INSERT” or “DELETE,” and press the [ENTER] button.
Function Explanation
INSERT Press the [ENTER] button to insert a space (blank) at the cursor location.
DELETE
Press the [ENTER] button to delete the character at the cursor location;
subsequent characters will be moved forward to ll the gap.
4.
When you’ve specied the name, press the [ENTER] button.
5.
Use the value dial to specify the save-destination.
6.
Press the [ENTER] button.
A conrmation message appears.
If you decide to cancel, press the [EXIT] button.
7.
Press the [ENTER] button to save the settings.
NOTE
Never turn o the power while the screen indicates “Writing....”