WARNING: To reduce the risk of fire or electric shock, do not expose this apparatus to rain or moisture. RISK OF ELECTRIC SHOCK DO NOT OPEN The lightning flash with arrowhead symbol, within an equilateral triangle, is intended to alert the user to the presence of uninsulated “dangerous voltage” within the product’s enclosure that may be of sufficient magnitude to constitute a risk of electric shock to persons. CAUTION: TO REDUCE THE RISK OF ELECTRIC SHOCK, DO NOT REMOVE COVER (OR BACK).
Owner’s Manual How to obtain a PDF of the owner’s manual PDF files of the owner’s manual and supplementary material for this product can be obtained from the Roland website. • JUPITER-80 Owner’s Manual (this document) • Parameter List * • MIDI Implementation * * These are not included with the product; you may download them as necessary. Visit the following URL, choose “owner’s manuals,” and search for the model name “JUPITER-80.” http://www.roland.
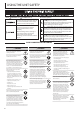
USING THE UNIT SAFETY About WARNING and CAUTION Notices Used for instructions intended to alert the user to the risk of death or severe injury should the unit be used improperly. Used for instructions intended to alert the user to the risk of injury or material damage should the unit be used improperly. * Material damage refers to damage or other adverse effects caused with respect to the home and all its furnishings, as well to domestic animals or pets.
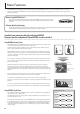
IMPORTANT NOTES WARNING DO NOT play a CD-ROM disc on a conventional audio CD player. The resulting sound may be of a level that could cause permanent hearing loss. Damage to speakers or other system components may result. CAUTION CAUTION Never climb on top of, nor place heavy objects on the unit. This JUPITER-80 for use only with Roland stand KS-J8, KS-G8, and KS-18Z. Use with other stands is capable of resulting in instability causing possible injury.
IMPORTANT NOTES Additional Precautions • Please be aware that the contents of memory can be irretrievably lost as a result of a malfunction, or the improper operation of the unit. To protect yourself against the risk of loosing important data, we recommend that you periodically save a backup copy of important data you have stored in the unit’s memory on USB flash drives.
Contents USING THE UNIT SAFETY. . . . . . . . . . . . . . . . . . . . . . . . . . . . . . . . . . . . . . . . . 4 IMPORTANT NOTES. . . . . . . . . . . . . . . . . . . . . . . . . . . . . . . . . . . . . . . . . . . . . . 5 Playing Sounds 35 Selecting the Sound for Each Part (Selecting Live Sets / Tones). . . . 36 9 Using the Part Sound Buttons to Switch Live Sets or the Solo Part’s Tone. . . . . . . . . . . . . . . . .
Contents Editing Sounds 51 The JUPITER-80’s System Settings . . . . . . . . . . . . . . . . . . . . . . . . . . . . . . . 83 Making System Settings. . . . . . . . . . . . . . . . . . . . . . . . . . . . . . . . . . . . . . . . 83 Editing a Registration. . . . . . . . . . . . . . . . . . . . . . . . . . . . . . . . . . . . . . . . . . . 52 Saving the System Settings. . . . . . . . . . . . . . . . . . . . . . . . . . . . . . . . . . . .
Introduction Playing Sounds Introduction Editing Sounds Other Convenient Functions Connecting Other Equipment Appendix
Main Features The JUPITER-80 is Roland’s flagship synthesizer, delivering powerful, SuperNATURAL sounds and stunning realtime performance. It includes numerous cutting-edge SuperNATURAL sounds generated by Behavior Modeling Technology, bringing you unprecedentedly natural and rich expressive possibilities.
Main Features Powerful Live Sets with SuperNATURAL x 4 The JUPITER-80 can handle up to four SuperNATURAL tones layered as a “Live Set,” letting you perform with awesome and richly expressive sounds. In addition, you can assign Live Sets to the Upper and Lower Parts to create splits and layers, making it easy to construct rich-sounding stacks that were difficult to obtain on a single conventional synthesizer.
Getting Acquainted with the JUPITER-80 How the Sound Generator is Organized The sound generator is organized into units of sounds called “Registrations,” “Live Sets,” and “tones.
Getting Acquainted with the JUPITER-80 Tones The “tone” is the smallest unit of sound that is managed on the JUPITER-80. There are four types of tones, as shown in the table below. These tones are the elements that make up Registrations (p. 15) and Live Sets (p. 14). Type Explanation These are acoustic-type SuperNATURAL sounds. Many realistic sounds using Behavior Modeling Technology are provided. You can also use the Live Set Tone Modify screen (p. 32, p.
Getting Acquainted with the JUPITER-80 Live Sets Parts A Live Set consists of the Tones assigned to the four layers, settings for four MFX units, and settings for one reverb unit. The JUPITER-80 has four parts; Solo, Upper, Lower, and Percussion. You can assign a Tone or Live Set to each Part and play it.
Getting Acquainted with the JUPITER-80 Registrations A Registration consists of these four Parts: Solo, Upper, Lower, and Percussion. Stored within a Registration are the settings for the sound selected for each Part, as well as settings for the Solo Part and Percussion Part. By switching Registrations, you can change all of these settings at once (except for the system parameters).
Getting Acquainted with the JUPITER-80 About Memory The area in which sounds and other settings are stored is called “memory.” Memory is divided into three areas: temporary memory (the temporary area), rewritable memory, and non-rewritable memory.
Getting Acquainted with the JUPITER-80 USB Memory Song Player/Recorder The USB Memory Song Player/Recorder plays back audio files (WAV, MP3, AIFF) that you’ve copied from your computer to a USB flash drive. Copy to a USB Memory Introduction Insert USB Memory MP3/WAV/AIFF You can also record the JUPITER-80’s performance and save it on a USB flash drive as a WAV file. NOTE Playing Sounds Use USB Flash Memory sold by Roland. We cannot guarantee operation if other products are used.
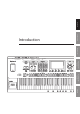
Panel Descriptions Top Panel 3 4 5 6 7 8 1 9 2 11 10 12 Number Area Name Explanation Page 1 USB MEMORY USB MEMORY connector Connect USB flash memory (available separately) here. p. 17 2 VOLUME [VOLUME] knob Adjusts the volume of the output from the MAIN OUT jacks and PHONES jack. p. 23 D Beam controller By moving your hand above the D Beam you can apply various effects to the sound. [PITCH] button If this is on, the D Beam controller will control the pitch.
Panel Descriptions Number Area Page [DEC]/[INC] buttons Use these buttons to edit values. To make the change occur more rapidly, hold down one button and press the opposite button. You can also make the value change rapidly by holding down the [SHIFT] button and pressing one of these buttons. p. 25 Move the cursor up/down/left/right. p. 24 Value dial Use this to edit values. To make the value change rapidly, operate the value dial while holding down the [SHIFT] button. p.
Panel Descriptions Rear Panel Connections [POWER] switch AC IN jack USB COMPUTER connector MIDI connectors This turns the power on/off (“Turning the Power On” (p. 23). Connect the included AC cord here. With a USB cable, you can connect the JUPITER-80 to your computer (p. 90). For connecting MIDI device (p. 91). DIGITAL AUDIO OUT (COAXIAL) jack FOOT PEDAL jacks Connect this to speakers or other devices that are equipped with a digital input.
Panel Descriptions SUB OUT jacks MAIN OUT (TRS) jacks MAIN OUT (XLR) jacks You can connect speakers here for use as monitors, or for outputting only the reverb sound. The system setting “Output Assign” (p. 86) specifies which sounds will be output from the SUB OUT jacks. Connect your speakers here. To employ monaural output, connect to the L/MONO jack. These are balanced output jacks for audio signals. Connect them to your mixer.
Placing the JUPITER-80 on a Stand Be careful not to pinch your fingers when setting up the stand. If you want to place the JUPITER-80 on a stand, use the Roland KS-J8, KS-G8, or KS-18Z. Place the instrument on the stand as follows. KS-J8 Firmly insert the rubber feet on the bottom of the keyboard (at its front, beneath the keys) into the rubber feet receptacles on the arms.
Turning the Power On Turning the Power On Once the connections have been completed (p. 20), turn on power to your various devices in the order specified. By turning on devices in the wrong order, you risk causing malfunction and/or damage to speakers and other devices. Turning the Power On * Before switching the power on/off, always be sure to turn the volume down. Even with the volume turned down, you might hear some sound when switching the power on/off (p. 5).
Basic Operation This section explains the basic button and knob operations used to operate the JUPITER-80. Moving the Cursor A single screen or window will contain multiple items (parameters) to edit or select. To edit a parameter’s setting, you must first move the cursor to that parameter’s value. The value of the selected parameter is highlighted in blue, and the knob or slider is indicated by a green frame. Touch panel To move the cursor, simply touch a parameter value, knob, or slider.
Basic Operation Editing a Value To edit the value highlighted by the cursor, use either of the following controllers. • Value dial • [DEC] [INC] buttons • Touch panel Introduction Value dial Turning the value dial toward the right will increase the value, and turning it toward the left will decrease the value. If you hold down the [SHIFT] button while turning the value dial, the value will change in larger steps.
Basic Operation [E1]–[E4] knobs When knob icons are shown in the Lower Part of the screen, the [E1]–[E4] knobs will change the parameter values of those knob icons. MEMO You can assign performance-related functions to knobs [E1]–[E4]. The functions assigned to knobs [E1]–[E4] can be specified in the Registration Common/Control screen (p. 52). If you turn an [E1]–[E4] knob while touching the selected knob or slider (i.e.
Basic Operation Basic Touch Panel Operation The JUPITER-80’s display is a touch panel; you can perform a variety of operations by directly touching the display. Here are the basic rules. Explanation Edit Displays an edit screen for Registrations or Live Sets. Return Returns you to the previous screen. Pressing the [EXIT] button has the same result. Top Accesses the Registration screen. Introduction Screen indication Playing Sounds Saves the Registration (p. 53). Saves the Live Set (p. 62).
Basic Operation [SHIFT] Button Operations By holding down the [SHIFT] button and pressing another button, you can edit the settings of the button you pressed, or access a specific screen (shortcut). Shortcut Description Page [SHIFT] + [ASSIGNABLE] Accesses the D Beam Assign setting screen. p. 52 [SHIFT] + [S1] (or [S2]) Accesses the Switch S1 Assign (or Switch S2 Assign) setting screen. p. 52 Accesses the arpeggiator setting screen. p.
Basic Operation [MENU] Button Operations Assigning a Name When you press the [MENU] button, the Menu screen will appear in the display. The JUPITER-80 lets you assign names to the following items. • Registration • Live set • SuperNATURAL Synth Tone • User arpeggio style Introduction • Song Regardless of what you’re naming, the procedure is the same. Clear All Back Space × Deletes all characters that you’ve entered. Deletes the character to the left of the cursor.
Navigating Between Screens On the JUPITER-80, you navigate between screens by touching the enclosed areas or buttons shown in the illustrations below. Here we explain how to navigate between screens. For details on each screen, refer to the page indicated by the p. XX symbol. The explanations in this manual include illustrations that depict what should typically be shown by the display. Note, however, that your unit may incorporate a newer, enhanced version of the system (e.g.
Navigating Between Screens Registration Part screen Here you can view the volume of the Registration, and the volume and pan settings of each Part. 7 3 4 Introduction 2 p. 36, p. 38 Registration PERC Part screen p. 52 Edit the settings of the Percussion Part. 9 Registration SOLO Part screen Playing Sounds 8 p. 52 Edit the settings of the Solo Part. Editing Sounds Registration Common/Control screen Make overall settings for the Registration. p.
Navigating Between Screens Live Set screen View the name and volume of the Tones assigned to each layer of the Live Set. 5 1 p. 30 13 Tone List screen 14 p. 57 Select the Tone for each layer. Live Set Effects Routing screen p. 59 Edit the effect settings for the Live Set. 24 p. 34, p. 61 15 Live Set Tone Modify screen 16 p. 56 Edit the sound of each layer. Live Set Layer screen p. 56 Edit the settings of each layer. 21 24 p. 34 17 Live Set List screen 18 p. 36 Select a Live Set.
Navigating Between Screens Live Set Effects Routing screen Edit the effect settings for the Live Set. 14 Introduction 24 Live Set MFX screen p. 59 20 Live Set Reverb screen Playing Sounds 19 p. 34, p. 61 p. 59 Edit the reverb parameters of the Live Set. Editing Sounds Other Convenient Functions Synth Tone Edit (OSC/FILTER/AMP) screen Edit the oscillator, filter, and amp settings of the SuperNATURAL Synth Tone. 21 Connecting Other Equipment 22 LFO screen p.
Navigating Between Screens Tone Blender screen Simultaneously edit multiple parameters of the Live Set. p. 61 Song screen Press the [SONG] button to access the Song screen. Here you can operate the USB song player/recorder. p. 72 24 Key Range View screen View the split and key range status. p. 39 25 Visual Control screen The Visual Control screen will appear when you press the [VISUAL CONTROL] button. Here you can use the JUPITER-80 to control video equipment that supports Visual Control. p.
Introduction Playing Sounds Playing Sounds Editing Sounds Other Convenient Functions Connecting Other Equipment Appendix
Selecting the Sound for Each Part (Selecting Live Sets / Tones) The JUPITER-80 has four Parts: Solo, Upper, Lower, and Percussion. You can assign a Tone or Live Set to each Part, and play it. Solo Part 2. If you press the same Part sound button once again, you’ll be able to choose sounds from a list. 1 Tone Upper Part Live Set Lower Part Live Set Percussion Part Select a sound category. 2 Tone Select a sound.
Selecting the Sound for Each Part (Selecting Live Sets / Tones) Lower Part Instantly Switching the Variation Sounds (Alternate Button) By pressing the [ALTERNATE] button, you can select a different sound of the same type as that of the Part sound button. BASS PAD CHOIR SYNTH STRINGS BRASS/SAX WOOD WINDS OTHER Acoustic bass E.
Playing Drum Sounds and Sound Effects (Percussion) The JUPITER-80 provides a “Percussion” function, which lets you play a variety of drum sounds and sound effects. Playing Percussion Sounds and Voice Phrases (Manual Percussion) You can use the 15 leftmost keys of the keyboard to play a variety of percussion instrument sounds and voice phrases. Playing Drum Sounds on the Entire Keyboard (Drums/SFX) You can use the entire keyboard to play various drum and sound effects (SFX).
Split Performance A “split” is a setup in which the keyboard is divided into zones, each playing a different Part. Lower Part Upper Part Solo Part Turning Split On 1. Press the [SPLIT] button or [SOLO SPLIT] button. Introduction Split or Solo Split will turn on (the button will light). The screen will indicate the split status.
Split Performance How Split and Parts are Related The following table shows how the split status determines the Parts that are assigned to the keyboard. [DRUMS/SFX] [MANUAL PERCUSSION] [SPLIT] [SOLO SPLIT] Solo Upper Lower Percussion On On On On On On On On On On On On On On On On Changing the Split Point You can change the point (Lower Split Point or Solo Split Point) at which the keyboard is divided when Split or Solo Split are on.
Switching Registrations A Registration is used to store the sounds selected for each Part, as well as various performance-related settings (system parameters are excepted). By switching Registrations, you can instantly change the song’s sounds while you perform, or change numerous settings with a single operation. Each bank contains 8 Registrations. There are 4 banks, A–D, meaning that 8 Registrations x 4 banks = 32 Registrations are available.
Switching Registrations Switching Registration Sets A Registration Set contains 4 banks (A–D). You can create 8 Registration Sets, meaning that 8 Registrations x 4 banks x 8 sets = 256 Registrations are available. Here’s how to switch the Registration Set so that you can select other banks. Switching Registrations Consecutively Here’s how to switch Registrations consecutively. 1. Set 8 Set the system parameter“Registration Next/Prev Button” (p. 86) to “REGISTRATION.
Using the Arpeggiator The JUPITER-80 has an arpeggiator that automatically plays arpeggios. When you press notes on the keyboard, those notes will be automatically played as an arpeggio. Holding the Arpeggio (HOLD) The Hold function allows you to have the arpeggio continue even after you release your fingers from the keyboard. Arpeggios can be played in the Lower Part and Upper Part. MEMO Arpeggiator settings are saved in the Registration. 1. Press the [HOLD] button. 1.
Using the Arpeggiator Editing the Arpeggiator Settings Here’s how to make detailed arpeggiator settings for the style, timing, and accent. 1. -3–+3 Accent 0–100% Modifies the groove of the performance by adjusting the strength of the accents and the duration of the notes. The “100%” setting produces the strongest sense of groove. Hold down the [SHIFT] button and press the ARPEGGIO [LOWER ON/OFF] button or ARPEGGIO [UPPER ON/OFF] button. The Registration Common/Control screen (p. 31) will appear. 2.
Using the Arpeggiator Creating an Arpeggio Style from a MIDI File (Import) 4. Select the SMF that you want to import, and then touch . 1 You can create your own original arpeggio style by importing an SMF (Standard MIDI File). Select the SMF. MEMO Introduction • Before you import the SMF, use your computer to copy the SMF to the root folder (top level) of your USB flash drive, or create a folder on your USB flash drive and copy the SMF into that folder.
Performing With Added Harmony The Harmony Intelligence function adds appropriate harmony to the highest notes of the Upper Part, based on the chords you play in the Lower Part. When you turn Harmony Intelligence on, Split (p. 39) will also turn on; the right keyboard zone will play the sound of the Upper Part, and the left keyboard zone will play the sound of the Lower Part. 2. MEMO Harmony Intelligence settings are saved in the Registration. 1. Press the [HARMONY INTELLIGENCE] button.
Controlling the Performance Moving Your Hand to Modify the Pitch or Volume (D Beam Controller) You use the D Beam controller simply by moving your hand above it. By assigning different functions to it, you can control the sound in various ways. Changing the Pitch/Applying Vibrato (Pitch Bend/Modulation Lever) While playing the keyboard, move the lever toward the left to lower the pitch, or toward the right to raise the pitch. This is called “pitch bend.
Controlling the Performance MEMO You can assign performance-related functions to the [E1]–[E4] knobs. The [E1]–[E4] knob assignments are specified by the Registration Common/Control screen (p. 52). Using Pedals The JUPITER-80 allows you to connect hold pedals (such as one from the DP series; available separately) and expression pedals (EV5; available separately).
Controlling the Rotary Effect and Reverb The rotary effect adds modulation similar to what is produced by rotary speakers to the sound. Reverb applies the reverberation that accompanies a sound played in a hall or other acoustic environment. You can control these effects by using panel buttons. Controlling the Rotary Effect Controlling Reverb The REVERB [ON/OFF] button simultaneously turns on/off the output of the Live Set’s reverb and of the reverb shared by the Solo and Percussion Parts.
Changing the Keyboard Settings Changing the Pitch by Octaves 1. Transposing By pressing the OCTAVE [DOWN] button or OCTAVE [UP] button you can shift the keyboard’s pitch range in steps of an octave. Transpose is a function that shifts the keyboard’s pitch range in steps of a semitone. When using your right hand to play low sounds such as the bass Part, it will be easier to play if you lower the pitch range by one or two octaves.
Introduction Playing Sounds Editing Sounds Editing Sounds Other Convenient Functions Connecting Other Equipment Appendix
Editing a Registration A Registration stores the sounds selected for each Part, as well as various performance-related settings. The Registration screen (p. 30) shows basic information about the currently selected Registration. Percussion tone name Registration name Solo tone name Basic Operation for Registration Editing 1. In the Registration screen (p. 30), touch Registration’s .
Editing a Registration Saving a Registration 3. A message will ask “Are you sure?” MEMO Edits you make to a Registration are temporary; they will be lost when you turn off the power or select another Registration. If you want to keep an edited Registration, you must save it. NOTE REFERENCE For details on how a Registration is structured, refer to “How Registrations are Organized” (p. 15). 1. In the Registration screen (p. 30), press the [WRITE] button.
Editing a Registration If the following display appears when you save 2. If Live Set parameters or SuperNATURAL Synth Tone parameters have been edited, the corresponding Live Set or SuperNATURAL Synth Tone will be highlighted when you save the Registration. If you want to specify the Live Set number or SuperNATURAL Synth Tone number for saving, touch
Editing a Registration Initializing a Registration Here’s how to initialize the currently selected Registration. MEMO Introduction • Initializing the Registration will affect the data in the temporary area (p. 16). When you initialize the Registration, the Live Sets and tones in the temporary area will also be initialized. • If you want to return the parameters of all sounds to their factory-set state, use Factory Reset (p. 87). 1. In the Registration Part screen (p. 31), touch .
Editing a Live Set You can edit a Live Set by switching the Tones in the Live Set, and by adjusting offset values relative to the value of each tone. Tips for editing a Live Set The Live Set screen (p. 32) shows basic information about the currently selected Live Set. View the Live Set Effects Routing screen. Level of each layer. View the Live Set Common screen. Choose which Parts will be heard A Registration consists of up to four Parts.
Editing a Live Set MEMO If a Live Set has been edited, a check mark (red) will appear at the right of the Live Set name. Changing a Live Set’s Tones Here’s how to change the Tones in a Live Set. 1. In the Live Set screen (p. 32), touch a tone name to view a list. MEMO Introduction You can also switch tones by moving the cursor to the tone name in the Live Set screen, and using the value dial or the [DEC] [INC] buttons to select a Tone.
Editing a Live Set Layer On/Off and Volume Adjustment Switching the MFX (Multi-effects) To turn a layer on/off, touch its layer number in the Live Set screen (p. 32). Each Live Set contains four MFX (multi-effects) processors. To switch the MFX, access the “Live Set Effects Routing” screen. 1. In the Live Set Effects Routing screen (p. 33), touch the MFX effect type to access a list. Touch an effect type. Layer button Status Off On MEMO The MFX Type screen will appear.
Editing a Live Set Turning MFX On/Off To switch an MFX on/off, touch its MFX button. Adjusting the Effect Send Levels and Effect Output Levels You can adjust the level at which the sound of each layer is sent to MFX, and the output level of the sound that has passed through the effect. MFX button Introduction Set the level of sound sent to MFX or reverb. Set the level of sound sent from MFX to reverb. Status Off Playing Sounds On Set the output destination and output level of the selected layer.
Editing a Live Set Editing the Tones Assigned to a Layer Here’s how to edit the sound of each layer. You’ll be able to edit selected parameters for each sound (Modify parameters and Offset parameters). Since the parameters you edit are stored in the Live Set, you can edit the sound without rewriting the original tones. 1. Editing a Tone For SuperNATURAL Synth Tones, you can go deeper to create and save your own original tones. Touch to access the Synth Tone Edit screen.
Editing a Live Set Simultaneously Adjusting Multiple Live Set Parameters (Tone Blender) 2. Touch . The Tone Blender function lets you shift between the initial values (the currently specified Live Set parameter values) and the destination values (which you may set freely) by turning just a single [E4] (Tone Blender Control) knob.
Editing a Live Set Convenient Ways to Use the Tone Blender Saving a Live Set Edits you make to the Live Set are temporary; they will be lost if you turn off the power or select another Live Set. If you want to keep the edited Live Set, you must save it to user memory. Saving the sound created by the Tone Blender After using the [E4] (Tone Blender Control) knob to get a sound you like, you can save that state as a Live Set. 1.
Editing a Live Set 4. Touch . If the following display appears when you save If SuperNATURAL Synth Tone parameters have been edited, the corresponding Synth Tone(s) will be highlighted when you save the Live Set. Introduction A message will ask “Are you sure?” To save the Live Set, touch . The Tone has been edited. The screen will indicate “Completed!” The Live Set has been saved to the save-destination Live Set number you specified.
Editing a Live Set 2. Specify the write destination. Select the write destination for the SuperNATURAL Synth Tone. Initializing a Live Set Here’s how to initialize the currently selected Live Set. MEMO • Initializing the Live Set affects the data in the temporary area (p. 16). When you initialize the Live Set, the temporary area for the Tones will also be initialized. • If you want to return the parameters of all sounds to their factory-set state, use Factory Reset (p. 87). 1. 3.
Editing a Live Set Copying a Layer Here’s how to copy a layer to a different layer. This is a convenient way to create a variation based on an edited layer. 1. In the Live set screen (p. 32), touch . Introduction Playing Sounds The Live Set Utility Menu screen will appear. 2. Touch , and then touch
Editing a Synth Tone You can edit a Synth Tone to create original sounds. 3. MEMO In the Live Set Tone Modify screen (p. 32), touch . It’s not possible to edit SuperNATURAL Acoustic Tones, Manual Percussion, or Drums/SFX. To edit these tones, refer to “Editing the Tones Assigned to a Layer” (p. 60). Tips for editing Synth Tones Decide which layers you want to hear A Live Set consists of up to four tones.
Editing a Synth Tone • If a Synth Tone has been edited, a check mark (yellow) is shown at the right of the tone name. Volume and On/Off Settings for Each Partial You can turn a Partial on/off by touching the . By touching you can select the Partial that you want to edit.
Editing a Synth Tone Saving a Synth Tone 4. Touch . A Synth Tone you edit is temporary; it will be lost if you turn off the power or select another tone. If you want to keep a Synth Tone you’ve edited, you must save it. NOTE When you save, the data in the save destination will be overwritten. 1. In the Synth Tone Edit screen (p. 33), touch . A message will ask “Are you sure?” 5. To save the Tone, touch .
Editing a Synth Tone Initializing a SuperNATURAL Synth Tone/Partial Here’s how to initialize the currently selected SuperNATURAL Synth Tone or Partial. MEMO Copying a Partial Here’s how to copy the Partial settings from a SuperNATURAL Synth Tone to the specified Partial of the currently selected SuperNATURAL Synth Tone. 1. In the Synth Tone Edit screen (p. 33), touch . Introduction • Initializing a SuperNATURAL Synth Tone or Partial will affect the data in the temporary area (p. 16).
MEMO 70
Introduction Playing Sounds Other Convenient Functions Editing Sounds Other Convenient Functions Connecting Other Equipment Appendix
Using the USB Memory Song Player/Recorder The USB Memory Song Player/Recorder lets you play back audio files (WAV, MP3, AIFF) that you’ve copied from your computer to a USB flash drive, or to record your keyboard performance to a USB flash drive. Playback Here’s how to play back audio files saved on the USB flash drive. NOTE • Never insert or remove a USB flash drive while this unit’s power is on. Doing so may corrupt the unit’s data or the data on the USB flash drive. 1. Press the [SONG] button.
Using the USB Memory Song Player/Recorder Audio files that can be played MP3 MPEG-1 audio layer 3 Sampling Frequency 44.1 kHz Bit Rate 32k, 40k, 48k, 56k, 64k, 80k, 96k, 112k, 128k, 160k, 192k, 224k, 256k, 320 kbps / VBR (Variable Bit Rate) WAV, AIFF Sampling Frequency 44.1 kHz, 48 kHz, 96 kHz Bit Rate 8, 16, 24-bit The USB memory song player provides a four-band equalizer. You can apply an equalizer to the audio file playback and to the sound being input via the AUDIO IN jack. 1. 2.
Using the USB Memory Song Player/Recorder Looping a Specific Region of Time You can specify start and end points within an audio file, and make the playback loop between those points. 1. Here’s how the audio files in the same folder can be played consecutively. In the Song screen (p. 34), touch . Loop playback will turn on (the button will light). 2. Playing Audio Files Consecutively (Chain Play) Use either of the following methods to specify the start and end points for loop playback.
Using the USB Memory Song Player/Recorder Creating a Folder Deleting an Audio File or Folder Here’s how to create a new folder inside the currently selected folder. Here’s how to delete an unwanted audio file or folder. NOTE In this example, we’ll create a new folder inside the audio folder that you created on your computer. 1. MEMO First select the audio folder, and then touch it or press the [ENTER] button to view the contents of that folder (p. 72). In the Song screen (p. 34), touch .
Using the USB Memory Song Player/Recorder Moving an Audio File or Folder Here’s how to move an audio file or folder to a different folder. 1. 2. First select the audio file or folder that you want to move (p. 72). In the Song screen (p. 34), touch . The Song Utility Menu screen will appear. 3. Touch , and then touch
Using the USB Memory Song Player/Recorder Basic Operations in the Audio Rec Standby Screen When you press the [REC] button, the Audio Rec Standby screen will appear. Here you can make settings for recording. Player Sync SELECT Indicates the name of the folder and file in which the recorded result will be saved. If this is on, audio file playback will begin at the same moment that recording begins. Changes the folder in which the recording will be saved.
Using the USB Memory Song Player/Recorder Audio Signal Flow JUPITER-80 Sound Generator (keyboard) MASTER EQ USB MEMORY SONG PLAYER CENTER CANCEL USB COMPUTER (to computer) Song Level SONG EQ MAIN OUT/SUB OUT/ DIGITAL AUDIO OUT AUDIO IN USB COMPUTER (from computer) USB MEMORY SONG RECORDER Recording Mode Recording Level Using the Included USB Memory Protector You can use the included USB memory protector to prevent theft of the USB flash drive connected to the JUPITER-80.
Settings and Convenient Functions Access the MENU screen to select the desired setting or function. 1. In the MENU screen (p. 34), touch the desired function. Backing Up All Settings to a USB Flash Drive You can back up all of settings in the JUPITER-80 to a USB flash drive (sold separately), or restore those settings into the JUPITER-80’s memory. Introduction MEMO One set of backup data can be saved on a USB flash drive.
Settings and Convenient Functions Restoring Backed-up Settings from a USB Flash Drive 1. Here’s how to back up the data from a USB flash drive to your computer. In the MENU screen (p. 34), touch . The Restore screen will appear. 2. Backing Up USB Flash Drive Data to a Computer Touch . 1. 2. 3. 4. Turn off the JUPITER-80’s power. Disconnect the USB flash drive from the JUPITER-80, and connect it to your computer. On your computer, open the USB flash drive.
Settings and Convenient Functions Initializing a USB Flash Drive (Format) Disabling the Registration Buttons The JUPITER-80’s settings will change if you press a Registration button unintentionally or switch Registration Sets. This operation will initialize (format) a USB flash drive. NOTE 1. 1. In the MENU screen (p. 34), touch . Introduction When you execute this operation, all data saved on the USB flash drive will be lost.
Settings and Convenient Functions Exchanging Registration Sets Calibrating the Touch Panel Here’s how to exchange entire Registration Sets. 1. In the MENU screen (p. 34), touch . The Registration Set Exchange screen will appear. 2. 3. Specify the numbers of the Registration Sets that you want to exchange. Touch . Perform this calibration if the touch panel does not operate as you expect. 1. In the MENU screen (p. 34), touch .
The JUPITER-80’s System Settings Making System Settings System Parameters These settings apply to the entire JUPITER-80; for example, here you can set the tuning and specify how MIDI messages will be received. 1. In the MENU screen (p. 34), touch . This section explains what each system parameter does, and how the parameters are organized. SETUP The System Setup screen will appear. Introduction These settings apply to the JUPITER-80 as a whole.
The JUPITER-80’s System Settings D Beam/Slider Parameter Value Sound Explanation D Beam D Beam Sens Parameter Value Explanation Local Switch OFF, ON Specifies whether the controller section (keyboard, pitch bend/modulation lever, [S1] [S2] buttons, D Beam controller, pedals, etc.) will be connected to the internal sound generator. Normally, this should be left at “ON.” Turn it “OFF” if you want to use the JUPITER-80’s controllers only to control an external sound generator. Master Tune 415.
The JUPITER-80’s System Settings Master EQ, Song EQ MIDI Tx/Rx Value Explanation Parameter EQ Switch OFF, ON Equalizer (EQ) screen MIDI Transmit Value Explanation Freq 200, 400 [Hz] Center frequency of the low range Transmit Program Change OFF, ON Program change message transmission on/off Gain -15–+15 [dB] Boost/cut for the low range Transmit Bank Select OFF, ON Bank select message transmission on/off Freq 200–8000 [Hz] Center frequency of the mid range Transmit Active Sensing O
The JUPITER-80’s System Settings Output Assign System Control Here you can specify which sounds will be sent from each output jack. Select the desired check boxes for each output jack (MAIN OUT, SUB OUT).
The JUPITER-80’s System Settings LIVE SET/TONE BUTTONS Here you can specify the sounds (Live Sets or tones) that will be assigned to the Part sound buttons (Upper, Lower, Solo). Restoring the Factory Settings (Factory Reset) This “Factory Reset” operation will restore all settings of the JUPITER-80 to their factory-set state. MEMO The sounds you specify here will be saved as system parameters (settings for the entire JUPITER-80).
MEMO 88
Introduction Playing Sounds Connecting Other Equipment Editing Sounds Other Convenient Functions Connecting Other Equipment Appendix
Connecting to Your Computer via USB If you use a commercially available USB cable to connect the USB COMPUTER connector on the JUPITER-80’s rear panel to your computer’s USB connector, audio or MIDI data played by your MIDI software (DAW software) can be sounded by the JUPITER-80. What is the USB driver? The USB driver is software that transfers data between the JUPITER-80 and the application (e.g., DAW software) on your computer when the JUPITER-80 is connected via USB to your computer.
Connecting an External MIDI Device About MIDI You can connect external MIDI devices to the JUPITER-80’s MIDI OUT connector, and use the JUPITER-80 to control the connected MIDI devices. MEMO Introduction MIDI (Musical Instrument Digital Interface) is a standard specification that allows musical data to be transferred between electronic musical instruments and computers.
Connecting an External MIDI Device Specifying the Transmit Channel Set the JUPITER-80’s transmit channel so it matches the channel your external MIDI device is using for reception. 1. Detailed Settings for External Parts Here you can make detailed settings for the messages transmitted to an external MIDI device. In the Registration External Part screen (p. 31), touch to turn it on for the channel that you want to transmit.
Connecting an External MIDI Device Playing the JUPITER-80 from an External MIDI Device Setting the Program Change Receive Switch Here’s how to turn on the receive switch for program change and bank select messages. With the factory settings, both are turned “ON.” Connection example In the System Setup screen, touch (p. 85). Introduction 1.
Connecting an External MIDI Device Synchronizing with an External MIDI Device Here’s how to synchronize the JUPITER-80’s tempo to an external MIDI device. Connection example MIDI device MIDI OUT connector MIDI IN connector JUPITER-80 MIDI OUT connector MIDI IN connector 1. 2. In the System Setup screen, touch (p. 86). Set the Sync Mode, Sync Out, and Sync Source. For details on each parameter, refer to “Sync/Metronome” (p. 86). 3. 94 To save the settings, touch .
Controlling Visuals Video equipment that supports MIDI Visual Control can be controlled from the JUPITER-80. What is Visual Control? Visual Control is a function that lets you control video along with your performance. The JUPITER-80 can control video equipment that supports MIDI Visual Control or V-LINK. Introduction MIDI Visual Control is an internationally-used recommended practice that was added to the MIDI specification so that visual expression could be linked with musical performance.
Controlling Visuals Visual Control Settings 1. Press the [VISUAL CONTROL] button. The Visual Control screen (p. 34) will appear. 2. Set the following parameters. Parameter Value Explanation Clip Ch 1–16 Specifies the MIDI channel used to switch images. Effect Ch 1–16 Specifies the MIDI channel used to switch video effects. Playback Speed Ctrl OFF, CC01–CC31, CC64–CC95, Bender, Ch Aftertouch Specifies the controller used to change the video playback speed. Playback Speed Range 0.1–1.0–2.
Introduction Playing Sounds Appendix Editing Sounds Other Convenient Functions Connecting Other Equipment Appendix
Error Message List If an incorrect operation is performed, or if processing could not be performed as you specified, an error message will appear. Refer to the explanation for the error message that appears, and take the appropriate action. Message Meaning Action Cannot Copy! Layer 1, to which the SuperNATURAL Acoustic Tone 0028: TW Organ is assigned, cannot be copied to another layer. Change the layer 1 Tone to something other than the SuperNATURAL Acoustic Tone 0028: TW Organ (p. 57).
Troubleshooting Problem Items to check Action Page Overall problems Check that the power cord is connected correctly. Power won’t turn on Are the included AC adaptor and power cord correctly connected to an outlet and to the JUPITER-80? Do not use any AC adaptor or power cord other than the supplied items. p. 20 Doing so will cause malfunctions. Have the connected amp or speakers been powered up? Turn on the power of the connected amp or speakers.
Troubleshooting Problem Items to check Action Page Could the effect switch be off? Check the on/off setting of each effect. p. 59 Is each layer’s Output Assign set to “MFX”? With the factory settings, the Output Assign of some are not set to “MFX.” Set the Output Assign to “MFX.” p. 86 Check the send level to each effect. The effect won’t be obtained if the send level to that effect is set at 0.
Specifications Roland JUPITER-80: Synthesizer Keyboard 76 keys (with velocity and channel aftertouch) Sound Generator Section Maximum Polyphony 256 voices (varies according to the sound generator load) Parts 4 parts (Upper, Lower, Solo, Percussion) Arpeggiator Harmony Intelligence PART LEVEL sliders (PERC, LOWER, UPPER, SOLO) Display Graphic Color LCD 800 x 480 dots (touch screen) PHONES jack (stereo 1/4-inch phone type) MAIN OUT jacks (L, R) (XLR type) MAIN OUT jacks (L/MONO, R) (1/4-inch TRS phone
MIDI Implementation Chart Date : Apr. 1, 2011 Version : 1.00 Model JUPITER-80 Transmitted Function...
Index D BEAM [ASSIGNABLE] button . . . . . . . . . 47 [PITCH] button. . . . . . . . . . . . . . . . 47 [VOLUME] button. . . . . . . . . . . . . 47 D Beam Controller . . . . . . . . . . . . 18, 47 D Beam Sens. . . . . . . . . . . . . . . . . . . . . . 84 D Beam/Slider . . . . . . . . . . . . . . . . . . . . 84 [DEC] button. . . . . . . . . . . . . . . . . . 19, 25 . . . . . . . . . . . . 75 Deleting. . . . . . . . . . . . . . . . . . . . . . . . . . 75 Device ID. . . . . . . . .
Index Receive Program Change. . . . . . . . . . 85 Recording . . . . . . . . . . . . . . . . . . . . . . . . 77 Recording Folder. . . . . . . . . . . . . . . . . . 77 Recording Level. . . . . . . . . . . . . . . . . . . 77 Recording Mode. . . . . . . . . . . . . . . . . . 77 . . . . . . . . . . . . . 81 Registration. . . . . . . . 11, 12, 15, 41, 52 Bank button . . . . . . . . . . . . . . . . . . 19 Common/Control screen. . . . . . 31 Effects Routing screen. . . . . . . . .
Information AFRICA EGYPT Al Fanny Trading Office 9, EBN Hagar Al Askalany Street, ARD E1 Golf, Heliopolis, Cairo 11341, EGYPT TEL: (022)-417-1828 REUNION MARCEL FO-YAM Sarl 25 Rue Jules Hermann, Chaudron - BP79 97 491 Ste Clotilde Cedex, REUNION ISLAND TEL: (0262) 218-429 SOUTH AFRICA T.O.M.S. Sound & Music (Pty)Ltd. 2 ASTRON ROAD DENVER JOHANNESBURG ZA 2195, SOUTH AFRICA TEL: (011) 417 3400 Paul Bothner(PTY)Ltd.
For EU Countries For China 106
For the USA DECLARATION OF CONFORMITY Compliance Information Statement Model Name : Type of Equipment : Responsible Party : Address : Telephone : JUPITER-80 Synthesizer Roland Corporation U.S. 5100 S. Eastern Avenue Los Angeles, CA 90040-2938 (323) 890-3700 For EU Countries This product complies with the requirements of EMCD 2004/108/EC and LVD 2006/95/EC.
* 5 1 0 0 0 2 4 0 8 1 - 0 2 *