For the U.K. IMPORTANT: THE WIRES IN THIS MAINS LEAD ARE COLOURED IN ACCORDANCE WITH THE FOLLOWING CODE. NEUTRAL BLUE: BROWN: LIVE As the colours of the wires in the mains lead of this apparatus may not correspond with the coloured markings identifying the terminals in your plug, proceed as follows: The wire which is coloured BLUE must be connected to the terminal which is marked with the letter N or coloured BLACK.
The OCTAPAD Legend 1985 was the year that Roland’s revolutionary percussion instrument was announced — the “OCTAPAD” (PAD-8). A totally unique percussion instrument, the OCTAPAD allowed one to perform on the 8 pads, and via MIDI, control a drum machine (like the TR-909) or an external MIDI module or sampler. This instrument was immediately adopted by musicians around the world, not only for playing drum or percussion sounds, but also using it to perform all styles of music.
Contents Turning the Power On/Off . . . . . . . . . . . . . . . . . . . . . . . 6 Overview 7 01 Overview of the OCTAPAD . . . . . . . . . . . . . . . . . . . 8 What is an Inst?. . . . . . . . . . . . . . . . . . . . . . . . . . . . . . . . . . . What is a Kit? . . . . . . . . . . . . . . . . . . . . . . . . . . . . . . . . . . . . . What are Ambience and FX?. . . . . . . . . . . . . . . . . . . . . . . What is a Phrase Loop?. . . . . . . . . . . . . . . . . . . . . .
Advanced Operation 2 (Phrase Loop) 43 Advanced Operation 3 (Other Settings) 52 Creating a Phrase . . . . . . . . . . . . . . . . . . . . . . . . . . . . . . 43 Settings for the Entire OCTAPAD (SYSTEM). . . . . . . 52 Measures, Time Signature (Beat) and Metronome (Click) Sound Settings (SETUP). . . . . . . . . . . . . . . . . . . . . . . 43 Using the [SET LOOP] Button to Set the Loop Point. . . . . . . . . . . . . . . . . . . . . . . . . . . . . . . . . . . . . . . . . .
Turning the Power On/Off NOTE Once the connections have been completed (p. 12), turn on power to your various devices in the order specified. By turning on devices in the wrong order, you risk causing malfunction and/or damage to amplified speakers (which we’ll simply call “speakers”) and other devices. 1. Lower the volume of the OCTAPAD and amplification system. Turn the [PHONES] and [MASTER] knob all the way to the left. 2. Press the [POWER] button. The OCTAPAD is equipped with a protection circuit.
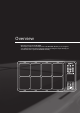
Overview Welcome to the world of the OCTAPAD. This chapter provides an overall explanation of the OCTAPAD. Whether you are a beginner or an experienced user of electronic musical equipment, reading this chapter will help you save time and learn to operate the OCTAPAD smoothly.
01 Overview of the OCTAPAD What is an Inst? All the sounds and instruments on board the OCTAPAD are referred to as “INST.” What is does Layer mean? Two Insts (Inst A, Inst B) can be assigned to each pad. “Inst Layer Type” (p. 30) lets you choose how the Layer function will operate. The layered sounds can be mixed equally, or can be controlled by playing dynamics. With a hi-hat for example, by playing softly you can have the closed hi-hat sound, and when playing harder, the open hi-hat sound (p. 33).
What are Ambience and FX? The “Ambience” selected is a global function, meaning that all kits will use this effect. You can select from various types of rooms and halls. “FX” is a full blown effects unit that can be used on an individual kit basis. Multi Effects Processor Ambience FX What is a Phrase Loop? Overview The Phrase Loop function is a recording feature that allows you to loop record something in real time, and then overdub on top. The potential is very exciting for live performances.
02 Panel Descriptions Top Panel Display, Buttons & Knobs Function button 1–3 These buttons (from left to right) [Button 1], [Button 2], and [Button 3] execute various functions indicated in the bottom of the display. Function knob 1–3 These knobs (from left to right) [Knob 1], [Knob 2], and [Knob 3] correspond to functions indicated by a knob icon ( ) in the display. [MENU] button p. 16 To access the main menu screen. Button 1 Button 2 Button 3 Knob 1 Knob 2 Knob 3 [QUICK] button p.
Playing area Pad Status Illumination The LED indicators can be helpful when playing on a dark stage. See “Illumination” (p. 52). When using a Phrase Loop, they will show pad status (muted, erase, etc.) Pad Play them with sticks. * Playing anything other than the pads can cause malfunctions. Volume & Power [VOLUME/PHONES] knob p. 6 Adjusts the headphone volume. [VOLUME/MASTER] knob p. 6 Adjusts the volume of the OUTPUT jacks. [POWER] button p. 6 For turning the power on/off.
Rear Panel Connections USB MIDI connector p. 58 DC IN jack Connect the included AC adaptor here. With a USB cable, you can connect the OCTAPAD to your computer for triggering sounds or recording MIDI information to your software sequencer (DAW). Place the AC adaptor so the side with the indicator (see illustration) faces upwards and the side with textual information faces downwards. The indicator will light when you plug the AC adaptor into an AC outlet.
FOOT SW jack Security slot ( ) p. 53 http://www.kensington.com/ You can connect a pair of foot switches to this input for various possibilities. MIDI connectors p. 63 For connecting MIDI modules/interfaces. Overview Basic Operation Adv. 1 (Kit) 3/HI-HAT 2/SNARE 1/KICK HH CTRL V-cymbal (e.g., CY-12R/C) Cymbal pad (e.g., CY-5) V-pad (e.g., entire PD series) Kick trigger pad (e.g., KD-8, KD-7) Hi-hat control pedal (FD-8, VH-11) EXTERNAL TRIGGER INPUT jacks p.
03 Displays and Operations KIT Screen The KIT screen is the basic screen that appears after powering up the OCTAPAD. The function buttons and knobs below the screen are used to navigate between screens. Press the [BACK] button to return to the KIT screen. For details on each screen, refer to the indicated pages KIT p. . p. 22 This is the basic screen for playing a kit. The icon is shown in the upper right of the screen when a quick menu is available.
QUICK MENU Screens When you see the icon in the upper right of the screen, pressing the [QUICK] button accesses the relative menu. We’ll use the Quick Menu that appears in the KIT screen as an example. In this manual, we’ll use “QUICK MENU Ú Kit Name” to refer to the operation of choosing Kit Name from the QUICK MENU. NAME p. 35 Assign a name to the kit. QUICK MENU This is a menu suitable for each screen. p. 35 Overview COPY/PASTE Copy/paste kit or pad data.
MENU Screen Accessible from any screen pressing the [MENU] button takes you to the OCTAPAD’s main menu. In various explanations regarding the screens and menus, when you see, for example,“choose MENU Ú SYSTEM Ú F.RESET,” the “Ú” points to the next selection you should make. For details on each screen, refer to the pages listed on p. . KIT INST p. 30 Edit an Inst. MENU This is the main menu screen. Pressing [Button 1] (CANCEL) takes you to the previous screen. PHRASE LOOP LIST p.
MENU screen Quick Menu If you press the MENU button and then press the [QUICK] button you will see “Force Save Data” in the pop-up window. By pressing [Button 3] (OK) current data will be saved. (Also, The OCTAPAD will save your data automatically during the power-off process). FX MIDI p. 39 Make effect (FX) settings. OTHERS p. 63 Make MIDI settings for the kit. p. 34 Make other settings such as the kit’s volume or tempo. Overview TOOLS p. 51 KIT CHAIN p. 37 USB p.
PHRASE LOOP Screen Pressing the [STANDBY] button takes you to a page where you can set parameters of the phrase you are about to create. . For details on each screen, refer to the page references shown below p. If you want to simply learn the operations, refer to “05 Recording a Phrase Loop (PHRASE LOOP)” (p. 26) in the Basic Operation section. Record Make settings REC Shown while you hold down the [STANDBY] button SETUP Press the [STANDBY] button to enter Phrase Loop mode. Record your phrase. p.
Set loop points p. 43 Modify the phrase Reserve the next operation p. 47 Control the effect FX CONTROL p. 41 Use [Knob 1–3] to control the effect. Overview Loop recording Mute MUTE Basic Operation Record an additional performance p. 46 Mute the selected track. Adv. 1 (Kit) Perform along with the phrase playback Adv. 2 (Phrase) Erase p. 47 Erase the selected track. Adv.
04 FACTORY RESET The restore function gives you a choice of restoring individual kits or all of them, all phrases, or a full Factory Reset. NOTE When you perform the Factory Reset operation, the kits and phrase data saved in the OCTAPAD will be initialized. If there’s any data you want to keep, be sure to back it up to USB memory as described in “Saving Data to USB Memory (USB-SAVE)” (p. 56). 1. Choose MENU Ú SYSTEM Ú F.RESET. Press the [MENU] button 2.
Basic Operation It is important to understand the basic operations and functions of the OCTAPAD before using it. Please read this section fully as you check out the OCTAPAD’S possibilities.
01 Selecting a Kit Select any kit. The kit number and name appear in the KIT screen. Information shown in the KIT screen Indicates if the FX/ambience are on or off and the FX name. Kit number/Kit name. The Inst and group names are highlighted when you play the pads. The external trigger indicators can be turned on or off. See “Ext Pad Indicator” (p. 52). [KIT] Buttons 1. FAVORITE KITS Here’s how to register and recall your favorite kits. Use the backlit [KIT] buttons to switch kits.
02 Selecting an Inst (INST) Here’s how to change or assign an Inst to each pad. More about Insts and Layers is here: “What is an Inst?” (p. 8). The changes you make here are saved. You can’t modify a kit whose “Kit Protect” (p. 34) is on. 1. Choose MENU Ú INST Ú INST (p. 16). The INST screen appears. Indicates the pad you’re currently editing and will change when you play any pad. Use [Knob 1] (SEL) to select a parameter.
03 MULTI EDIT What is Multi Edit? Pushing the Multi Edit button gives you access to 10 different editing parameters. (See the chart below) 1. In the KIT screen, press [Button 2] (MULTI EDIT). The Multi Edit screen appears. Here you can see all the relative values assigned to each pad and external trigger input. The changes you make are saved in the kit. You can’t edit a kit whose “Kit Protect” (p. 34) is on. Indicates the pad you’re editing and will change when you play a pad.
04 Effects Editing (AMBIENCE and FX) For an overview of the effects, refer to “What are Ambience and FX?” (p. 9). AMBIENCE 1. Choose MENU Ú AMBIENCE Ú AMBIENCE (p. 16). The AMBIENCE screen appears. Use [Knob 1] and [Knob 3] to switch ambience on/off or change its type. Turns ambience on/off Ambience type Use [Knob 1] (SEL) to select a parameter. Ambience depth Turn [Knob 3] (–/+) to edit the value. MEMO In the KIT screen, you can also turn ambience on/off by using QUICK MENU Ú Ambience ON/OFF. 1.
05 Recording a Phrase Loop (PHRASE LOOP) To simply explain the Phrase Loop function we will use the basic 8-beat phrase shown below. Step 1: Select a Kit 1. Use the [KIT] buttons to select the acoustic kit “50: Tutorial.” In kit “50: Tutorial,” instruments are assigned to pads as follows. Start by practicing this phrase.
Quantization and tempo settings What is quantization? Quantization is a function that automatically corrects the timing of your playing. It only functions during the recording process. By making the appropriate quantization setting, you choose between resolution intervals of 8th notes, 12th note triplets, 16th notes, or 24th note triplets. When you take your finger off the [STANDBY] button, it will light and the PHRASE LOOP screen appears. Turn [Knob 1] (QTZ) to select the quantize interval.
Re-doing the Recording If you want to re-do the recording, it’s easy to use the following methods. Erasing a Track (ERASE) During playback or recording, you can erase just the track of a specific pad. Start erasing 1. Stop erasing Hold down the [ERASE] button, and when you want to start erasing, hit the pad whose track you want to erase. That pad’s illumination will blink while its track is being erased. 2.
Advance Operation 1 Kit. . . . . . . . . . . . . . . . . . . . . . . . . . . . . . . . . . . . . . . . . . . . p. 30 This chapter explains how to create a kit and use effects. 2 Phrase Loop . . . . . . . . . . . . . . . . . . . . . . . . . . . . . . . . . . p. 43 This chapter provides a full explanation of the Phrase Loop functionality. 3 Other Settings. . . . . . . . . . . . . . . . . . . . . . . . . . . .
Advance Operation 1 (Kit) Creating a Kit Inst Settings (INST) Inst and Layer Settings (INST-INST) For more about Insts and Layers, refer to “What is an Inst?” (p. 8). How to access individual Inst parameters for each pad. 1. Choose MENU Ú INST Ú INST (p. 16). The INST-INST screen appears. Darkened pad indicator is the pad you’re editing. Hit the pad to change this. Turn [Knob 3] (–/+) to edit the value. Use [Knob 1] (SEL) to select a parameter.
You can’t select Inst Layer Type for an external pads For external pads (p. 60), you can only use 2 sounds: Inst Head and Inst Rim. (Dual trigger pad is needed to have head and rim sounds) Refer to the owner’s manual of the pad you’re using. Internal pads External pads Inst A Inst Head Inst B Inst Rim Head shot Inst Head Rim shot Inst Rim Editing an Inst (INST-EDIT) Here’s how to access the various editing parameters. 1. Choose MENU Ú INST Ú EDIT (p. 16). The INST-EDIT screen appears.
Hi-hat Settings (INST-HH CTRL) Here you can decide how the hi-hat Inst will sound, and choose the Inst to be controlled by a hi-hat control pedal (FD-8: sold separately). 1. Choose MENU Ú INST Ú HH CTRL (p. 16). The INST-HH CTRL screen appears. Values for each pad (Inst A is above, Inst B is below) Values for external trigger inputs 1–4 (Head is above, Rim is below) [Knob 1] (PAD SEL) selects the pad to edit. 2. 3. [Knob 2] (B) edits the Inst B (Rim) value. [Knob 3] (A) edits the Inst A (Head) value.
HH CTRL setting examples If a hi-hat control pedal is connected Choose “PEDAL” for the pad that’s assigned to the hi-hat Inst. Set to “PEDAL” If a hi-hat control pedal is not connected Make the following settings if you want to assign the closed hi-hat and open hi-hat sounds to two different pads.
Settings for the Entire Kit (KIT OTHERS) Kit Volume, Tempo, and Protect (KIT OTHERS-KIT) Here you can edit the kit’s volume, tempo, and protect settings. 1. Choose MENU Ú OTHERS Ú KIT (p. 16). The KIT OTHERS-KIT screen appears. [Knob 3] (–/+) edits the value. [Knob 1] (SEL) selects a parameter. Press [Button 3] (KIT NAME) to edit the kit name (p. 35). 2. Turn [Knob 1] (SEL) to select a parameter. 3. Turn [Knob 3] (–/+) to edit the value.
Assigning a Name (NAME) Here’s how to enter a name for a kit or phrase. 1. From the KIT screen, choose QUICK MENU Ú Kit Name (p. 15). * In some cases the NAME palette may also be displayed from other screens as well. The NAME palette will appear. Use the following knobs and buttons to enter a name; when you’re finished, press [Button 3] (OK) to confirm it.
Copying a Kit Here’s how to copy the currently selected kit. 1. Select the copy-source kit. 2. From the KIT screen, choose QUICK MENU Ú Copy Ú Kit (p. 15). 3. Press [Button 3] (OK) to copy the kit. 4. Select the copy-destination kit. 5. From the KIT screen, choose QUICK MENU Ú Paste Ú Kit. 6. Press [Button 3] (OK). A confirmation screen appears. 7. Press [Button 3] (OK) to paste the kit. Exchanging Pads (PAD EXCHANGE) Here’s how to exchange the settings of two pads.
KIT CHAIN The Kit Chain function lets you decide a specific order in which kits will be switched. This makes it very easy, during live performances, to switch kits in your desired order. You can use the [KIT] buttons or a foot switch (sold separately) to do the switching. You can create eight Kit Chain Banks (A–H) with 20 kits in each chain.
Switching Kit Chains From the KIT screen, choose QUICK MENU Ú Kit Chain ON/OFF to turn Kit Chain on/off. If Kit Chain is on,the CHAIN icon appears in the display. You can use the knobs, [KIT] buttons, or foot switch to move in the order you have decided. You can also switch between the Chain Banks. CHAIN icon The STEP list appears when you turn [Knob 1] (STEP). The BANK list appears when you turn [Knob 2] (BANK). Press [Button 3] (OK) to confirm. Go back one step 38 Press [Button 3] (OK) to confirm.
Using the Effects (FX) The onboard effects processor, “FX” , has 30 different effects to choose from. FX Settings (FX) Switching the FX Type (FX-TYPE) Here’s how to switch the FX type. 1. Choose MENU Ú FX Ú TYPE (p. 16). The FX-TYPE screen appears. Pads for which FX is enabled FX type [Knob 3] (TYPE) displays a list of FX types. A diagram of the selected FX type is shown. [Button 3] (BYPASS) temporarily turns FX off. Turn [Knob 3] (–/+) to select an FX type. 3. Press [Button 3] (OK) to confirm.
Setting the FX Send Level for Each Pad (FX-SEND) Each pad has its own individual effects send level. 1. Choose MENU Ú FX Ú SEND (p. 16). The FX-SEND screen appears. Value for each pad (Inst A is above, Inst B is below) Value for external trigger inputs 1–4 (Head is above, Rim is below) [Knob 1] (PAD SEL) selects the pad to edit. [Knob 2] (B) edits the Inst B (Rim) value. [Knob 3] (A) edits the Inst A (Head) value. 2.
Using the Knobs to Control the FX (FX CONTROL) You can use [Knob 1]–[Knob 3] to control FX parameters. For each FX, the most suitable parameters are automatically assigned to the three knobs. Changes you make in the FX CONTROL screen are not saved to the kit. 1. Press the [FX CTRL] button. The FX CONTROL screen appears. MEMO You can also access the FX CONTROL screen from the KIT screen by pressing [Button 3] (FX CTRL). FX type Pads for which FX is enabled.
Editing the AMBIENCE This section explains how to adjust the overall sound of the entire OCTAPAD. You can use a choice of Ambiences plus an Equalizer and Limiter. As these effects are applied to the entire OCTAPAD, they will not change when you switch kits. Ambience Settings (AMBIENCE-AMBIENCE) Here’s how to make Ambience settings. You can make adjustments as appropriate for the environment in which you’re playing the drums. 1. Choose MENU Ú AMBIENCE Ú AMBIENCE (p. 16).
Advanced Operation 2 (Phrase Loop) Creating a Phrase For an overview of Phrase Loop, refer to “What is a Phrase Loop?” (p. 9). Measures, Time Signature (Beat) and Metronome (Click) Sound Settings (SETUP) Hold down the [STANDBY] button; the PHRASE LOOP SETUP screen appears. The position you hit on the pads will be selected. The upper row is Measures, the lower row is Beat. Press [Button 2] (CLICK); a bar appears above the button, and the click (Metronome) will start.
Quantize and Tempo Settings (STANDBY) Press the [STANDBY] button; the [STANDBY] button will light, and the PHRASE LOOP STANDBY screen appears. Turn [Knob 1] (QTZ) to set the quantization. If you select “OFF,” quantization will not be applied. The currently selected kit is shown here. Turn [Knob 3] (TEMPO) to set the tempo. You can set the tempo by pressing [Button 3] (TAP) four times or more at the desired tempo (Tap Tempo).
Recording a Phrase (REC Mode) From the PHRASE LOOP STANDBY screen, press [Button 2] (START) or hit a pad to start recording. Shows each pad’s track data and Inst name. This indicates each part’s kit. If not even one note has been recorded in a part, a check mark is displayed and you won’t be able to switch kits. The bar indicates the data of all parts, and the position pointer and remaining measures are shown. Indicates the current measure and beat.
Editing a Phrase What You can do in REC/PLAY Mode In Phrase Loop record or play mode, you can press the following buttons to access various realtime editing or performance functions. This ability to modify phrases in realtime is one of the OCTAPAD’s most important and distinguishing features. Button Explanation Page Switches to Play (PLAY) mode. Recording will not occur even if you play the pads. p. 45 Switches to Record (REC) mode. Your pad performance will be recorded. p.
Erasing a Track (ERASE) Hold down the [ERASE] button; the PHRASE LOOP ERASE screen appears. Pad Status Illumination The text label of the pad (track) being erased will blink. Erasing Data exists Blinking Pressing [Button 1] (CANCEL) will cancel all of the erase start points, and recover the data. No data Lit Dark Pressing the [Button 3] (FX TRACK) will delete the entire FX Control track (p. 41).
Adjusting the Volume of Each Part (PART LEVEL) Here’s how to adjust the level of parts 1–3. 1. From the PHRASE LOOP screen (during Rec or Play), choose the QUICK MENU command Part Level. Use the three knobs to adjust the level of parts 1–3. Press the [BACK] button to return to the REC/PLAY screen. Indicates the current part and each part’s kit. Use [Knob 1]–[Knob 3] to adjust the level of parts 1–3. You can use [Button 1] (PART 1)–[Button 3] (PART 3) to switch the current part.
Saving/Loading a Phrase Saving a Phrase (SAVE PHRASE) A phrase you record will be lost when you select a different phrase or turn off the power. You can save the phrase to internal memory or to USB memory. 1. From the PHRASE LOOP screen (while stopped), choose the QUICK MENU command Save Phrase. The SAVE PHRASE screen appears. Use the following knob and buttons to select the save-destination, and then press [Button 3] (SAVE) to save the phrase.
Loading a Phrase (PHRASE LIST) Phrases saved to internal memory or USB memory can be selected from a list and previewed, or you can load that phrase and use Phrase Loop to play it or record additional material into it. 1. Choose MENU Ú LIST (p. 16). The PHRASE LIST screen appears. Use the following knob and buttons to select a phrase, and then press [Button 3] (STANDBY); the phrase will be loaded and the STANDBY screen (p. 44) will appear.
Phrase Loop and Metronome (Click) Sound Settings Phrase Loop Settings (PHRASE LOOP SETUP) Here’s how to make phrase loop settings. 1. Choose MENU Ú SETUP Ú SETUP (p. 16). The PHRASE LOOP SETUP-SETUP screen appears. [Knob 1] (SEL) selects a parameter. [Knob 3] (–/+) edits the value. 2. Turn [Knob 1] (SEL) to select a parameter. 3. Turn [Knob 3] (–/+) to edit the value.
Advanced Operation 3 (Other Settings Settings for the Entire OCTAPAD (SYSTEM) These settings apply to the entire OCTAPAD. 1. Choose MENU Ú SYSTEM (p. 16). The SYSTEM screen appears. Use [Button 1] and [Button 2] to switch tabs. For details on each screen, refer to the pages listed below. Screen Explanation Page OPTIONS Make screen and illumination settings. p. 52 CONTROL Make foot switch and external pad settings. p. 53 MIDI Make MIDI settings for the entire OCTAPAD. p.
s) Foot Switch and External Pad Settings (SYSTEM-CONTROL) Connecting Foot Switches You can connect foot switches to the FOOT SW jack. You can use a dedicated cable (PCS-31L: sold separately) to connect two foot switches (FS-5U: sold separately). The foot switch connected to the black plug is foot switch 1, and the one with the red plug is foot switch 2. Set the polarity switch of the FS-5U as shown below.
Parameter Ext Pad 1 Ext Pad 2 Ext Pad 3 Ext Pad 4 FootSw1 Polarity FootSw2 Polarity Value Explanation OFF Specify the operations that will occur when you hit Ext Pad 1–4. With a setting other than “OFF,” the assigned pad will no longer produce sound. PHRASE-LOOP CTRL Execute the phrase loop operations STANDBY g SET LOOP g PLAY f g REC. KIT + Select the next kit (or the next step if Kit Chain is on). KIT – Select the previous kit (or the previous step if Kit Chain is on).
Using USB Memory By connecting a USB memory (sold separately), you can back up all of the OCTAPAD’s settings (or even just an individual kit) to USB memory. Don’t hit the pads when you’re in the USB screen! If you hit the pads while USB memory is being read or written, the vibration may cause errors to occur. For this reason, the pads are disabled and will not produce sound while you’re in the USB screen. Use USB memory sold by Roland! We cannot guarantee operation if other products are used.
Saving Data to USB Memory (USB-SAVE) Here’s how to back up all of the OCTAPAD’s settings, or the settings of one specific kit, to USB memory. 1. Choose MENU Ú USB Ú SAVE (p. 16). The USB-SAVE screen appears. [Knob 1] (SELECT) selects the operation. 2. [Button 3] (ENTER) confirms the operation. Use [Knob 1] (SELECT) to select the settings you want to save, and press [Button 3] (ENTER) to confirm the operation.
2. Use [Knob 1] (SELECT) to select the data that you want to load, and press [Button 3] (ENTER) to confirm the operation. Item Explanation 1 KIT Load only one kit BACKUP ALL Load all data Loading only one kit (1 KIT) 3. Use [Knob 1] (SOURCE) to select the source kit (i.e., the kit in USB memory) that you want to load, use [Knob 3] (DEST) to select the destination kit number (in the OCTAPAD) into which it will be loaded, and use [Button 3] (LOAD) to confirm the operation. 4.
Connecting to your Computer via USB If you use a commercially available USB cable to connect the OCTAPAD’s rear panel USB (MIDI) connector to a USB connector of your computer, you’ll be able to do the following things using MIDI. • Trigger sounds in the computer by playing the OCTAPAD. • Record into your sequencer software directly from the OCTAPAD. • Use your sequencer software to play the OCTAPAD.
Internal Pad Sensitivity Settings Internal Pad Settings (PAD SETTING-INTERNAL) Here’s how to adjust the sensitivity of the internal pads. 1. Trigger meter. This indicates the velocity value. Choose MENU Ú PAD Ú INTERNAL (p. 16). The PAD SETTING-INTERNAL screen appears. 2. Hit a pad to select the pad whose settings you want to edit. 3. Turn [Knob 1] (SEL) to select a parameter. 4. Turn [Knob 3] (–/+) to edit the value. Hit a pad to select the pad whose settings you want to edit.
External Pad and Pedal Settings Connecting Optional Pads or Pedals The OCTAPAD lets you connect a hi-hat control pedal (FD-8), kick trigger or pads to the external trigger inputs. The illustration below shows a typical set of connections, but there are many possibilities; like connecting two kick pedals to the 1/KICK input and the 2/SNARE input. After connecting any external pads or pedals, you need to set the appropriate Pad Type as described below. 4/RIDE 3/HI-HAT 2/SNARE 1/KICK HH CTRL V-cymbal (e.
Specifying the External Pad Type (PAD TYPE) The “Pad Type” is a set of various pad-related parameters corresponding to specific pads. Those parameters are set to their appropriate values automatically upon selecting the “Pad Type.” If the pad’s response is not as you wished , then you can still make fine adjustments to the pad parameters in order to adapt to your playing dynamics.
Parameter Value Explanation This setting cancels “crosstalk,” which means that when you play one pad you hear a sound coming from another pad. This can happen when two pads are installed on the same stand. In some cases you can prevent crosstalk by increasing the distance between the two mounted pads. MEMO X-Talk Cancel Rate (%) In some cases you can prevent crosstalk by increasing the distance between the two mounted pads.
MIDI Settings About MIDI MIDI stands for Musical Instrument Digital Interface, and is a global standard that allows electronic musical instruments and computers to exchange performance data. “MIDI Implementation Chart” (p. 70) is a chart that provides an easy way of checking which MIDI messages the OCTAPAD is able to receive. By comparing the MIDI implementation charts of the OCTAPAD and some other MIDI device, you can see which messages are compatible between the two devices.
For the HIHAT or KNOB tabs [Knob 1] (SEL) selects a parameter. [Knob 3] (–/+) edits the value. Parameter Value Explanation HH Close Note# A OFF, 0–127 MIDI note number transmitted by closed hi-hat Inst A (Head). With the “OFF” setting, MIDI messages will not be transmitted. HH Close Note# B OFF, 0–127 MIDI note number transmitted by closed hi-hat Inst B (Rim). With the “OFF” setting, MIDI messages will not be transmitted.
System MIDI Settings (SYSTEM-MIDI) Here you can make overall MIDI settings for the entire OCTAPAD. 1. Choose MENU Ú SYSTEM Ú MIDI (p. 16). The SYSTEM-MIDI screen appears. [Knob 1] (SEL) selects a parameter. [Knob 3] (–/+) edits the value. Parameter Value Global Channel OFF, 1–16 Explanation Specifies the transmit/receive channel. With the “OFF” setting, MIDI messages will not be transmitted. Specifies how the OCTAPAD’s phrase playback tempo will be synchronized.
Using V-LINK to Control Images What is V-LINK? V-LINK ( ) is a function that allows a musician to make visual performances with images at the same time he or she is performing music. By using MIDI to connect two or more V-LINK compatible devices, you can easily enjoy performing , in real time, a wide range of visual effects that are linked to the expressive aspects of a your performance. For example, if you use the OCTAPAD in conjunction with the EDIROL P-10, you’ll be able to do the following.
Appendix This chapter contains a list of error messages, main specifications, and troubleshooting information.
Error Message List Message Meaning Action MIDI Offline. The MIDI cable or USB cable was disconnected. Alternatively, communication with the external MIDI device has been interrupted for some reason. Check whether the MIDI cable or USB cable could have been disconnected or broken. MIDI Buffer Full. A large amount of MIDI messages was received in a short time, and the OCTAPAD was unable to process them all. Make sure that the external MIDI device is correctly connected.
Troubleshooting Problem No sound / Insufficient volume No sound or insufficient volume from a device connected to the MIX IN connector Items to check Action Is the OCTAPAD and the connected equipment powered-on? Use the dedicated AC adaptor. Is the OCTAPAD correctly connected to the external devices? Check the connections. Could an audio cable be broken? Try using a different cable. Could the volume of the connected amp or mixer be lowered? Adjust the volume to an appropriate level.
MIDI Implementation Chart (Sound Generator Section) Date : Jan. 1, 2010 Model OCTAPAD (SPD-30) Version : 1.00 Function...
Date : Jan. 1, 2010 (Phrase Loop Section) Model OCTAPAD (SPD-30) Version : 1.00 Function...
USING THE UNIT SAFELY Used for instructions intended to alert the user to the risk of death or severe injury should the unit be used improperly. Used for instructions intended to alert the user to the risk of injury or material damage should the unit be used improperly. * Material damage refers to damage or other adverse effects caused with respect to the home and all its furnishings, as well to domestic animals or pets. The symbol alerts the user to important instructions or warnings.
IMPORTANT NOTES Power Supply Additional Precautions • Do not connect this unit to same electrical outlet that is being used by an electrical appliance that is controlled by an inverter (such as a refrigerator, washing machine, microwave oven, or air conditioner), or that contains a motor. Depending on the way in which the electrical appliance is used, power supply noise may cause this unit to malfunction or may produce audible noise.
Index A G AC adaptor 12 AMBIENCE 9, 25, 42 AMBIENCE-AMBIENCE 42 AMBIENCE-EQ 42 AMBIENCE-LIMIT 42 Global Channel 65 G.
MEMO
MEMO
For China For EU Countries
For the USA Model Name : Type of Equipment : Responsible Party : Address : Telephone : DECLARATION OF CONFORMITY Compliance Information Statement SPD-30 Electronic Drum Roland Corporation U.S. 5100 S. Eastern Avenue, Los Angeles, CA 90040-2938 (323) 890-3700 For EU Countries This product complies with the requirements of EMC Directive 2004/108/EC.
Information AFRICA EGYPT Al Fanny Trading Office 9, EBN Hagar Al Askalany Street, ARD E1 Golf, Heliopolis, Cairo 11341, EGYPT TEL: (022)-417-1828 REUNION MARCEL FO-YAM Sarl 25 Rue Jules Hermann, Chaudron - BP79 97 491 Ste Clotilde Cedex, REUNION ISLAND TEL: (0262) 218-429 SOUTH AFRICA T.O.M.S. Sound & Music (Pty)Ltd. 2 ASTRON ROAD DENVER JOHANNESBURG ZA 2195, SOUTH AFRICA TEL: (011)417 3400 Paul Bothner(PTY)Ltd.
* 5 1 0 0 0 0 9 6 6 5 - 0 2 *