
Specifications
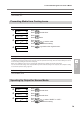
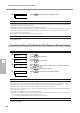
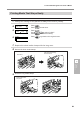
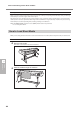

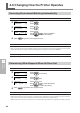
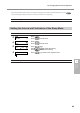
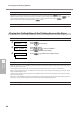
Table Of Contents
- Contents
- Chapter 1 Introduction
- Chapter 2 Operation
- Chapter 3 Maintenance and Adjustment
- Chapter 4 Feature Reference
- 4-1 Pausing or Canceling Output
- 4-2 Setting the Location for Starting Output
- 4-3 Saving the Printer Settings to Match the Media
- 4-4 Optimizing Printing or Cutting to Match Media Thickness
- Adjusting Head Height to Match Media Thickness (54-inch Model Only)
- Correcting for Misalignment in Bidirectional Printing
- Correcting for Misalignment in Bidirectional Printing More Precisely
- Performing Feed Correction to Alleviate Horizontal Bands and the Like
- Performing Distance Correction During Cutting
- 4-5 Accommodating Various Kinds of Media
- 4-6 Changing How the Printer Operates
- 4-7 Changing the Ink-drying Method
- 4-8 Making Various Adjustments for Cutting
- 4-9 Performing Printing and Cutting Separately
- 4-10 Making the Network Settings
- 4-11 Viewing Information about the Media and the System
- 4-12 Performing Maintenance
- 4-13 Menu List
- Chapter 5 What to Do If
- Chapter 6 Specifications
4-5 Accommodating Various Kinds of Media
81
4
Feature
Reference
Printing Media That Warps Easily
Procedure
1.
Change the setting for the [MEDIA CLAMP] menu item to [LONG].
Press .
Press
several times.
Press .
Use
to select "LONG."
Press
to enable the setting.
Press to go back to the original screen.
2.
Replace the short media clamps with the long ones.
Remove the short media clamps.
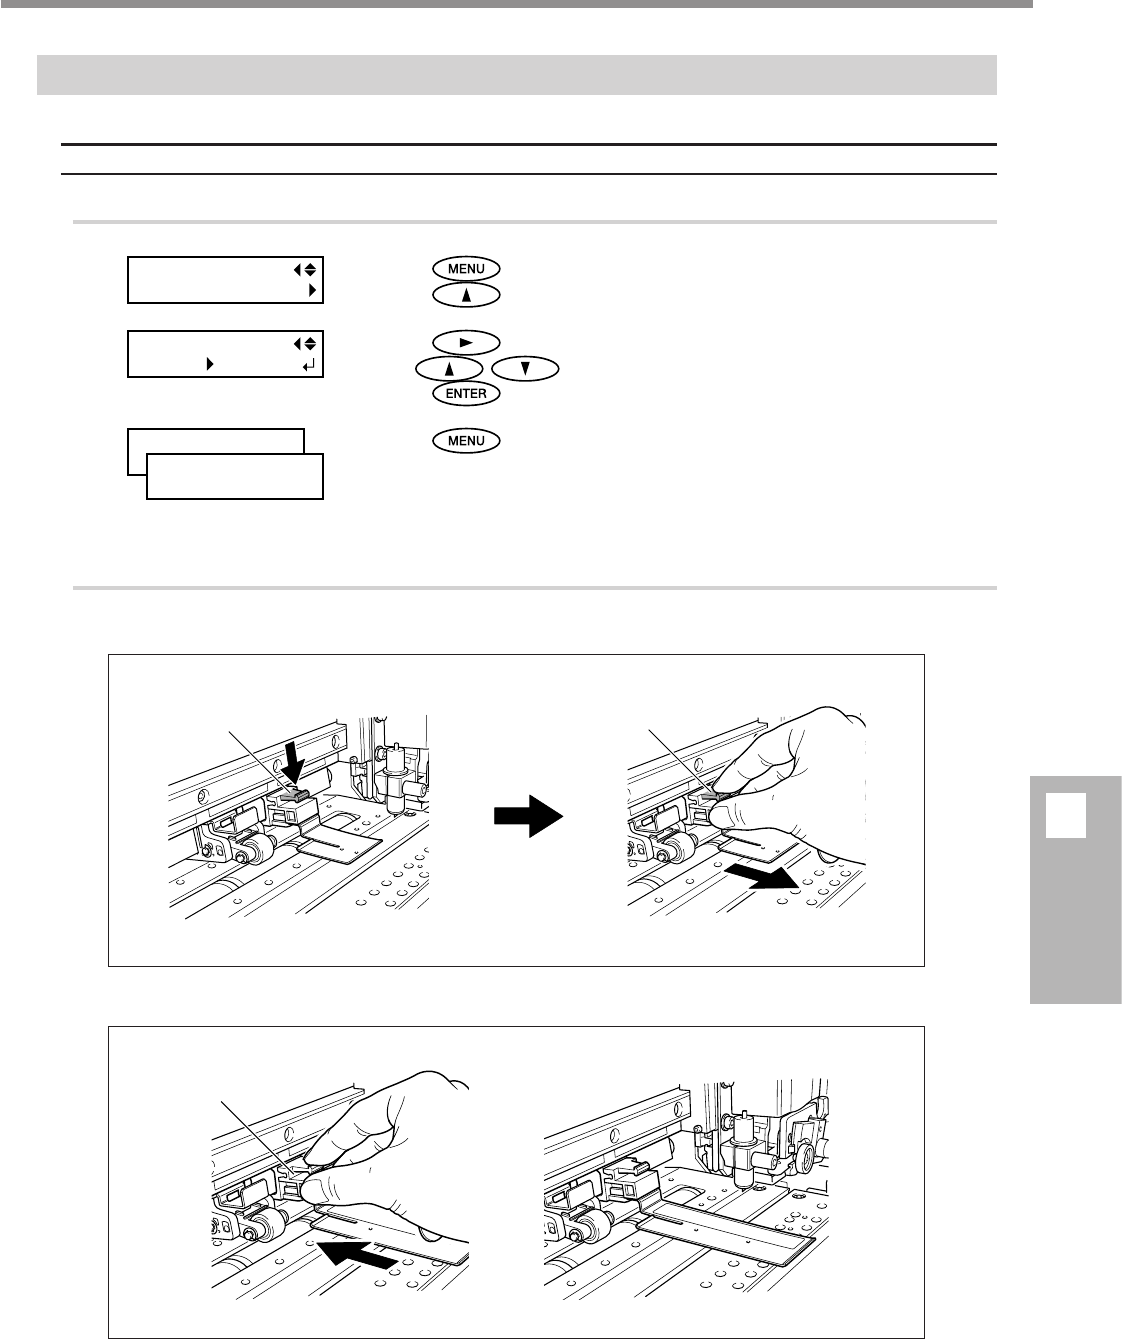
Attach the long media clamps.
MENU
MEDIA CLAMP
MEDIA CLAMP
SHORT LONG
W1200mm
SETUP SHEET
Push here.
Pull back while holding
down the area.
Insert until it clicks
into place.