Information AFRICA EGYPT Al Fanny Trading Office 9, EBN Hagar A1 Askalany Street, ARD E1 Golf, Heliopolis, Cairo 11341, EGYPT TEL: 20-2-417-1828 When you need repair service, call your nearest Roland Service Center or authorized Roland distributor in your country as shown below. PHILIPPINES CURACAO URUGUAY NORWAY JORDAN G.A. Yupangco & Co. Inc. 339 Gil J. Puyat Avenue Makati, Metro Manila 1200, PHILIPPINES TEL: (02) 899 9801 Zeelandia Music Center Inc.
For the USA DECLARATION OF CONFORMITY Compliance Information Statement Model Name : Type of Equipment : Responsible Party : Address : Telephone : V-Synth GT Synthesizer Keyboard Roland Corporation U.S. 5100 S. Eastern Avenue, Los Angeles, CA 90040-2938 (323) 890-3700 For EU Countries This product complies with the requirements of European Directives EMC 89/336/EEC and LVD 73/23/EEC.
V-Synth-GT_e.book 3 ページ 2007年4月9日 月曜日 午後1時46分 Thank you, and congratulations on your choice of the Roland V-Synth GT. 201b Before using this unit, carefully read the sections entitled: “IMPORTANT SAFETY INSTRUCTIONS” (p. 4), “USING THE UNIT SAFELY” (p. 5), and “IMPORTANT NOTES” (p. 7). These sections provide important information concerning the proper operation of the unit.
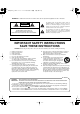
V-Synth-GT_e.book 4 ページ 2007年4月9日 月曜日 午後1時46分 IMPORTANT SAFETY INSTRUCTIONS WARNING: To reduce the risk of fire or electric shock, do not expose this apparatus to rain or moisture. CAUTION RISK OF ELECTRIC SHOCK DO NOT OPEN ATTENTION: RISQUE DE CHOC ELECTRIQUE NE PAS OUVRIR CAUTION: TO REDUCE THE RISK OF ELECTRIC SHOCK, DO NOT REMOVE COVER (OR BACK). NO USER-SERVICEABLE PARTS INSIDE. REFER SERVICING TO QUALIFIED SERVICE PERSONNEL.
V-Synth-GT_e.book 5 ページ 2007年4月9日 月曜日 午後1時46分 USING THE UNIT SAFELY The symbol alerts the user to important instructions or warnings.The specific meaning of the symbol is determined by the design contained within the triangle. In the case of the symbol at left, it is used for general cautions, warnings, or alerts to danger. Used for instructions intended to alert the user to the risk of death or severe injury should the unit be used improperly.
V-Synth-GT_e.
V-Synth-GT_e.book 7 ページ 2007年4月9日 月曜日 午後1時46分 IMPORTANT NOTES 291b In addition to the items listed under “IMPORTANT SAFETY INSTRUCTIONS” and “USING THE UNIT SAFELY” on pages 4–6, please read and observe the following: Power Supply Maintenance 301 401a • Do not connect this unit to same electrical outlet that is being used by an electrical appliance that is controlled by an inverter (such as a refrigerator, washing machine, microwave oven, or air conditioner), or that contains a motor.
V-Synth-GT_e.book 8 ページ 2007年4月9日 月曜日 午後1時46分 IMPORTANT NOTES 562 • Some connection cables contain resistors. Do not use cables that incorporate resistors for connecting to this unit. The use of such cables can cause the sound level to be extremely low, or impossible to hear. For information on cable specifications, contact the manufacturer of the cable. 566a • The usable range of D Beam controller will become extremely small when used under strong direct sunlight.
V-Synth-GT_e.book 9 ページ 2007年4月9日 月曜日 午後1時46分 Contents IMPORTANT SAFETY INSTRUCTIONS.................................................................................4 USING THE UNIT SAFELY ..................................................................................................5 IMPORTANT NOTES .........................................................................................................7 How to Use the Documentation.....................................................................
V-Synth-GT_e.book 10 ページ 2007年4月9日 月曜日 午後1時46分 Contents Patch Mode (Playing in Patch Mode) ...............................................................................39 About the Patch Play Screen ...........................................................................39 Selecting a Patch...........................................................................................40 Selecting Patches from the List ................................................................
V-Synth-GT_e.book 11 ページ 2007年4月9日 月曜日 午後1時46分 Contents Patch Mode (Editing a Tone) ...........................................................................................80 Creating a Tone ............................................................................................80 Tone Menu ...................................................................................................81 Tone Write (Saving Tones) ....................................................................
V-Synth-GT_e.book 12 ページ 2007年4月9日 月曜日 午後1時46分 Contents AP Syn (AP-Synthesis)...................................................................................124 Phrase Model ....................................................................................125 Pitch .................................................................................................126 Modify (when Phrase Model is “Violin”)................................................127 Modify (when Phrase Model is “Erhu”)..........
V-Synth-GT_e.book 13 ページ 2007年4月9日 月曜日 午後1時46分 Contents Sampling General (Setup Settings) .......................................................174 Sampling Pre-Effect (Pre-Effect Settings)..................................................175 Metronome (Metronome Settings) .........................................................176 Template Name (Naming a Template) ..................................................177 Editing a Sample ...................................................................
V-Synth-GT_e.book 14 ページ 2007年4月9日 月曜日 午後1時46分 Contents Utility Mode.................................................................................................................214 Project (Project-related Settings) .....................................................................215 Load Project (Loading a Project into the V-Synth GT) ...............................215 Save Project (Saving a Project).............................................................
V-Synth-GT_e.book 15 ページ 2007年4月9日 月曜日 午後1時46分 How to Use the Documentation The V-Synth GT documentation is organized as follows. Refer to the printed documentation or CD-ROM as appropriate for your needs. Quick Start “Quick Start” provides easily understandable, step-by-step explanations that the first-time user will need to know in order to play the V-Synth GT. To get a quick understanding of the overall functionality provided by the V-Synth GT, please be sure to read this.
V-Synth-GT_e.book 16 ページ 2007年4月9日 月曜日 午後1時46分 Main Features The V-Synth GT is a professional synthesizer that brings together Roland’s revolutionary technologies. A variety of sound generators, including the latest AP-Synthesis, unique controllers, and a sophisticated user interface are joined in this amazing instrument.
V-Synth-GT_e.book 17 ページ 2007年4月9日 月曜日 午後1時46分 Getting Ready Connecting an Amp and Speaker System Since the V-Synth GT contains no amplifier or speakers, you’ll need to connect it to audio equipment such as a keyboard amplifier, monitor speaker system or home stereo, or use headphones to hear its sound. To prevent malfunction and/or damage to speakers or other devices, always turn down the volume, and turn off the power on all devices before making any connections.
V-Synth-GT_e.book 18 ページ 2007年4月9日 月曜日 午後1時46分 Getting Ready Turning On the Power Once you’ve made connections correctly (see preceding page), turn on the power using the following procedure. Powering up your equipment in the wrong order may cause malfunctions or speaker damage. Be careful not to set your listening volume too high to avoid damage to your amp/speaker system or your hearing.
V-Synth-GT_e.book 19 ページ 2007年4月9日 月曜日 午後1時46分 Getting Ready 5. Adjust the volume appropriately. While playing the keyboard to produce sound, adjust the volume of the V-Synth GT and of the connected audio equipment. fig.01b-003-j.eps Turning Off the Power 1. Before you turn off the power, consider these two questions: • Have the volume controls of the V-Synth GT and all connected audio devices been turned to their lowest settings? • Have you saved your V-Synth GT sounds or other data you’ve created? 2.
V-Synth-GT_e.book 20 ページ 2007年4月9日 月曜日 午後1時46分 Panel Descriptions Front Panel 00b-01.eps 1 3 4 5 2 7 6 12 8 9 11 1 TIME TRIP PAD [TIME TRIP] [ASSIGNABLE] [HOLD] 13 2 D BEAM By touching the pad surface with your finger you can apply a variety of effects to the sound. (p. 46) Indicator 10 This will light when you touch the Time Trip Pad. Switches to the Time Trip effect. Switches to the effect that is specified for each tone.
V-Synth-GT_e.book 21 ページ 2007年4月9日 月曜日 午後1時46分 Panel Descriptions 4 MODE 9 ARPEGGIO These buttons switch between modes of the V-Synth GT. [SYSTEM] Switches to System mode (p. 193). [PATCH] [UTILITY] Opens the Patch mode Patch Play screen (p. 39). Switches to Utility mode (p. 214). [SAMPLE] Switches to Sample mode (p. 163). Use these buttons when you want to edit a patch or tone. [PRO EDIT] [MENU] [WRITE] Opens the Sound Shaper II screen (p. 158). Opens the Pro Edit screen (p. 85).
V-Synth-GT_e.book 22 ページ 2007年4月9日 月曜日 午後1時46分 Panel Descriptions 00b-02.eps 21 16 14 17 15 18 22 19 23 24 25 26 20 14 Pitch Bend/Modulation Lever This allows you to control pitch bend or apply vibrato. (p. 43) [S1] [S2] These will apply the effect specified by AP-Synthesis. With the default settings, they switch the violin sound between tremolo or pizzicato. 15 HELP/DEMO This opens the help browser, in which you can view the help screens (p. 36).
V-Synth-GT_e.book 23 ページ 2007年4月9日 月曜日 午後1時46分 Panel Descriptions 20 KEY MODE TONE [LOWER] TONE [UPPER] SELECT KEY RANGE 24 OSC1, OSC2 If [SELECT] is unlit: These switch the upper tone and lower tone on/off. If both are off, there will be no sound. If [SELECT] is lit: These select the upper tone or lower tone. You cannot select both simultaneously. Switches the function of the TONE LOWER/ UPPER buttons. Opens the Key Range screen, where you can make settings for the keyboard (p. 68).
V-Synth-GT_e.book 24 ページ 2007年4月9日 月曜日 午後1時46分 Panel Descriptions Rear Panel 00b-03.eps 1 2 3 4 1 POWER Switch 5 6 7 8 9 10 11 12 5 MIDI Connectors This switch turns the power on/off. 2 AC Inlet Connect the included power cord to this inlet. 3 USB Connectors COMPUTER You can connect a USB memory device to this connector, and load files from the USB memory device into the V-Synth GT. Use a USB cable to connect this to your computer.
V-Synth-GT_e.book 25 ページ 2007年4月9日 月曜日 午後1時46分 Panel Descriptions 8 MIC IN Jack This is a mic jack for analog audio signal input. It accommodates either XLR type or phone type plugs. XLR type connections can provide 48 V phantom power, allowing you to connect condenser mics that require phantom power. In this case, turn the PHANTOM switch to “ON.” * This instrument is equipped with balanced (XLR/TRS) type jack. Wiring diagrams for this jack are shown below.
V-Synth-GT_e.book 26 ページ 2007年4月9日 月曜日 午後1時46分 Overview of the V-Synth GT How the V-Synth GT Is Organized Basic Structure Broadly speaking, the V-Synth GT consists of a controller section and a sound generator section. fig.02-01-j V-Synth GT Sound Generator Section Performance Controller Section (Controllers such as the keyboard and the pitch bend lever) Sound Generator Section The units of sound that you play on the V-Synth GT are called “patches.” A patch consists of two tones, upper and lower.
V-Synth-GT_e.book 27 ページ 2007年4月9日 月曜日 午後1時46分 Overview of the V-Synth GT Controller Section The controller section consists of the keyboard, pitch bend/modulation lever, time trip pad, D Beam controller, C1/C2 knobs, E1–E8 knobs, S1/S2 buttons, arpeggiator, and pedals connected to the rear panel. When you manipulate these controllers, they send performance data to the sound generator section, causing the V-Synth GT to create sound. fig.
V-Synth-GT_e.book 28 ページ 2007年4月9日 月曜日 午後1時46分 Overview of the V-Synth GT About Structures The V-Synth GT’s upper tone and lower tone consist of eight elements (sections) that create the sound. The way in which these sections are combined is called the structure type. To create a tone for the V-Synth GT, you need to start by specifying the structure type. Then, you can edit the parameters of each section. Structure Type You can choose one of five structure types, as follows.
V-Synth-GT_e.book 29 ページ 2007年4月9日 月曜日 午後1時46分 Overview of the V-Synth GT Section There are eight sections, as follows. Section name OSC1, OSC2 MOD COSM1, COSM2 TVA AP-SYNTHESIS VOCAL DESIGNER Explanation These sections produce the sound. You can select internal preset waves or waves you’ve sampled, or use analog-modeled waves generated by calculations. You can also use external audio input. In this section, the two audio signals are mixed and modulated.
V-Synth-GT_e.book 30 ページ 2007年4月9日 月曜日 午後1時46分 Overview of the V-Synth GT About Memory Memory Structure fig.02-04-e.
V-Synth-GT_e.book 31 ページ 2007年4月9日 月曜日 午後1時46分 Overview of the V-Synth GT Project The largest unit of memory used by the V-Synth GT is the project. A project contains up to 512 patches, up to 896 tones, up to 999 waves, and various system settings. The V-Synth GT uses one project at a time. Internal Memory The V-Synth GT has internal memory that stores a project. When the V-Synth GT is shipped from the factory, this memory already contains patch and wave data, but you are free to overwrite any of this.
V-Synth-GT_e.book 32 ページ 2007年4月9日 月曜日 午後1時46分 Overview of the V-Synth GT About VariPhrase What is VariPhrase? VariPhrase has the following advantages: 1. Capable of changing the pitch, rate of time expansion/compression and voice characteristics (formant) on a realtime basis. 2. Allows easy synchronization to tempo and pitch. 3. A single sample covers an extended range of keys compared to conventional digital samplers. 4. Retains sound quality, while implementing the above three advantages.
V-Synth-GT_e.book 33 ページ 2007年4月9日 月曜日 午後1時46分 Basic Operation of the V-Synth GT Basic Operations in the Touch Panel The V-Synth GT features a touch screen. The touch screen lets you perform a variety of operations by lightly touching the screen. * The touch screen responds to a light touch. Pressing the touch screen with too much force, or with a hard object, may damage it. Be careful not to apply excessive force, and touch it only with your finger. Enabling/Disabling the Beep Tone (p.
V-Synth-GT_e.book 34 ページ 2007年4月9日 月曜日 午後1時46分 Basic Operation of the V-Synth GT Editing a Value To edit a value, you can use the VALUE dial, [INC/+] [DEC/-], or drag on the touch screen. • In each V-Synth GT screen, you can select a value using the cursor as described earlier, and modify its value. • Each parameter has its own range of possible values. You cannot set any value smaller than the minimum value or greater than the maximum value.
V-Synth-GT_e.book 35 ページ 2007年4月9日 月曜日 午後1時46分 Basic Operation of the V-Synth GT E1–E8 Knobs If the small numbers 1–8 are shown in the display, you can use the E1–E8 knobs to control the corresponding parameters. Envelope Sliders • When the ENV section’s TVA indicator is on (lit) Lit fig.03-08.eps You can use the envelope sliders to edit the ADSR values of the TVA section (p. 119). [A] [D] [S] [R] This This This This modifies modifies modifies modifies the the the the Attack Time. Decay Time.
V-Synth-GT_e.book 36 ページ 2007年4月9日 月曜日 午後1時46分 Basic Operation of the V-Synth GT Common Icons in the Touch Panel The V-Synth GT’s touch panel contains certain icons that perform common operations regardless of the scene. In many cases you can also use the panel buttons to perform these operations, but it’s worth knowing about these icons, since they allow you to complete an operation from within the touch panel. fig.03-10.
V-Synth-GT_e.book 37 ページ 2007年4月9日 月曜日 午後1時46分 Basic Operation of the V-Synth GT Using the Map Function Since the V-Synth GT lets you edit many different aspects of the sound, you may lose track of what you’re currently editing in a patch or tone. If so, you can use the Map function to open the V-Synth GT Map window, which will show you the currently selected structure, and the section you’re editing within that structure.
V-Synth-GT_e.book 38 ページ 2007年4月9日 月曜日 午後1時46分 Basic Operation of the V-Synth GT The V-Synth GT’s Four Modes The V-Synth GT provides a large number of functions, which are organized into four operating modes: Patch mode, Sample mode, System mode, and Utility mode. Patch Mode (p. 39) System Mode (p. 193) fig.patch-ps.eps_50 fig.system.eps_50 When you press [PATCH], you’ll be in Patch mode. In this mode you can play patches from the keyboard, and edit patch settings.
V-Synth-GT_e.book 39 ページ 2007年4月9日 月曜日 午後1時46分 Patch Mode (Playing in Patch Mode) About the Patch Play Screen When you press [PATCH], you’ll be in Patch mode, and the Patch Play screen will appear. fig.04-01-j.eps Lists the patches. Indicates/specifies the tempo. Opens the Arpeggio setting screen (p. 69). Indicates/specifies the number and name of the selected patch. Opens the V-Synth GT Map screen. Opens the Help screen. Opens the Patch menu. Indicates the category of the patch.
V-Synth-GT_e.book 40 ページ 2007年4月9日 月曜日 午後1時46分 Patch Mode (Playing in Patch Mode) Selecting a Patch 1. Press [PATCH] to access the Patch Play screen. fig.04-03-j.eps Patch Number Patch Name Patch Category Search Button 2. Move the cursor to the patch number, either by using the cursor buttons or by touching the patch number indication (the patch name field will light). 3. Select a patch number. You can use any of the following methods to specify the patch number.
V-Synth-GT_e.book 41 ページ 2007年4月9日 月曜日 午後1時46分 Patch Mode (Playing in Patch Mode) Selecting Patches from the List You can display a list of patches and select a patch from that list. 1. In the upper left of the screen, touch the search button. The Patch List window appears. fig.04-30-e.eps Category Search Area Keyword Search Area 2. Select a patch from the list. Either turn the VALUE dial or use [INC/+] [DEC/-] to select a patch. You can also select a patch by touching it on the display.
V-Synth-GT_e.book 42 ページ 2007年4月9日 月曜日 午後1時46分 Patch Mode (Playing in Patch Mode) Selecting Favorite Patches (Patch Palette) Favorite patches you use frequently can be registered in the Patch Palette. This allows you to quickly select favorite patches that are stored in the V-Synth GT. For details on registering a patch in the patch palette, refer to “Registering a Favorite Patch (Patch Palette)” (p. 42). 1. Press [PATCH] to access the Patch Play screen. 2.
V-Synth-GT_e.book 43 ページ 2007年4月9日 月曜日 午後1時46分 Patch Mode (Playing in Patch Mode) Applying Various Effects to the Sound Varying the Velocity or Aftertouch The force with which you play the keyboard, or the “velocity” with which you play, can affect the volume or timbre of a sound. Aftertouch—downward pressure you apply to a key after playing a note—can also affect the sound.
V-Synth-GT_e.book 44 ページ 2007年4月9日 月曜日 午後1時46分 Patch Mode (Playing in Patch Mode) Transpose (Transposing the Keyboard in Semitone Steps) Transpose changes keyboard pitch in units of semitones. This function is useful when you play transposed instruments such as trumpet or clarinet following a printed score. 1. While holding down [TRANSPOSE], press [+OCT] or [-OCT] to transpose the keyboard. Pressing [+OCT] once while holding down [TRANSPOSE] will raise the keyboard one semitone.
V-Synth-GT_e.book 45 ページ 2007年4月9日 月曜日 午後1時46分 Patch Mode (Playing in Patch Mode) Octave Shift (Transposing the Keyboard in Octave Units) The Octave Shift function transposes the pitch of the keyboard in 1 octave units (-3– +3 octaves). For playing a bass part more easily using your right hand, transpose the keyboard down by 1 or 2 octaves. 1. Press [+OCT] or [-OCT] and its indicator will light. Pressing [+OCT] once will raise the keyboard 1 octave.
V-Synth-GT_e.book 46 ページ 2007年4月9日 月曜日 午後1時46分 Patch Mode (Playing in Patch Mode) Applying an Effect by Touching Your Finger to the Pad (Time Trip Pad) You can apply a variety of effects by touching your fingertip to the Time Trip pad located at the left side of the V-Synth GT’s panel. What is the Time Trip Function? One of the advantages of VariPhrase (p. 32) is that the playback location and speed of the wave can be changed in real time.
V-Synth-GT_e.book 47 ページ 2007年4月9日 月曜日 午後1時46分 Patch Mode (Playing in Patch Mode) 3. While you play the keyboard to produce sound, place your fingertip on the Time Trip pad and move your finger in the following way. If [TIME TRIP] is on The effect will be applied when you move your finger in a circle on the Time Trip pad. fig.04-16.eps If you are using matrix control as well, the effect will be applied when you move your finger from the circumference of the Time Trip pad toward the center. fig.04-17.
V-Synth-GT_e.book 48 ページ 2007年4月9日 月曜日 午後1時46分 Patch Mode (Playing in Patch Mode) Applying an Effect by Passing Your Hand Over the D Beam The D Beam controller can be used simply by waving your hand over it. It can be used to apply various effects, depending on the function that is assigned to it. You can also create effects in which the sound changes instantaneously, in a way that would not be possible by operating a knob or the bender lever. 1. Press [PATCH] to access the Patch Play screen. 2.
V-Synth-GT_e.book 49 ページ 2007年4月9日 月曜日 午後1時46分 Patch Mode (Playing in Patch Mode) Using the E1–E8 Knobs You can modify the sound in real time by turning the E1–E8 knobs to control the functions assigned to the knobs. 1. Press [PATCH] to access the Patch Play screen. 2. While playing the keyboard to produce sound, turn the E1–E8 knobs. When you turn a knob, the sound will change according to the function that is assigned to that knob.
V-Synth-GT_e.book 50 ページ 2007年4月9日 月曜日 午後1時46分 Patch Mode (Playing in Patch Mode) Using the Assignable Controllers You can turn the ASSIGNABLE CONTROL knobs to modify the sound in real time. The assignable controllers use matrix control to apply effects to the sound. This means that you will need to make matrix control settings separately. Set the matrix control Source to “KNOB1” or “KNOB2,” and specify the parameter to be controlled in Destination.
V-Synth-GT_e.book 51 ページ 2007年4月9日 月曜日 午後1時46分 Patch Mode (Playing in Patch Mode) Arpeggiator Playing Arpeggios The V-Synth GT comes with an arpeggiator that can play arpeggios automatically. Once you turn on the arpeggiator, the keys you press will automatically be played as an arpeggio. 1. Press [PATCH] to access the Patch Play screen. 2. Press ARPEGGIO [ON/OFF] to make the indicator light. The arpeggiator is turned on. 3. Play the keyboard. The V-Synth GT arpeggiates what you’ve played. 4.
V-Synth-GT_e.book 52 ページ 2007年4月9日 月曜日 午後1時46分 Patch Mode (Playing in Patch Mode) V-LINK (Synchronizing Music and Video While You Play the V-Synth GT) The V-Synth GT lets you use the pitch bend/modulation lever, Time Trip pad, D Beam controller, and C1/C2 knobs to control an externally connected video device that supports V-LINK. This means that your performance on the V-Synth can control not only sound but also images, producing sound and video effects that are linked to your playing.
V-Synth-GT_e.book 53 ページ 2007年4月9日 月曜日 午後1時46分 Patch Mode (Playing in Patch Mode) Enter V-LINK Mode 1. Press [V-LINK] so the indicator lights. V-Synth GT will enter V-LINK mode. For details on how to assign V-LINK functions to the controllers, refer to “V-LINK Settings” (p. 208). 2. To exit V-LINK mode, press [V-LINK] once again so the indicator goes out.
V-Synth-GT_e.book 54 ページ 2007年4月9日 月曜日 午後1時46分 Patch Mode (Editing a Patch) With the V-Synth GT, you have total control over a wide variety of settings. This chapter explains the procedures used in creating patches, and the functions of the patch parameters. Creating a Patch 1. Access the Patch Play screen, and select the patch that you want to edit (p. 40).
V-Synth-GT_e.book 55 ページ 2007年4月9日 月曜日 午後1時46分 Patch Mode (Editing a Patch) Selecting a Tone Specifying the Upper Tone and Lower Tone A patch consists of an upper tone and a lower tone. When selecting a tone, you must first specify which one you’re selecting—upper or lower. 1. Press [PATCH] to access the Patch Play screen. 2. Touch or to select the tone you want to specify. Alternatively, press [SELECT] so it’s lit, then press [TONE LOWER]/[TONE UPPER]. fig.05-01-j.
V-Synth-GT_e.book 56 ページ 2007年4月9日 月曜日 午後1時46分 Patch Mode (Editing a Patch) Selecting a Tone Once you’ve specified either the upper or lower tone, you can select the tone. fig.05-02-j.eps Tone Number Tone Name Tone Category Search Button 1. Move the cursor to the tone number, either by pressing the cursor buttons, or by touching the tone number indication. 2. Select the desired tone number. You can use any of the following methods to select a tone number.
V-Synth-GT_e.book 57 ページ 2007年4月9日 月曜日 午後1時46分 Patch Mode (Editing a Patch) Selecting a Tone from a List You can view a list of tones and select a tone from the list. 1. Touch the search button. The Upper (or Lower) Tone List window will appear. fig.05-05-e.eps Category Search Area Keyword Search Area 2. Choose a tone from the list. Either turn the VALUE dial or use [INC/+] [DEC/-] to choose a tone. You can also choose a tone by directly touching it in the touch panel.
V-Synth-GT_e.book 58 ページ 2007年4月9日 月曜日 午後1時46分 Patch Mode (Editing a Patch) Patch Menu Patch Write (Saving Patches) Changes you make to sound settings are temporary, and will be lost if you turn off the power or select another sound. If you want to keep the modified sound, you must save it in the internal (internal memory). When you modify the settings of a patch, the Patch Play screen will indicate “*.” Once you save the patch into internal memory, the “*” indication goes away.
V-Synth-GT_e.book 59 ページ 2007年4月9日 月曜日 午後1時46分 Patch Mode (Editing a Patch) Patch Name (Naming a Patch) Assign a new name to the patch before you save it. You can assign a name of up to twelve characters to the patch. 1. Make sure that the patch that you want to name is selected. 2. Touch
V-Synth-GT_e.book 60 ページ 2007年4月9日 月曜日 午後1時46分 Patch Mode (Editing a Patch) Patch Category (Assigning the Category of a Patch) If you assign a category to your patches, you’ll be able to search for them by category in the Patch List window. If no category is assigned to a patch, its category name will be “No Assign.” 1. Make sure that the patch that you want to category is selected. 2. Touch
V-Synth-GT_e.book 61 ページ 2007年4月9日 月曜日 午後1時46分 Patch Mode (Editing a Patch) 4. Select a category from the list. Patch Category List Category No Assign Synth Lead Pad, Strings Vox, Choir Piano, Keyboards Bass, Guitar Winds Bell, Mallet, Hit Melodic Sequence Rhythmic Sequence Arpeggio FX, Noise, Ambient Ethnic Drum, Perc Combination, Others Contents No Assign Synth Lead Pad/Strings Voice/Choir Piano/Keyboards Bass/Guitar Winds Bell/Mallet/Hit Melodic (i.e., pitched) sequences Rhythmic (i.e.
V-Synth-GT_e.book 62 ページ 2007年4月9日 月曜日 午後1時46分 Patch Mode (Editing a Patch) Patch Init (Initializing the Patch Settings) “Initialize” means to return the settings of the currently selected patch to a standard set of values. The Initialize operation will affect only the currently selected patch; the patches that are stored in internal memory and temporary area will not be affected. If you wish to restore all of the V-Synth GT’s settings to their factory values, perform a Factory Reset (p. 235). 1.
V-Synth-GT_e.book 63 ページ 2007年4月9日 月曜日 午後1時46分 Patch Mode (Editing a Patch) Patch Common (Settings Shared by the Entire Patch) Here we’ll explain the parameters that are used in common by the entire patch (Patch Common parameters). Editing the Patch Common Parameters 1. Press [PATCH] to access the Patch Play screen. 2. Touch
V-Synth-GT_e.book 64 ページ 2007年4月9日 月曜日 午後1時46分 Patch Mode (Editing a Patch) 6. In each screen, touch the touch panel to edit the parameters. Move the cursor to the value box of the parameter you want to edit, and use any of the following methods to edit it. • Turn the VALUE dial • Press [INC/+] or [DEC/-] • Drag your fingertip on the touch panel 7. Repeat steps 4–6 to edit the patch common parameters.
V-Synth-GT_e.book 65 ページ 2007年4月9日 月曜日 午後1時46分 Patch Mode (Editing a Patch) Common (Settings Used by the Entire System) General fig.05-20-j.eps_50 In this screen you can turn the upper/lower tones on/off, change each tone, and adjust the level and pan. Parameter Patch Level Value Patch Coarse Tune 0–127 -48– +48 Lower Level Lower Pan 0–127 L64–0–63R Upper Level Upper Pan 0–127 L64–0–63R Description Specifies the volume of the patch.
V-Synth-GT_e.book 66 ページ 2007年4月9日 月曜日 午後1時46分 Patch Mode (Editing a Patch) Time Trip Pad fig.05-21.eps_50 Parameter Pad Mode (Time Trip Pad Mode) Hold Switch (Time Trip Pad Hold Switch) Value Time Trip Assignable OFF, ON Description Applies the Time Trip effect (p. 46). Applies the effect that is specified by each tone. Specifies whether the current value will be maintained (ON) when you remove your finger from the Time Trip pad, or not maintained (OFF).
V-Synth-GT_e.book 67 ページ 2007年4月9日 月曜日 午後1時46分 Patch Mode (Editing a Patch) D Beam fig.05-22.eps_50 Parameter D Beam (D Beam Mode) Value OFF Time Trip Time Pitch Assignable Description The D Beam The D Beam The D Beam The D Beam The D Beam controller controller controller controller controller will will will will will not be used. control the Time Trip effect (p. 46). control the Time Control effect. control the Pitch Control effect. control the effect specified for each tone.
V-Synth-GT_e.book 68 ページ 2007年4月9日 月曜日 午後1時46分 Patch Mode (Editing a Patch) Key Range Here you can specify the zones of the keyboard in which the upper and lower tones are to be sounded. You can also specify how the two tones will be played. You can access this screen not only from the Patch Common screen, but also directly by touching in the Patch Menu. fig.05-30-j.eps_50 From this screen you can turn the lower and upper tones on/off and make other changes for the tones.
V-Synth-GT_e.book 69 ページ 2007年4月9日 月曜日 午後1時46分 Patch Mode (Editing a Patch) Arpeggio In addition to accessing this screen from the Patch Common screen, you can access it directly by touching in the Patch Menu. fig.05-40-ps.eps_50 Parameter Arpeggio Switch Patch Tempo Hold (Arpeggio Hold Switch) Destination Motif (Arpeggio Motif) Sets the order in which notes of the chord will sound. Value OFF, ON 20.0–250.
V-Synth-GT_e.book 70 ページ 2007年4月9日 月曜日 午後1時46分 Patch Mode (Editing a Patch) Parameter Shuffle Rate (Arpeggio Shuffle Rate) Value 0–100% Description This setting lets you modify the note timing to create shuffle rhythms. With a setting of “50%” the notes will be spaced evenly. As the value is increased, the note timing will have more of a “dotted” (shuffle) feel. fig.
V-Synth-GT_e.book 71 ページ 2007年4月9日 月曜日 午後1時46分 Patch Mode (Editing a Patch) Arpeggio Pattern Edit (Creating an Original Arpeggio Pattern) You can create your own arpeggio pattern that specifies how an arpeggio will be sounded. This gives you even more interesting ways to use arpeggios. An arpeggio pattern is a set of data that can be up to 32 steps (horizontally) x 16 lines (vertically). An arpeggio pattern can be saved for an individual patch as part of the patch settings.
V-Synth-GT_e.book 72 ページ 2007年4月9日 月曜日 午後1時46分 Patch Mode (Editing a Patch) Pattern Input Area Value 0, 32, 64, 96, 127, Tie/Clr Grid This area is where you input or edit notes or control changes. The symbols have the following meaning: ●: Note =: Tie ❍: Control change Shows the velocity of the note or the value of the control change selected in the pattern input area.
V-Synth-GT_e.book 73 ページ 2007年4月9日 月曜日 午後1時46分 Patch Mode (Editing a Patch) Creating a Pattern by Playing in Real Time (Real Rec) This method lets you create a pattern in a way similar to realtime recording on a sequencer. Your playing on the VSynth GT’s keyboard and your controller operations will be recorded “as is.” 1. Specify the Grid and End Point of the arpeggio pattern that you will be creating. Move the cursor to each value box and set the value. 2. Touch .
V-Synth-GT_e.book 74 ページ 2007年4月9日 月曜日 午後1時46分 Patch Mode (Editing a Patch) Creating a Pattern by Inputting One Step at a Time (Step Rec) This method lets you create a pattern in a way similar to step-recording on a sequencer. You can record notes and control changes by inputting them one by one. 1. Specify the End Point of the arpeggio pattern that you want to create. Move the cursor to the End Point value box and make the setting. 2. Touch .
V-Synth-GT_e.book 75 ページ 2007年4月9日 月曜日 午後1時46分 Patch Mode (Editing a Patch) Erasing a Pattern (Clear) Here’s how to erase data from the pattern. You can erase a specific line or the entire pattern. 1. To specify a line that you want to erase, move the cursor to that line. 2. Touch . A window like the following will appear. fig.02-09e_50 3. To erase a line of data, touch . To erase the entire pattern, touch . If you decide you don’t want to clear anything, touch .
V-Synth-GT_e.book 76 ページ 2007年4月9日 月曜日 午後1時46分 Patch Mode (Editing a Patch) Effects (Setting Effects for a Patch) The V-Synth GT provides three high-quality effects: Tone-FX (tone effect), Chorus, and Reverb. The tone effect can be applied to each tone individually, and the amount of signal sent to chorus and to reverb can be specified individually for each tone. You can also access the effects screen by touching in the Patch Menu, as well as from the Patch Common screen.
V-Synth-GT_e.
V-Synth-GT_e.book 78 ページ 2007年4月9日 月曜日 午後1時46分 Patch Mode (Editing a Patch) Tone-FX This is an effect that can be applied to each tone individually. For details, refer to “Tone-FX (Tone Effect)” (p. 139). Chorus fig.05-51-j.eps Chorus Switch Chorus Type Search Button Parameter Chorus Switch CHO Type (Chorus Type) Value OFF, ON 00 (Off)–08 Description Switches the Chorus on/off. You can choose one of eight types of chorus.
V-Synth-GT_e.book 79 ページ 2007年4月9日 月曜日 午後1時46分 Patch Mode (Editing a Patch) Reverb fig.05-52-j.eps Reverb Switch Reverb Type Search Button Parameter Reverb Switch REV Type (Reverb Type) Value OFF, ON 00 (Off)–13 Description Switches the Reverb on/off. You can choose one of 13 types of reverb. In this editing screen you can select the reverb type and edit the parameters for that type. For details on each type of reverb, refer to “COSM_EffectsList(E).
V-Synth-GT_e.book 80 ページ 2007年4月9日 月曜日 午後1時46分 Patch Mode (Editing a Tone) A patch consists of a combination of two tones. This chapter will explain how to edit these tones, and what the tone parameters do. Creating a Tone Broadly speaking, there are two ways to create a tone.
V-Synth-GT_e.book 81 ページ 2007年4月9日 月曜日 午後1時46分 Patch Mode (Editing a Tone) Tone Menu Tone Write (Saving Tones) Changes you make to sound settings are temporary, and will be lost if you turn off the power or select another sound. If you want to keep the modified sound, you must save it in the internal (internal memory). When you modify the settings of a tone, the Patch Play screen will indicate “*.” Once you save the patch into internal memory, the “*” indication goes away.
V-Synth-GT_e.book 82 ページ 2007年4月9日 月曜日 午後1時46分 Patch Mode (Editing a Tone) Tone Name (Naming a Tone) Before you save the tone, here’s how to give it a new name. You can assign a name of up to twelve characters to a tone. 1. Make sure that the tone that you want to name is selected. 2. Touch
V-Synth-GT_e.book 83 ページ 2007年4月9日 月曜日 午後1時46分 Patch Mode (Editing a Tone) Tone Category (Assigning the Category of a Tone) If you assign a category to your tones, you’ll be able to search for them by category in the Tone List window. If no category is assigned to a tone, its category name will be “No Assign.” 1. Make sure that the tone that you want to category is selected. 2. Touch
V-Synth-GT_e.book 84 ページ 2007年4月9日 月曜日 午後1時46分 Patch Mode (Editing a Tone) Tone Init (Initializing the Tone Settings) “Initialize” means to return the settings of the currently selected tone to a standard set of values. The Initialize operation will affect only the currently selected tone; the tones that are stored in internal memory and temporary area will not be affected. If you wish to restore all of the V-Synth GT’s settings to their factory values, perform a Factory Reset (p. 235). 1.
V-Synth-GT_e.book 85 ページ 2007年4月9日 月曜日 午後1時46分 Editing a Tone (Pro Edit) “Pro Edit” lets you individually edit all of a tone’s parameters, allowing you to perform detailed and professional tone editing. 1. In the Patch Play screen, select the tone that you want to edit. fig.06b-01-j.eps_50 2. Touch . The Pro Edit window will appear. fig.06b-02-ps.eps_50 After you’ve selected a structure, edit the parameters of each section to create the sound. 3. Save the tone you’ve created.
V-Synth-GT_e.book 86 ページ 2007年4月9日 月曜日 午後1時46分 Editing a Tone (Pro Edit) Com OSC1/2 MOD COSM1/2 TVA AP Syn Effects Com (Settings Common to the Entire Tone) Structure Select the type of structure. The icons that indicate each section show the parameter that is selected for each. You can turn each section on/off by pressing the V-Synth GT’s buttons or by touching these icons. By holding down [SHIFT] and touching an icon, you can jump directly to the editing screen for that parameter. fig.06b-10.
V-Synth-GT_e.book 87 ページ 2007年4月9日 月曜日 午後1時46分 Editing a Tone (Pro Edit) Com OSC1/2 MOD COSM1/2 TVA AP Syn Effects Keyboard fig.06b-11.eps_50 Parameter Keyboard Mono/Poly Legato (Legato Switch) Value Description Mono (Monophonic) Only the last-played note will sound. The monophonic setting is effective when playing a solo instrument patch such as sax or flute. Two or more notes can be played simultaneously.
V-Synth-GT_e.book 88 ページ 2007年4月9日 月曜日 午後1時46分 Editing a Tone (Pro Edit) Com OSC1/2 MOD COSM1/2 TVA AP Syn Effects Zone Settings (Zone) On the V-Synth GT, the keyboard range is divided into up to 16 areas for each tone, allowing a different sound to be played in each area. Each of these areas in the keyboard range is called a “zone.” The following tone settings are applied in common to each of the individual sounds that are divided by zone.
V-Synth-GT_e.book 89 ページ 2007年4月9日 月曜日 午後1時46分 Editing a Tone (Pro Edit) Com OSC1/2 MOD COSM1/2 TVA AP Syn Effects 4. Specify the split point between zones 01 and 02. Either turn the VALUE dial or use [INC/+] [DEC/-] to specify the note number. If you want to divide the keyboard into three zones, lower the top note of zone 02, and specify the split point between zones 02 and 03. By lowering the top note of the highest zone in this way, you can add more zones.
V-Synth-GT_e.book 90 ページ 2007年4月9日 月曜日 午後1時46分 Editing a Tone (Pro Edit) Com OSC1/2 MOD COSM1/2 TVA AP Syn Effects Bender/Octave fig.06b-12.eps_50 Parameter Bender Pitch Bend Range Down Value Description 0–48 Pitch Bend Range Up 0–48 Specifies the degree of pitch change in semitones when the Pitch Bend lever is all the way left. For example if this is set to “48” and you move the pitch bend lever all the way to the left, the pitch will fall 4 octaves.
V-Synth-GT_e.book 91 ページ 2007年4月9日 月曜日 午後1時46分 Editing a Tone (Pro Edit) Com OSC1/2 MOD COSM1/2 TVA AP Syn Effects Matrix Control fig.06b-13-e.eps Up to eight Matrix Controls can be used in a single patch. In the right side of the screen, touch the “Control 1/2”–“Control 7/8” tabs to select the matrix control that you want to use.
V-Synth-GT_e.book 92 ページ 2007年4月9日 月曜日 午後1時46分 Editing a Tone (Pro Edit) Com OSC1/2 MOD COSM1/2 TVA Parameter Source 1, 2 (Matrix Control Source 1, 2) Sets the MIDI message used to change the patch parameter with the Matrix Control. Sens 1, 2 (Matrix Control Sens 1, 2) Destination 1, 2 (Matrix Control Destination 1, 2) Specifies the parameters that will be controlled by the matrix controllers. When not controlling parameters with the Matrix Control, set this to “OFF.
V-Synth-GT_e.book 93 ページ 2007年4月9日 月曜日 午後1時46分 Editing a Tone (Pro Edit) Com Parameter Value CSM1/2-ENV2-ATK CSM1/2-ENV2-DCY CSM1/2-ENV2-REL CSM1/2-LFO-RATE CSM1/2-LFO-PRM1 CSM1/2-LFO-PRM2 TVA-LVL TVA-ENV-ATK TVA-ENV-DCY TVA-ENV-REL TVA-LFO-RATE TVA-LFO-LVL TVA-LFO-PAN TONE-FX-SEND CHO-SEND REV-SEND T-FX-PRM 1–3 TVA-PAN OSC1/2 MOD COSM1/2 TVA AP Syn Effects Description COSM Envelope Attack Time (p. 121) COSM Envelope Decay Time (p. 121) COSM Envelope Release Time (p. 121) COSM LFO Rate (p.
V-Synth-GT_e.book 94 ページ 2007年4月9日 月曜日 午後1時46分 Editing a Tone (Pro Edit) Com OSC1/2 MOD COSM1/2 TVA AP Syn Effects Tune fig.06b-14.eps Value Parameter Tone Coarse Tune -48– +48 Tone Fine Tune -50– +50 Scale Tune (Tone Scale Tune Switch) OFF, ON Description Adjusts the pitch of the tone’s sound up or down in semitone steps (+/-4 octaves). Adjusts the pitch of the tone’s sound up or down in 1-cent steps (+/-50 cents). One cent is 1/100th of a semitone.
V-Synth-GT_e.book 95 ページ 2007年4月9日 月曜日 午後1時46分 Editing a Tone (Pro Edit) Com OSC1/2 MOD COSM1/2 TVA AP Syn Effects OSC1/OSC2 (Oscillator 1/2) The “oscillator” is the section that specifies the basic wave that the V-Synth GT will play, and modifies this wave in various ways. Each tone can contain up to two oscillators. Parameter Oscillator Switch Value OFF, ON Description Switches the oscillator on/off. OSC Type fig.06b-20-j.
V-Synth-GT_e.book 96 ページ 2007年4月9日 月曜日 午後1時46分 Editing a Tone (Pro Edit) Com OSC1/2 MOD COSM1/2 TVA AP Syn Effects OSC Type (Analog OSC) fig.06b-21-ps.eps_50 Parameter Waveform (Analog Oscillator Waveform) Value SAW: Sawtooth wave Selects the wave upon which the sound is to be based when using an analog oscillator.
V-Synth-GT_e.book 97 ページ 2007年4月9日 月曜日 午後1時46分 Editing a Tone (Pro Edit) Com Parameter Sub OSC Octave Select (Sub Oscillator Octave Select) Sub Level (Sub Oscillator Level) Impact (Analog Oscillator Impact) Wave Gain Pitch (Oscillator Pitch) Coarse Tune (Oscillator Coarse Tune) Fine Tune (Oscillator Fine Tune) Value OFF -2 -1 0 0–127 0.0–4.0 -12– +12 dB -63– +63 -48– +48 -50– +50 OSC1/2 MOD COSM1/2 TVA AP Syn Effects Description The sub-oscillator will not be used.
V-Synth-GT_e.book 98 ページ 2007年4月9日 月曜日 午後1時46分 Editing a Tone (Pro Edit) Com OSC1/2 MOD COSM1/2 TVA AP Syn Effects What is a sub-oscillator? The sub-oscillator adds a low pitch to create a thicker sound. You can use the Detune parameter to add a detune effect. Detune is the effect or technique of adding (layering) a sound at a slightly different pitch. When using the suboscillator, you can apply a detune effect by setting Detune to a value other than “0.
V-Synth-GT_e.book 99 ページ 2007年4月9日 月曜日 午後1時46分 Editing a Tone (Pro Edit) Com OSC1/2 MOD COSM1/2 TVA AP Syn Effects OSC Type (PCM OSC) fig.06b-22-ps.eps_50 Parameter Waveform (PCM Oscillator Waveform) Value 1–999 (wave number) Description Selects the wave upon which the sound is to be based when using a PCM oscillator. When you touch , the Wave List window will appear, allowing you to select the wave from the list.
V-Synth-GT_e.book 100 ページ 2007年4月9日 月曜日 午後1時46分 Editing a Tone (Pro Edit) Com OSC1/2 MOD COSM1/2 TVA AP Syn Effects Parameter Coarse Tune (Oscillator Coarse Tune) Fine Tune (Oscillator Fine Tune) Value -48– +48 Description Adjusts the pitch of the oscillator up or down in semitone steps (+/-4 octaves). -50– +50 Adjusts the pitch of the oscillator up or down in 1-cent steps (+/-50 cents). Time Formant -63– +63 -63– +63 This sets the playback speed (time).
V-Synth-GT_e.book 101 ページ 2007年4月9日 月曜日 午後1時46分 Editing a Tone (Pro Edit) Com OSC1/2 MOD COSM1/2 TVA AP Syn Effects OSC Type (External In) You can use the signal being received from the rear panel INPUT jack as the oscillator. This allows you to play an external input source from the keyboard. fig.06b-23-ps.eps_50 Parameter Wave Gain Value -12– +12 dB Description Sets the gain (amplification) of the waveform.
V-Synth-GT_e.book 102 ページ 2007年4月9日 月曜日 午後1時46分 Editing a Tone (Pro Edit) Com OSC1/2 MOD COSM1/2 TVA AP Syn Effects Pitch (common to Analog and PCM) fig.06b-24-ps.eps_50 Parameter Pitch (Oscillator Pitch) Pitch Keyfollow (Oscillator Pitch Keyfollow) Value -63– +63 -200– +200 Description Adjusts the pitch of the oscillator. This specifies the amount of pitch change that will occur when you play a key one octave higher (i.e., 12 keys upward on the keyboard).
V-Synth-GT_e.book 103 ページ 2007年4月9日 月曜日 午後1時46分 Editing a Tone (Pro Edit) Com OSC1/2 MOD COSM1/2 TVA AP Syn Effects Pulse Width (Analog) fig.06b-25-ps.eps_50 Parameter Pulse Width Value Pulse Width Keyfollow -63– +63 -200– +200 Pulse Width LFO Depth -63– +63 Description Specifies the amount by which the wave shape will be modified. Specifies the amount by which the pulse width value will be affected by the key you play. Specifies how deeply the LFO will affect pulse width.
V-Synth-GT_e.book 104 ページ 2007年4月9日 月曜日 午後1時46分 Editing a Tone (Pro Edit) Com OSC1/2 MOD COSM1/2 TVA AP Syn Effects Fat (Analog) fig.06b-26-ps.eps_50 Parameter Fat Value Fat Keyfollow 0–127 -200– +200 Fat LFO Depth -63– +63 Description Emphasizes the low-frequency region of the sound. Specifies the amount by which the fat value will be affected by the key you play. Specifies how deeply the LFO will affect fat. In this screen you can make settings for the envelope that affects the fat.
V-Synth-GT_e.book 105 ページ 2007年4月9日 月曜日 午後1時46分 Editing a Tone (Pro Edit) Com OSC1/2 MOD COSM1/2 TVA AP Syn Effects Detune (Analog, when using Sub OSC) fig.06b-28-ps.eps_50 Value Parameter Detune -63– +63 Detune Keyfollow -200– +200 Detune LFO Depth -63– +63 Description Specifies the detuning (pitch difference) of the sub-oscillator. This setting is valid if the Sub-Oscillator Octave Select is set to “-2, -1, or 0.
V-Synth-GT_e.book 106 ページ 2007年4月9日 月曜日 午後1時46分 Editing a Tone (Pro Edit) Com OSC1/2 MOD COSM1/2 TVA AP Syn Effects SS Detune (Analog, when SUPER-SAW is selected) fig.06b-29-ps.eps_50 Value Parameter SS Detune -63– +63 SS Detune Keyfollow -200– +200 SS Detune LFO Depth -63– +63 Description Adjusts the degree of pitch detuning. As the knob is rotated to the right, the pitch will be detuned more greatly, making the sound more spacious.
V-Synth-GT_e.book 107 ページ 2007年4月9日 月曜日 午後1時46分 Editing a Tone (Pro Edit) Com OSC1/2 MOD COSM1/2 TVA AP Syn Effects Mix (Analog, when SUPER-SAW is selected) fig.06b-29-ps.eps_50 Value Parameter Mix -63– +63 Mix Keyfollow -200– +200 Mix LFO Depth -63– +63 Description Adjusts the volume of the detuned sounds relative to the central sound. As the knob is rotated to the right, the detuned sounds will become louder, making the sound thicker.
V-Synth-GT_e.book 108 ページ 2007年4月9日 月曜日 午後1時46分 Editing a Tone (Pro Edit) Com OSC1/2 MOD COSM1/2 TVA AP Syn Effects Harmonics (Analog, when FBACK-OSC is selected) fig.06b-30-ps.eps_50 Parameter Harmonics Value Harmonics Keyfollow -63– +63 -200– +200 Harmonics LFO Depth -63– +63 Description Varies the sound of the harmonics. Specifies the amount by which the Harmonics value will be affected by the key you play. Specifies how deeply the LFO will affect Harmonics.
V-Synth-GT_e.book 109 ページ 2007年4月9日 月曜日 午後1時46分 Editing a Tone (Pro Edit) Com OSC1/2 MOD COSM1/2 TVA AP Syn Effects FBK Amount (Analog, when FBACK-OSC is selected) fig.06b-31-ps.eps_50 Parameter FBK Amount (Feedback Amount) Value Amount Keyfollow -63– +63 -200– +200 Amount LFO Depth -63– +63 Description Adjusts the amount of feedback to adjust the level of the harmonics. Specifies the amount by which the feedback value will be affected by the key you play.
V-Synth-GT_e.book 110 ページ 2007年4月9日 月曜日 午後1時46分 Editing a Tone (Pro Edit) Com OSC1/2 MOD COSM1/2 TVA AP Syn Effects X-Mod (Analog, when X-MOD-OSC is selected) fig.06b-32-ps.eps_50 Parameter X-Mod (Cross Modulation Depth) Value -63– +63 Description Cross Modulation is when OSC2 modifies the frequency of OSC1. X-Mod adjusts the depth of this Cross Modulation.
V-Synth-GT_e.book 111 ページ 2007年4月9日 月曜日 午後1時46分 Editing a Tone (Pro Edit) Com OSC1/2 MOD COSM1/2 TVA AP Syn Effects Time (PCM) fig.06b-33-ps.eps_50 Parameter Time Value Time Keyfollow -63– +63 -200– +200 Time Offset BWD Time LFO Depth ZERO FWD -63– +63 Description This sets the range of change in playback speed (time). Specifies the amount by which the time value will be affected by the key you play. Specifies “reverse playback” as the basic speed when the time value is “0.
V-Synth-GT_e.book 112 ページ 2007年4月9日 月曜日 午後1時46分 Editing a Tone (Pro Edit) Com OSC1/2 MOD COSM1/2 TVA AP Syn Effects Formant (PCM) fig.06b-34-ps.eps_50 You can use this only if the Vari switch (p. 99) is on and when the Encode Type (p. 188) is “SOLO.” Parameter Formant Formant Keyfollow Value -63– +63 -200– +200 Energy OFF, 1–127 Fmt LFO Depth (Formant LFO Depth) -63– +63 Description This sets the range of change in vocal quality (formant).
V-Synth-GT_e.book 113 ページ 2007年4月9日 月曜日 午後1時46分 Editing a Tone (Pro Edit) Com OSC1/2 MOD COSM1/2 TVA AP Syn Effects OSC TVA (common to Analog and PCM) fig.06b-35-ps.eps_50 Parameter Level Value Level Keyfollow 0–127 -200– +200 Level LFO Depth -63– +63 Description Specifies the volume of the oscillator. Use this parameter if you want the volume of the oscillator to change according to the key that is pressed.
V-Synth-GT_e.book 114 ページ 2007年4月9日 月曜日 午後1時46分 Editing a Tone (Pro Edit) Com OSC1/2 MOD COSM1/2 TVA AP Syn Effects LFO (common to Analog and PCM) fig.06b-36-ps.eps_50 In this screen you can make settings for the LFO that affects the oscillator. For details on LFO settings, refer to “Making LFO Settings” (p. 122).
V-Synth-GT_e.book 115 ページ 2007年4月9日 月曜日 午後1時46分 Editing a Tone (Pro Edit) Com OSC1/2 MOD COSM1/2 TVA AP Syn Effects MOD In the MOD section, you can not only simply mix OSC1 and OSC2, but also combine them in a variety of ways to create sounds. This is especially effective when you’ve selected analog oscillators. Parameter Modulator Switch Value OFF, ON Description Switches the modulator on/off. Value Description Adds OSC1 and OSC2. fig.06b-40-j.
V-Synth-GT_e.book 116 ページ 2007年4月9日 月曜日 午後1時46分 Editing a Tone (Pro Edit) Com OSC1/2 MOD COSM1/2 TVA Parameter AP Syn Effects Value ENV RING Description OSC1 OSC2 Envelope This is an envelope ring. It uses the volume changes (envelope) of OSC2 to control the volume of OSC1. Output OSC SYNC This is oscillator sync. It generates a complex waveform by forcibly resetting OSC1 to the beginning of its cycle in synchronization with the OSC2 OSC2 frequency.
V-Synth-GT_e.book 117 ページ 2007年4月9日 月曜日 午後1時46分 Editing a Tone (Pro Edit) Com OSC1/2 MOD COSM1/2 TVA AP Syn Effects COSM1/COSM2 Here you can apply various effects to the sound. COSM effects are similar to the built-in effects (Tone-FX, reverb, chorus) or to conventional effect processors, but have the important difference that they are polyphonic, so that the effect is applied to each note you play.
V-Synth-GT_e.book 118 ページ 2007年4月9日 月曜日 午後1時46分 Editing a Tone (Pro Edit) Com OSC1/2 MOD COSM1/2 TVA AP Syn Effects LFO fig.06b-51.eps_50 For some COSM selections that you choose in COSM Type, you can make LFO settings. For details on LFO settings, refer to “Making LFO Settings” (p. 122).
V-Synth-GT_e.book 119 ページ 2007年4月9日 月曜日 午後1時46分 Editing a Tone (Pro Edit) Com OSC1/2 MOD COSM1/2 TVA AP Syn Effects TVA This section determines the volume and panning. TVA stands for Time Variant Amplifier, and controls the overall volume of each note you play, affecting aspects of the sound such as master volume (level), envelope, keyboard velocity, pan, and tremolo. TVA fig.06b-55-j.
V-Synth-GT_e.book 120 ページ 2007年4月9日 月曜日 午後1時46分 Editing a Tone (Pro Edit) Com OSC1/2 MOD COSM1/2 TVA AP Syn Effects LFO fig.06b-56-j.eps_50 LFO Switch Parameter LFO Switch Value OFF, ON Description Switches LFO on and off. In this screen you can make settings for the LFO that affects the TVA. For details on LFO settings, refer to “Making LFO Settings” (p. 122).
V-Synth-GT_e.
V-Synth-GT_e.
V-Synth-GT_e.book 123 ページ 2007年4月9日 月曜日 午後1時46分 Editing a Tone (Pro Edit) Com OSC1/2 MOD COSM1/2 TVA AP Syn Effects How to Apply the LFO ● Apply the LFO gradually after the key is pressed fig.LFO-1.e Delay Time Pitch Cutoff Frequency Level Pan Note on low (less) high (more) Delay Time Fade Mode Fade Time ● Apply the LFO gradually after the key is released fig.LFO-3.
V-Synth-GT_e.book 124 ページ 2007年4月9日 月曜日 午後1時46分 Editing a Tone (Pro Edit) Com OSC1/2 MOD COSM1/2 TVA AP Syn Effects AP Syn (AP-Synthesis) AP-Synthesis is the world’s first sound generating technology that is able to apply the “behavioral model” of specific acoustic instruments to synthesizer sounds, thus creating new synth sounds that are overflowing with living expression.
V-Synth-GT_e.book 125 ページ 2007年4月9日 月曜日 午後1時46分 Editing a Tone (Pro Edit) Com OSC1/2 MOD COSM1/2 TVA AP Syn Effects Phrase Model fig.06b-61-ps.
V-Synth-GT_e.book 126 ページ 2007年4月9日 月曜日 午後1時46分 Editing a Tone (Pro Edit) Com OSC1/2 MOD COSM1/2 TVA AP Syn Effects Pitch fig.06b-62-ps.eps_50 Parameter Pitch Coarse (Pitch Coarse Tune) Value Pitch Fine (Pitch Fine Tune) -48– +48 -50– +50 Octave Shift -3– +3 Description Adjusts the pitch of the tone in semitone steps (+/-4 octaves). Adjusts the pitch of the tone in one-cent steps (+/-50 cents).
V-Synth-GT_e.book 127 ページ 2007年4月9日 月曜日 午後1時46分 Editing a Tone (Pro Edit) Com OSC1/2 MOD COSM1/2 TVA AP Syn Effects Modify (when Phrase Model is “Violin”) fig.06b-63-ps.
V-Synth-GT_e.book 128 ページ 2007年4月9日 月曜日 午後1時46分 Editing a Tone (Pro Edit) Com OSC1/2 MOD COSM1/2 TVA AP Syn Effects Modify (when Phrase Model is “Erhu”) fig.06b-64-ps.
V-Synth-GT_e.book 129 ページ 2007年4月9日 月曜日 午後1時46分 Editing a Tone (Pro Edit) Com OSC1/2 MOD COSM1/2 TVA AP Syn Effects Modify (when Phrase Model is “Sax”) fig.06b-65-ps.
V-Synth-GT_e.book 130 ページ 2007年4月9日 月曜日 午後1時46分 Editing a Tone (Pro Edit) Com OSC1/2 MOD COSM1/2 TVA AP Syn Effects Modify (when Phrase Model is “Flute”) fig.06b-66-ps.
V-Synth-GT_e.book 131 ページ 2007年4月9日 月曜日 午後1時46分 Editing a Tone (Pro Edit) Com OSC1/2 MOD COSM1/2 TVA AP Syn Effects Modify (when Phrase Model is “Multifade”) fig.06b-67-ps.eps_50 Parameter Attack Time Value Release Time -100– +100 Porta Time (Portamento Time) -100– +100 Sub Tone Level -100– +100 Natural Feel -100– +100 Vibrato Dly Time (Vibrato Delay Time) -100– +100 Vibrato Depth -100– +100 Vibrato Rate -100– +100 -100– +100 Description Adjusts the attack of the sound.
V-Synth-GT_e.book 132 ページ 2007年4月9日 月曜日 午後1時46分 Editing a Tone (Pro Edit) Com OSC1/2 MOD COSM1/2 TVA AP Syn Effects Advanced (when Phrase Model is “Violin”) fig.06b-70-ps.
V-Synth-GT_e.book 133 ページ 2007年4月9日 月曜日 午後1時46分 Editing a Tone (Pro Edit) Com OSC1/2 MOD COSM1/2 TVA AP Syn Effects Advanced (when Phrase Model is “Erhu”) fig.06b71-ps.
V-Synth-GT_e.book 134 ページ 2007年4月9日 月曜日 午後1時46分 Editing a Tone (Pro Edit) Com OSC1/2 MOD COSM1/2 TVA AP Syn Effects Advanced (when Phrase Model is “Sax”) fig.06b-73-ps.
V-Synth-GT_e.book 135 ページ 2007年4月9日 月曜日 午後1時46分 Editing a Tone (Pro Edit) Com OSC1/2 MOD COSM1/2 TVA AP Syn Effects Advanced (when Phrase Model is “Flute”) fig.06b-74-ps.
V-Synth-GT_e.book 136 ページ 2007年4月9日 月曜日 午後1時46分 Editing a Tone (Pro Edit) Com OSC1/2 MOD COSM1/2 TVA AP Syn Effects Advanced (when Phrase Model is “Multifade”) fig.06b-75-ps.
V-Synth-GT_e.book 137 ページ 2007年4月9日 月曜日 午後1時46分 Editing a Tone (Pro Edit) Com OSC1/2 MOD COSM1/2 TVA AP Syn Effects Control 1 fig.06b-76.eps_50 Parameter name Controller (can be changed using VALUE) Reverse switch Reverses the direction in which the controller will operate. Parameter Dynamics Ctrl1 (Dynamics Controller 1) Dynamics Ctrl2 (Dynamics Controller 2) Fade 1 Fade 2 Portamento Vibrato Description Controls the dynamics.
V-Synth-GT_e.book 138 ページ 2007年4月9日 月曜日 午後1時46分 Editing a Tone (Pro Edit) Com OSC1/2 MOD COSM1/2 TVA AP Syn Effects Control 2 fig.06b-77-ps.eps_50 Parameter name Controller (can be changed using VALUE) Reverse switch Reverses the direction in which the controller will operate. Parameter Tremolo Pizzicato Mono/Poly Mix Level Pan 138 Description Switches to a tremolo sound. * This can be specified only if the Phrase Model is “Violin.” Switches to pizzicato.
V-Synth-GT_e.book 139 ページ 2007年4月9日 月曜日 午後1時46分 Editing a Tone (Pro Edit) Com OSC1/2 MOD COSM1/2 TVA AP Syn Effects Tone-FX (Tone Effect) The V-Synth GT contains three high-quality effects: Tone-FX (tone effect), Chorus, and Reverb. The tone effect can be applied to individual tones, and the amount of signal sent to chorus and reverb can be specified for each tone. Routing The effect blocks are displayed as small rack units.
V-Synth-GT_e.
V-Synth-GT_e.book 141 ページ 2007年4月9日 月曜日 午後1時46分 Editing a Tone (Pro Edit) Com OSC1/2 MOD COSM1/2 TVA AP Syn Effects Tone-FX fig.06b-81.eps_50 Parameter Tone-FX Switch Tone-FX Type Value OFF, ON 00 (Thru)–41 Description Switches the Tone-FX on/off. Use this parameter to select from among the 41 available Tone-FX. In this setting screen, you can edit the parameters of the Tone-FX that is selected by the Tone-FX Type setting. For details on each Tone-FX type, refer to “COSM_EffectsList(E).
V-Synth-GT_e.book 142 ページ 2007年4月9日 月曜日 午後1時46分 Editing a Tone (Pro Edit) Using Steps to Vary the Sound (Multi Step Modulator) The Multi Step Modulator is a function that modulates the value of various parameters according to a sixteen-step sequence. On the V-Synth GT, the patterns of this sequence are managed as “tracks.” You can simultaneously use up to four tracks, with each track containing a different sequence. You can use the panel knobs to freely modify the sequence pattern. 1.
V-Synth-GT_e.book 143 ページ 2007年4月9日 月曜日 午後1時46分 Editing a Tone (Pro Edit) 5. Make settings for the track. Touch one of the tabs for a track name you turned on in step 4. fig.StepModTrackSW2 6. While playing the keyboard to hear the sound, input steps 1–8. The V-Synth GT’s E1–E8 knobs correspond to knobs 1–8 and 9–16. To switch between 1–8 and 9–16, hold down [SHIFT] and use [ ][ ] (the frame in the screen will move).
V-Synth-GT_e.book 144 ページ 2007年4月9日 月曜日 午後1時46分 Editing a Tone (Pro Edit) Multi Step Modulator fig.06b-80.eps Multi Step Modulator Switch Step Indicator Step Bar Parameter Multi Step Modulator Switch Value OFF, ON Description This turns the multi step modulator on/off. * This setting applies to all tracks (Track A–D). Step Indicator Step Bar This indicates the current location within the step sequence. This graphically shows the sixteen steps.
V-Synth-GT_e.book 145 ページ 2007年4月9日 月曜日 午後1時46分 Editing a Tone (Pro Edit) Parameter Track Button A–D (Step Modulator Track Buttons A– D) Track TAB A–D (Step Modulator Track Tabs A–D) Loop (Step Modulator Loop Switch) Grid (Step Grid) Value OFF, ON Description These turn the multi step modulator on/off for the four tracks (A–D). OFF, ON Note These access the editing screens for the four multi step modulator tracks (A– D). This turns looping on/off for the step sequence.
V-Synth-GT_e.book 146 ページ 2007年4月9日 月曜日 午後1時46分 Vocal Designer If you select structure type 5, you’ll be able to use Vocal Designer. Vocal Designer is a function that uses cutting-edge human vocal modeling technology. By connecting a mic to the VSynth GT and playing the keyboard while you sing, you can model an extremely realistic and natural singing voice. fig.06d-01-j.
V-Synth-GT_e.book 147 ページ 2007年4月9日 月曜日 午後1時46分 Vocal Designer How Vocal Designer is Structured Vocal Designer consists of four elements: the mic, OSC1/2 (carrier), the vocoder, and effects. fig.06d-02-j.eps Carrier Vocoder Effects This corresponds to the vocal cords of a human. The signal on which the sound is based (tone and pitch) is produced according to the pitches you play on the keyboard. On the V-Synth GT, this consists of the combination of the OSC, COSM, MOD, and TVA.
V-Synth-GT_e.book 148 ページ 2007年4月9日 月曜日 午後1時46分 Vocal Designer Using Vocal Designer Connecting a Mic 1. Connect your mic to the “MIC IN jack.” 2. Press INPUT [SETTING] on the panel. The Audio Input Settings screen will appear. fig.06d-16-ps.eps_50 3. Check the mic settings. fig.06d-17.eps_50 While vocalizing into the mic, use the panel’s INPUT MIC LEVEL knob to adjust the volume so that the Level indicator in the screen does not quite light red. If the Peak indicator lights, the volume is too high.
V-Synth-GT_e.book 149 ページ 2007年4月9日 月曜日 午後1時46分 Vocal Designer Make settings for Vocal Designer 1. Select structure type 5. • Select Structure Type 5 in the Pro Edit screen (p. 86). • Press STRUCTURE [5], then touch in the Patch Play screen. fig.06d-01-j.eps Make sure that UPPER or LOWER is lit as the KEY MODE of the patch for which Vocal Designer is selected. 2. Play the keyboard. 3. While continuing to hold down notes, vocalize into the mic.
V-Synth-GT_e.book 150 ページ 2007年4月9日 月曜日 午後1時46分 Vocal Designer Vocal Designer fig.06d-10-ps.eps Parameter Value OFF, ON Description Turns Vocal Designer on/off. 0–127 Indicates the mic input level. Use the panel INPUT MIC LEVEL knob to adjust the level so that the peak indication does not light.
V-Synth-GT_e.book 151 ページ 2007年4月9日 月曜日 午後1時46分 Vocal Designer Mic Settings fig.06d-04-j.eps Vocal Designer TVA Vocoder Tone-FX Mic Settings Mic effects such as equalizer are provided to enhance the mic input. You can use these to adjust the character of the mic sound, and make it easier for you to sing. As mic effects, equalizer (EQ), noise suppressor (Noise Sup), and compressor (Comp) are provided. These mic effect settings can be stored together as mic settings, and called up when necessary.
V-Synth-GT_e.book 152 ページ 2007年4月9日 月曜日 午後1時46分 Vocal Designer EQ Equalizer: Adjusts the character of the low, mid, and high-frequency ranges. The EQ settings are shown by the graph in the middle of the screen. fig.06d-12-ps.eps Parameter Mic/EQ Switch 3 Band EQ EQ Low Freq (EQ Low Frequency) EQ Low Gain EQ Mid Freq (EQ Mid Frequency) EQ Mid Gain EQ Mid Q EQ Hi Freq (EQ High Frequency) EQ Hi Gain (EQ High Gain) 152 Value OFF, ON Description Turns the equalizer on/off.
V-Synth-GT_e.book 153 ページ 2007年4月9日 月曜日 午後1時46分 Vocal Designer Noise Sup Noise suppressor: Suppresses noise when no sound is being input. fig.06d-13-ps.eps Parameter Mic/Noise Suppressor Switch NS Threshold (Noise Suppressor Threshold) NS Attack (Noise Suppressor Attack) NS Release (Noise Suppressor Release) Value OFF, ON -60– -36dB 0–127 0–127 Description Turns the noise suppressor on/off. Specifies the level at which the noise suppressor begins to operate.
V-Synth-GT_e.book 154 ページ 2007年4月9日 月曜日 午後1時46分 Vocal Designer Comp Compressor: Reduces high-level sounds and boosts low-level sounds, thus improving the overall volume balance of the sound. fig.06d-14-ps.eps Parameter Description Turns the compressor on/off. Specifies the compression ratio. CP Threshold (Compressor Threshold) CP Attack (Compressor Attack) Value OFF, ON 1:1.
V-Synth-GT_e.book 155 ページ 2007年4月9日 月曜日 午後1時46分 Vocal Designer Vocoder fig.06d-05-j.eps Vocal Designer TVA Vocoder Tone-FX Mic Settings You can use these settings to modify the character of the vocal sound created by Vocal Designer. Choose one of the following four vocoder types, which will determine the character of the sound. Parameter Vocoder Type Value Stereo Mono Vintage Enhance Description This produces a spacious stereo sound.
V-Synth-GT_e.book 156 ページ 2007年4月9日 月曜日 午後1時46分 Vocal Designer Stereo/Mono/Enhance fig.06d-xxx-ps.eps Parameter Formant Type 156 Value Level Attack Flat Soprano Alto 1 Alto 2 Baritone Bass TalkBox (Mono only) 0–127 0–100 Release 0–100 Consonant Level 0–127 Consonant Detect 0–100 Description No conversion. Transforms the mic input sound into the specified voice range. “TalkBox” is suitable for obtaining metallic talkbox-type sounds. Specifies the volume of Vocal Designer.
V-Synth-GT_e.book 157 ページ 2007年4月9日 月曜日 午後1時46分 Vocal Designer Vintage fig.06d-21-ps.eps Parameter Vocoder EQ Low Freq Value Description 200–800 Hz EQ Low Gain Hi Cut Switch -15– +15dB OFF, ON Level Attack 0–127 0–100 Release 1–100 Consonant Level 0–127 Consonant HPF Freq 4500–9000 Hz Specifies the center frequency at which the low-frequency range will be boosted or cut. Specifies the amount of boost/cut for the low-frequency range. Turns the high-frequency cut on/off.
V-Synth-GT_e.book 158 ページ 2007年4月9日 月曜日 午後1時46分 Editing a Tone (SOUND SHAPER II) By using the “Sound Shaper II” function you can edit the tone simply by turning knobs or pressing buttons. 1. Access the Patch Play screen, and select the tone whose settings you wish to modify. 2. Touch . fig.06c-01-j.eps The SOUND SHAPER II window will appear. Adjust the sound by operating the switches and knobs while you play the keyboard. In the case of Structures 1–4 fig.06c-02-ps.
V-Synth-GT_e.book 159 ページ 2007年4月9日 月曜日 午後1時46分 Editing a Tone (SOUND SHAPER II) In the case of Structure 5 fig.soundshape03 Mic Level The most suitable parameters for editing the vocoder will be assigned. OSC1/2 Switch Vocoder Type OSC1/2 Wave (Touch to view a list.) Cho/Rev Send Level Adjust the OSC 1/2 level. 3. Touch to make COSM settings (p. 160). 4. Touch to make AP-Synthesis settings (p. 161). 5. Touch to make effect settings (p. 162). 6.
V-Synth-GT_e.book 160 ページ 2007年4月9日 月曜日 午後1時46分 Editing a Tone (SOUND SHAPER II) COSM Here you can use the [E1]–[E8] knobs to edit the most important COSM parameters. fig.06c-xx-ps.eps_50 COSM1 Type COSM1 Switch COSM2 Type COSM2 Switch The most suitable parameters for COSM will be assigned. 1. Use the COSM 1/2 switches to turn COSM 1/2 on/off. 2. Touch the screen to select the COSM 1/2 types. You can also change the type by using the VALUE dial or [INC/+] [DEC/-]. 3.
V-Synth-GT_e.book 161 ページ 2007年4月9日 月曜日 午後1時46分 Editing a Tone (SOUND SHAPER II) AP-Synthesis Here you can use the [E1]–[E8] knobs to edit the most important AP-Synthesis parameters. fig.06c-10-ps.eps_50 AP-Synthesis Switch Source Wave Phrase Model AP-Synthesis Modify Parameters AP-Synthesis Level 1. Use the AP-Synthesis switch to turn AP-Synthesis on/off. 2. Use the [E1] knob to select the source wave. You can also use the VALUE dial or [INC/+] [DEC/-] to change this. 3.
V-Synth-GT_e.book 162 ページ 2007年4月9日 月曜日 午後1時46分 Editing a Tone (SOUND SHAPER II) Effects Here you can use the [E1]–[E8] knobs to edit the most important parameters of each effect. fig.06c-20-ps.eps_50 TONE-FX/CHORUS/ REVERB Type TONE-FX/CHORUS/REVERB Parameter (The most suitable parameters are assigned.) TONE-FX/CHORUS/REVERB Switch 1. Use the effect switches to turn each effect on/off. 2. Select the desired type for each effect. 3. Use the [E1]–[E8] knobs to edit the parameters of each effect.
V-Synth-GT_e.book 163 ページ 2007年4月9日 月曜日 午後1時46分 Sample Mode In this chapter, we will explain the procedures for: • Sampling (p. 163) • Editing samples (p. 178) • Converting samples so the VariPhrase function can be used (Encoding) (p. 187) Sampling What is a Template? (Settings before you sample) A sampling template is something that holds a collection of settings for sampling (the setup settings, pre-effect settings, and metronome settings described below).
V-Synth-GT_e.
V-Synth-GT_e.book 165 ページ 2007年4月9日 月曜日 午後1時46分 Sample Mode Sampling Procedure Here’s how to input a sound from the input jacks and sample it. For resampling, refer to the following section. The V-Synth GT has the following input jacks. • INPUT L, R • MIC IN (mixed into INPUT R) • DIGITAL AUDIO INTERFACE OPTICAL IN COAXIAL IN USB (Audio) Use the input jack that is appropriate for your situation.
V-Synth-GT_e.book 166 ページ 2007年4月9日 月曜日 午後1時46分 Sample Mode 2. Select the location (sample number) that you wish to sample. Move the cursor to the desired sample. Normally, you will select a sample that has no wave; i.e., a sample number whose name is “NO SAMPLE.” In this screen you can use the following functions. • Select a sample by directly touching it. • Change the number in steps of eight by pressing [ ] [ ].
V-Synth-GT_e.book 167 ページ 2007年4月9日 月曜日 午後1時46分 Sample Mode 7. Adjust the sampling level. Adjust the volume of the device that is producing the sound. When sampling from the MIC IN jack, adjust the level by turning the front panel INPUT MIC LEVEL knob. When sampling from the INPUT jacks, press the INPUT [SETTING] button on the front panel, and in the Audio Input Settings screen that appears, use to adjust the level.
V-Synth-GT_e.book 168 ページ 2007年4月9日 月曜日 午後1時46分 Sample Mode Sample Name (Naming a Sample) Assign a new name to the sample. You can assign a name consisting of up to twelve characters. 1. Access the Sample Top screen, and select the sample that you want to name (p. 178). 2. Touch
V-Synth-GT_e.book 169 ページ 2007年4月9日 月曜日 午後1時46分 Sample Mode Sample Copy (Copying a Sample) 1. Access the Sample Top screen (p. 165). 2. Touch
V-Synth-GT_e.book 170 ページ 2007年4月9日 月曜日 午後1時46分 Sample Mode Sample Move (Moving a Sample) 1. Access the Sample Top screen (p. 165). 2. Touch
V-Synth-GT_e.book 171 ページ 2007年4月9日 月曜日 午後1時46分 Sample Mode Sample Exchange (Exchanging a Sample) 1. Access the Sample Top screen (p. 165). 2. Touch
V-Synth-GT_e.book 172 ページ 2007年4月9日 月曜日 午後1時46分 Sample Mode Sample Delete (Deleting a Sample) 1. Access the Sample Top screen (p. 165). 2. Touch
V-Synth-GT_e.book 173 ページ 2007年4月9日 月曜日 午後1時46分 Sample Mode Resampling The V-Synth GT is able to resample samples from its internal memory. This is called resampling. In actuality, the sounds that are output from the rear panel MAIN OUT L/MONO, R jacks are sampled. For example, you could sample multiple samples played simultaneously, and record them as a single sample. You can conserve voices in this way. fig.04-05.
V-Synth-GT_e.book 174 ページ 2007年4月9日 月曜日 午後1時46分 Sample Mode Sampling General (Setup Settings) fig.04-06_50 Parameter Sampling Type Input Source Trigger Mode Value STEREO L R MONO MIX MONO L MONO R ANALOG USB OPTICAL COAXIAL RESAMPL MANUAL MIDI LEVEL NOTE 174 Trigger Level -∞–00 dB Pre Trigger 0–1000 msec Pre Gain -12– +36 dB Description Samples in stereo. Mixes the signals input to L and R, and sample in monaural. Samples the L input signal in monaural.
V-Synth-GT_e.book 175 ページ 2007年4月9日 月曜日 午後1時46分 Sample Mode Sampling Pre-Effect (Pre-Effect Settings) fig.04-07_50 There are three pre-effects: compressor, limiter, and noise suppressor. By using these you can adjust the level of the sound being sampled. Compressor Limiter Noise Suppressor By reducing high levels and raising low levels, this effect smoothes out unevenness in volume. By compressing sounds that exceed a specified volume level, this effect prevents the sound from distorting.
V-Synth-GT_e.book 176 ページ 2007年4月9日 月曜日 午後1時46分 Sample Mode Metronome (Metronome Settings) fig.04-08_50 Parameter Metro Type (Metronome Type) Level (Metronome Level) Count In * If Trigger Mode is set to other than “MANUAL,” this parameter has no effect. Tempo Beat Value OFF 1MEASURE 2MEASURE Description The metronome will not sound. The metronome will sound only during sampling. The metronome will sound whenever you sample (including while you are making settings in preparation for sampling).
V-Synth-GT_e.book 177 ページ 2007年4月9日 月曜日 午後1時46分 Sample Mode Template Name (Naming a Template) A template can be given a name of up to eight characters. 1. Access the Sampling Template screen, and select the sample that you want to name (p. 165). 2. Touch
V-Synth-GT_e.book 178 ページ 2007年4月9日 月曜日 午後1時46分 Sample Mode Editing a Sample When you have finished sampling, you can edit the sample data. When editing a sample, touching will play the sample so you can check whether it was edited as you expect. When the editing screens are displayed, playing the keyboard will not produce sound. It is not possible to edit two or more samples simultaneously.
V-Synth-GT_e.book 179 ページ 2007年4月9日 月曜日 午後1時46分 Sample Mode 4. Touch one of the tabs in the left side of the screen to access the desired editing screen. : Edit the sample of the specified region (p. 182) : Specify the loop region for forward playback (p. 185) : Specify the loop region for backward playback (p. 185) For details on each editing operation, refer to the corresponding page. 5. When you have finished making settings, press [EXIT] to return to the Sample Top screen.
V-Synth-GT_e.book 180 ページ 2007年4月9日 月曜日 午後1時46分 Sample Mode (LENGTH LOCK) This locks the length of the region between the start point (Start) and end point (End) of the sample. It is convenient to use this when you already know the length of the sample that you need, and want to find the right region to use.
V-Synth-GT_e.book 181 ページ 2007年4月9日 月曜日 午後1時46分 Sample Mode (Zero Cross Search) This function searches for locations where the sample has a value of zero. When setting loop points or when cutting the sample, you should search for locations where the sample value is zero so that noise is not heard when you play the sample. Move the cursor to the point (“Start,” “End,” or “Current”) for which you want to find a zero-cross point, and then touch or Touching .
V-Synth-GT_e.book 182 ページ 2007年4月9日 月曜日 午後1時46分 Sample Mode Editing the Specified Region of the Sample You can specify a region of the sample, and edit the region by cutting or copying. Basic Operation 1. Access the Sample Edit screen (p. 178). 2. Specify the region that you want to edit (Edit Start–Edit End), or the Current location (p. 179). 3. Touch
V-Synth-GT_e.book 183 ページ 2007年4月9日 月曜日 午後1時46分 Sample Mode Sample Editing Functions fig.04-18 Cut Truncate Copy Clear Paste The region of the sample between Edit Start and Edit End will be cut. The region of the sample between Edit Start and Edit End will be kept, and the remainder of the sample will be deleted. The sample between Edit Start and Edit End will be copied. The sample between Edit Start and Edit End will be set to values of zero.
V-Synth-GT_e.book 184 ページ 2007年4月9日 月曜日 午後1時46分 Sample Mode Normalize The Normalize operation is used to uniformly increase or decrease the level of the entire sample without allowing it to distort. This is used when you wish to make the volume consistent with other samples. In the Sample Edit Normalize window, specify the degree of normalization that you want to use. The value is specified in terms of a percentage.
V-Synth-GT_e.book 185 ページ 2007年4月9日 月曜日 午後1時46分 Sample Mode Loop Region Settings When the loop switch (p. 180) is ON, you can specify the region that will be played back as a loop. The region of the sample between Loop Start and Loop End will be played back repeatedly. In the Sample Loop FWD screen that appears when you touch , specify the loop region for forward playback. In the Sample Loop BWD screen that appears when you touch , specify the loop region for backward playback. fig.
V-Synth-GT_e.book 186 ページ 2007年4月9日 月曜日 午後1時46分 Sample Mode Original Tempo Setting The Original Tempo is the reference tempo of the sample used when synchronizing it to the master tempo. Example: A sample whose original tempo is 100 If the master tempo is set to 200 and the sample is synchronized, the sample will play back at double the speed at which it was recorded. If you set the master tempo to 50 and synchronize the sample, it will play back at half the speed at which it was recorded. fig.
V-Synth-GT_e.book 187 ページ 2007年4月9日 月曜日 午後1時46分 Sample Mode Encode (Converting the Sample to V-Synth GT Data) After you have finished editing the sample, you should encode it. By using the encoding that is appropriate for the sample, you’ll be able to maintain a higher quality of audio while controlling the pitch, time, and formant. The factory-set waves (preset waves) cannot be encoded. Displaying the Encode Screen Samples whose wave is too short (0.
V-Synth-GT_e.book 188 ページ 2007年4月9日 月曜日 午後1時46分 Sample Mode Selecting the Encoding Type You can choose from the following four types of encoding. Touch the appropriate button to select a type. fig.04-21 LITE This is the simplest encoding type. When you sample on the V-Synth GT, this type is selected by default. This type can be used with a variety of sounds, but to obtain the highest quality we recommend that you encode using one of the other types.
V-Synth-GT_e.book 189 ページ 2007年4月9日 月曜日 午後1時46分 Sample Mode Automatically Detecting Events By specifying the Depth, you can automatically detect and “▼”mark locations where there is a strong attack (i.e., locations where the volume changes abruptly). Such marked locations are called events. fig.04-22 Parameter Depth (Encode Depth) Value 0–127 Description In the Sample Encode screen, move the cursor to “Depth” and set the value. The higher the value you set, the more events will be assigned.
V-Synth-GT_e.book 190 ページ 2007年4月9日 月曜日 午後1時46分 Sample Mode Deleting and Adding Events Setting the Encode Depth and automatically detecting events does not guarantee that the events will be added at the locations that you expect. If necessary, you can delete or add events as you like. In the Sample Encode screen, you can touch to play the sample from the current location until the next event.
V-Synth-GT_e.book 191 ページ 2007年4月9日 月曜日 午後1時46分 Sample Mode Saving a Sample Samples that you sample or encode will be lost when you turn off the power. If you want to keep these samples, use the Save Project screen in the Utility Menu. When you edit the settings of a sample, an asterisk (*) will appear at the left of the sample name in the Sample Browser screen. When you save the sample to internal memory or USB memory, the asterisk (*) will disappear. 1. Access the Sample Top screen (p. 165). 2.
V-Synth-GT_e.book 192 ページ 2007年4月9日 月曜日 午後1時46分 Sample Mode Checking Sample Information 1. Access the Sample Top screen (p. 165). 2. Touch . The Sample Information screen appears. fig.04-10a_50 In • • • • • • • the Sample Information screen you can check the following information for the sample. Encode type (p. 188) Sampling type (p. 174) Loop point location (Loop Start, Loop End) (p. 185) Time signature (p. 186) Original tempo (p.
V-Synth-GT_e.book 193 ページ 2007年4月9日 月曜日 午後1時46分 System Mode (Settings Common to All Modes) Settings that affect the entire operating environment of the V-Synth GT, such as tuning and MIDI message reception, are referred to as system functions. This section explains how to make settings for the System functions and describes the functions of the different System parameters. How to Make the System Function Settings 1. Press [SYSTEM]. fig.08-01-ps.eps_50 Tabs Editing Groups 2.
V-Synth-GT_e.book 194 ページ 2007年4月9日 月曜日 午後1時46分 System Mode (Settings Common to All Modes) System Menu System Write (Saving the System Settings) Changes you make to the System function settings are only temporary—they will be discarded as soon as the power is turned off. If you want to keep any changes you’ve made in the system settings, you must save them in internal memory. When you perform the save procedure, the data that previously occupied the save destination will be lost.
V-Synth-GT_e.book 195 ページ 2007年4月9日 月曜日 午後1時46分 System Mode (Settings Common to All Modes) System Init (Initializing the System Settings) The current settings of the system functions can be restored to the factory settings. 1. Touch
V-Synth-GT_e.book 196 ページ 2007年4月9日 月曜日 午後1時46分 System Mode (Settings Common to All Modes) Common (Settings Common to the Entire System) Master fig.08-02.eps_50 Parameter Master Tune Master Key Shift Master Level Patch Remain (Patch Remain Switch) Startup Patch Value 415.3–466.2 Hz -24– +24 0–127 OFF, ON Last Patch Patch 001 196 Description Adjusts the overall tuning of the V-Synth GT. The display shows the frequency of the A4 note (center A).
V-Synth-GT_e.book 197 ページ 2007年4月9日 月曜日 午後1時46分 System Mode (Settings Common to All Modes) EQ fig.08-04.
V-Synth-GT_e.book 198 ページ 2007年4月9日 月曜日 午後1時46分 System Mode (Settings Common to All Modes) MIDI fig.08-05.
V-Synth-GT_e.book 199 ページ 2007年4月9日 月曜日 午後1時46分 System Mode (Settings Common to All Modes) USB MIDI fig.08-08.eps_50 Parameter USB-MIDI Thru Switch Value OFF, ON Description Specifies whether MIDI messages received at the USB connector or MIDI IN connector when using MIDI via the USB connection will be retransmitted without change from the MIDI OUT connector or USB connector (ON), or will not be retransmitted (OFF).
V-Synth-GT_e.book 200 ページ 2007年4月9日 月曜日 午後1時46分 System Mode (Settings Common to All Modes) Audio Input fig.08-03.eps_50 ON, OFF Peak Level Input Gain (INPUT Jack Gain) Input Sw (INPUT Jack Switch) 0dB, +10dB ON, OFF Ext In Source (External Input Source) ANALOG USB Selects the source of external input used when Oscillator Type (p. 95) is set to “EXT IN.” Ext In Type (External Input Type) Selects the type of external input used when Oscillator Type (p. 95) is set to “EXT IN.
V-Synth-GT_e.book 201 ページ 2007年4月9日 月曜日 午後1時46分 System Mode (Settings Common to All Modes) Audio Output fig.08-06.eps_50 Value Parameter Output Gain -12– +12 dB Mix/Parallel MIX Specifies how the sound of the entire V-Synth GT will be output. PARALLEL Digital Output Frequency 44.1, 48, 96 kHz Description This adjusts the output gain from the V-Synth GT’s Analog Out and Digital Out.
V-Synth-GT_e.book 202 ページ 2007年4月9日 月曜日 午後1時46分 System Mode (Settings Common to All Modes) USB Audio fig.08-07.
V-Synth-GT_e.book 203 ページ 2007年4月9日 月曜日 午後1時46分 System Mode (Settings Common to All Modes) Controller (Controller-related Settings) Keyboard fig.08-11.eps_50 Parameter Keyboard Sens (Keyboard Sensitivity) Value Keyboard Velocity REAL, 1–127 Aftertouch Sens (Aftertouch Sensitivity) 0–200 Local Sw (Local Switch) OFF, ON Light Medium Heavy Description Sets the keyboard sensitivity to “light.” Sets the keyboard sensitivity to “normal.” Sets the keyboard sensitivity to “heavy.
V-Synth-GT_e.book 204 ページ 2007年4月9日 月曜日 午後1時46分 System Mode (Settings Common to All Modes) Time Trip Pad fig.08-12.eps_50 Parameter X Assign-XY 204 Value OFF CC01–31, 33–95 (Controller numbers 1–31, 33–95) X Assign-TT (X Assign-Time Trip) OFF CC01–31, 33–95 (Controller numbers 1–31, 33–95) Y Assign-XY OFF CC01–31, 33–95 (Controller numbers 1–31, 33–95) Y Assign-TT (Y Assign-Time Trip) OFF CC01–31, 33–95 (Controller numbers 1–31, 33–95) Description No message will be transmitted.
V-Synth-GT_e.book 205 ページ 2007年4月9日 月曜日 午後1時46分 System Mode (Settings Common to All Modes) D-Beam fig.08-14.eps_50 Value Parameter Beam Sens L, R (D Beam Sensitivity L, R) 0–200 1–4 Assign L, R (D Beam 1–4 Assign L, R) OFF CC01–31, 33–95 Description This sets the D Beam Controller’s sensitivity. Sens L is the left side, and Sens R is the right side. Increasing this value will make the D Beam controller more sensitive. Normally you will leave this at “100.” No message will be transmitted.
V-Synth-GT_e.book 206 ページ 2007年4月9日 月曜日 午後1時46分 System Mode (Settings Common to All Modes) C1/C2 Knob fig.08-17.eps_50 Parameter C1, 2 Knob Assign Value OFF CC01–31, 33–95 (Controller numbers 1–31, 33–95) Description No message will be transmitted. Specifies the MIDI controller number that will be transmitted by movements in the ASSIGNABLE CONTROL knob. S1/S2 Switch fig.08-19.
V-Synth-GT_e.book 207 ページ 2007年4月9日 月曜日 午後1時46分 System Mode (Settings Common to All Modes) Pedal fig.08-18.eps_50 Parameter Hold Polarity (Hold Pedal Polarity) Pedal 1, 2 Assign This specifies the function of each pedal connected to the CTRL 1, CTRL 2 PEDAL jacks. Value Standard, Reverse OFF CC01–31, 33–95 BEND UP BEND DOWN AFT VALUE INC VALUE DEC Pedal 1, 2 Polarity Standard, Reverse Description Selects the polarity of the Hold pedal.
V-Synth-GT_e.book 208 ページ 2007年4月9日 月曜日 午後1時46分 System Mode (Settings Common to All Modes) V-LINK Settings Tx fig.08-20.eps_50 Parameter V-LINK MIDI Channel V-LINK Audio Sw (V-LINK Audio Switch) Keyboard Output Fade Sw (V-LINK Keyboard Output Fade Switch) Patch Palette Local Sw (V-LINK Patch Palette Local Switch) 208 Value 1–16 OFF, ON OFF, ON OFF, ON Description Specifies the channel used to transmit MIDI messages for V-LINK control.
V-Synth-GT_e.book 209 ページ 2007年4月9日 月曜日 午後1時46分 System Mode (Settings Common to All Modes) Time Trip Pad fig.08-21.eps_50 Parameter Time Trip Pad Local Sw (V-LINK Time Trip Pad Local Switch) X Assign-XY (V-LINK X Assign-XY) Specify the V-LINK function that will be controlled when you operate the Time Trip pad in the X (horizontal) direction in XY mode.
V-Synth-GT_e.book 210 ページ 2007年4月9日 月曜日 午後1時46分 System Mode (Settings Common to All Modes) D Beam fig.08-23.eps_50 Parameter D Beam Local Sw (V-LINK D Beam Local Switch) 1–4 Assign L, R (V-LINK D Beam1–4 Assign L, R) Specify the V-LINK function that will be controlled when you operate the D Beam controller. Assign L is the left side, and Assign R is the right side.
V-Synth-GT_e.book 211 ページ 2007年4月9日 月曜日 午後1時46分 System Mode (Settings Common to All Modes) C1/C2 Knob fig.08-24.eps_50 Parameter C1, 2 Knob Local Sw (V-LINK Knob1, 2 Local Switch) C1, 2 Knob Assign (V-LINK Knob1, 2 Assign) Specify the V-LINK function that will be controlled when you turn the ASSIGNABLE CONTROL knob.
V-Synth-GT_e.book 212 ページ 2007年4月9日 月曜日 午後1時46分 System Mode (Settings Common to All Modes) Bender fig.08-26.eps_50 Parameter Modulation Local Sw (V-LINK Modulation Local Switch) Bender Local Sw (V-LINK Pitch Bend Local Switch) Aftertouch Local Sw (V-LINK Aftertouch Local Switch) Modulation Assign (V-LINK Modulation Assign) Specify the V-LINK function that will be controlled when you operate the modulation lever.
V-Synth-GT_e.book 213 ページ 2007年4月9日 月曜日 午後1時46分 System Mode (Settings Common to All Modes) Info (Viewing Various Information) Version (Checking the Version) Here you can check the V-Synth GT’s program version. fig.08-30.eps_50 Features (Checking the Functions) Here you can view a screen that introduces the functionality of the V-Synth GT. fig.08-31.
V-Synth-GT_e.book 214 ページ 2007年4月9日 月曜日 午後1時46分 Utility Mode Utility mode provides various functions for your convenience when using the V-Synth GT. Press [UTILITY] to access the Utility Menu screen, then select and carry out the desired function. fig.utility-ps.eps_50 • • • • • • • • • 214 Project (Project-related Settings) ................................................ p. USB Storage (Exchanging Files with Your Computer)................... p. Beep (Beep Tone Settings)..............................
V-Synth-GT_e.book 215 ページ 2007年4月9日 月曜日 午後1時46分 Utility Mode Project (Project-related Settings) You can load a project from USB memory into the V-Synth GT’s temporary area, or save the project that’s in the temporary area. Load Project (Loading a Project into the V-Synth GT) This operation will load a project from internal memory or USB memory into the V-Synth GT’s temporary area. When you load a project, the temporary area will be rewritten.
V-Synth-GT_e.book 216 ページ 2007年4月9日 月曜日 午後1時46分 Utility Mode 5. Touch . A Warning window like the following appears. fig.09-03-ps.eps_50 If you want to cancel the procedure at this point, touch . 6. Touch to execute the operation. It will take several minutes for the project to be loaded. 7. When is displayed, loading is finished. Touch to return to the Patch Play screen.
V-Synth-GT_e.book 217 ページ 2007年4月9日 月曜日 午後1時46分 Utility Mode Save Project (Saving a Project) This operation saves the project from the temporary area into internal memory or USB memory. 1. Press [UTILITY] to access the Utility Menu screen. 2. Touch . The Project Menu screen appears. fig.09-01-ps.eps_50 3. Touch . The Save Project screen appears. fig.09-04-ps.eps_50 4. To save to internal memory, touch . To save to USB memory, touch .
V-Synth-GT_e.book 218 ページ 2007年4月9日 月曜日 午後1時46分 Utility Mode 5. Touch . A Warning window like the following appears. fig.09-05-ps.eps_50 If you want to cancel the procedure at this point, touch . 6. Touch to execute the operation. It will take several minutes for the project to be saved. 7. When is displayed, saving is finished. Touch to return to the Patch Play screen.
V-Synth-GT_e.book 219 ページ 2007年4月9日 月曜日 午後1時46分 Utility Mode Convert Project (Convert a Project) This operation will convert (import) a V-Synth Version 2.0 or V-Synth XT project for use with your V-Synth GT. 1. Using your computer, create a folder named “XT” on your USB memory device. 2. Copy the V-Synth Version 2.0 or V-Synth XT project to the “XT” folder on the USB memory device, and connect it to the V-Synth GT’s USB MEMORY connector. 3. Press [UTILITY] to access the Utility Menu screen. 4.
V-Synth-GT_e.book 220 ページ 2007年4月9日 月曜日 午後1時46分 Utility Mode 7. Touch . A Warning window like the following appears. fig.09-xxx-ps.eps_50 If you want to cancel the procedure at this point, touch . 8. Touch to execute the operation. It will take several minutes for the project to be converted.
V-Synth-GT_e.book 221 ページ 2007年4月9日 月曜日 午後1時46分 Utility Mode USB Storage (Exchanging Files with Your Computer) By connecting the V-Synth GT to your computer via a USB cable, you can save (back up) projects and other files such as individual patches, waves, and data from internal memory to the hard disk of your computer. Using software on your computer, you can also edit wave data you’ve created on the V-Synth GT. Conversely, wave data created on your computer can be used by the V-Synth GT.
V-Synth-GT_e.book 222 ページ 2007年4月9日 月曜日 午後1時46分 Utility Mode 5. Touch in the Utility Menu screen. The USB Storage screen appears. fig.09-11-ps.eps_50 6. Touch to establish the connection with your computer. 7. When the USB connection is established, the driver installation will begin. A dialog box of “Found new hardware” will appear near the Windows task tray. Installation is completely automatic. Please wait for it to be completed. 8.
V-Synth-GT_e.book 223 ページ 2007年4月9日 月曜日 午後1時46分 Utility Mode Mac Users Connecting the V-Synth GT to Your Computer 1. Make sure that the power of the V-Synth GT is turned off. 2. Start up your computer. 3. Connect the V-Synth GT and your computer using a USB cable. fig.09-15_j.eps_50 USB Connector USB Cable Computer V-Synth GT 4. Turn on the power of V-Synth GT. 5. Touch in the Utility Menu screen. The USB Storage screen appears. fig.09-11-ps.eps_50 6.
V-Synth-GT_e.book 224 ページ 2007年4月9日 月曜日 午後1時46分 Utility Mode Disconnecting USB Storage 1. Select the V-Synth GT drive icon on the desktop, and drag it into the “trash.” Alternatively, select “Eject “V-SYNTH GT”” from the “Files” menu. 2. Press [EXIT]. The USB storage will be disconnected.
V-Synth-GT_e.book 225 ページ 2007年4月9日 月曜日 午後1時46分 Utility Mode Examples of Using Storage Function Backing Up Patch and Wave Data (Project) from the V-Synth GT When using USB in Storage function, the data within the V-Synth GT may be damaged if you operate your computer incorrectly or if your computer crashes. As a precaution against such occurrences, we recommend that you create a backup as described below. Backing Up the V-Synth GT’s Internal Data onto Your Computer 1.
V-Synth-GT_e.book 226 ページ 2007年4月9日 月曜日 午後1時46分 Utility Mode The V-Synth GT’s File Structure As seen from your computer, the V-Synth GT’s file structure is as follows. Do not perform operations on your computer to erase (format) or rename these folders or files. If the V-Synth GT stops operating correctly, break the USB connection between the computer and the V-Synth GT (p. 222, p. 224), and then execute the Factory Reset command (p. 235).
V-Synth-GT_e.book 227 ページ 2007年4月9日 月曜日 午後1時46分 Utility Mode Beep (Beep Tone Settings) You can specify whether a “beep” will be heard when you touch a valid point in the touch panel. * With the factory settings, there will be a beep tone. 1. Press [UTILITY] to access the Utility Menu screen. 2. Touch . The beep tone will be switched on/off. fig.09-35-ps.eps_50 fig.09-36-ps.
V-Synth-GT_e.book 228 ページ 2007年4月9日 月曜日 午後1時46分 Utility Mode E1–E8 Knobs (E1–E8 knob Settings) 1. Press [UTILITY] to access the Utility Menu screen. 2. Touch . The E1–E8 Knob Settings screen appears. 3. Specify the parameters you wish to assign to the E1–E8 knobs. fig.09-37-ps.eps_50 Parameter Init Settings Sw E1–E8 Assign 228 Value Description Initializes the settings of the E1–E8 knobs. Specify the parameters assigned to the E1–E8 knobs.
V-Synth-GT_e.book 229 ページ 2007年4月9日 月曜日 午後1時46分 Utility Mode Screen Saver This feature allows you to have a simple animation be displayed whenever the V-Synth GT has not been operated for a certain period of time. Because of the characteristics of the TFT liquid crystal display used in the V-Synth GT, leaving the same screen displayed for an extended time may cause that image to be burned into the screen. To avoid this, we recommend that you use the screen saver. 1.
V-Synth-GT_e.book 230 ページ 2007年4月9日 月曜日 午後1時46分 Utility Mode Wallpaper (Changing the Wallpaper) You can change the background image of the touch panel. Via USB memory, you can also use data such as a photo you’ve taken as the background image. 1. Press [UTILITY] to access the Utility Menu screen. 2. Touch . The Wallpaper screen appears. fig.09-40-ps.eps_50 3. Touch the image that you want to use as the background. The selected image will appear in the background.
V-Synth-GT_e.book 231 ページ 2007年4月9日 月曜日 午後1時46分 Utility Mode Calibration (Adjusting the Controllers) Adjusting the Positional Accuracy of the Touch Panel Perform this adjustment if the touch panel no longer responds as you expect. 1. In the Utility Menu screen, touch . The Calibration screen appears. fig.09-30-ps.eps_50 2. Touch . The Touch Screen Calibration screen appears. fig.09-31-ps.eps_50 3.
V-Synth-GT_e.book 232 ページ 2007年4月9日 月曜日 午後1時46分 Utility Mode Adjusting the Positional Accuracy of the Time Trip Pad Perform this adjustment if the Time Trip pad no longer responds as you expect. 1. In the Utility Menu screen, touch . The Calibration screen appears. fig.09-30-ps.eps_50 2. Touch
V-Synth-GT_e.book 233 ページ 2007年4月9日 月曜日 午後1時46分 Utility Mode Adjusting the Sensitivity of the D Beam Controller Perform this adjustment if the D Beam controller is functioning incorrectly, such as responding even though you have not operated it. 1. In the Utility Menu screen, touch . The Calibration screen appears. fig.09-30-ps.eps_50 2. Touch . The D Beam Calibration screen appears. fig.09-33-ps.eps_50, fig.09-39.
V-Synth-GT_e.book 234 ページ 2007年4月9日 月曜日 午後1時46分 Utility Mode Format (Initializing Internal Memory or USB Memory) You can initialize (format) internal memory or USB memory to erase all data. 1. Press [UTILITY] to access the Utility Menu screen. 2. Touch . The Format screen appears. fig.09-50-ps.eps_50 3. If you want to format the internal memory, touch . If you want to format a USB memory, touch . 4.
V-Synth-GT_e.book 235 ページ 2007年4月9日 月曜日 午後1時46分 Utility Mode Factory Reset (Reset to Default Factory Settings) This restores all data in the V-Synth GT to the factory-set condition (Factory Reset). If there is important data you’ve created that’s stored in the V-Synth GT’s internal memory, all such data is discarded when a Factory Reset is performed. If you want to keep the existing data, save it on a USB memory (p. 217) or USB backing up onto a computer (p. 221). 1.
V-Synth-GT_e.book 236 ページ 2007年4月9日 月曜日 午後1時46分 MIDI Implementation Chart Synthesizer Keyboard Model: V-Synth GT Date: April 1, 2007 Version: 1.00 MIDI Implementation Chart Transmitted Function...
V-Synth-GT_e.
V-Synth-GT_e.book 238 ページ 2007年4月9日 月曜日 午後1時46分 Specifications ● Connectors Headphone Jack (Stereo 1/4 inch phone type) Main Output Jacks (L/MONO, R) (1/4 inch TRS phone type) Direct Output Jacks (L, R) (1/4 inch phone type) Input Jacks (L, R) (1/4 inch phone type) Mic Jack (1/4 inch phone type/XLR type, phantom power) Hold pedal Jack Control pedal Jacks (1, 2) MIDI Connectors (IN, OUT, THRU) USB Connectors COMPUTER (supports USB 2.0 file transfer, USB 1.1 USB MIDI, and USB Audio) MEMORY (supports USB 2.
V-Synth-GT_e.book 239 ページ 2007年4月9日 月曜日 午後1時46分 Index Symbols [-/+OCT] ....................................................................... 21, 44–45 Numerics 1–4 Assign L, R ....................................................................... 205 V-LINK ............................................................................. 210 A AC IN ...................................................................................... 24 Active Sens ......................................................
V-Synth-GT_e.book 240 ページ 2007年4月9日 月曜日 午後1時46分 Index Carrier ........................................................................... 147, 150 Category Patch ........................................................................... 41, 60 Tone ............................................................................ 57, 83 Chorus ..................................................................................... 78 Vintage Vocoder ...............................................................
V-Synth-GT_e.book 241 ページ 2007年4月9日 月曜日 午後1時46分 Index H L Harmonics .............................................................................. 108 Harmonics Keyfollow ................................................................ 108 Harmonics LFO Depth ............................................................... 108 Headphones ............................................................................. 25 Hi Cut Switch ........................................................................
V-Synth-GT_e.book 242 ページ 2007年4月9日 月曜日 午後1時46分 Index MIDI Clock .............................................................................. 198 MIDI Connectors ........................................................................ 24 MIDI Message V-LINK ............................................................................... 53 MIDI Thru ................................................................................ 199 Mix ...................................................................
V-Synth-GT_e.book 243 ページ 2007年4月9日 月曜日 午後1時46分 Index Portamento ................................................................................ 87 AP-Synthesis ..................................................................... 137 Portamento Switch ..................................................................... 87 Portamento Time ........................................................................ 87 Portamento Type ........................................................................
V-Synth-GT_e.book 244 ページ 2007年4月9日 月曜日 午後1時46分 Index [SYSTEM] ................................................................................ System Init ............................................................................... System Menu ........................................................................... System Mode .................................................................... 38, System Settings Initializing .......................................................................
V-Synth-GT_e.book 245 ページ 2007年4月9日 月曜日 午後1時46分 Index VOCAL DESIGNER .................................................................... 29 Vocal Designer ........................................................................ 146 Compressor ...................................................................... 154 EQ (Equalizer) .................................................................. 152 Mic Settings ......................................................................
V-Synth-GT_e.
For the USA DECLARATION OF CONFORMITY Compliance Information Statement Model Name : Type of Equipment : Responsible Party : Address : Telephone : V-Synth GT Synthesizer Keyboard Roland Corporation U.S. 5100 S. Eastern Avenue, Los Angeles, CA 90040-2938 (323) 890-3700 For EU Countries This product complies with the requirements of European Directives EMC 89/336/EEC and LVD 73/23/EEC.
Information AFRICA EGYPT Al Fanny Trading Office 9, EBN Hagar A1 Askalany Street, ARD E1 Golf, Heliopolis, Cairo 11341, EGYPT TEL: 20-2-417-1828 When you need repair service, call your nearest Roland Service Center or authorized Roland distributor in your country as shown below. PHILIPPINES CURACAO URUGUAY NORWAY JORDAN G.A. Yupangco & Co. Inc. 339 Gil J. Puyat Avenue Makati, Metro Manila 1200, PHILIPPINES TEL: (02) 899 9801 Zeelandia Music Center Inc.