
Owner`s manual
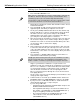

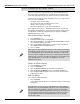
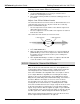
Table Of Contents
- Welcome!
- About this Application Guide
- I. The Components of a VM-7000 System
- II. Adding Options
- III. Listening to the VM-7000
- IV. Powering Up
- V. Initializing the System
- VI. The Level Meter Button as Home Page
- VII. Exiting Screens
- VIII. A New Kind of Bussing
- IX. What Do the Console’s Channel Strips Do?
- X. What Do the Console’s Faders Do?
- XI. The PARAM VIEW on Fader Buttons
- XII. Navigating the Display
- XIII. Adjusting Parameter Values
- XIV. SHIFT and the Green Button Labels
- XV. The CH EDIT Buttons
- XVI. The STATUS and MODE Buttons
- XVII. The Patchbay
- XVIII. Getting the First Signal
- XIX. Understanding Multi Outs
- XX. Routing a Signal to a Multi Out
- XXI. Using Flex Busses
- XXII. Routing Signals to an Internal Flex Bus
- XXIII. Routing Signals to an External Flex Bus
- XXIV. Routing Signals to a Pair of Flex Busses
- XXV. Understanding the Internal Effects
- XXVI. Setting Up a Send-and-Return Effect
- XXVII.Setting Up an Insert Effect
- XXVIII. Stereo-In, Stereo-Out Effects
- XXIX. Dual-Mono Effects
- XXX. Channel Dynamics Processing
- XXXI. Delay, Dynamics, EQ and Channel Libraries
- XXXII. Using a Memory Card
- XXXIII. Setting the VM-7000’s Clock
- XXXIV. Projects
- XXXV. Scenes
- XXXVI. Storing Libraries on a Memory Card
- XXXVII. Moving On...

The EZ NAMING feature provides a couple of handy shortcuts for
naming a library. The first allows you to copy one of the category
titles listed in the center of the display for use as part or all of an
effect’s name.
4. Turn V1 [CATEGORY] to select VOCAL. Note that “VOCAL” now
appears as the effect’s current name.
You can return to the effect’s original name at any time.
5. Press F5 [REVERT] to restore “RV: Vocal Plt” as the effect name.
When you want to have numbered versions of an effect, EZ
NAMING provides a simple way to add a number to a name.
6. Turn V2 [NUMBER]—watch the effect’s name as you turn the
knob—to select 2. The effect is now called “RV: Vocal P 2” (the
VM-7000 shortened “Plt” to make room for the “2”).
7. Press F5 [REVERT] again.
When you’re naming an effect, you can combine techniques as you
need to.
8. For example, turn V1 [CATEGORY] to select VOICE, and then turn
V2 [NUMBER] to select 3—the effect is now named “VOICE 3.”
You can also name an effect from scratch. While this takes a bit
longer, it allows you to use any name you wish, which can help
make it easier to identify the library later on.
When you name an effect from scratch, you do so by positioning the
cursor—the small black box currently positioned at the “V” of
“VOICE 3”—and then turning V4 [ABC] to select the desired upper-
case letter, V5 [abc] to select a lower-case letter, or V6 [123!”#] (no,
we’re not swearing) to select a number or other non-letter character.
By moving the cursor from position to position, and selecting the
desired character for each position, you can create a name. Let’s do
this to name the effect “NOISE 3.” It’s not a very sensible name, but
it will quickly demonstrate how to name a library using the knobs.
9. Since the cursor’s already positioned at the “V,” turn V4 [ABC] to
select N.
10. Turn V3 [CURSOR POS] to select the C.
11. Turn V4 [ABC] to select S.
There’s actually a much easier, quicker way to do this. It may take a
little practice, but you’ll eventually be able to create names in no
time using the following method.
12. Press F1 [ASCII] to type the desired name using the console’s
buttons.
©2000 Roland Corporation U.S. Getting Started with the VM-7000 2796US, v1.0 Page 36
Setting Up a Send-and-Return Effect (Continued)
®ÂØÒňΠApplication Guide Getting Started with the VM-7000
The effect’s current name