
Reference Manual

11
Video Operations
Specifying the operation mode
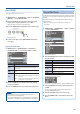
7 Auto scan
1. [MENU] button
0
“AUTO SWITCHING”
0
select “TYPE.”
2. Turn the [VALUE] knob to select “AUTO SCAN,” and press
to conrm.
3. Use the [VALUE] knob to select a menu item.
Menu item Explanation
SEQUENCE
Species the order in which video signals are shown.
NORMAL:
INPUT 1–3
0
switch in the order of
scenes A–E.
RANDOM: Switch randomly.
INPUT 1–3
DURATION
Species the time that the video is shown. If this is
“OFF,” video switching does not aect the input.
SCENE A–E
DURATION
4. Turn the [VALUE] knob to edit the value of the setting,
and press to conrm.
5. Press the [MENU] button several times to close the menu.
7 Beat sync
1. [MENU] button
0
“AUTO SWITCHING”
0
select “TYPE.”
2. Turn the [VALUE] knob to select “BEAT SYNC,” and press
to conrm.
3. Use the [VALUE] knob to select a menu item.
Menu item Explanation
SYNC SOURCE Species the input audio that synchronizes the video.
CYCLE
Species the number of beats at which to switch to
the next video.
SEQUENCE
Species the order in which video signals are shown.
NORMAL:
INPUT 1–3
0
switch in the order of
scenes A–E.
RANDOM: Switch randomly.
INPUT 1–3 SW
Species whether video switching applies (ON) or
does not apply (OFF) to the source.
SCENE A–E SW
4. Turn the [VALUE] knob to edit the value of the setting,
and press to conrm.
5. Press the [MENU] button several times to close the menu.
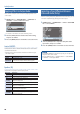
7 Video follows audio
1. [MENU] button
0
“AUTO SWITCHING”
0
select “TYPE.”
2. Turn the [VALUE] knob to select “VIDEO FOLLOWS
AUDIO,” and press to conrm.
3. Use the [VALUE] knob to select a menu item.
Menu item Explanation
TIME
Species the time until audio detection resumes
after mic audio has been detected to switch the
video or scene.
MIC 1 SENSE
Specify the detection level for the audio being
input to the MIC 1 or 2 jack. The higher the level,
the more easily audio is detected.
MIC 2 SENSE
MIC 1 SELECT
Species the video/scene that is output when
audio is detected in MIC 1.
MIC 2 SELECT
Species the video/scene that is output when
audio is detected in MIC 2.
MIC 1 + MIC 2
SELECT
Species the video/scene that is output when
audio is detected in both MIC 1 and MIC 2.
SILENT SELECT
Species the video/scene that is output when there
is no audio input in either MIC 1 or MIC 2.
4. Turn the [VALUE] knob to edit the value of the setting,
and press to conrm.
5. Press the [MENU] button several times to close the menu.
Turning the auto switching function on/o
1. Press the [AUTO SW] button to turn the auto switching
function on (lit).
* If you’re using beat sync, input or play back a song.
2. To turn the auto switching function o, press the [AUTO
SW] button once again.