
Owner's Manual


Page 6
OPERATION AND SET UP CONT.
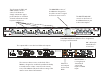
ZONE 1
ZONE 2
ZONE 3
ZONE 4
MASTER VOLUME
HEADPHONE
MONITOR
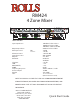
The MASTER VOLUME controls on the front of the RM424 function just as the name implies.
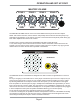
NOTE: with channel volumes, master volumes and possibly remote volumes there are plenty of op-
portunities to get distortion on the outputs. It is best to set all volumes at half (white pointer facing up).
Then make adjustments from there as needed.
Q: When using a remote volume does the MASTER VOLUME control still work?
A: Yes, when using a remote volume both the remote volume and master volumes are active. We
suggest if you are using a remote volume to set the master volume to 10 (all the way up) to give the
remote volume access to the full volume potential of the RM424.
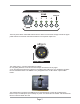
The MONITOR section of the RM424 is designed to be able to monitor a signal before it is sent to a
zone.
EX: If you are going to send audio from a music player connected to input 3 to zone 4 output, but you
want to be sure the sound is correct you can preview (monitor) it before sending it to zone 4 output.
By selecting MONITOR on the input 3 section of the front panel, you can either listen to the signal
from the speaker on the front panel or plug in headphones to MONITOR the signal before you select
input 3 to be sent out to zone 4 output. This can be done in any combination of channels etc. The Vol-
ume level for the monitor is for either the headphones or the speaker. When headphones are plugged
in to the headphone monitor jack the speaker is disabled allowing you to monitor quietly.
Q: The monitor works with source signals but seems to be low with mic’s?
A: The unit is working ¿ ne, the problem is that the small speaker on the front of the RM424 is sending
out a signal to monitor the mic, but the mic is lower in volume than the line level signals. We recom-
mend using the headphone output to monitor sensitive information.