
Instruction manual

10 Installation and Operations Manual
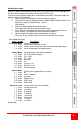
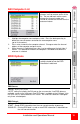
User Preference
(User defined preferences)
U 1 Enter
Enable mouse switching
U 2 Enter
Disable mouse switching
U 7 Enter
Cycle all port (when using ‘Hotkey + Tab’ or ‘Auto-scan’)
U 8 Enter
Cycle only active ports (when using ‘Hotkey + Tab’ or ‘Auto-
scan’)
Table 2. Configuration menu options
Pressing the Esc key will exit from an option choice and return to the main menu ( [ ).
Note: Using the front panel will switch USB 1 or USB 2 to a computer.
Using the Hotkeys will switch both USB 1 and USB2 (Ctrl + Alt + U) to a
computer.
Examples:
You need to change the Hotkey from the default Ctrl + Alt to Ctrl + Shift because it
conflicts with a KVM switch’s Hotkey.
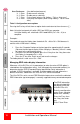
1. Press the “Computer” button on the front panel for approximately 5 seconds.
(Observe the front panel display. When it displays a bracket [ the unit is ready
for inputs to the configuration menu)
2. Using the user console keyboard, press the ‘H’ key then the 2 key then enter.
(the hotkey is changed to Ctrl + shift)
3. Press the ‘E’ key then ‘Enter’ to exit and save the changes.
The hotkey default is now set to ‘Ctrl + Shift’.
Managing EDID video display information
Whenever a Vista DVI Plus unit is powered on (or when the refresh EDID option is
selected from the configuration menu), it will interrogate the connected monitor(s) to
determine whether EDID (Extended Display Identification Data) information is
available. If EDID information is available, it will be copied and used; otherwise a
default set of data, stored within the Vista DVI Plus, will be substituted.
The Vista DVI Plus units use our EDID Emulation feature to ensure that the collected
EDID information (up to two pages) is correctly supplied to every connected computer.
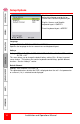
The EDID information
can be refreshed with-
out power cycling the
Vista DVI Plus unit.
Enter the configuration
menu (Press computer
button for 5 seconds)
Press the F key, then
the 2 key, then enter
key.
Press E then Enter