
User Guide


Wireless 300 Mbps PCI-Express Wi-Fi Adapter Wireless 300 Mbps PCI-Express Wi-Fi Adapter
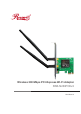
User Manaul User ManaulRNX-N250PCEv2 RNX-N250PCEv2
4 5
SECTION 2: Installation
2.1 Hardware Installation
2.2 Software Installation
Note:
1. Turn off your computer and unplug the power cord from the computer.
2. Remove the metal slot cover on the back of the PC. Keep the screws. Turn to your computer
manufacturer for instructions, if needed.
3. Insert the PCI-Express adapter into the PCI-Express slot. Make sure that all of its pins have
touched the slot's contacts. Once the adapter has been rmly inserted, screw its fastening
tab. Then close your PC case.
4. Insert the power cable back into the computer and turn on your computer.
The adapter’s Setup Wizard will guide you through the installation procedures for Windows XP,
Windows 7, Windows 8.1 and Windows 10. The procedures in different systems are similar;
therefore we have presented the procedures in Windows 10 as an example.
Important Notice:
In order to install the driver successfully, please uninstall other Wi-Fi drivers before installing
the RNX-N250PCEv2 driver. Installing two or more Wi-Fi adapter drivers in one PC may cause
conflicts between the drivers and cause the Wi-Fi adapter to fail to work. You can find the
installed Wi-Fi adapter drivers and uninstall from the Control Panel -> Install and Uninstall
Software.
If the PC has an integrated Wi-Fi adapter, turn it off before installing the RNX- N250PCEv2
driver. Otherwise, the system will not show which Wi-Fi adapter is working and it may cause
conicts between the adapters.
Follow the steps below to install the RNX-N250PCEv2 driver on your Windows PC:
1. Insert the Resource CD into your CD-ROM drive; AutoRun window will pop up (Figure 2-2).
Please select Windows or Windows XP according to your current operating system.
If AutoRun does not work, browse the CD, open the folder and double-click “Setup.exe” to
begin.
2. The InstallShield Wizard will pop up (Figure 2-3) and start installing the driver automatically.
This process may take 1-3 minutes (Figure 2-4). Do not click the “Cancel” button, otherwise
the installation will stop.
When the hardware has been successfully installed on your computer, you may be prompted by
the Found New Hardware Wizard (Figure 2-1). Please click “Cancel”, then follow the Software
Installation steps to install Driver and Utility for your adapter.
Figure 2-1 Found New Hardware Wizard in Windows XP
Figure 2-3
Figure 2-2
Please install the PCI-Express adapter into your computer before installing the Driver and Utility
software from the Resource CD.