
User manual


CrossOver 6 / 12 User Manual (v1.4) Configuration • 2–9
Note:
• It is not recommended to set the Panel Glow color
to red. Red indicates a source is on-air.
For More Information on...
• hue, saturation, and luminance, refer to the section
“Selecting Colors” on page 1-6.
Saving Color Schemes
You can save a custom Panel Glow color scheme so
that it may be recalled as needed.
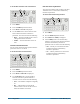
To save a custom Panel Glow color scheme:
1. Modify the Panel Glow as described above, to
obtain the desired appearance.
2. Press MENU.
3. Press the USER Wipe Pattern button.
4. Press the Scheme knob to display the Color
Scheme menu.
5. Press NEXT until Save is displayed.
6. Rotate the Save knob to select the custom
scheme you wish to save.
7. Press the Save knob to save the color scheme.
8. Press the Confrm knob to commit the save (if
there was a color scheme saved to the selected
custom scheme, it is overwritten). Press the
Cancel knob to cancel the save.
Loading Color Schemes
You can load a custom color scheme or one of the
preset color schemes that are included on your
switcher.
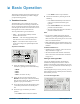
To load a custom Panel Glow color scheme:
1. Press MENU.
2. Press the USER Wipe Pattern button.
3. Press the Scheme knob to display the Color
Scheme menu.
4. Press NEXT until Load is displayed.
5. Use the Load knob to select the color scheme
you want to load. You can select from a list of
presets or one of the custom color schemes you
have previously saved.
6. Press the Load knob to load the color scheme.
7. Press the Confrm knob to commit the load.
Press the Cancel knob to cancel the load.
Power-Save Mode
The switcher goes into a Power-Save mode after a
certain amount of time (20 minutes by default)
without user interaction. Touching any control will
wake the switcher. Any functionality associated with
the touched control is ignored until the unit is active
and all lights and display are turned on.
During Power-Save mode, video related hardware is
not affected and video signals are still passed through
the switcher.
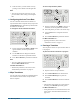
To configure the power-save timeout:
1. Press MENU.
2. Press the PERS Wipe Pattern button.
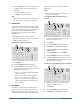
6 4
3 5
2
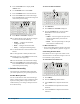
5 3
2 4
1
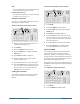
3
2
1