
User manual


CrossOver 6 / 12 User Manual (v1.4) Configuration • 2–11
are asked if you wish to take the first Chroma
Key off-air and use the Chroma Key resource
for the new key.
• ASK — The Chroma Key can be used by any
key. If a Chroma Key is in-use (on or off-air),
you are asked if you wish to convert the
original Chroma Key to an Auto-Select key,
take it off-air, and use the Chroma Key
resource for the new key.
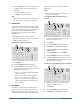
5. Press the ChrKey knob to select the Chroma
Key sharing mode.
6. Press the Confrm knob to commit the change.
Press the Cancel knob to cancel the change.
For More Information on...
• creating and using Chroma Keys, refer to the
section “Chroma Key” on page 3-4.
Switch on Field or Frame
The Switch On feature allows you to select when the
switcher triggers a transition from one video source
to the next when you are running in an interlaced
video format. Each interlaced video frame is
composed of an odd field and an even field and you
can specify that transitions are initiated on:
• even fields only
• odd fields only
• either even or odd fields
If you are running in a progressive scan video
format, setting your switcher to transition on even or
odd fields will cause the switcher to only allow
transitions on every second frame.
To set when the switcher initiates transitions:
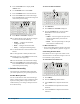
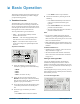
1. Press MENU.
2. Press the PERS Wipe Pattern button.
3. Press NEXT until FldSwt (FrmSwt if you are
using a progressive scan video format) is
displayed.
4. Use the FldSwt (FrmSwt if you are using a
progressive scan video format) knob to select
when transitions are initiated. You can choose
from the following:
• F1 — Field 1 (Odd Field) transitions are
initiated after the odd field of the source video
is drawn.
• F2 — Field 2 (Even Field) transitions are
initiated after the even field of the source
video is drawn.
• BOTH — Transitions can be initiated on
either even or odd fields or frames.
5. Press the FldSwt (FrmSwt if you are using a
progressive scan video format) knob to commit
the selection.
Editor Control
Your switcher can be controlled by external editors
using the GVG100 protocol. You can enable or
disable external control.
To enable or disable external editor control:
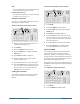
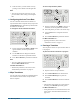
1. Press MENU.
2. Press the PERS Wipe Pattern button.
3. Press NEXT until Editor is displayed.
4. Use the Editor knob to enable or disable
external editor control. You can choose from the
following:
• GVG100 — Editor control is enabled.
• G100L — Legacy editor control is enabled.
• Off — Editor control is disabled.
For More Information on...
• external editor control, refer to the section “Editor
Port” on page 4-14.
Next Transition Area Reset
You can choose the state of the Next Transition area
after a transition is performed.
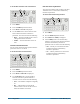
4
2 3
1
4
2 3
1