
Operator`s manual


CrossOver 6 / 12 User Manual (v4.0) Advanced Operation • 4–9
To Access EDL files via an FTP connection
1. Create an FTP connection from a computer to
your switcher using the following user account:
• name: liveedl
• password: password
2. Copy EDL files from the switcher to your
computer for use in your NLE suite.
3. Close the FTP connection.
For More Information on...
• creating an FTP connection, refer to the section
“Creating an FTP Connection” on page 4-6.
Using Internal Timecode with EDL Files
If you are not using a Ross Video GearLite
TSC-9902 LTC to Serial Converter to provide
timecode information, you may use an internally
generated base timecode that begins at 0 when EDL
capture begins.
You may specify an offset that is applied to the base
timecode to meet individual requirements.
To apply an offset to internally generated base
timecode:
1. Ensure that the switcher Editor setting is not set
to LTC.
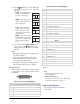
2. Press MENU.
3. Press the SYSTEM Wipe Pattern button.
4. Press NEXT until Config LivEDL is
displayed.
5. Press the Config LivEDL knob to display
the EDL Configuration menu.
6. Press NEXT until Hour Minute Second
is displayed.
7. Use the Hour knob to select the required
hours offset.
8. Use the Minute knob to select the required
minutes offset
9. Use the Second knob to select the required
seconds offset.
For More Information on...
• configuring the switcher Editor setting, refer to the
section “Editor Control” on page 2-13
Reset Options
You can restore the entire switcher or individual
settings to default values. Menu items can also be
reset.
You can also capture the state of the switcher as a
user-defined default, allowing you to reset to those
settings at any time.
Note:
• Default transition rates vary depending on the
frequency of the selected video format.
Configuring Default Settings
You can customize many of the default switcher
parameters and save them as a user-defined default.
To configure user-defined defaults:
1. Configure the switcher as desired. This will
become the new default state.
2. Press MENU.
3. Press the RESET Wipe Pattern button.
4. Press NEXT until Attrib is displayed.
5. Use the Attrib knob to select Media.
6. Set whether Media-Store channels are included
in the reset as follows:
•Use the Media knob to select the
Media-Store channel you wish to configure.
•Use the Value knob to select whether the
Media-Store channel is included in the reset.
You can choose from the following:
› NoRst — The Media-Store channel is not
reset. Any loaded image or animation is
retained.
› Reset — Any loaded image or animation
is removed and the Media-Store channel is
returned to the default state.
7. Use the Attrib knob to select Aux.
8. Set whether Aux buses are included in the reset
as follows:
•Use the Aux knob to select the Aux bus
you wish to configure.
•Use the Value knob to select whether the
Aux bus is included in the reset. You can
choose from the following:
› Reset — The Aux bus is included in the
reset.
MENU
NEXT
NEXT
MENU
NEXT