
User's Manual


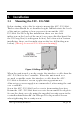

Table Of Contents
- 1. General Information
- 2. Technical Specifications
- 3. Installation
- 4. Wiring Instructions
- 5. Reader Functionality
- 5.1 Transmit Mode
- 5.2 Programming the AYC- F/G/M60 Series
- Programming Menu
- Entering Programming Mode
- Exiting Programming Mode
- Selecting Keypad Transmission Format
- Keypad Transmission Format Option Number
- Option 1: Single Key, 6-Bit Wiegand (Rosslare Format)
- Option 2: Single Key, 6-Bit Wiegand Nibble and Parities
- Option 3: Single Key, 8-Bit Wiegand Nibbles Complemented
- Option 4: 4 Keys Binary + Facility Code, 26-Bit Wiegand
- Option 5: 1 to 5 Keys + Facility Code, 26-Bit Wiegand
- Option 6: 6 Keys BCD and parity bits, 26-Bit Wiegand
- Option 7: Single Key, 3x4 Matrix Keypad (MD-P64)
- Option 8: 1 to 8 Keys BCD, Clock & Data
- Option 9: Single Key, 4-bit Wiegand
- Selecting Proximity Card Transmission Format
- Changing the Programming Code
- Changing the Facility Code
- Setting the Backlight and Reader Format
- Return to Factory Default Settings
- Replacing a Lost Programming Code
- 6. Controller Functionality
- 6.1 Normal, Secure, and Master Users
- 6.2 Modes of Operation
- 6.3 Auxiliary Input & Output
- 6.4 Door Alarms
- 6.5 Internal Case and Back Tamper
- 6.6 Lockout Feature (Keypad / Card Tamper)
- 6.7 Request to Exit (REX) Function
- 6.8 Secure Application Appurtenances
- 6.9 Programming the AYC- F/G/M60
- Programming Menu
- Entering Programming Mode
- Exiting Programming Mode
- Changing Lock Strike Code
- Changing Auxiliary Code
- Changing the Programming Code
- Changing the Normal / Secure Code
- Changing the Normal / Bypass Code and Door Chime Settings
- Setting Fail Safe/Secure Operation, Tamper Siren and Lock Strike Release Time
- Defining the Auxiliary Input and Output
- Quick Reference Guide for Auxiliary Mode Setting
- Detailed Reference Guide
- Setting the Lockout Feature
- Setting the backlight behavior
- Enrolling Primary and Secondary Codes
- Deleting Primary and Secondary Codes
- Relay Codes Assignment
- Relay Code Assignment using Search Method
- Pin Code Length / Factory Default Settings
- Replacing a Lost Programming Code
- Replacing a Lost Normal / Secure Code

4. Wiring Instructions
The unit is supplied with a 22-inch pigtail, having a 6-conductor
cable. To connect the unit to the controller, perform the following:
Prepare the unit's cable by cutting the cable jacket back 1¼
inches and strip the wire ½ inch. Prepare the controller cable by
cutting the cable jacket back 1¼ inches and strip the wire ½ inch.
Splice the unit’s pigtail wires to the corresponding controller wires
and cover each connection.
Refer to the wire color table below, and to the wiring diagrams
provided on the following pages.
Reader Controller Color Functionality
5~16 VDC 5~16 VDC Red +DC Input
Shield / Ground Shield / Ground
Black
Ground
Data 1 / Clock C 1 White
Communication
Data 0 / Data C 2 Green
Communication
LEDCTL AUX. IN Brown
LED Control / Auxiliary Input
Tamper Tamper Purple
Tamper
If the tamper output is used, connect the purple wire to the
correct input on the controller when used as a reader, or to a
zone input of an intruder alarm system when used as a controller.
Trim and cover all unused conductors.
Note:
• The individual wires from the unit are color-coded
according the Wiegand standard.
• When using a separate Power Supply for the Reader, this
Power Supply and that of the Controller must have a
common ground.
• The Reader’s cable shield wire should preferably be
attached to an earth ground, or a signal ground
connection at the panel, or power supply end of the
cable. This configuration is best for shielding the Reader
cable from external interference
AYC-Qx4 family manual
Page 11