
Programming Manual


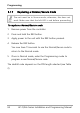

Table Of Contents
- 1. Introduction
- 2. Technical Specifications
- 3. Installation
- 4. Operation
- 5. Programming
- 5.1 Entering the Programming Mode
- 5.2 Exiting the Programming Mode
- 5.3 Changing the Open Code
- 5.4 Changing the Auxiliary Code
- 5.5 Changing the Programming Code
- 5.6 Changing the Normal/Secure Code
- 5.7 Changing the Normal/Bypass Code
- 5.8 Setting Fail Safe/Secure Operation
- 5.9 Setting Auxiliary Modes
- 5.10 Setting the Lockout Feature
- 5.11 Setting the Backlight Behavior
- 5.12 Enrolling Primary and Secondary Codes
- 5.13 Deleting Primary and Secondary Codes
- 5.14 Relay Codes Assignment
- 5.15 Changing PIN Code Length/Factory Default Settings
- 5.16 Replacing a Programming Code
- 5.17 Replacing a Normal/Secure Code
- A. Declaration of Conformity
- B. Limited Warranty

Programming
66 AC-F/G4x Series Installation and Programming Manual
5.17
Replacing a Normal/Secure Code
The
unit must be in Secure mode; otherwise, this does not
work. Make sure that the
left LED is red before proceeding.
To replace a Normal/Secure code:
1. Remove power from the controller.
2. Press and hold the REX button.
3. Apply power to the unit with the REX button pressed.
4. Release the REX button.
You now have 15 seconds to use the Normal/Secure code to
return to the Normal mode.
5. Once in Normal mode, enter the Programming mode to
program a new Normal/Secure code.
The deafult code depends on the PIN length selected (see Table
2).