Trademarks All brand and product names are trademarks or registered trademarks of their respective companies. Note The information in this manual is subject to change without notice.
Table of Contents 1 Getting Started................................................................................ 1 1.1 1.2 1.3 1.4 1.5 1.6 2 Understanding Hardware Components................................................ 1 Front Components ............................................................................... 1 Back Components ................................................................................ 2 Right-Side Components ..........................................................
3 Troubleshooting and Maintenance.............................................. 19 3.1 3.2 3.3 4 Regulatory Information ................................................................ 22 4.1 4.2 4.3 5 Regulations Statements ..................................................................... 22 European Notice ................................................................................ 22 Safety Precautions .............................................................................
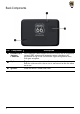
1 Getting Started 1.1 Understanding Hardware Components NOTE: Depending upon the specific model purchased, the color of your device may not exactly match the device shown in this manual. Front Components Ref Component Touch Screen Description Displays the output of your device. Tap the screen with your stylus to select menu commands or enter information. Charge Indicator Glows bright amber to indicate that the battery is charging, and turns green when the battery is fully charged.
Back Components Ref Component Description External GPS This connector (under rubber dust cover) allows use of an optional Antenna Connector Stylus Speaker 2 external GPS antenna with magnetic mount, which may be positioned on top of the car for better signal reception in areas with poor reception. Tap the touch screen to make selections and enter information. Pull the stylus out of its slot to use it, and store it in the slot when not in use. Sends out music, sounds and voice.
Right-Side Components Ref Component Description Power Button Navigation Button Turns on and off the device. Opens the navigation menu. Top Components Ref Component SD/MMC Slot Description Accepts a SD (Secure Digital) or MMC (MultiMediaCard) card for accessing data such as MP3 music.
Bottom Components Ref Component Description Reset Button Restarts your device (soft reset). Headphone Connects to stereo headphones. Connects to stereo headphones or the TMC (Traffic Message Channel) antenna for receiving TMC information. Connects to the charger or USB cable. Connector(ROUTE 66 Chicago) Headphone/TMC Connector (ROUTE 66 Chicago TMC) Mini-USB Connector 1.2 Performing the Initial Start Up 1. Make sure that power is supplied to your device. (See the next section.) 2.
1.3 Charging the Battery via the USB Cable When charging the battery for the very first time, you should charge it for at least 8 hours. 1. Turn on the computer. 2. Connect the mini-USB end of the USB cable to the bottom of your device and the other end to a USB port on your computer. The charge indicator glows amber when charging is in progress. Do not disconnect your device until the battery is fully charged, when the charge indicator turns green. This will take a couple of hours.
1.4 Using Your Device in a Vehicle A car holder and a car charger are supplied with your device. Using the Car Holder CAUTION: Select an appropriate location for the car holder. Never place the holder where the driver’s field of vision is blocked. If the car’s windshield is tinted with a reflective coating, an external antenna (optional) may be needed to route the antenna to the top of the car through a window.
Connecting the Car Charger The car charger supplies power to your device when you are using the device in a car. CAUTION: To protect your device against sudden surges in current, connect the car charger only after the car engine has been started. 1. Connect one end of the car charger to the power connector of your device. 2. Connect the other end to the cigarette lighter in the car to power and charge your device.
ROUTE 66 Chicago The TMC receiver and antenna are purchased separately.
1.5 Operating Basics Turning On and Off Briefly press the power button to turn on and off your device When you press the power button to turn off the unit, your device actually enters a suspend state and the system stops operating. Once you turn on the system again, it resumes. NOTE: In case you turn off the power by pressing the power button for 6 seconds, you will need to press the power button for 6 seconds again for turning on. You will then see the initial start up screen.
1.6 Inserting a SD/MMC Card Your device has a SD/MMC slot where you can insert an optional Secure Digital or MultiMediaCard storage card. To use a SD/MMC card, insert it into the slot, with the connector pointing to the slot and its label facing the front of the device. To remove a card, first make sure that no application is accessing the card, then slightly push the top edge of the card to release it and pull it out of the slot. NOTE: Make sure that no foreign objects enter the slot.
2 Audio Player 2.1 Introduction Audio Player features: Playback of MP3/WAV/WMA files Basic playback controls such as play, pause, stop, next and previous Playback includes single selection playback, repeat, single repeat, sampling playback, normal sequence and random sequence. 11 preset equalizer audio profiles Play list support Lyrics display When you start the program, the control panel appears on the screen where you can easily control the player by tapping the control buttons.
2.2 Preparing the Audio Files for Your Device Before using the program, have the files ready on either your device’s My Flash Disk\My Audio folder or on a storage card. Use ActiveSync to copy files from your computer to the correct location. Install ActiveSync using the CD supplied. When the “Set up partnership” screen appears, select No and Next to connect as a guest device. You can then use the Explorer function of ActiveSync to transfer files between your computer and your device. 2.
2.4 Playback Controls Control Button Name Description Play/Pause Play or pause the playback. Stop Stop the playback. Previous/ Next Play the previous or next file. Volume Increase or decrease the volume. The indicator on the panel shows the current volume level. Switch to the next mode: / / / Playback Mode Repeated playback of the current file. Repeated playback of all files in the current play list in sequence. Playback of all files in the current play list in random order.
2.5 Displaying Lyrics The Audio Player allows you to display the real-time lyrics on the screen while playing songs. This feature is especially handy for you to sing along with the songs. Preparing the Lyrics Files for your Device To display the lyrics, you need to have the lyrics files (.lrc) ready on your device’s \My Flash Disk\My Audio\Lyric\ folder or the \Lyric\ folder on your storage card. NOTE: You can search and download these .lrc files from the internet.
To close the lyrics screen and go back to the control panel, tap anywhere on the screen. 2.6 Using the Play Lists You can create your own play lists for future use. Creating a Play List 1. Tap on the control panel to open the play list screen. The screen shows the current play list. Back Play the selected file. Save the play list. Add song Remove the selected song from the list or from the storage media. 2. To add a song to the play list, tap Open the list of play lists.
Back Add the selected song(s) to the play list. 4. To save the play list, tap Select all songs. . 5. The keyboard screen appears where you can change the default name of the play list. Rename the play list if you want. Tap when finished. 6. To return to the control panel, tap . Opening a Play List To open one of the play lists that you have created: 1. Tap 2. Tap 16 on the control panel. to display all the play lists you have created.
3. Tap the play list you want to open and tap . Back Rename the selected play list. Open the selected play list. Delete the selected play list. 4. To return to the control panel, tap Delete all play lists. . 2.7 Equalizer The program provides 11 preset audio profiles. Tap panel. to open the equalizer Tap or to cycle through the available options: Normal, Hall, 3D, Soft, Disco, Heavy, Dance, Classic, Jazz, Pop and Rock.
Tap to save your selection and return to the control panel. To select the Default profile, tap . 2.8 Settings Tap on the control panel. The Settings screen appears. Tap the check box (√) to turn on the power saving mode. Tap the up/down button to set the timer to 10 seconds, 30 seconds, 1 minute, or 5 minutes. During the playback, the screen backlight will automatically shut off if you haven’t tapped the screen within the preset time (5 minutes by default).
3 Troubleshooting and Troubleshooting and Maintenance Maintenance 3.1 Resetting Your System Occasionally, you may need to reset your device. For example, you should reset your system when it stops responding; or appears to be “frozen” or “locked up.” Insert a small rod, such as a straightened paperclip, into the reset button on the bottom of your device. This is called a “soft reset.” 3.
Screen Problems Screen responds slowly Make sure that your device is not running out of battery power. If the problem still exists, reset your system. Screen freezes Reset your system. Screen is hard to read Make sure that the backlight of the display is on. Move to a location with more light. Inaccurate response to taps Recalibrate the touch screen.
Avoid exposing your device to direct sunlight or strong ultraviolet light for extended periods of time. Do not place anything on top of your device or drop objects on your device. Do not drop your device or subject it to severe shock. Do not subject your device to sudden and severe temperature changes. This could cause moisture condensation inside the unit, which could damage your device. In the event of moisture condensation, allow the device to dry out completely before use.
4 Regulatory Information NOTE: Marking labels located on the exterior of your device indicate the regulations that your model complies with. Please check the marking labels on your device and refer to the corresponding statements in this chapter. Some notices apply to specific models only. 4.
4.2 Safety Precautions Prolonged listening of music in maximum volume can damage the ears. About Charging Use only the charger supplied with your device. Use of another type will result in malfunction and/or danger. This product is intended to be supplied by a LISTED Power Unit marked with “LPS”, “Limited Power Source” and output rated + 5 V dc / 1.0 A”. Use a specified battery in the equipment. About the Battery Use a specified charger approved by the manufacturer.
5 Limited warranty 5.1 WARRANTOR Non-U.S. and non-Canadian purchases: If you have made your purchase outside the United States and Canada, this Limited Warranty is granted by and this Limitation of Liability is stipulated for the benefit of ROUTE 66 Geographic Information Systems B.V., Brouwerstraat 36, NL-2984 AR Ridderkerk (The Netherlands). 5.2 WHAT THIS WARRANTY COVERS 1) ROUTE 66 Geographic Information Systems B.V.
5.4 HOW TO MAKE A WARRANTY CLAIM 3) In order to make a claim of a Defect, you must contact ROUTE 66 by email during the Warranty Period via www.66.com to explain the Defect and to obtain an RMA number (Return Materials Authorization) if necessary. You must return the Hardware during the Warranty Period, along with an explanation of the Defect, to the address provided to you by ROUTE 66.
8) This Limited Warranty cannot be transferred to any other person. 5.