ROYER Labs Model SF Ribbon Velocity Microphone Operation Instructions Manual & Users Guide Made in U S A
TABLE OF CONTENTS Model SF Ribbon Microphone Table of Contents page 1 Introduction page 2 Description page 2 Applications page 2 Users Guide: Using the SF-1 page 3 Amplification Considerations page 4 The Sweet Spot Finding & Working with the “Sweet Spot” page 7 Other Types of Microphones page 8 Proximity Effect & Working Distance page 8 Microphone Technique page 9 Stereophonic Microphone Technique page 10 Care & Maintenance page 13 A Little Bit of History page 13 Features & Speci
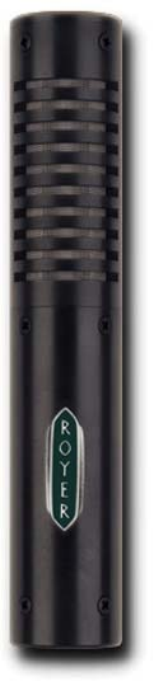
Introduction Congratulations on your purchase of a Royer Labs model SF-1 ribbon microphone. The SF-1 is a handcrafted precision instrument capable of delivering superior sound quality and overall high performance. This operator’s manual describes the SF-1, its function and method of use. It also describes the care and maintenance required to ensure proper operation and long service life.
to capture detail make it a fine choice for many instruments, as well as for general broadcast applications. Its gentle low-frequency proximity effect makes it especially useful for announcers and vocalists. Female vocalists often benefit from the SF-1’s ability to capture high frequencies without distortion or edginess. Orchestral instruments are captured in a very natural sounding way, free from microphone-induced “hype.” The SF1 has exceptionally smooth high frequency characteristics.
blown ribbon could result. 6. Always provide adequate protection for your SF-1, or any ribbon microphone. 7. If the microphone is to remain set-up on a stand when not in use, place a “mic sock” over it until it is to be used. Do not carry the microphone around without placing a “mic sock” over it.
So what should we use with our beloved ribbon microphones? The features that translate into top performance for a ribbon microphone are the following: 1. Lots of gain! A ribbon microphone works best with preamplifiers that have at least 6070 dB of maximum gain. 2. Low noise is a must! With this much gain being required for efficient operation of a ribbon microphone, the noise characteristics of the preamp play a pivotal role in overall performance of the captured acoustic event. 3.
disconnect one of the microphone’s two Pin-1 ground connections. A better method is to make a small ground lifter out of a male-female XLR barrel adapter. Switchcraft makes a very nice one and it takes less than five minutes to wire it up. Simply connect Pin-2 to Pin-2, Pin-3 to Pin-3, and leave Pin-1 disconnected. Correcting the problem at the preamplifier would be preferable, but is often more difficult and/or expensive.
produce hum on their own. Unwanted noise (hum) can only come from an external source. Fortunately, there is a simple procedure that can be used to identify the source of the noise and eliminate it. Repositioning a dynamic and ribbon microphone is the number-one way to get rid of unwanted noise. If hum is detected, it means that the microphone is in the proximity of an alternating magnetic field. While listening (preferably with headphones) to the mic, move it around.
2. Frequency response variation due to treble losses as a result of absorption and narrowing of the pattern at high frequencies-causing weakening of highs as the microphone is moved away from the sound source. 3. Rise in treble response on-axis due to diffraction. 4. Loss of treble response off-axis due to phase-loss effect. 5. Variation in ratio of direct to reverberant sound. 6.
Typical relationship of microphone distance to frequency response for ribbon-velocity bidirectional microphone. Another area where proximity effect can be turned to an advantage is in making things sound “more real than real.” For example, many voices and certain musical instruments produce fundamental frequencies within the bass range (below 150HZ or so) but the fundamentals are weak.
piano at a distance of one foot to several feet, depending on taste. A more direct up front sound will be achieved when the microphone is placed closer to the soundboard. For capturing a piano in stereo, place the microphones apart, one over the bass strings and the other over the high strings. The farther the mics are from each other, the wider the stereo spread. For a more direct stereo effect, the microphones may be placed in an “X” pattern a couple of feet from the center of the soundboard.
Figure 1 Classic Blumlein or “coincident miking technique Mid-Side Technique: In the early days of stereo radio broadcasting, there was a need for a mic setup that would allow for simultaneous stereo and mono feeds from the same mic array and for electronic fiddling with the severity of the stereo effect. The result was what is known as the mid-side microphone technique. One mic faces sideways, one faces forward as shown in Figure 2, and they are connected as shown in Figure 3.
Figure 2 – Typical M-S miking technique Figure 3 – Typical M-S connection set-up 12
Care and Maintenance The SF-1 is a well-built precision instrument. All that is required to ensure proper operation of this microphone is to follow some commonsense rules. 1. Avoid transducer damage by not exposing the microphone to severe shock or vibration. If the microphone is accidentally dropped, test it to see if damage has occurred before returning it to service. 2. Do not expose the microphone to direct blasts of air.
them. The new designs were compact, rugged and sensitive. It wasn’t long before the television industry embraced these new designs. Radio followed the trend shortly afterward. Further technological development of ribbon microphones was considered unnecessary and the beloved ribbon soon faded into obscurity. It is a fate reminiscent of that of the vacuum tube when transistors hit the scene.
Electrical Specifications Acoustic Operating Principle: Generating Element: Polar Pattern: Frequency Range: Sensitivity: Output Impedance: Rated Load Impedance: Maximum SPL: Output Connector: Electro-dynamic pressure gradient 1.8 micron aluminum ribbon Figure-8 30 HZ – 15,000 HZ -54 dBv Ref 1 Volt per Pascal (+ or -) 1dB 300 Ohms (nominal) balanced > 1500 Ohms > 130 dB SPL Male XLR 3 pin (Pin 2 Hot) Mechanical Specifications High grade Neodymium magnet assembly 1.25” x .0625” x 1.
Warranty Royer Labs warrants its products to be free from defects in materials or imperfect workmanship. This warranty is offered to the original owner without time limit. Royer Labs will repair or replace any product that fails to meet published specifications during the warranty period. This warranty does not apply if the product has been damaged by accident or misuse, or as a result of repair or modification by other than a Royer Labs customer service facility authorized to service this product.