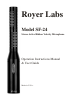
Royer Labs Model SF-24 Stereo Active Ribbon Velocity Microphone Operation Instructions Manual & User Guide Made in U.S.A.
TABLE OF CONTENTS Model SF-24 Ribbon Microphone Revised 2015 Introduction 3 Active Ribbon Technology 3 Description 4 Applications 5 Ribbons in the Digital World 5 User Guide 6 Using the SF-24 Active Ribbon Microphone 6 Operation 7 Using the RSM-24 Shock Mount Accessory 8 Description 8 Features 8 Usage 8 Properly Inserting the Microphone into the Shock 8 Removing the Microphone from the Shock 9 Connecting the SF-24 9 Amplification Considerations 10 Stereo Microphones and Groun
Introduction Congratulations on your purchase of a Royer Labs model SF-24 stereo active ribbon microphone. The SF-24 is a handcrafted precision instrument capable of delivering superior sound quality and exceptional performance. The SF-24 represents a new level of performance for ribbon microphones, combining sophisticated technological advancements with old-world craftsmanship.
Key Points: • No longer is it necessary to mate a ribbon microphone to an ultra-high gain, low noise preamplifier for optimum performance. Any preamplifier of nominal gain will provide good results with the SF-24. • No longer is it necessary to carefully consider impedance matching characteristics when choosing a preamplifier. Microphone loading is a non-issue and consistent performance is assured, regardless of the preamplifier’s impedance characteristics.
The SF-24 is reasonably tolerant of shock and vibration, but care should be taken to prevent accidental stretching of the ribbon elements. This is covered in the Care & Maintenance section of this manual. The performance of the microphone is unaffected by changes in temperature or humidity. Applications The SF-24 is a highly versatile microphone, ideally suited for a wide range of critical recording applications.
User Guide Using the SF-24 Active Ribbon Microphone The head amplification system utilized in the SF-24 was designed to operate with standard 48 volt simplex phantom power sources only. The microphone will not work at all if phantom power is not provided to the microphone! This aspect of an active ribbon microphone is in sharp contrast to the common wisdom normally applied to ribbon microphones, in which phantom power usually spells danger or destruction to the ribbon element.
6. If the studio has the microphone lines brought to a patch bay (tie lines), never crosspatch a microphone line when phantom power is applied or the monitor volume is raised. This could cause damage to your microphone, preamplifier or monitor speakers. Operation There are a few important facts that are key to understanding how to use ribbon microphones successfully. 1. With ribbon microphones, rejection in the “dead” areas is very strong. Due to this directionality, ribbon mics should be placed at 1.
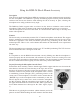
Using the RSM-24 Shock Mount Accessory Description Your SF-24 is supplied with a Royer RSM-24 suspension type shock mount designed specifically for this microphone. The RSM-24’s specially formulated polymer mounts provide maximum isolation from shock and vibration while holding the SF-24 securely in place, allowing the microphone to be safely positioned at any angle. The RSM-24’s Delrin support tubes are relieved on the inside to minimize contact with the microphone.
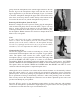
gently insert the microphone's base into the upper tube first. Be sure that the logo on the microphone aligns itself with the slot in the upper support tube as you feed the mic through. (Figure 2) Continue to feed the microphone through the upper tube and into the lower tube where it will stop when it reaches the lip at the bottom of the lower tube. Do not force or jerk the microphone into position! Removing the Microphone from the Shock Removal is simply the reverse process.
Amplification Considerations Almost any stereo microphone preamplifier (or pair of mono preamplifiers) with nominal gain characteristics and built in 48-volt phantom power sources will give excellent results with your SF-24 active ribbon microphone.
Stereo Microphones and Ground Loops Some preamplifiers are prone to developing ground loops when used in conjunction with stereo microphones such as the SF-24. Ground loops can develop in the preamplifier with any stereo microphone regardless of type (i.e. condenser, dynamic, ribbon). A ground loop manifests itself as unwanted buzz or hum at 60 Hz and/or harmonics of 60 Hz.
Hum, Noise and Mic Orientation All dynamic microphones, including ribbons, are susceptible to picking up stray alternating magnetic fields. Power transformers (such as those found in guitar amplifiers) and alternating current motors are the most likely sources of hum. In-wall wiring and electrical utility transformers are other likely sources. A well-designed microphone provides shielding to minimize the effects of such stray magnetic radiation.
Microphone Techniques General Tips for Using the Royer SF-24 The following are good basic starting places for recording with the SF-24. These positions are known to produce good results, but experimentation is the key to getting the most out of your recordings! Photographs of many of the following techniques can be found on our website www.royerlabs.com. It is important to remember that the SF-24’s ribbon elements can be damaged by wind.
the rest of the kit. Many times an overhead SF-24 is all that is needed for tom-toms and cymbals. For a single point stereo room mic, position the SF-24 vertically at four to eight feet in front of the kit. Compress to taste for either a very natural drum sound (light compression) or large rock drum sound (heavy compression). For jazz recordings, EQ is generally not required. For more aggressive drum tracks where cymbals need to sizzle, you can brighten them by adding a few dB of 10 K to 12 K.
Percussion The SF-24 records percussion instruments naturally, without upper frequency hype or low-end boominess. Congas, bongos and the like can be recorded with left/right stereo effect by positioning the mic within a few feet of the instruments. Shakers, bells, triangles and other instruments that are often problematic in the upper frequencies will record naturally and nonabrasively.
sound will arrive at both ribbon elements at the same time. This means that the two channels can be summed to mono with no comb filter effects, and room reverberation (undesirable in mono) is cancelled to a surprising degree. For the sake of clarity, engineers commonly refer to similar stereo miking with cardioid mics as “X-Y.” When figure-8’s are used, it is more commonly referred to as “Blumlein” recording.
W. Dooley & R. Streicher “M-S Stereo: A Powerful Technique for Working in Stereo” Audio Eng. Soc., Vol. 30 pp.707 (1982 Oct.) Figure 3 Care and Maintenance The SF-24 is a solidly built, precision instrument. All that is required to ensure proper operation of this microphone is to follow some commonsense rules. 1. To avoid transducer damage, do not expose the microphone to severe shock or vibration.
8. Leave disassembly of the microphone to a trained technician. There are no user-serviceable parts inside. Care for the Optical Black Finish The SF-24's optical black finish is a sophisticated surface treatment designed to refract light rather than reflect it. This makes the microphone appear less conspicuous, especially when used with high intensity lighting or within a camera shot. The finish requires occasional maintenance to retain a smooth, even appearance and to maintain its unique optical qualities.
Specifications Acoustic Operating Principle: Electro-dynamic pressure gradient with active electronics Polar Pattern: Symmetrical Figure-8 Generating Elements: Two 1.
Wiring Diagram Polar Pattern Frequency Response 20
Warranty PLEASE RETAIN YOUR ORIGINAL BILL OF SALE AS YOU WILL NEED TO PRESENT IT SHOULD YOU REQUIRE SERVICE UNDER THIS WARRANTY. TO VALIDATE THIS WARRANTY, THE REGISTRATION CARD AND A PHOTOCOPY OF THE SALES RECEIPT FROM AN AUTHORIZED ROYER DEALER MUST BE ON FILE WITH ROYER LABS. Royer Labs hereby warrants all Royer SF-series microphones with the following terms and conditions.