
User's Manual


5
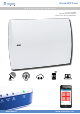
W and WIP Panel www.videofied.com
1. W installation and setup
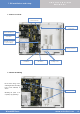
1.4 SIM Card Installation
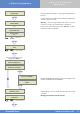
Insert a Mini-SIM 2FF SIM card in the location shown in the image.
Please refer to the markings for the insertion direction.
Use a M2M (machine-to-machine) 2G3G SIM card. If the panel is used
with a smartphone application, the SIM card shall be able to receive
SMS.
DO NOT insert or remove the SIM card while the panel is powered.
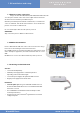
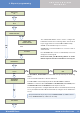
1.5 Powering and initialization
AC Power
• Connect the backup battery.
• Install the power supply inside or outside the panel box
depending on the needed cable length.
• Connect the power supply to the panel mini-USB connector
• Plug the power supply in an electrical outlet.
Initialization
• Leave the panel open. The green status LED de statut verte is on.
Press and hold the INIT button for 6-7 seconds until the status LED
turns red for 1 second.
• The red LED blinks several times then turns off. That procedure
resets the panel memory.
• The panel is now reset, a Videofied
®
keypad has to be enrolled to
configure the panel.
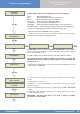
1.3 Ethernet cable connection
Once the panel is fixed on the wall connect a RJ45 cable between the
site internet network and the panel Ethernet port.
When the panel attempts a transmission via Ethernet, a red LED on the
connector will flash. This will allow the installer to check whether the
panel is connected to a valid network.
Do not touch the RJ45 cable when the panel is powered.
IMPORTANT :
Only connect the panel on 10Base-T SELV networks.
Only for models WIP 210/220/230, WIP 620/630 and WIP 720/730
INSTALLATION
MANUAL