PM-311B User's Manual
©2016 RuggON Corporation. All rights reserved. TRADEMARKS RuggON logo is a trademark of RuggON Corporation, registered in the United States Patent and Trademark Office and in other countries. Microsoft and the Windows logo are either registered trademarks or trademarks of Microsoft Corporation in the United States and/or other countries. Microsoft products are licensed to OEMs by Microsoft Licensing, Inc., a wholly owned subsidiary of Microsoft Corporation.
Table of Contents About This Manual Related Information ......................................................................................1 Conventions..................................................................................................1 Basic Safety Guidelines Intended Use ................................................................................................2 Maintenance and Operation Overview .........................................................2 Safety ....................
Installing on the Desktop Dock....................................................................29 Removing from the Desktop Dock...............................................................29 Using the Stylus...........................................................................................30 Removing the Protective Film from the Display...........................................30 Chapter 3. Operation Removing the Snap-on Module Connector Cover.......................................
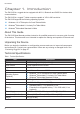
About This Manual The PM-311B User’s Manual provides instruction for qualified personnel to follow when setting up a new PM-311B device. This document is intended for use by qualified personnel to compliment the training and expertise, not to replace it. Related Information Current information and manuals are available for download at the following website: http://www.ruggon.com Conventions Bolded or underlined text is used to emphasize the designated information.
Basic Safety Guidelines The following safety guidelines are intended to help protect the user from injury and prevent damage to the hardware. Do not place anything on the AC adapters power cable and make sure the cable is not located where it can be tripped over or stepped on. Do not cover the AC adaptor as it reduces the cooling Do not use the AC adapter while it is inside the carrying case. Use only the AC adapter, power cord, and batteries that are approved for use with the device.
Safety To prevent injury and damage, read the following safety guidelines prior to operating the device. The manufacturer assumes no liability for any and all damages arising from misuse or noncompliance with these guidelines. Electrical Hazards Cleaning/Servicing: Power Off the PM-311B Disconnect the PM-311B from power before cleaning or servicing it. Power Adapter Contact an authorized service personnel for repairs to the power pack.
Connecting and Disconnecting External Devices To prevent the considerable damage, the PM-311B and the external device should be disconnected from power when connecting/disconnecting excluding USB devices. Only Use Authorized Accessories Only use the supplied cables, power packs and other accessories that have been tested and approved by RuggON. Contact your local distributor for further information.
■ Consult the dealer or an experienced radio / TV technician for help. Any changes or modifications not expressly approved by the grantee of this device could void the user¡s authority to operate the equipment. This device is operation in 5.15 ¡ 5.25GHz frequency range, then restricted in indoor use only, Outdoor operations in the 5.15 ¡ 5.25GHz is prohibit. This device is slave equipment; the device is not radar detection and not ad-hoc operation in the DFS band.
Introduction Chapter 1. Introduction The PM-311B is a rugged device equipped with 802.11, Bluetooth and GNSS for wireless data communications. The PM-311B is a rugged 7” tablet computer capable of 1024 x 600 resolution. The PM-311B supports the following operating systems: Windows® 10 IoT Enterprise for Small Tablets 64bits Windows® Embedded 8.
Introduction Item Description Wireless WLAN Wi-Fi IEEE 802.11 a/b/g/n/ac Bluetooth Bluetooth V4.0 Sensor Sensor Gyroscope, G Sensor, E-compass, Light Sensor I/O Docking Connector 32-pin DC-IN Jack x1 MicroSD Slot x1 Audio Jack x1; headphone / microphone combo USB 3.0 x2; type A RS-232 x1 Ethernet x1 Security TPM TPM 2.
Introduction Item Description Rugged Specifications Drop 153 cm (5 feet), 26 drops on plywood ■ ■ ■ MIL-STD 810G ■ ■ Vibration (MIL-STD-810G Method 514.6 Category 4, Fig 514.6C-1, Fig 514.6C-2, Fig 514.6C-3) Drop (MIL-STD-810G Method 516.6 Procedure IV) Mechanical shock (MIL-STD-810G Method 516.6 Procedure I, Procedure V) Operation and storage temperature (MIL-STD-810G Method 501.5 and 502.5) Humidity MIL-STD-810G Method 507.5 Humidity Procedure II Aggravated Cycles (Fig 507.
Introduction Parts List The PM-311B is shipped with the following items. All other accessories are sold and ordered separately. For help, contact your local RuggON sales representative. See “Contacting RuggON” on page 67.
Introduction Identifying the Device Overview 1 2 3 4 6 Figure 1. Overview 5 Table 2. Overview No 10 Item Description 1 Left view See “Side View” on page 13 for further information. 2 Front view See “Front View” on page 11 for further information. 3 Rear view See “Rear View” on page 14 for further information. 4 Right view See “Side View” on page 13 for further information.
Introduction Front View 1 2 3 3 P1 15 P2 14 13 P4 P3 4 5 6 7 8 12 11 10 9 Figure 2. Front View Table 3. Front View No Item Description 1 Snap-on module connector cover Open to access snap-on module connector. 2 Touch screen Capacitive touch panel. 3 Rubber bumpers Easy to grip rubber bumpers enable the rugged tablet to withstand shocks and drop for use in demanding environments. 4 P1 key Programmable function key. 5 P2 key Programmable function key.
Introduction LED Status Table 4. LED Status Item Status Power Storage Access Wi-Fi Description Green: On Power on / not charging Green: Blinking Battery charging Amber: On Low battery Green: On The system is accessing storage drive Green: Off The system is not accessing storage Green: On Wi-Fi is enabled Off Wi-Fi is disabled Bottom View 1 2 Figure 3. Bottom View Table 5. Bottom View No Item 1 Docking connector 32 pin connector for docking onto a station.
Introduction Side View Left view Right view 5 2 1 3 6 7 10 4 8 11 9 12 Figure 4. Side Views Table 6. Side View No Item Description 1 Left I/O compartment cover Open to access the left I/O ports. 2 LAN Connect the PM-311B to an Ethernet interface. 3 RS-232 Connect the PM-311B to a serial device. 4 USB 3.0 Connect USB devices to the PM-311B. 5 Power key Turns the PM-311B on or off. 6 USB 2.0 Connect USB devices to the PM-311B.
Introduction Rear View 1 2 3 3 5 4 4 Figure 5. Rear View Table 7. Rear View No 14 Item Description 1 Snap-on module connector cover Open to access snap-on module connector. 2 External battery connector cover Open to access external battery connector. The external battery is optional. 3 Securing holes Location of holes to secure the handstrap. 4 External battery bracket slots Align with the external battery bracket when installing. 5 Rear camera 8.
Introduction Dimensions The following image lists the device dimensions without add-ons (mm/inches). 240.79 / 9.48 168.00 / 6.61 183.60 / 7.23 225.00 / 8.86 Figure 6. Front View Dimensions 40.00 / 1.57 26.50 / 1.04 Figure 7.
Introduction Touch Screen Features Always use the point of the stylus for clicking or making strokes on the touch screen. Never use an actual pen, pencil, or sharp/abrasive object on the touch screen. The stylus is used as if it were a pen or pencil. Touch the screen with the tip of the stylus then remove the stylus from the screen. After each use, replace the stylus in the stylus holder for proper care and to preserve the life of the stylus.
17
Getting Started Chapter 2. Getting Started This section provides an outline of the steps necessary to setup a new PM-311B. A detailed guide follows the listed items, see as follows. For additional technical assistance, contact your RuggON representative. See “Contacting RuggON” on page 67. It is recommended to installing or remove accessories on a clean, well-lit work surface.
Getting Started 3. Connect the AC adapter to the DC-IN port. Figure 10. Connecting the AC Adapter After charging the battery, disconnect the AC adapter and close the DC-IN cover. 1. Locate the DC-IN cover. Right view DC-IN Cover Figure 11. Right View: Locating the DC-IN Cover 2. Flip the DC-IN cover and install. Figure 12. Closing the DC-IN Cover The DC-IN cover must be inserted correctly to prevent internal damage to the device.
Getting Started Powering the Device On and Off Powering On the Device Only power on the PM-311B after connecting all of the peripherals and cabling. 1. Press and hold the power button until the screen lights. The device runs through the start up sequence and powers up. Figure 13. Power On the PM-311B Powering Off the Device Start screen: Tap > Shut down. Desktop screen: 1. Tap and hold at the bottom left corner of the Desktop screen. 2. Tap Shut down or sign out > Shut down.
Getting Started Installing the MicroSD Card The device supports microSD card for easier data storage. 1. Open the right I/O compartment cover. See “Opening the I/O Compartment Cover” on page 34. 2. Locate the microSD slot in the right I/O parts. Right view MicroSD Slot Figure 22. Right View: Locating the MicroSD Slot 3. The microSD card has a beveled edge. Align the microSD card with the slot making sure that the corners match. 4.
Getting Started Removing the MicroSD Card 1. Open the right I/O compartment cover. See “Opening the I/O Compartment Cover” on page 34. 2. Locate the microSD slot in the right I/O parts. Right view MicroSD Slot Figure 24. Right View: Locating the MicroSD Slot 3. Press the microSD card in and release it. The card springs out. 4. Grasp the microSD card and remove it from the slot. Figure 25. Removing the MicroSD Card 5. 26 Close the right I/O compartment cover.
Getting Started Installing on the Vehicle Dock 1. Power off the PM-311B. See “Powering Off the Device” on page 20. 2. Flip the levers upward on the both sides. Figure 26. Releasing the Levers 3. Align the docking connector on the PM-311B with the connector on the vehicle dock and push downward. 4. Push the PM-311B forward and make sure it fixed with latches. Figure 27. Installing the PM-311B 5. Press down the levers at the same time to lock. Figure 28. Installing the PM-311B 6.
Getting Started Removing from the Vehicle Dock 1. Power off the PM-311B. See “Powering Off the Device” on page 20. 2. Disconnect the cabling from the vehicle dock. 3. Flip the levers upward on the both sides. Figure 29. Releasing the Levers 4. Remove the PM-311B from the vehicle dock with an angle. Figure 30.
Getting Started Installing on the Desktop Dock 1. Power off the PM-311B. See “Powering Off the Device” on page 20. 2. Align the docking connector on the PM-311B with the connector on the desktop dock and push downward. 3. Push the PM-311B downward. Figure 31. Installing the PM-311B 4. Connecting the cabling to the desktop dock. Removing from the Desktop Dock 1. Power off the PM-311B. See “Powering Off the Device” on page 20. 2. Disconnect the cabling from the desktop dock. 3.
Getting Started Using the Stylus Following the information below when using a stylus: Use only the included stylus to touch the screen. Do not place any objects on its surface and do not press down strongly with sharp-pointed or hard objects that may leave marks (e.g., nails, pencils and ball point pens). Use the stylus only for touching the screen. Using it for any other purpose may damage the stylus and result in scratches on the screen.
Operation Chapter 3. Operation Removing the Snap-on Module Connector Cover The snap-on module connector is located on the top side of the device. For further information see “Overview” on page 10 1. Locate the snap-on module connector cover. Snap-on Module Connector Cover P1 P2 P4 P3 Figure 34. Front View: Locating the Snap-on Module Connector Cover 2. Place the device display side down on a clean work surface. 3. Remove the screws securing the cover. Figure 35.
Operation 4. Remove the cover. Figure 36. Removing the Snap-on Module Connector Cover Replacing the Snap-on Module Connector Cover The snap-on module connector is located on the top side of the device. For further information see “Overview” on page 10. 1. Locate the snap-on module connector cover. Snap-on Module Connector Cover P1 P2 P4 P3 Figure 37.