
Specifications
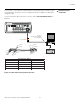


Installation
Runco RS-1100 Series Owner’s Operating Manual 37
PRE
L
IMINAR
Y
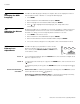
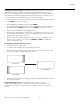
Once the proper lens angle has been set, firmly tighten the Yaw/X-Adjustment Levers to
secure the lens in place.
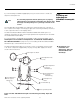
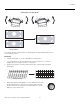
Geometry:
1. Input an anamorphic cross-hatch test pattern to the projector.
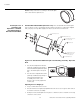
2. Loosen the three Lens Rotation Set Screws (shown in Figure 3-17) on the lens
adapter plate just enough to allow it to rotate freely.
3. Grasp the lens by the center ring and rotate the lens until the image is properly
anamorphic:
4. When the image geometry appears correct, tighten the three Lens
Rotation Set Screws to secure the lens in place. (When viewed
from the front, the rear opening on the anamorphic lens should
appear as a tall, narrow oval.)
Anamorphic Lens (Top View)
Wrong Position
Correct Position
Wrong Position Correct Position