
OWNER'S OPERATING MANUAL Projectors CL-610, CL-610LT, CL-610, CL-610LT


Operation
Runco CL-610 Series Owner’s Operating Manual 47
PRE
L
IMINAR
Y
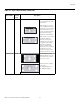
Store Settings: For each input, the CL-610 lets you store image quality settings as
presets that you can recall at a later time. You can create up to three presets per input
and resolution.
To store image quality settings to a preset:
1. Select Picture Adjust from the ISF Calibration menu.
2. Select Color Temperature from the Picture Adjust menu.
3. Use the or button to set the color temperature to “4” or “5.” Make a note of
your selection.
4. Press EXIT.
5. Adjust brightness and contrast as described in the Picture Adjustment section
(page 32). Exit the Picture Adjustment menu when finished.
6. Select White Balance from the ISF Calibration menu. Adjust the grayscale as required
(refer to
White Balance on page 42).
7. From the White Balance menu, select “Store Color Temp. 4” or “Store Color Temp. 5”
(depending on your selection in Step 3) and press ENTER.
8. From the ISF Calibration menu, select Save ISF Settings and choose “Save ISF Night”
to store your settings.
9. Repeat Steps 1 through 8 for the “Save ISF Day” preset.
To recall stored custom image quality settings, select Restore Image Settings from the
Picture Adjustment menu (refer to Picture Adjustment on page 32) and choose
“Memory 1,” “ISF Night” or “ISF Day.” Or, simply use the corresponding buttons on the
remote control.
Splash Screen Timer: Use the or button to set the Splash Screen Timer. This timer
controls how long the startup (ISF and Runco logo) image stays on-screen after you turn
on the projector. Select from 5 to 60 seconds, in one-second increments. When finished,
press EXIT.
ISF Enable: Select ISF Enable from the ISF Calibration menu to control the display of the
ISF logo on the CL-610 splash screen upon power-up.
You can personalize the CL-610 splash screen with the projector owner’s name and/or
the installer’s name. For instructions, refer to
Appendix A.
Return to User OSD: To exit the ISF Calibration menu, use the up- or down-arrow keys
to highlight
Return to User OSD and press ENTER.
To return to the ISF Calibration menu, select it from the Main Menu, press ENTER twice,
then press MENU on the remote control. (You do not need to re-enter the passcode.)
When you change a setting, save the change to a preset
afterwards. Otherwise, the change will be lost when a different
input is selected. (Most settings are saved for each input and
resolution separately.)
The first time you perform this procedure, store the current white
balance settings in both color temperatures (4 and 5). This will give
you a convenient starting point for color temperature 5, should you
wish to use it for the other preset.
Note
Tip