CP-42HD CP-52HD Climate Series High Definition LCD Monitor Runco CP-42HD/CP-52HD Owner’s Operating Manual i
ii Runco CP-42HD/CP-52HD Owner’s Operating Manual
RuncoCareTM One Year Limited Warranty For North America Congratulations on your purchase of a Runco® product! With proper installation, setup and care, you should enjoy many years of unparalleled video performance. This RuncoCare One Year Limited Warranty is provided free of charge by Runco International, LLC (“Runco”) with the purchase of a covered Runco product.
RuncoCare Claim Procedure In the event of a product defect, please follow the warranty claim procedure provided below: The customer is required to contact a Runco dealer or Runco Technical Support via email at support@runco.com or via phone at (toll free) 800-23-RUNCO (800-237-8626). If the customer is located outside North America, call +3589 4200 554 in Europe for product service.
. 6. 7. 8. m. Any damage or dissatisfaction associated with latent images, “burn-in,” or any other damage determined by Runco to be the result of customer use patterns n.
Exclusion of Damages RUNCO‟S MAXIMUM AGGREGATE LIABILITY HEREUNDER IS LIMITED TO THE COST OF REPAIR OR REPLACEMENT OF THE PRODUCT. 1. 2. 3.
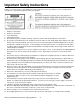
Important Safety Instructions Thank you for your purchase of this quality Runco video product! For the best performance, please read this manual carefully as it is your guide through the menus and operation. 1. 2. 3. 4. 5. 6. 7. 8. 9. 10. 11. 12. 13. 14. 15. 16. 17. Read these instructions. Keep these instructions. Heed all warnings. Follow all instructions. Do not block any of the ventilation openings. Install in accordance with the manufacturer‟s instructions.
18. This LCD monitor should have a minimum distance of 5cm away from the wall and the monitor should have 10cm distance around the top and sides. 19. Refer all servicing to qualified service personnel. Servicing is required when the apparatus has been damaged in an way, such as power supply cord or plug is damaged, objects have fallen into the apparatus, the apparatus does not operate normally, or has been dropped. 20. Keep the packing material in case the equipment should ever need to be shipped.
Compliance Information FCC PART 15: NOTE: This equipment has been tested and found to comply with the limits for a Class B digital device, pursuant to Part 15 of the FCC Rules. These limits are designed to provide reasonable protection against harmful interference in a residential installation. This equipment generates, uses and can radiate radio frequency energy and, if not installed and used in accordance with the instructions, may cause harmful interference to radio communications.
x Runco CP-42HD/CP-52HD Owner’s Operating Manual
Table of Contents RuncoCare™ Standard One Year Limited Warranty ........................................ iii Important Safety Instructions ........................................................................... vii Compliance Information .................................................................................... ix 1. Introduction .................................................................................................... 1 About This Manual .............................................
Table of Contents 4. Operations .................................................................................................... 20 Turning on the Power .................................................................................... 20 Changing the OSD Language ........................................................................ 20 Setting the PC Display Properties ................................................................. 21 Using the On-Screen Menus ...................................
List of Figures 2-1. Climate Series LCD Controls and Indicators ................................. 5 2-2. Climate Series LCD Inputs and Output Interfaces ......................... 7 2-3. Climate Series LCD Remote Control ............................................. 9 3-1. HDMI Connections ...................................................................... 15 3-2. Analog RGB Connections ............................................................ 16 3-3. Component Video Connections .......................
xiv Runco CP-42HD/CP-52HD Owner’s Operating Manual
1. This Owner‟s Manual describes how to Install, set up and operate a Runco Climate Series Model CP-42HD and CP-52HD Weatherproof FlatPanel LCD. Throughout this manual, the Runco CP-42HD and CP-52HD are referred to collectively as the “Climate Series LCD.” The information in this manual applies to both products, except where otherwise indicated. Runco has prepared this manual to help home theater installers and end users get the most out of the Climate Series LCD. Introduction 1.
Introduction Graphic Conventions: These symbols appear in numerous places throughout the manual, to emphasize points that you must keep in mind to avoid problems with your equipment or injury: TIPS highlight time-saving short cuts and helpful guidelines for using certain features. NOTES emphasize text with unusual importance or special significance. They also provide supplemental information. CAUTIONS alert users that a given action or omitted action can degrade performance or cause a malfunction.
Introduction The Climate™ Series LCD offers legendary Runco® product quality and attention to detail housed inside a slim, yet rugged, weatherproof cabinet. Best of all, this display is finished with the same clean and elegant look and style that distinguishes all Runco flat panels. Rain or shine, the Climate Series LCD will enhance your luxury outdoor lifestyle. This full high-definition widescreen flat-panel monitor utilizes advanced LCD technology in an enclosure designed to withstand the elements.
Introduction Key Features and Benefits The Climate Series LCD offers these key feathers and benefits: Full HD Native Resolution: 1920 x 1080 Anti-Reflective Glass that helps to reduce glare and reflection for easy viewing in direct sunlight as well as protect the LCD from being damaged by sunlight. Engineered into the monitor is an internal setting that allows operation in colder temperatures (down to 0º F) so you can enjoy viewing year round.
2. Controls & Functions 2.1 Climate Series LCD at a Glance Figure 2-1 shows the locations of the Climate Series LCD controls and indicators (shown with stand).
Controls and Functions 1. HANDLES Always use the handles when carrying the display. DO NOT touch or hold the screen face. 2. KEYPAD You can use the keypad instead of the remote control unit to operate the onscreen display (OSD) controls. The keypad operates as follows: VOLUME DOWN / MENU LEFT Use this button to increase sound volume. When a menu is visible on-screen, this button operates identically to the Left Key on the Climate Series remote control unit.
Controls and Functions Figure 2-2 shows the Climate series Input and Output Interfaces. Figure 2-2. Climate Series LCD Input/Output Interfaces 1. HDMI 1 (Digital) HDCP-compliant digital video inputs for connecting an HDMI or DVI source. 2. HDMI 2 (Digital) HDCP-compliant digital video inputs for connecting an HDMI or DVI source. 3. RS-232 A female, 9-pin D-sub connector for interfacing with a PC or home theater automation/control system. 4. PC LINE Connect the audio output from a personal computer here.
Controls and Functions 8. VIDEO INPUT (Composite or S-Video + Stereo Audio) Standard, composite or S-video input and stereo audio input for connecting a VCR, camcorder, laser disc player, Super VHS (S-VHS) VCR or other composite or S-video source. 9. DIGITAL AUDIO OUTPUT Connects the TV audio out to the digital audio input of an amplifier. 10. SPEAKER OUTPUT (LEFT + RIGHT) For connecting external speakers with an impedance of 4 ohms.
Controls and Functions Figure 2-3 shows the Climate Series LCD remote control, and the paragraphs that follow describe its functionality. Figure 2-3. Climate Series LCD Remote Control Runco CP-42HD/CP-52HD Owner’s Operating Manual 9 2.
Controls and Functions 1. REMOTE SENSOR 2. SOUND MODE Press this button to select sound mode, Standard, Music, Movie, or Personal. 3. DISPLAY INFORMATION Press this button to view input signal information (source and resolution). 4. MUTE ON/OFF Press this button to mute the audio output to the speakers. 5. MTS Press this button to scroll through the available MTS settings. 6. VOLUME UP Use this button to increase sound volume. 7.
Controls and Functions 25. COMPOSITE Press to select the Composite input as the source. 26. T.V Press this button to switch to the antenna/DTV/CATV input. 27. S-VIDEO BUTTON Press to select the S-Video input as the source. 28. VGA BUTTON Press to select the VGA input as the source. 29. DIGITAL BUTTON Press this button to switch to the Digital Video input. 30. ASPECT BUTTON Use this button to select Normal, Wide, Zoom, or Cinema. 31. NC Reserved button 32.
3. Installation 3.1 Remote Control PET Film Removal Battery Installation For the first time use of the remote control, please pull out the PET Film. To change the battery in the remote control: 1. Remove the six screws on the back of the remote. 2. Remove the battery and replace with another Lithium CR2032 Battery. 3. Please follow the drawing to remove the screws and replace the battery.
Installation Table 3-1 gives a quick overview of the Climate Series LCD installation process. The sections following this one provide detailed instructions. Installation should be performed by a qualified custom video installation specialist. Table 3-1.
Installation 3.3 Installation Considerations Wall-Mounting the Climate Series LCD Proper installation of your Climate Series LCD will ensure the highest possible picture quality. Whether you are installing the Climate Series LCD temporarily or permanently, you should take the following into account to ensure that it performs optimally. You can either place the Climate Series LCD on a table or in an entertainment center, or mount it on a wall.
Installation Connect your video sources to the Climate Series LCD as shown and described in the sections that follow. HDMI Connections: The Climate Series LCD has two HDMI inputs for connecting a BD/HD-DVD/DVD player, DTV decoder, personal computer or any other device with an HDMI or DVI output. Connect such devices as shown in Figure 3-1. Use the HDMI inputs whenever possible.
Installation RGB Connections: The Climate Series LCD has an RGB input and a stereo audio input for connecting a personal computer; see Figure 3-2. Figure 3-2. Analog RGB Connections 1. Refer to Supported Timings on page xx for a list of computer signals compatible with the Climate Series LCD. Use with signals other than those listed may cause some functions not to work. 2. Some Macintosh computers may require a Macintosh video adapter. Contact your nearest authorized service center or dealer. 3.
Installation Component Video Connections: If you have a DVD player, DTV decoder with a component (YPbPR) output or other component video source, connect it to the COMPONENT 1 or COMPONENT 2 input as shown in Figure 3-3. Figure 3-3. Component Video Connections Composite/S-Video Connections: The Climate Series LCD has one (1) Composite video input and an S-Video input for connecting a VCR, camcorder, laser disc player or DVD player; see Figure 3-4.
Installation Connecting External Speakers (Optional) Connect the (positive) and (negative) speaker wires to the SPEAKER-R and SPEAKER-R terminals; see figure 3-5. Maintain the correct polarity. For more information, refer to the owner‟s manual for your speakers. Figure 3-5.
Runco CP-42HD/CP-52HD Owner’s Operating Manual 19
4. Operations 4.1 Turning on the Power 1. Turn on your source components. 2. Plug the female end of the supplied power cord into the AC receptacle inside the back input panel of the Climate Series LCD (AC 100V ~ 240 V). 3. Connect the other end to your AC power source. 4. Press the ON button ( ) on the remote control to turn on the display (or press the power button ( ) on the side of the display). 5. After a brief warm-up period (approximately 10 seconds), the Climate Series LCD will display an image. 4.
Operations To maximize image quality when using the Climate Series LCD with a personal computer, you may need to adjust the display properties of your PC Video Card. To do this: 1. Choose Settings from the Windows Start menu and click on “Control Panel.” 2. Double click on the Display icon. 3. Click the Settings tab on the display dialog box. 4. Set the Screen area to 1400x1050 pixels. 5. Click the Advanced button and click the Monitor tab on the dialog box.
Operations 1. The maximum available resolution and vertical frequency is 1920x1200/60Hz or the maximum supported by your video card, whichever is lower. 2. The Climate Series LCD supports 8-bit color (16,777,216 possible colors). 4.4 Using the On-Screen Menus Many functions are controlled through the menu function, using the remote control handset or keypad on the side of the display. To use the on-screen menus: 1. Press MENU to display the Main Menu. 2.
Operations Standard Picture Mode English Menu Language Dynamic Personal Spanish Contrast Brightness Picture French Transparency 0~100 Off / On Normal Color Zoom Mode Wide Tint -50~+50 Sharpness 0~100 Cinema Normal Off Color Mode Warm Noise Reduction Cool Standard Sound Mode Zoom Weak Middle Strong Music Setup Advanced Movie On Personal CC Mode Off CC on mute Basic Selection CC1 Bass Treble 0~100 Closed Caption Balance Audio Surround Off / On Advanced Selection AVC O
Operations Picture Use the controls in the Picture Menu to calibrate your Climate Series LCD for optimum picture quality. Picture Mode: To set the Picture Mode, select Picture Mode from the Picture menu and press the left- or right- arrow buttons to select Standard, Dynamic or Personal. Press O.K. or MENU to confirm your selection. Contrast: To adjust the Contrast, select Contrast from the Picture menu and press the left- or right- arrow buttons to adjust. Press O.K. or MENU to confirm your selection.
Operations To adjust the Climate Series LCD audio setting, select Audio from the Main Menu and press the up- or down-button to select the setting you want to change. Sounds Mode: To set the Sound Mode, select Sound Mode from the Audio menu and press the left- or right- arrow buttons to select Standard, Music, Movie or Personal. Press O.K. or MENU to confirm your selection. Bass: To adjust the Bass, select Bass from the Audio menu and press the left- or right- arrow buttons to adjust. Press O.K.
Operations Time To set the Climate Series LCD Time functions, select Time from the Main Menu and press the up- or down-button to select the setting you want to change. Sleep Timer: Use the Sleep Timer to turn off the Climate Series LCD after a specified interval. To set the Sleep Timer: Select Sleep Timer from the Time menu and press the left- or right- arrow buttons to change setting. -ORPress the SLEEP button on the remote control.
Operations Use the controls in the Setup menu to perform advanced image quality adjustments and access various other Climate Series LCD Display functions. Menu Language: Select Menu Language from the Setup menu and press the left- or right- arrow buttons to select English, French or Spanish. Press O.K. or MENU to confirm your selection. Transparency: To turn the Transparency of the Menu on or off, select Transparency from the Setup Menu and press the left- or right- arrow buttons to change setting.
Operations Lock Use the Lock Menu to set your own password and use this password to lock your Climate Series LCD. Password default is set to 0000.
Operations Use the controls in the Channel menu to adjust Channel settings and access various other Climate Series LCD Display functions. Air/Cable: Use the Air/Cable setting in the Channel menu to select Air or Cable. Auto Scan: Use the Auto Scan to select the Cable system. Press the left- or right- arrow buttons to select Auto, STD, IRC or HRC. Favorite: Select Favorite from the Channel menu to set the favorite channel associated with the FAV button on the Climate Series remote control.
Operations 4.5 Stereo Sound/SAP The Climate Series LCD supports Multichannel Television Sound (MTS), the broadcast audio standard that allows transmission of both stereo and Secondary Audio Program (SAP) content. The SAP is usually a foreign-language translation. However, it can also be used for other purposes such as Described Video Services (DVS0, which provide descriptive narration of key visual elements in programs for the benefit of the visually impaired.
5. Maintenance and Troubleshooting Regular cleaning will extend the life and performance of the Climate Series LCD. Before cleaning, be sure to unplug the power cord from the power outlet. Do not under any circumstances use solvents such as benzene or thinner to clean the Climate Series LCD. Doing so may cause deterioration or peeling of paint from the display or remote control unit. 5.1 5.
Troubleshooting Table 5-1. Troubleshooting Chart (continued) Symptom Picture is okay, but there is no sound. Possible Cause(s) Audio output is muted. Volume setting is too low. Source component is connected incorrectly or not at all. Speakers are connected incorrectly or not at all. Audio settings are incorrect Image is too bright and/or lacks definition in the bright areas of the image. Image appears “washed out” and/or dark areas appear too bright.
6. Serial Communications To Interface the Climate Portfolio Series LCD with a home theater automation/control system or a PC running terminal emulation software (such as TeraTerm Open Source project at http://ttssh2.sourceforge.jp/), connect it to your control system or PC as shown in Figure 3-6. Use a straight-through cable. 6.1 RS-232 Connection and Port Configuration Configure the RS-232 controller or PC serial port as follows: no parity, 8 data bits, 1 stop but and no flow control.
Serial Communications Table 6-1. Serial Commands (continued) COMMAND DATA 1 ID DATA 2 0X97 : MENU 0x00 0X00 0X98 : CHRTN 0x00 0X00 0XA1 : DISPLAY 0x00 0X00 0XA2 : 2 0x00 0X00 0XA3 : 5 0x00 0X00 0XA4 : 8 0x00 0X00 0XA5 : .
Serial Communications Table 6-1. Serial Commands (continued) COMMAND DATA 1 ID DATA 2 0XCD : S-VIDEO 0x00 0X00 0XBA : DIGITAL 0x00 0X00 0XDA : VGA 0x00 0X00 0X60 : CLEAR EEPROM 0x00 0X00 0X61 : DIRECTLY CONTROL VOLUME 0x00 0x00-0x64 0X64 : BLACKLIGHT OFF 0x00 0X00 0X65 : BLACKLIGHT ON 0x00 0X00 0X67 : HDMI 1 0x00 0X00 0X68 : HDMI 2 0x00 0X00 0X69 : COMPONENT 1 0x00 0X00 0X6A : COMPONENT 2 0x00 0X00 Example code fragment from a TeraTerm v4.
7. Specifications 7.1 Climate Series LCD Specifications Table 7-1 lists the Climate Series LCD specifications. Table 7-1. Climate Series LCD Specifications Native Resolution: Screen Size: Screen Aspect Ratio: Available Aspect Ratios: DTV Compatibility: Contrast Ratio: Data/Graphics Compatibility: 1920 x 1080 (full high definition) CP-42HD = 42 in. (diagonal) CP-52HD = 52 in.
Specifications Figure 7-1 shows the CP-42HD dimensions (all dimensions are in millimeters). Figure 7-1. CP-42HD Dimensions (Front/Side/Rear) Runco CP-42HD/CP-52HD Owner’s Operating Manual 37 7.
Specifications Figure 7-2 shows the CP-52HD dimensions (all dimensions are in millimeters). Figure 7-2.
Specifications 7.3 Supported Timings Table 7-2 lists the signal types supported by each input on the Climate Portfolio Series LCD. Table 7-2. Supported Signal Timings by Input Format 640x480 800x600 Resolution 640x480 800x600 1024x768 1024x768 1152x864 1152x864 1280x768 1280x768 1280x960 1280x960 1280x1024 1366x768 1280x1024 1366x768 1400x1050 1400x1050 1600x1200 1920x1200 1600x1200 1920x1200 Refresh Rate (Hz) 60.00 72.00 75.00 85.00 60.00 72.00 75.00 85.00 60.00 70.00 75.00 85.
Specifications Table 7-2. Supported Signal Timings by Input (continued) Horizontal Frequency (kHz) Pixel Frequency (MHz) Format Resolution Refresh Rate (Hz) 480/60i 720x487 60.00 15.734 13.500 480/60p 720x483 60.00 31.469 27.000 576/50i 720x576 50.00 15.625 13.500 576/50p 720x576 50.00 31.250 74.250 720/50p 1280x720 50.00 37.500 74.250 720/60p 1280x720 60.00 45.000 74.250 1080/24i 1920x1080 24.00 26.997 74.250 1080/25i 1920x1080 25.00 28.125 74.
SERIAL NUMBER 020-1065-00 Rev. B January 2011 Runco International 1195 NW Compton Drive Beaverton, OR 97006 Ph (503) 748-1100 / (800) 23-RUNCO / Fax (503) 748-1244 www.runco.