
International Home Theater System User Manual


Operation
54 Runco LS-7 Installation/Operation Manual
PRE
L
IMINAR
Y
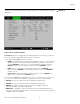
Figure 4-14. PIP Split-Screen Mode
Menu Position: Select Menu Position from the System menu to change the OSD menu
position. The default setting is “ “ (top left).
Translucent Menu: Select Translucent Menu from the System menu to adjust the
degree of translucence (show-through) in the menus and message boxes. 0% means that
the menus are opaque. The default setting is 25%.
Lamp Power: Select Lamp Power from the System menu to adjust the lamp output level.
You can choose to run the lamp as bright as possible (260W; this is the default setting) or
you can choose the Economy (230W) setting. Generally, lower lamp output prolongs the
life of the lamp, but decreases brightness. This setting is per source, not global, so it can
be saved like other user settings.
Blank Screen: Select Blank Screen from the System menu to choose the color of the
blank screen that appears when no source signal is present. The options are Black, Blue
and White. The default is Black.
Auto Power Off: Set Auto Power Off to On to have the LS-7 turn itself off after 20
minutes of inactivity (no source signal present).
Auto Power On: Setting Auto Power On to On causes the projector to automatically
power up when AC power is present. If the projector is plugged into a switched AC outlet,
this allows the projector to be turned on using a wall switch instead of the remote control
unit. If you do not need this capability, set
Auto Power On to Off (this is the default
setting).
Rear Projection: This control reverses all images and menus, and is necessary when the
projector is used in rear-projection applications. The default is Off.
Ceiling Mode: This control flips the image so the projector can be used in ceiling
mounted installations. The default setting, Auto, automatically determines the orientation
using an internal sensor.
Power On Chime: This controls the audible chime at startup.