
Installation Guide

Russound Architectural Series of In-Ceiling and In-Wall Loudspeakers4
Retrot Installation
Locate existing pipes, duct work, and AC
wiring before cutting any holes in the
ceiling.
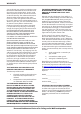
1. Center the cardboard template
between adjacent joists, avoiding
all wiring, pipes, duct work, and
lightly mark the outline with a pencil.
Then use a keyhole/drywall saw or
motorized spiral-cut tool to make the
opening.
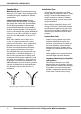
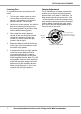
2. Score the outline of the template with
a utility knife to prevent chipping.
If dealing with lath and plaster or
thick paneling, drill 1” (2.5 cm) holes
in several places around the pencil
outline. Use a ne-toothed keyhole
saw or hacksaw blade with slow
strokes to saw through and remove
the inner surface.
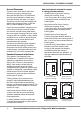
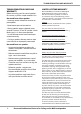
Pre-wire or Pre-construction
Locate all obstructions (AC wiring,
plumbing, duct work, studs, and joists).
Route the speaker wire to the speaker
location avoiding all obstacles. Watch out
for closeness to AC wiring.
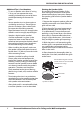
Russound oers Speaker Rough-In Brackets
that can be fastened to the adjacent studs.
Once the dry wall is installed, the opening
is cut out. There are holes molded into the
bracket for speaker wire tie-o to keep the
wire from being lost during construction.
Make sure the speaker cutout (hole) doesn’t
extend further than 1/4” (0.6 cm) from the
inside of the mounting bracket.
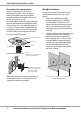
PREPARATION FOR INSTALLATION
Note:
Run two pair conductors for
single point speakers.
Rough-in Bracket
Magnetic square grille
ICG-6S (6” Models) and
ICG-8S (8” models)
(sold separately)
Speaker Cable
Screw
Stud / Joist
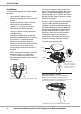
In-ceiling bracket Installation
In-wall bracket Installation
Retrot Installation
Score template outline Cut out opening