
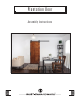
Installation Guide

R H
•••••••••••••••••••••••••••••••••••••••••
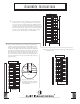
INSTALLATION INSTRUCTIONS
HANGER HOLES
Tools Needed
Ratchet with
7
/16” socket
PLEASE NOTE: ese instruc-
tions are specic to a particular
door size and type. Adjustments
may be needed on your part for
changes in specications and mea-
surements, as well as door types
that are dierent from these.
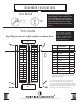
Parts Included
BL
A1
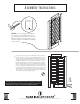
Assembly Instructions
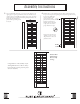
Lay all parts out on a at surface as shown here.
If any of the slats have been damaged
during shipping, call us at 800-891-8312
and we will expedite a replacement slat.
Lay out your Door parts according to the
illustration shown below to accurately
identify which part needs to be replaced,
if any.
Rubber
Mallet
A2
Description Qty
A1 Top Rail 1
A2 Bottom Rail 1
BL Left Stile 1
BC Center Stile 1
BR Right Stile 1
C1 Top Slat 2
C2 Bottom Slat 2
C3 Slats 32*
D Dowels 2
E 6” Lag Bolts 6
F Wood Glue 4 oz.
BR
BC
C1
C1
C2
C2
C3
C3
D
D
E
E
E E
Lay out all your parts on the oor or another solid
surface. Start by identifying your parts. Refer to the
parts page of the instructions to distinguish between the
parts. ere are 3 long wood parts to this door, you have
a BL, BC and BR. BL and BR are universal and can be
used either on the right or left side of the door.
F
Quantities will vary depending on Door size.
All quantities in this table are for an average
single Door order size.
*