OPERATOR'S MANUAL CORDLESS DRILL-DRIVER 16 18 20 22 2 MODEL NOS. CTH1202K2/CTH1442K2/CTH1802 THANK YOU FOR BUYING A RYOBI CORDLESS DRILL-DRIVER. Your new cordless drill-driver has been engineered and manufactured to Ryobi’s high standard for dependability, ease of operation, and operator safety. Properly cared for, it will give you years of rugged, trouble-free performance. CAUTION: Carefully read through this entire operator's manual before using your new cordless drill-driver.
TABLE OF CONTENTS ■ Table Of Contents/Typical Applications. ................................................................................ 2 ■ Rules For Safe Operation ...................................................................................................3-5 A. Precautions On Using Your Cordless Tool ....................................................................... 4 B. Important Safety Instructions For Charger ....................................................................4-5 C.
RULES FOR SAFE OPERATION The purpose of safety symbols is to attract your attention to possible dangers. The safety symbols, and the explanations with them, deserve your careful attention and understanding. The safety warnings do not by themselves eliminate any danger. The instructions or warnings they give are not substitutes for proper accident prevention measures. SYMBOL MEANING SAFETY ALERT SYMBOL: Indicates danger, warning or caution. May be used in conjunction with other symbols or pictographs.
RULES FOR SAFE OPERATION (Continued) 9. 10. 11. 12. 13. 14. 15. 16. 17. 18. 19. 20. 21. 22. when working outdoors. Wear protective hair covering to contain long hair and keep it from being drawn into nearby air vents. ALWAYS WEAR SAFETY GLASSES. Everyday eyeglasses have only impact-resistant lenses; they are NOT safety glasses. PROTECT YOUR LUNGS. Wear a face mask or dust mask if operation is dusty. PROTECT YOUR HEARING. Wear hearing protection during extended periods of operation. SECURE WORK.
RULES FOR SAFE OPERATION (Continued) 5. To reduce risk of damage to electric plug and cord, pull by the plug rather than the cord when disconnecting charger. 6. Make sure cord is located so that it will not be stepped on, tripped over, or otherwise subjected to damage or stress. 7. An extension cord should not be used unless absolutely necessary. Use of improper extension cord could result in a risk of fire and electric shock. If extension cord must be used, make sure: a.
SPECIFICATIONS: DRILL-DRIVER CTH1202K2 CTH1442K2 CTH1802 Chuck 3/8 in. Keyless 3/8 in. Keyless 1/2 in. Keyless Motor DC Motor 12.0 V DC Motor 14.4 V DC Motor 18.
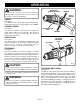
OPERATION TORQUE ADJUSTMENT RING TWO SPEED GEAR TRAIN (LO-HI) 22 See Figures 1 and 2. Before attempting to use any tool, familiarize yourself with all operating features and safety requirements. 2 KNOW YOUR DRILL-DRIVER 18 20 WARNING: BIT STORAGE 16 Do not allow familiarity with tools to make you careless. Remember that a careless fraction of a second is sufficient to inflict severe injury.
OPERATION WARNING: DIRECTION OF ROTATION SELECTOR REVERSE If any parts are missing, do not operate tool until the missing parts are replaced. Failure to do so could result in possible serious personal injury. 22 SWITCH TRIGGER 20 SWITCH 16 18 See Figure 4. Your drill starts and stops by depressing and releasing the switch trigger. Release the switch trigger to turn drill OFF. VARIABLE SPEED CENTER POSITION (LOCK) See Figure 4. Your drill has a variable speed feature in the switch.
OPERATION TO INSTALL BATTERY PACK ■ ■ ■ Place the direction of rotation selector in center position. See Figure 4. Place the battery pack in your drill. Align raised rib on battery pack with groove in drill's battery port. See Figure 6. Make sure the latches on each side of your battery pack snap in place and that battery pack is secured in drill before beginning operation. BATTERY PACK TO REMOVE BATTERY PACK ■ ■ ■ Place the direction of rotation selector in center position. See Figure 4.
OPERATION INSTALLING AND REMOVING BITS CHUCK BODY ■ 18 20 22 2 CHUCK JAWS DRILL BIT 16 Place the direction of rotation selector at the center position. This will turn off the power to your drill. ■ Open or close the chuck jaws to a point where the opening is slightly larger than the bit size you intend to use. Also, raise the front of your drill slightly to keep the bit from falling out of the chuck jaws. ■ Insert your drill bit into the chuck the full length of the jaws. See Figure 8.
OPERATION TORQUE ADJUSTMENT RING WARNING: TO DECREASE TORQUE 18 20 22 2 Be prepared for binding or breakthrough. When these situations occur, the drill has a tendency to grab and kick in the opposite direction, and could cause loss of control when breaking through material. If you are not prepared, this loss of control can result in possible serious injury. 16 When drilling metals, use a light oil on the drill bit to keep it from overheating.
OPERATION CHUCK REMOVAL MALLET 2 22 20 18 ALLEN WRENCH Fig. 13 22 CHUCK JAWS KEYLESS CHUCK 16 See Figures 13, 14, and 15. The chuck must be removed in order to use some accessories. To remove: ■ Lock the switch trigger by placing the direction of rotation selector in center position. ■ Insert a 5/16 inch or larger allen wrench (hex key wrench) into the chuck of your drill and tighten the chuck jaws securely. ■ Tap the allen wrench sharply with a mallet in a clockwise direction. See Figure 13.
MAINTENANCE DO NOT ABUSE POWER TOOLS. Abusive practices can damage the tool, as well as the work piece. WARNING: When servicing use only identical Ryobi replacement parts. Use of any other parts may create a hazard or cause product damage. Avoid using solvents when cleaning plastic parts. Most plastics are susceptible to damage from various types of commercial solvents and may be damaged by their use. Use a clean cloth to remove dirt, oil, grease, etc.
OPERATOR'S MANUAL CORDLESS DRILL-DRIVER MODEL NOS. CTH1202K2/CTH1402K2/CTH1802 • SERVICE Now that you have purchased your tool, should a need ever exist for repair parts or service, simply contact your nearest Ryobi Authorized Service Center. Be sure to provide all pertinent facts when you call or visit. Please refer to the Service Center insert or call 1-800525-2579 in the United States or 1-800-265-6778 in Canada for your nearest Ryobi Authorized Service Center. You can also check our web site at www.