OPERATOR’S MANUAL MANUEL D’UTILISATION MANUAL DEL OPERADOR 18 volt 1/2 in. 2-SPEED DRILL-DRIVER 18 V 13 mm (1/2 po) perceuse-tournevis 2 vitesses Taladro-destornillador de 18 V 13 mm (1/2 pulg.
TABLE OF CONTENTS Introduction...................................................................................................................................................................... 2 Warranty........................................................................................................................................................................... 2 General Safety Rules........................................................................................................
GENERAL SAFETY RULES WARNING – Read all instructions. Failure to follow all instructions listed below may result in electric shock, fire and/or serious injury. The term “power tool” in all of the warnings listed below refers to your mains-operated (corded) power tool or battery-operated (cordless) power tool. Save These Instructions Work Area SAFETY Keep work area clean and well lit. Cluttered or dark areas invite accidents.
GENERAL SAFETY RULES to be performed. Use of the power tool for operations different from those intended could result in a hazardous situation. BATTERY TOOL USE AND CARE Ensure the switch is in the off position before inserting battery pack. Inserting the battery pack into power tools that have the switch on invites accidents. Recharge only with the charger specified by the manufacturer.
SYMBOLS The following signal words and meanings are intended to explain the levels of risk associated with this product. SYMBOL SIGNAL MEANING DANGER: Indicates an imminently hazardous situation, which, if not avoided, will result in death or serious injury. WARNING: Indicates a potentially hazardous situation, which, if not avoided, could result in death or serious injury. CAUTION: Indicates a potentially hazardous situation, which, if not avoided, may result in minor or moderate injury.
FEATURES PRODUCT SPECIFICATIONS Chuck............................................................1/2 in. Keyless Motor.......................................................................18 V DC Switch............................... VSR (Variable Speed Reversible) No Load Speed........................ 0-440/0-1,600 r/min. (RPM) Clutch............................................................... 24 Positions Torque.................................................................... 330 in.lb.
ASSEMBLY WARNING: WARNING: Do not attempt to modify this product or create accessories not recommended for use with this product. Any such alteration or modification is misuse and could result in a hazardous condition leading to possible serious personal injury. To prevent accidental starting that could cause serious personal injury, always remove the battery pack from the product when assembling parts.
OPERATION DIRECTION OF ROTATION SELECTOR (FORWARD/REVERSE/CENTER LOCK) See Figure 3, page 11. The direction of bit rotation is reversible and is controlled by a selector located above the switch trigger. With the drill held in normal operating position, the direction of rotation selector should be positioned to the left of the switch trigger for forward drilling. The drilling direction is reversed when the selector is to the right of the switch trigger.
OPERATION removing BITS See Figure 8, page 12. Lock the switch trigger by placing the direction of rotation selector in the center position. Open the chuck jaws. Note: Rotate the chuck body in the direction of the arrow marked UNLOCK to open the chuck jaws. Do not use a wrench to tighten or loosen the chuck jaws. Remove the drill bit. DRILLING See Figure 10, page 12. A level is located on the top of the motor housing to help keep the drill bit level during use.
MAINTENANCE CHUCK REMOVAL WARNING: When servicing, use only identical replacement parts. Use of any other parts may create a hazard or cause product damage. See Figures 11 - 13, page 12. The chuck may be removed and replaced by a new one. Lock the switch trigger by placing the direction of rotation selector in center position. Insert a 5/16 in. or larger hex key into the chuck of the drill and tighten the chuck jaws securely. WARNING: Always wear eye protection marked to comply with ANSI Z87.1.
TABLE DES MATIÈRES Introduction...................................................................................................................................................................... 2 Garantie............................................................................................................................................................................ 2 Règles de sécurité générales..............................................................................................
RÈGLES DE SÉCURITÉ GÉNÉRALES AVERTISSEMENT – Lire toutes les instructions. Le non-respect de toutes les instructions ci-dessous peut entraîner un choc électrique, un incendie et/ou des blessures graves. Le terme « outil motorisé », utilisé dans tous les avertissements ci-dessous désigne tout outil fonctionnant sur secteur (câblé) ou sur piles (sans fil). Conserver ces instructions SÉCURITÉ DU LIEU DE TRAVAIL Garder le lieu de travail propre et bien éclairé.
RÈGLES DE SÉCURITÉ GÉNÉRALES UTILISATION ET ENTRETIEN DE LA BATTERIE DÉPANNAGE S’assurer que le commutateur est en position d’arrêt avant d’insérer le piles. L’insertion du piles dans un outil dont le commutateur est en position de marche peut causer un accident. Ne recharger qu’avec l’appareil spécifié par le fabricant. Un chargeur approprié pour un type de batterie peut créer un risque d’incendie s’il est utilisé avec un autre type de batterie.
SYMBOLES Les termes de mise en garde suivants et leur signification ont pour but d’expliquer le degré de risques associé à l’utilisation de ce produit. SYMBOLE SIGNAL SIGNIFICATION DANGER : Indique une situation extrêmement dangereuse qui, si elle n’est pas évitée, aura pour conséquences des blessures graves ou mortelles. AVERTISSEMENT : Indique une situation potentiellement dangereuse qui, si elle n’est pas évitée, pourrait entraîner des blessures graves ou mortelles.
CARACTÉRISTIQUES FICHE TECHNIQUE Mandrin........................................ 13 mm (1/2 po), sans clé Moteur....................................................................18 V c.c. Commutateur............... (VSR) Vitesse variable et réversible Vitesse à vide.....................0 à 440 / 0 à 1 600 r/min (RPM) Embrayage........................................................24 positions Couple................................................
ASSEMBLAGE AVERTISSEMENT : AVERTISSEMENT : Ne pas essayer de modifier cet produit ou de créer des accessoires non recommandés pour l’produit. De telles altérations ou modifications sont considérées comme un usage abusif et peuvent créer des conditions dangereuses, risquant d’entraîner des blessures graves. Pour empêcher un démarrage accidentel pouvant entraîner des blessures graves, toujours retirer le bloc de batterie de l’produit avant d’assembler des pièces.
UTILISATION note : La gâchette peut produire un bruit de sifflement ou de grincement pendant le fonctionnement. Ne pas s’inquiéter, ce bruit fait partie du fonctionnement normal. SÉLECTEUR DE SENS DE ROTATION (AVANT / ARRIÈRE / VERROUILLAGE CENTRAL) Voir la figure 3, page 11. Le sens de rotation est commandé par un sélecteur situé au-dessus de la gâchette. La perceuse étant tenue en position normale d’utilisation, le sélecteur de sens de rotation doit être tourné vers la gauche pour percer.
UTILISATION NOTE : Tourner le corps du mandrin dans le sens de la flèche marquée LOCK (serrer) pour serrer les mors. Ne pas utiliser une clé pour serrer ou desserrer les mors du mandrin. RETRAIT DES EMBOUTS Voir la figure 8, page 12. Verrouiller la gâchette en mettant le sélecteur de sens de rotation en position centrale. Ouvrir les mors en tournant le manchon du mandrin vers la droite. NOTE : Tourner le corps du mandrin dans le sens de la flèche marquée UNLOCK (desserer) pour desserrer les mors.
ENTRETIEN RETRAIT ET PRÉPARATION DU Piles POUR LE RECYCLAGE AVERTISSEMENT : Utiliser exclusivement des pièces d’origine pour les réparations. L’usage de toute autre pièce pourrait créer une situation dangereuse ou endommager l’produit. AVERTISSEMENT : Toujours porter une protection oculaire certifiée conforme à la norme ANSI Z87.1. Si cette précaution n’est pas prise, des objets peuvent être projetés dans les yeux et causer des lésions graves.
ÍNDICE DE CONTENIDO Introducción...................................................................................................................................................................... 2 Garantía............................................................................................................................................................................ 2 Reglas de seguridad generales............................................................................................
REGLAS DE SEGURIDAD GENERALES ADVERTENCIA – Lea todas las instrucciones. El incumplimiento de las instrucciones señaladas abajo puede causar descargas eléctricas, incendios y lesiones serias. El término “herramienta eléctrica” empleado en todos los avisos de advertencia enumerados abajo se refiere a las herramientas eléctricas de cordón (alámbricas) y de baterías (inalámbricas). Guarde estas instrucciones Seguridad en el área de trabajo Mantenga limpia y bien iluminada el área de trabajo.
REGLAS DE SEGURIDAD GENERALES Utilice la herramienta eléctrica, los accesorios y brocas, hojas y cuchillas de corte, ruedas de esmeril, etc. de conformidad con estas instrucciones, y de la forma apropiada para cada una de dichas herramientas, tomando en cuenta las condiciones de trabajo y la tarea por realizar. Si se utiliza la herramienta eléctrica para operaciones diferentes de las indicadas podría originar una situación peligrosa.
SÍMBOLOS Las siguientes palabras de señalización y sus significados tienen el objeto de explicar los niveles de riesgo relacionados con este producto. SÍMBOLO SEÑAL SIGNIFICADO PELIGRO: Indica una situación peligrosa inminente, la cual, si no se evita, causará la muerte o lesiones serias. ADVERTENCIA: Indica una situación peligrosa posible, la cual, si no se evita, podría causar la muerte o lesiones serias.
CARACTERÍSTICAS ESPECIFICACIONES DEL PRODUCTO Portabrocas..............13 mm (1/2 pulg.), de apriete sin llave Motor........................................................... 18 V corr. cont. Interruptor................... (VSR) Velocidad variable e invertible Velocidad en vacío..................0-440 / 0-1 600 r/min (RPM) Embrague...................................................... 24 posiciones Fuerza de torsión............................ 37,3 N-·m (330 lb·-pulg.
ARMADO ADVERTENCIA: ADVERTENCIA: Si hay piezas dañadas o faltantes, no utilice esta producto sin haber reemplazado las piezas dañadas o faltantes. Usar este producto con partes dañadas o faltantes puede causar lesiones serias al operador. Para evitar un arranque accidental que podría causar lesiones corporales serias, siempre desmonte de la producto el paquete de baterías al montarle piezas a aquélla. ADVERTENCIA: No intente modificar esta producto ni hacer accesorios no recomendados para la misma.
FUNCIONAMIENTO ADVERTENCIA: ADVERTENCIA: Las productos de baterías siempre están en condiciones de funcionamiento. Por lo tanto, siempre debe estar asegurado el interruptor cuando no esté usándose o el operador lo lleve por un lado. GATILLO DEL INTERRUPTOR Vea la figura 3, página 11. Para ENCENDER el taladro, oprima el gatillo del interruptor. Para APAGAR la unidad, suelte el gatillo del interruptor.
FUNCIONAMIENTO INSTALACIÓN DE LAS BROCAS Vea las figuras 8 y 9, página 12. Asegure el gatillo del interruptor; para ello, coloque el selector de sentido de rotación en la posición central. Abra o cierre las mordazas del portabrocas a tal punto que la abertura sea levemente más grande que la broca deseada. Además, eleve levemente la parte frontal del taladro para evitar que la broca caiga de las mordazas del portabrocas. Introduzca la broca.
MANTENIMIENTO DESMONTAJE DEL PORTABROCAS ADVERTENCIA: Al dar servicio a la unidad, sólo utilice piezas de repuesto idénticas. El empleo de piezas diferentes puede causar un peligro o dañar el producto. Vea las figuras 11 a 13, página 12. El portabrocas puede desmontarse y reemplazarse con uno nuevo. Asegure el gatillo del interruptor; para ello, coloque el selector de sentido de rotación en la posición central. Introduzca una llave hexagonal de 7,9 mm (5/16 pulg.
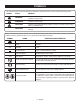
Fig. 1 Fig. 2 H B Fig. 4 A B A C C D D B E C A - Keyless chuck (mandrin sans clé, portabrocas de apriete sin llave) B - Unlock (release) [unlock (libération), unlock (aflojar)] C - Chuck jaws (mors du mandrin, mordazas del portabrocas) D- Lock (tighten) [lock (blocage), lock (apretar)] I F Fig.
Fig. 7 Fig. 11 Fig. 9 B A A C B Wrong / InCorrect / Forma incorrecta A - Mag Tray™ (screw holder) [Mag Tray™ (compartiment pour vis), Mag Tray™ (compartimiento para tornillos)] B - Double-ended bit (embout doubles, punta de destornillador dobles) C - Bit storage (rangement d’embouts, compartimiento de brocas) D Fig. 10 level TOP VIEW / VUE DE DESSUS de niveau / VISTA SUPERIOR de nivel A Fig.
NOTES / NOTAS 13
OPERATOR’S MANUAL / 18 vOLT DRILL-DRIVER MANUEL D’UTILISATION / perceuse-tournevis 18 V MANUAL DEL OPERADOR / Taladro-destornillador DE 18 V • Parts and Service Prior to requesting service or purchasing replacement parts, please obtain your model and serial number from the product data plate. P204 • MODEL NUMBER _____________________ • SERIAL NUMBER _____________________ • How to obtain Replacement Parts: Replacement parts can be purchased online at www.ryobitools.com or by calling 1-800-525-2579.