OPERATOR'S MANUAL ELECTRONIC PLUNGE ROUTER RE180PL VARIABLE SPEED – DOUBLE INSULATED Your new router has been engineered and manufactured to Ryobi's high standard for dependability, ease of operation, and operator safety. Properly cared for, it will give you years of rugged, trouble-free performance. WARNING: To reduce the risk of injury, the user must read and understand the operator’s manual. Thank you again for buying Ryobi tools.
TABLE OF CONTENTS ■ Introduction ........................................................................................................................................................ 2 ■ General Safety Rules .....................................................................................................................................3-4 ■ Specific Safety Rules .......................................................................................................................................
GENERAL SAFETY RULES ■ SAVE THESE INSTRUCTIONS WARNING: Read and understand all instructions. Failure to follow all instructions listed below, may result in electric shock, fire and/or serious personal injury. ■ WORK AREA ■ ■ ■ Keep your work area clean and well lit. Cluttered benches and dark areas invite accidents. Do not operate power tools in explosive atmospheres, such as in the presence of flammable liquids, gases, or dust. Power tools may create sparks which may ignite the dust or fumes.
GENERAL SAFETY RULES ■ SERVICE ■ When servicing a tool, use only identical replacement parts. Follow instructions in the Maintenance section of this manual. Use of unauthorized parts or failure to follow Maintenance Instructions may create a risk of electric shock or injury. Tool service must be performed only by qualified repair personnel. Service or maintenance performed by unqualified personnel could result in a risk of injury.
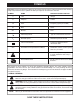
SYMBOLS Important: Some of the following symbols may be used on your tool. Please study them and learn their meaning. Proper interpretation of these symbols will allow you to operate the tool better and safer.
SPECIFICATIONS Plunge Depth 0 - 2 in. (0 - 5.08 cm) Collet 1/2 in. (12.7 mm) Adaptor 1/4 in. (6.35 mm) Peak Horsepower 2 Input 120 Volts, 60 Hz, AC Only, 10.0 Amperes No Load Speed 15,000 - 23,000 RPM Power Cord 10 ft. (3 m) Net Weight 8.5 lbs. (3.86 kg.) UNPACKING INSTRUCTIONS PACKING LIST Your router has been shipped completely assembled. ■ Carefully remove the tool and accessories from the box. Make sure that all items listed in the packing list are included.
FEATURES Your plunge router is a versatile woodworking tool that will give you years of trouble-free performance. It is engineered with the professional in mind, but its ease of operation allows the amateur to produce work that is beautiful and precise. As the name implies your plunge router can be used for making plunge cuts in workpieces, routing grooves, edge routing, routing circles, and freehand routing.
FEATURES FRONT VIEW OF ROUTER SPEED SELECTION SIGHT WINDOW VARIABLE SPEED CONTROL SELECTOR SCALE ZERO RESET INDICATOR OPERATION HANDLE LOCK KNOB SPINDLE LOCK STOP BAR ACCU-STOPTM MICRO-ADJUSTABLE DEPTH STOP CHIP SHIELD EACH 90O ROTATION OF DEPTH STOP KNOB EQUALS 1/64 in. (0.4 mm) CHANGE IN DEPTH OF CUT EACH COMPLETE ROTATION (360O) OF DEPTH STOP KNOB EQUALS 1/16 in. (1.6 mm) CHANGE IN DEPTH OF CUT Fig.
FEATURES REAR VIEW OF ROUTER POWER CORD PLUNGE LOCK LEVER HEX NUT(S) COLLET NUT SUBBASE 15 16 ROUTER BASE 1/4 in. (6.35 mm) ADAPTOR 15/16 in. (23.8 mm) WRENCH Fig. 2 WARNING: Do not attempt to modify this tool or create accessories not recommended for use with this tool. Any such alteration or modification is misuse and could result in a hazardous condition leading to possible serious personal injury.
ADJUSTMENTS SPINDLE LOCK WARNING: Your router should never be connected to power supply when you are assembling parts, making adjustments, installing or removing cutters, or when not in use. Disconnecting your router will prevent accidental starting that could cause serious injury. TO LOOSEN COLLET NUT CUTTER INSTALLATION See Figures 3 and 4. ■ UNPLUG YOUR ROUTER. WARNING: Failure to unplug your router could result in accidental starting causing serious injury.
ADJUSTMENTS WARNING: Do not use cutters with undersized shanks. Undersized shanks will not tighten properly and could be thrown from the tool causing injury. TO UNLOCK HEX NUTS TO LOCK WARNING: Do not use cutters that are larger in diameter than the opening in router base. Use of such cutters will come in contact with the router base and damage both the cutter and router base.
ADJUSTMENTS ■ Lock plunge lock lever to position cutter at "zero" depth of cut. ■ Adjust hex nuts until they come in contact with stop flange. This will provide a position stop at “zero” depth of cut. ■ Make sure the hex nuts are securely tightened against each other. ■ Rotate depth stop to desired position, loosen lock knob and adjust stop bar until it touches depth stop.
ADJUSTMENTS TO ADJUST DEPTH OF CUT USING OPTIONAL DEPTH CONTROL KNOB See Figure 9. ■ UNPLUG YOUR ROUTER. OPTIONAL DEPTH CONTROL KNOB WARNING: Failure to unplug your router could result in accidental starting casuing serious injury. ■ Loosen lock knob and raise stop bar. ■ Unlock plunge lock lever and raise cutter to its uppermost position. ■ Plunge router until cutter reaches the approximate desired depth of cut. ■ Lock plunge lock lever, temporarily locking cutter at desired depth of cut.
ADJUSTMENTS WARNING: SPEED SELECTION CHART Always wear safetey goggles or safety glasses with side shields when using your router. Failure to do so could result in dust, shavings, chips, loose particles, or foreign objects being thrown in your eyes resulting in possible serious injury. If the operation is dusty, also wear a face or dust mask. CUTTER SIZE MATERIAL 1/2 3/4 E-F D-E A-B A MEDIUM D-E C-D A A HARD C-D B-C A A SOFT TO SET DEPTH STOP ■ UNPLUG YOUR ROUTER.
OPERATION SWITCH MOTOR HOUSING See Figure 13. To turn the router ON, toggle the switch to the I position. To turn the router OFF, toggle the switch to the O position. I = ON CAUTION: O = OFF We suggest that you practice with your router before installing a cutter and making cuts in wood. ROUTING See Figure 14. For ease of operation and maintaining proper control, your router has two handles, one on each side of the router base. When using your router hold it firmly with both hands.
OPERATION ROUTING BY FREEHAND See Figure 16. When used freehand, your plunge router becomes a flexible and versatile tool. This flexibility makes it possible to easily rout signs, relief sculptures, etc. There are two basic techniques for freehand routing: ■ Routing letters, grooves, and patterns into wood. ■ Routing out the background, leaving the letters or pattern raised above the surface. When freehand routing, we suggest the following: ■ Draw or layout the pattern on workpiece.
OPERATION PILOT BIT EDGING ROUTER See Figure 17. Rabbets and molded edges can be cut using piloted cutters. The pilot extends below the cutter. Some pilots are solid extensions of the cutter. Others are ball bearing guides that are fastened to the end of the cutter. The pilots allow the cutters to turn while the pilot follows the edge of the workpiece. Arbor-type bits with pilots are excellent for quick, easy, edge shaping. They will follow workpiece edges that are either straight or curved.
OPERATION PROPER FEEDING ROUT END GRAINS FIRST ROUTER FEED DIRECTION ROUTER FEED DIRECTION The right feed is neither too fast nor too slow. It is the rate at which the bit is being advanced firmly and surely to produce a continuous spiral of uniform chips. A feed to fast produces large, individual chips and a feed to slow creates sawdust. If you are making a small diameter, shallow groove in soft, dry wood, the proper feed may be as fast as you can travel your router along your guide line.
OPERATION RATE OF FEED IMPORTANT: The “secret” of professional routing and edge shaping lies in making a careful set-up for the cut and in selecting the proper rate of feed. The proper rate of feed depends on several factors: the hardness and moisture content of the wood, the depth of cut, and the cutting diameter of the bit. When cutting shallow grooves in soft woods such as pine, a faster rate of feed can be used. When making deep cuts in hardwoods such as oak, a slower rate of feed should be used.
OPERATION DEPTH OF CUT As previously mentioned, the depth of cut is important because it affects the rate of feed that, in turn, affects the quality of the cut (and, also, the possibility of damage to your router motor and bit). A deep cut requires a slower feed than a shallow one, and a too deep cut will cause you to slow the feed so much that the bit is no longer cutting, it is scraping, instead. Making a deep cut is never advisable. The smaller bits — especially those only 1/16 inch (1.
MAINTENANCE LUBRICATION BRUSH ASSEMBLY All of the bearings in this tool are lubricated with a sufficient amount of high grade lubricant for the life of the unit under normal operating conditions. Therefore, no further lubrication is required. BRUSH ASSEMBLY CUTTERS Get faster and more accurate cutting results by keeping cutters clean and sharp. Remove all accumulated pitch and gum from cutters after each use. When sharpening cutters, sharpen only the inside of the cutting edge.
MAINTENANCE PLUNGE LOCK LEVER See Figures 25, 26, and 27. After extended use, the plunge lock may wear. If this happens, you can easily adjust the lever. TO ADJUST PLUNGE LOCK LEVER ■ UNPLUG YOUR ROUTER. PLUNGE LOCK LEVER TO LOOSEN WARNING: Failure to unplug your router could result in accidental starting causing serious injury. ■ ■ ■ ■ ■ ■ SCREW TO TIGHTEN Make sure lever is in locked position. Remove the screw supporting the plunge lock lever. Remove the lever.
ACCESSORIES OPTIONAL STRAIGHT GUIDE WARNING: An optional straight guide, part number 6090080, is available and may be purchased for use with your router. When using a UL listed router table, large router bits should be used for edging only. Do not use router bits that are larger in diameter than the opening in the router base for any purpose. Failure to heed this warning could result in serious personal injury.
OPERATOR'S MANUAL ELECTRONIC PLUNGE ROUTER RE180PL VARIABLE SPEED – DOUBLE INSULATED EXTENSION CORD CAUTION When using a power tool at a considerable distance from a power source, be sure to use an extension cord that has the capacity to handle the current the tool will draw. An undersized cord will cause a drop in line voltage, resulting in overheating and loss of power. Use the chart to determine the minimum wire size required in an extension cord. Only round jacketed cords should be used.