
User's Manual


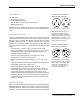

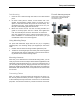
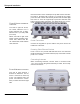
Table Of Contents

6 S&C Instruction Sheet 1069-500
Installation Overview - 1710
Radio installation is straightforward. You must power up and con-
figure all radios on a table or bench before deployment. Place
the unit on a table or shelf. Apply power. The power LED should
illuminate immediately; after about 60-90 seconds, the status LED
should switch to steady green.
Note the location of the reset hole in the lower right corner of the
rear panel. To reset the unit, apply power and wait until the unit
has fully booted and the status light has come on. Then use a
paperclip to press and hold the reset button until the status LED
blinks.
The supplied antennas are rated for use in dry, indoor environ-
ments. If the antenna is exposed to weather, moisture, or high
humidity, it may fail. Use an approved outdoor-rated antenna in-
stead.
Installation Overview - 1720
1. Pre-assemble the antenna, radio, and other devices to a metal
pole or other sub-assembly. Then, attach the assembly to the
mast, tower, or other mounting system. It is often easier to in-
stall all devices to one object, such as a pole, and then attach
the pole to the roof. In many cases, connecting the devices
to a pole already attached to the roof top can be difficult and
dangerous.
2. A lightning surge suppressor must be used. Some antennas
include one. If not, you must install a lightning suppressor.
3. Install the antenna higher than the radio. Take care when lo-
cating the radio far away from the antennas; a short antenna
cable gives better performance than a longer one. When pos-
sible, use antenna cables less than three meters long.
4. The radio and its antenna must both be grounded.
5. Use weatherproofing kits that include non-vulcanized rubber
to weatherproof connectors and antennas. All Ethernet cables
must be waterproofed; standard RJ-45 connectors do not last
outdoors.
6. Power over Ethernet: Consider which devices require PoE and
what the required input voltage will be. Ports 2 and 3 on the
radio can supply up to 13W each of PoE-compliant power.
7. Connect peripheral devices to the radio.
8. Connect power to the radio and peripherals.
Setup and Installation