Owner’s Manual Saab 9-5, Model Year 2002 Safety Security Instruments and controls Saab 9-5 Audio System OnStar - Telematics Interior equipment and trunk Starting and driving Car care and technical information Maintenance and owner assistance Specifications Index © Saab Automobile AB 2001 Service Readiness, Saab Automobile AB, Trollhättan, Sweden Printed in Sweden 11 37 49 83 105 117 145 187 243 247 261
NOTE IB1734 NOTE texts warn of potential damage to the car if the recommendations are not followed. Introduction This manual provides practical guidance on driving and caring for your Saab. The Saab 9-5 is available with the following engine variants: • 2.3t Ecopower. • 2.3 Turbo Ecopower. • 3.0t V6 Ecopower. Although this manual describes the most important differences between model variants, it does not include precise specifications of the different variants.
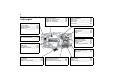
Instrument panel Indicator and warning lights ______ Speedometer _________________ Odometer and trip meter ________ Fuel gauge __________________ Engine temperature gauge ______ 50 57 56 57 57 Parking lights ____________ 65 High/low beam __________ 65 Daytime running lights _____ 65 Rear fog light ____________ 66 Instrument illumination _____ 67 Changing bulbs _________ 204 Trip computer (Saab Information Display, SID) __ 59 Night panel __________________ 63 Clock _______________________ 64 Traction
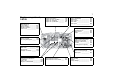
Exterior Sunroof _______________ Washing the car ________ Waxing and polishing ____ Touching-up of paintwork _ Anticorrosion treatment ___ Roof-rack load _______________ Mounting holes for roof rack ____ Maximum loads ______________ Rearview mirrors _____________ 176 176 248 123 Hood ______________________ 188 Engine compartment: washing __ 233 126 233 233 235 235 Front lights _____________ 65 Headlight switch _________ 65 High/low beam control stalk ____________ 65 Turn signal & lane change indicat
Interior Interior lighting ________________ 69 Sunroof ____________________ 126 Interior lighting: changing bulbs __ 213 Internal rearview mirror ________ 123 Door mirrors _________________ 123 Sun visors___________________ 128 Steering-wheel adjustment 122 Airbag (SRS) ____________ 28 Power steering _________ 198 Audio system steering-wheel controls ___ 100 Safety belts _____________ 12 Airbag (SRS) ___________ 28 Child seats _____________ 19 Child safety lock catch ____ 41 Safety belt care ________
Engine compartment, 4-cyl engine Engine: description ___________ Engine oil level: checking ______ Engine oil: changing __________ Engine oil specification ________ 192 193 194 251 Warning labels ___________ 8 V.I.N.
Engine compartment, 3.0t V6 Engine: description ___________ Engine oil level: checking ______ Engine oil: changing __________ Engine oil specification ________ 192 193 194 251 Warning labels ___________ 8 V.I.N.
Warning labels A/C system Refrigerant at high pressure. Always drain the A/C system before undoing any connections. Failure to follow prescribed procedures can result in injury. System to be serviced by authorized personnel only. See Workshop Service Manual for correct procedures. The A/C system complies with SAE J639. Refrigerant: 875 g of R134a. Refrigeration oil: 145 cc of PAG ND-8 oil or Saab 4319752 SK 20 oil Drive belt Moving belt. Do not touch while engine running.
Long loads Always SECURE LOAD to prevent it from shifting during transport. An unsecured load could cause passenger injuries in braking situations or in the event of a crash. Cover sharp edges with a protective wrap. Door mirrors Do not trap your fingers when folding out the mirrors IB336 Contact an authorized Saab workshop if a Xenon headlight requires replacement. (Only cars with Xenon headlights.
IB1195 10 CANADA USA IB336 AIR BAG WARNING Flip visor over CANADA WARNING DEATH or SERIOUS INJURY can occur. • Children 12 and under can be killed by the air bag. • The BACK SEAT is the SAFEST place for children. • NEVER put a rear-facing child seat in the front. • Sit as far back as possible from the air bag. • ALWAYS use SEAT BELTS and CHILD RESTAINTS. IB994 50 10 111 USA Jack (Text printed on jack) Use on Saab 9-5 & 9-3.Use on level ground only. Use vehicle support stands.
Safety 11 Safety IB1740 Safety belts......................... Head restraint..................... Child safety......................... Airbag (Supplemental Restraint System "SRS").
Safety Safety belts Research has established that it is dangerous for rear seat passengers not to wear their safety belts. WARNING Child safety, see page 19. Check that the locking tongue is properly locked in the belt lock. Three-point inertia-reel safety belts are provided for all seats.
Safety 13 Safety belt pretensioners The belts of the front seats are fitted with automatic pretensioners, which are activated in the event of a severe frontal or rear-end crash, provided that the safety belts are being worn. They serve to reduce the forward movement of the body by tensioning the belt. The safety belt pretensioners are not activated by vehicle rollover. The belt pretensioners do not activate in less severe frontal or rear-end crashes.
Safety • Children who have grown out of a child seat should be restrained by the car’s standard three-point belts. Make sure that the shoulder belt is not in contact with the neck or throat. If it is, a booster seat/cushion may be necessary. IB411 Never fasten the safety belt with the shoulder belt behind the body or pull the belt off the shoulder and under the arm. IB412 WARNING To fasten the belt Front safety belts Fasten the belt by pulling the belt and inserting the tongue in the buckle.
Safety Belt height adjustment IB414 The front safety belts and the outside belts in the rear (9-5 Sedan) are equipped with automatic height adjustment. After fastening the belt, grasp it at chest height, pull it out and, without letting go, allow the slack to be taken up by the reel. Make sure that the belt is well in on the shoulder. Safety belt use during pregnancy Pregnant women must always wear a safety belt to protect both themselves and the unborn child.
Safety belt, rear seat Safety belt, rear seat Three-point safety belts are provided for all three rear seat passengers. Fasten the belt by pulling out the strap carefully and inserting the tongue in the lock. Check that it is securely fastened. Then grip the diagonal part of the strap near the lock and pull the belt upwards towards the shoulder to tighten the lap strap. The lap strap should lie low over the hips. The diagonal part should lie as far in on the shoulder as possible.
Safety WARNING Safety belts are designed to bear upon the bony structure of the body, and should be worn low across the front of the pelvis or the pelvis, chest and shoulders, as applicable; wearing the lap portion of the belt across the abdominal area must be avoided. Safety belts should be adjusted as firmly as possible, consistent with comfort, to provide the protection for which they have been designed. A loose belt will greatly reduce the protection afforded to the wearer.
Safety Head restraint WARNING • Adjust the head restraint so that the head is well supported and the center of the head restraint is at ear height, thus reducing the likelihood of neck injury in a crash. IB400 The front seats in the Saab 9-5 are equipped with Saab Active Head Restraints (SAHRs). These reduce the risk of whiplash injury if the car is hit from behind. In the event of a rear-end crash, the body is forced back against the backrest.
Safety Child safety WARNING • NEVER put a rear-facing child seat in the front. • Children must always be suitably restrained in the car. All child restraints and booster seats are designed to be secured in vehicle seats by the lap belt of a lap-shoulder belt or LATCH. If the child restraint is not properly secured, a child can be injured in a crash. • Children 12 and under can be killed by the airbag.
Safety The same attention must be given to child safety in the car as is given to adults. Saab recommends rearward facing child restraints. Children travel most safely when properly restrained, but restraints must be suitable for the size of the child. Always follow the child seat/booster cushion manufacturer´s instructions when installing these devices in your vehicle. Make sure you are acquainted with the legal requirements for seating children in the car.
Safety To facilitate the proper fitting of new specially-designed child restraints rigid lower anchorages (ISOFIX) have been installed to the vehicle that shall be used with the top tether anchorages in the two outboard rear seating positions. There is an additional top tether anchorage for the center rear seating position that is to be used together with the safety belt. LATCH is a U.S./Canadian government standard for an uniform method of fitting child restraints without using the standard safety belts.
IB1685 Safety IB1684 22 Rigid 2-point lower attachment with top tether For the top tether, only use the strap supplied with the child restraint. Always follow the installation instructions supplied with the child restraint. The availability of LATCH child restraints may be limited. When fitting child seats in cars you must always read the instructions supplied by the car seat manufacturer.
Safety WARNING Child tether anchorages are designed to withstand only those loads imposed by correctly fitted child restraints. Under no circumstances are they to be used for adult safety belts. Child restraints with a tether strap must be anchored according to Canadian and USA laws. If you have any questions regarding child tether anchorages please contact your Saab dealer. 9-5 Sedan: 1 Open the cover that is right behind the child restraint. Make sure it locks.
Safety 9-5 Wagon: 1 Fold the backrest of the rear seat forward, see page 132. 2 Fold the anchor that is right behind the child restraint to its upright position. 3 Place the child restraint in the rear seat. 4 Raise the head restraint to its upper position and then route the tether under the head restraint. 5 Attach the tether to the anchor. 6 Raise the backrest of the rear seat. Make sure it locks properly.
Safety In fitting a child seat that is intended to be secured in position by the lap portion of the safety belt, make use of the locking function of the buckle. Locking the lap portion of the belt lessens the risk that the seat will work loose while the car is in motion. The button for the locking function is located on the back of the buckle. 1 Position the child seat in the back of the car.
Safety Installation of child restraint using the standard safety belt Child restraint that are approved for rearward facing installation in the rear seat can be positioned in any of the three rear places. If you intend to install another make of child restraint make sure that it is possible to fit it in accordance with the manufacturer’s instructions.
Safety 27 Integrated booster seat (accessory) Folding down 1 Pull the opening strap on the side of the booster seat outwards to release the catch securing the seat. 2 Fold down the booster seat cushion by grasping the upper edge and pulling outwards. Fastening the safety belt WARNING Never wear a safety belt with the diagonal strap positioned behind your back or slipped off the shoulder and under your arm.
Safety WARNING • Use only the vehicle’s lap and shoulder belt system when restraining the child in the booster seat. • The seat must not be modified or changed in any way. • Never leave a child unattended. • The car’s regular head restraint must always be turned 180° back to its original position after the integrated booster seat is folded away. • Check to ensure that the belt is not twisted or rubbing against any sharp edges.
Safety Airbag (Supplemental Restraint System "SRS") WARNING To reduce risk of injury: • Always wear your safety belt. • Always adjust your seat so that you are as far back as possible but still able to reach the steering wheel and controls comfortably. • Children 12 and under or shorter than 140 cm (55 inches) should always travel in the rear as the vehicle is equipped with an airbag on the passenger side.
Safety • Never rest your hands or forearms on the steering-wheel center padding. Moment of impact. • If the AIR BAG warning light remains on after the car has been started or comes on while you are driving, have the car checked immediately by an authorized Saab dealer. The warning light could signify that the airbags may not inflate in a crash, or they could even inflate without a crash. See page. 52.
Safety 3 5 6 7 6 IB1743 7 Accessories and other equipment must not be fitted to the surfaces marked as these are where the airbags inflate in the event of a crash.
Safety Front passenger seat WARNING Never secure a rear-facing child seat in the right front seat of a car equipped with a passenger airbag. Inflation of the airbag in the event of a crash could seriously injure or kill a child. The airbags are interconnected and have a common warning light. The passenger airbag module is housed in the fascia above the glove compartment and is marked ”SRS AIRBAG”.
Safety WARNING IB1182 • This car is equipped with side airbags and no extra interior trim should be fitted. Failure to observe this warning could result in the side airbags not inflating as intended and thus not providing the intended protection either. Side airbag inflated impact condition. The side airbag trigger will be commanded based on the characteristics of this pressure rise. • Never place any object in the area that would be occupied by the inflated airbag.
Safety AIR BAG warning light IB1707 WARNING Side airbag components 1 2 3 4 Side airbag Sensor Moisture barrier Text on seat • If the air bag readiness light stays on after you start your vehicle, it means the air bag system may not be working properly. • The air bags in your vehicle may not inflate in a crash, or they could even inflate without a crash.
Safety Frequently asked questions on function of airbags Do you still need to wear a safety belt if airbags are fitted? Yes, always! The airbag merely supplements the car’s normal safety system. Moreover, the airbag will only be actuated in a moderate to severe frontal, or near-frontal crash, which means, of course, that it provides no protection in minor frontal crashes, major rear-end or side-on crashes or if the car rolls over.
Safety Are the smoke and fumes given off when the airbag operates at all harmful? Most people who have remained in a car with little or no ventilation for several minutes complained only of minor irritation of the throat and eyes. Avoid as far as possible getting dust on your skin as there is a risk of skin irritation. If this trouble persists, you should consult a doctor.
Security 37 Security IB446 Doors................................... Central locking ................... Car alarm ............................
Security Central locking 1 WARNING Door handle Doors Door handles Pull the handle to open the door. If the door is stuck (e.g. if frozen), hold the handle from above to secure a better grip. Key / Remote control The key unit consists of a mechanical key with integrated remote control. The mechanical key is used for manual locking and unlocking. The remote control is used for remote locking and unlocking.
Security 39 Locking/unlocking the car The key contains delicate electronics. • Do not expose it to water. • Avoid rough handling. • Do not place the key where it may be subjected to high temperatures, e.g. on the instrument panel. • The key may malfunction if it becomes very cold. Warm it in your hands for a couple of minutes. Never open the key except to change the battery. For changing the battery, see page 40. To check the number of keys that are programmed for the car; see page 47.
Security If the car is left with the doors open, the interior lighting and the courtesy lights in the doors will be switched off automatically after 20 minutes, to prevent a flat battery. In such cases the electrically operated seats will not function. 1 2 Locking/unlocking by key IB451 IB1555 WARNING Switch for operation of central locking 1 To lock 2 To unlock Locking by key (1) When the car is locked and unlocked the theft alarm is also affected. Turn the key clockwise: all doors locked.
Security 41 Child safety lock on rear doors IB457 IB1871 Unlocking The trunk lid is unlocked using: Trunk lid switch Child safety locks Trunk lid lock, 9-5 Sedan The rear doors are equipped with child safety locks that are operated by means of a catch adjacent to the door lock. Insert a key and turn the catch 45° clockwise or counterclockwise as indicated by the label on the door. When the child safety catch is in the locked position, the door cannot be opened from the inside.
Security Tailgate, 9-5 Wagon Trunk Release Handle Trunk Release Handle There is a glow-in-the-dark trunk release handle located inside the trunk on the latch. This handle will glow following exposure to light. Pull the release handle down to open the trunk from the inside. NOTE The trunk release handle was not designed to be used to tie down the trunk lid or as a an anchor point when securing items in the trunk. Improper use of the trunk release could damage it.
Security Car alarm 1 WARNING The car alarm (anti-theft system) is activated/deactivated when the car is locked/unlocked by the remote control or by the key, see page 39. The antenna for the alarm system is located in the center console. All the doors plus trunk lid/tailgate and hood are monitored by microswitches, and window-glass sensors will trigger the alarm if any glass is broken. 3 2 IB1524 Leaving children or pets unattended in a locked car is dangerous.
Security Activating the car alarm Window glass sensor The car alarm cannot be activated if the driver’s door is open or if the ignition switch is in ON position. If, on the other hand, one of the other doors or the trunk or hood is open or opened and not closed again during the 10-seconds delay period, it will be excluded from the alarm function. If it is then closed, a new delay period of ten seconds will start, and the door (or trunk or hood) will once again be secured by the alarm system.
Security Alarm signals When the car alarm is armed, it will be triggered if any door, or the trunk lid or hood, is opened or if a window is broken. The alarm will also be triggered if an attempt is made to bypass or short-circuit the ignition switch, or to disconnect the battery. If the alarm is triggered, the following alarm signals will be set off: • Flashing of hazard warning lights for five minutes. • Siren wailing for 30 seconds.
Security Overview of functions Locking/ activation Hazard warning lights flash once and the horn chirps once. The LED will come on for 10 seconds. Unlocking/ deactivation Hazard warning lights flash twice and the horn chirps twice. The LED will come on for two seconds. Unlocking/ deactivation of trunk lid/tailgate alarm Hazard warning lights flash three times and the horn chirps three times. The LED will flash three times per second for 10 seconds.
Security 47 Overview of LED signals and SID messages Status LED signal Activation (during 10-second delay). Comes on for 10 seconds. Alarm activated (after delay). Flashes once every other second. Deactivation. Comes on for 2 seconds. Alarm not activated. Off. SID message Reason/action SERVICE THEFT ALARM Probably a fault in one of the sensors or the alarm siren. Have the car checked by an authorized Saab dealer. KEY NOT ACCEPTED Fault in key transmitter or in ignition-switch receiver.
Security This device complies with Part 15 of the FCC Rules. Operation is subject to the following two conditions: (1) this device may not cause harmful interference, and (2) must accept any interference received, including interference that may cause undesired operation. Changes or modifications not expressly approved by the manufacturer could void the user´s authority to operate the equipment. Canada only: This device complies with RSS-210 of Industry Canada.
Instruments and controls 49 Instruments and controls VOL PUSH ON ECON OFF PULL BAL 1 2 3 4 5 6 Indicator and warning lights ................................. Instruments ........................ Trip computer SID.............. Switches ............................. Automatic climate control (ACC) .................................
Instruments and controls 1 2 3 40 60 30 20 9 60 80 100 Tachometer Indicator and warning lights Speedometer Indicator and warning lights Pressure gauge 5 A number of indicator and warning lights will come on when the ignition is switched on prior to starting. Under normal conditions, these should go out a few seconds after the engine has started (see page 56).
Instruments and controls Warning, charging This light will come on together with if the battery is discharging. If it comes on while you are driving, stop the car as soon as possible and switch off the engine. Check the alternator drive belt (see page 201). If the belt has broken, the engine may overheat (cooling system will not function properly), the battery will not be charged, the A/C compressor will not run and power assistance for the steering will be lost.
Instruments and controls Anti-lock brake warning This light will come on if a fault has occurred in the ABS system. On certain variants and as well as can light up to indicate a fault in the electronic brake force distribution system (distribution of the brake pressure between the front and rear wheels). Conventional braking without the ABS function will still be available. For safety reasons, stop the car and check the level of the brake fluid (see page 197).
Instruments and controls CHECK message indicator This light indicates that there is a message in the SID. A chime will also sound (see page 63). Central warning light This light will come on and a chime will sound if a fault has been detected in any system that is critical to safety. Any of the following can activate the central warning light and alarm: • • • • • • Airbag system. Low oil pressure in engine. Parking brake is on (when car is moving). Brake fluid level low. Fault detected in ABS system.
Instruments and controls Xenon headlight fault indicator (certain variants only) Indicator, cruise control This light shows when the cruise-control system is active (see page 164). Indicator, high beam This light shows when the headlights are on high beam (see page 65). This light indicates that there is a fault in the xenon headlight system, which consists of xenon headlights and an automatic levelling system.
Instruments and controls Automatic transmission, fault indicator On a car with an automatic transmission, this warning symbol is illuminated if a fault has been detected in the transmission. Switch the ignition off and on again to check if the fault persists. Even if the fault persists, it is still possible in most cases to drive the car (see page 159). Have the automatic transmission checked by an authorized Saab dealer as soon as possible.
Tachometer Autochecking of lights, main instrument panel The above warning and indicator lights should come on when the ignition is switched on prior to starting. They should go out after about 3 seconds. The following lights light up until the engine is started, presuming that no fault exists: • Central warning light . • Oil pressure warning light • Warning, charging . IB340 Instruments 1 Cars with automatic transmission .
Instruments and controls 40 20 10 80 100 70 120 80 140 90 100 180 110 200 120 220 260 240 130 160 150 140 160 Speedometer (U.S. speedometer shown) The speedometer receives signals from the wheel sensors in the ABS system. If the NIGHT PANEL mode has been selected, the scale will be illuminated up to 87 mph (140 km/h). The remainder of the scale will be illuminated if the speed of the car exceeds 84 mph (135 km/h).
Instruments and controls NOTE Check fuse 15 (radiator fan) in the fuse panel under the hood, see page 220. If the needle repeatedly enters the red zone, stop the car as soon as it is safe to do so and check the coolant level by looking at the level visible through the plastic tank - do not remove the cap. If the coolant level falls below the MIN mark, the SID will display the message ”FILL COOLANT FLUID”.
Instruments and controls 59 Trip computer SID (Saab Information Display (SID) The SID displays CHECK messages and has eight trip-computer functions (Saab Car Computer, SCC) The SID is also used by the Audio System. IB1750 WARNING Selector lever indication (Automatic transmission) The position of the selector lever is indicated on the main instrument panel. It is strongly recommended that the SID settings be changed only when the car is stationary.
Instruments and controls Outdoor temperature (Frost warning) Regardless of which function has been selected, except Night Panel Mode, SID will automatically display the outdoor temperature when it is between 26° and 38°F (-3° and +3°C). This also applies if the temperature has moved outside the range of 21° to 43°F (-6° to +6°C) but is again between 26° and 38°F (-3° and +3°C).
Instruments and controls Turning the Alarm and Speed warning on or off Calculation of arrival time and average speed 1 Select the Alarm or Speed-warning function. 2 Press SET to turn on the function. Press CLEAR to turn off the function. When either function is on, ALARM/SPD W respectively will be visible on the display. An asterisk * will be visible on the far right of the display when either function is selected. The Alarm and Speed-warning settings will not be cancelled when the engine is switched off.
Instruments and controls To calculate the arrival time if a specified average speed is maintained 1 Select DIST using the button. 2 Set the distance to be covered. 3 Press to select SPD Ø. 4 Set the average speed you intend to drive. 5 Press SET to display the estimated arrival time. At the beginning of a journey, the SPD Ø and ARRIV functions will display current values. If values are set during the journey, the new values will be displayed after a delay of about 10 seconds.
Instruments and controls CHECK messages When the engine is started, CHECKING will appear on the display for about four seconds, while the SID checks are being performed. When a CHECK message is generated while the car is being driven, a chime will sound, INFO DISPL will illuminate on the main instrument panel, and the message will appear on the SID. The number of messages that can be displayed by the SID varies with the specification of the car.
Instruments and controls The following conditions will wake up the respective displays in the Night-Panel mode: • Setting of the Audio system, SID or ACC (display comes on for ten seconds). • CHECK message generated in the SID. • High engine revs cause the rev counter to be illuminated until the engine speed has fallen again. • If the quantity of fuel remaining falls below 4 gallons (15 liters), the fuel gauge will be illuminated.
Instruments and controls 65 Switches Daytime running lights Light switches Headlights Parking lights The parking lights can be switched on regardless of the position of the ignition switch. Do not use parking lights when driving. Note: The lighting switch must be in parking light or headlight position (low beam position only) to operate the fog lights (see page 68). IB1594 2 IB350 The parking lights and daytime running lights come on automatically when the ignition switch is ON.
Instruments and controls Courtesy Headlight Feature A delay function allows the headlights to remain on low beam for about 30 seconds after the driver’s door has been closed. To activate this function, In poor visibility, avoid following the tail lights of the vehicle in front. If the vehicle stops suddenly, you may be unable to avoid a crash and therefore risk injury to yourself and others.
Instruments and controls 67 Instrument illumination To switch on the turn signals/lane change indicators, move the stalk up or down. The stalk has fixed positions for indicating a right or left turn, and the indicators are cancelled automatically (stalk returns to off position). The stalk also has an intermediate, spring-loaded position that is useful for signalling when changing lanes or passing.
Instruments and controls Front fog lights The front fog lights can be activated in both dimmed headlight and parking light positions. Fog lights should only be used in poor visibility conditions. Make sure you are familiar with the applicable provincial/state law regarding the use of fog lights. Reversing lights The reversing lights come on automatically when reverse gear is engaged or selected with the ignition switched on.
Instruments and controls 1 1 69 2 2 1 IB357 IB358 3 1 Interior lighting on continuously 2 Lighting comes on when a door is opened 3 Lighting always off Interior lighting The interior lighting consists of one dome light in the front and one in the back, a map-reading light in the front, two reading lights in the back, floor courtesy lights in the front (in some model variants) and door courtesy lights on all doors. The courtesy lights come on automatically when the respective door is opened.
Instruments and controls Wipers and washers 1 There are three intermittent wiper positions. Moving the control stalk to the spring-loaded position between 0 and 2 will produce a single sweep of the wipers. The wipers are designed for optimal cleaning at all driving speeds. At higher speeds, it may be possible to detect a slight ”sweeping” sound. This may be due to the increased air pressure on the blades at higher speeds.
Instruments and controls sensitivity is selected, the wipers make one sweep of the windshield for reference. The rain sensor has a daylight and a night time mode. The sensor measures the amount of available light and automatically selects the appropriate mode. The sensor is more sensitive at night. The function of the rain sensor is impaired by dry snow. 1 2 The rear-window wiper and washer are operated with the same stalk switch as used for washing and wiping the windshield and headlights.
Instruments and controls Automatic climate control (ACC) ºF AUTO ºC 2 4 5 AUTO 1 6 3 ECON 7 ACC panel 1 2 3 4 5 ºF ºC ECON OFF Temperature setting: LH side AUTO: All settings selected automatically Manual setting of fan speed Manual setting of air distribution Rear-window heating: ON/OFF The incoming air is treated in three stages: first it passes through a filter; it is then dehumidified and cooled and, finally, if required, heated. The filter is a combined particle and charcoal filter.
Instruments and controls 73 The system has five sensors: 1 IB362 • Outdoor temperature sensor. • Interior temperature sensor. • Sun sensor (mounted on top of the fascia). • Two blended-air temperature sensors (mounted inside the front floor vents). Caution If anything is placed over the sun sensor, the ACC system will not function properly. Panel vent Panel vents IB368 2 1 Interior-temperature sensor 2 Sun sensor The panel vents swivel universally, so that air can be directed as desired.
Instruments and controls IB369 74 Air vent at rear side window Temperature control Settings when HI selected: The cabin is divided into two temperature zones: • Maximum heat. • Air distribution to windshield and floor. • Recirculation OFF (even if manually selected before). • Fan: high speed. • Settings shown on ACC display. Settings when LO selected: • The driver’s zone. • The passenger zone (front and rear seats). The desired temperature can be set between 58 and 82°F (15 and 27°C).
Instruments and controls 75 Temperature, air distribution, fan speed and recirculation will all be controlled automatically. In falling temperatures the A/C compressor is switched off at 32°F (0°C). In rising temperatures the A/C compressor is switched on at 41°F (+5°C). If at the start the outside air temperature is 32 - 41°F (0 – +5°C), the A/C compressor is switched off. • Pressing AUTO once will cancel all previous manual selections.
The rear-window and door-mirror heating is controlled manually. Switch off the heating as soon as the rear window is clear, to avoid imposing a heavy load on the battery longer than necessary. Note, however, that the heating will go off automatically after 2-10 minutes (depending on the outdoor temperature) or sooner if the voltage in the electrical system falls below 10 V.
Instruments and controls Press once: Defrosting of all windows will take place (air flow to rear side windows shut off) with: Defroster & floor vents ACC67 • • • • • Floor vents and rear side windows ACC68 The fan running at high speed. Air being distributed to the defroster vents. Normal temperature control will operate. Recirculation will be OFF. Heating of the rear window and door mirrors will be switched ON.
Instruments and controls Programming I ACC69 Manual selections can be programmed into the ACC system so that these will take effect when the car is started. Note that the ignition must be switched off for at least ten minutes after programming for the selections to be saved in the system’s memory. Panel (and center rear vent) Starting in cold weather To start with, the system will automatically select the defroster setting, maximum heat and low fan speed.
Instruments and controls Programming II It is also possible to customize the ACC system, e.g. to adapt to driving and weather conditions. Function Operation in AUTO mode after Programming II Standard operation in AUTO mode The A/C compressor will not activate unless the outdoor temperature is above 55°F (+13°C). –This function saves fuel by delaying the activation of the A/C compressor.
Instruments and controls To program a function or to cancel a programmed function, press and hold in the relevant button until the corresponding symbol has flashed four times on the display and a chime has sounded. Make sure the ignition is ON.
Instruments and controls Condensation When the A/C system is running, the intake air is dehumidified, and the resultant condensation is drained off through two outlets underneath the floor of the car, in the vicinity of the front doors. It is therefore perfectly normal for water to be seen dripping from these outlets when the car is parked. Greater amounts of condensation will result in warmer, more humid ambient air.
Instruments and controls Afterheater, V6-engine cars The afterheater enables a comfortable temperature to be maintained inside the car even after the engine has been switched off. The heater can be activated up to 10 minutes after the engine has stopped, although the coolant temperature must be at least 104°F (40°C) for the heater to operate. To start the heater: 1 The ignition should be OFF.
Saab 9-5 Audio System 83 Saab 9-5 Audio System IB1940 Quick guide to the Saab 9-5 Audio System ........... Sound controls................. Radio ................................. Cassette player ................ CD player .......................... CD changer....................... Programmable functions. Steering-wheel controls .. Security lock..................... Technical data .................. Fault codes .......................
Saab 9-5 Audio System To get the best out of your Saab 9-5 Audio System, we recommend that you read through this entire section. The Saab 9-5 Audio System is available in two versions: Premium on the 9-5 Linear and Prestige on the 9-5 Arc and 9-5 Aero (Prestige system is also available as an option in the U.S. on the 9-5 Linear model.) Both models have been specially matched to the Saab 9-5 cabin. The two models are comprised of a radio, CD player and cassette player.
Saab 9-5 Audio System Quick guide to the Saab 9-5 Audio System 1 2 3 4 5 6 85 Preset station buttons Press once: play the preset station. Press & hold briefly: store a new station. Radio (see page 88) PUSH ON BAS VOL TRE PULL BAL FAD ON To switch the system ON, press the volume button. The last settings used will be activated.
Saab 9-5 Audio System Cassette player. See page 90 Remove CD. Press once: Selects cassette player when other source active. When tape playing: Dolby B/C ON/OFF. CD changer (accessory/option). See page 95 Switch to playback other side of tape. Press once: Change to CD changer when CD player is active. Press twice: Change to CD changer when radio or cassette player is active. Press & hold briefly (a chime will sound): Random playback of entire magazine. CD RDM Eject.
Saab 9-5 Audio System 87 Sound controls ON/OFF The Audio System will come on: • When the volume control is pressed. • When the ignition key is removed. • One hour after the ignition was switched OFF, if the ignition key has not been removed. • When one hour has elapsed since a control button on the Audio System was last pressed after the ignition key was removed. VOL - Volume BAL - Balance Pull out and rotate the VOL control to adjust the balance between the left and right speakers.
Saab 9-5 Audio System Radio Press the RADIO button to switch to the radio when another source is active. Preset station buttons (1) The small figure on the far right of the display is the number of the preset button selected. Presetting a station Press and hold in the desired button (for more than a second) to store the currently tuned station. During this time, the radio will be mute. The sound will return as soon as the station has been stored.
Saab 9-5 Audio System Press and hold in the AS/SEARCH button for more than a second to initiate a search for the six strongest stations. Each time the system finds and stores a station, the number on the far right of the display will change. If the system cannot find six stations with good reception, the remaining preset buttons will be empty. If one of these empty buttons is pressed, U**** (FM) or AM**** will appear on the display.
Saab 9-5 Audio System Cassette player Before playing a tape, make sure that the label is secure and that the cassette is not warped, otherwise the cassette can become jammed in the deck. The cassette player automatically senses whether the tape is normal or metal (Type I or Type II). 5 TAPE (1) 2 Turn on the cassette player by pressing or by inserting a cassette in the deck, with the exposed tape to the right. Playback will start with the side that is facing up (indicated by A on the display).
Saab 9-5 Audio System 91 Music search forward/reverse (5) Fast forward/rewind Auto music search (Blank skip) To search forward for a track, press and release quickly (within half a second). The following will now appear on the display: Press and hold to start fastforward to the end of the tape. The following will now appear on the display: To switch the Blank-skip function ON/OFF, press and hold (mid-segment).
Saab 9-5 Audio System Type II (metal) tapes Tape care The cassette has an automatic tape-type selector. Do not expose cassette tapes to direct sunlight or to extremes of temperature as this can damage the cassette and the tape. Always keep cassettes in their boxes when not in use. If a cassette should become jammed in the deck, contact an authorized Saab dealer.
Saab 9-5 Audio System CD player 93 3 NOTE To select the CD mode, load a CD into the deck or, if one is already loaded, press the CD/RDM button. Insert the CD, label-side up, and allow the mechanism to load it automatically. Playback of the first track will start and the following message will appear on the display: A tiny, amber-colored LED indicator to the left of the disc tray is illuminated when a disc is loaded.
Saab 9-5 Audio System Fast track search Random playback (RDM) (2) Press (mid-segment) once to switch between the CD-PLAY and CD-TRACK modes. Press and hold the CD/RDM button to select/deselect random playback of the current disc. When this function is selected, RDM will appear at the bottom of the display. Press once to move from the current track to the next during random playback. Press once to repeat the current track during random playback. Pressing and holding or will start Rapid play.
Saab 9-5 Audio System 2 95 3 CD changer in luggage compartment, Saab 9-5 Sedan CD changer (accessory) NOTE Do not use writeable CDs in your Audio System. In certain cases, this type of CD is only suitable for home use and can therefore cause operational problems. Important! Always keep the sliding cover closed to keep dust out of the CD changer, so that it will continue to provide satisfactory service for a long time.
Saab 9-5 Audio System If the magazine in the CD changer is empty, the following will appear on the display: 1 2 The CD number will change as each CD is played. After a magazine has been loaded, playback will start with the first track on the first CD when the CD changer is selected, and the following will appear on the display: 3 Selecting CDs (1) When the CD changer is operating, the radio preset buttons work for the six CDs in the magazine. Press the button for the corresponding CD.
Saab 9-5 Audio System 97 If for some reason the CD selected by the preset button cannot be played, playback of the current CD will continue. Track search (2) 1 Press or repeatedly to move to preceding or following tracks. Pressing once will restart playback from the beginning of the current track. Thus, to play the preceding track, press twice. 2 Rapid play 3 If the button is depressed for more than 5 seconds, the rapid play will be even faster. Rapid play stops when the button is released.
Saab 9-5 Audio System SCAN Scanning the current CD: To start the SCAN function, which enables you to hear a sample of each track on the disc, press and hold (mid-segment). The display shows that SCAN is in progress and which track is currently being sampled. For instance, if you started SCAN while playing track one, the following display will appear: The sample playback starts 30 seconds after the start of the track and lasts for 8 seconds.
Saab 9-5 Audio System Programmable functions WARNING These functions should only be carried out when the car is stationary. Adjusting the volume The default setting for START VOL is volume setting 9, and that for TEL VOL is volume setting 14 (the highest volume setting is 30). • Maximum START VOL Volume-preset mode To select the volume-preset mode, press and hold the BAND button at the same time as you switch the Audio System on. Use the button to select the desired function.
Saab 9-5 Audio System Steering-wheel controls Security lock To facilitate use of the Audio System and to promote safer driving, most of the functions can be operated using the integral remote controls on the steering wheel. The Audio System is equipped with an electronic security lock. The special code is unique to the car in which the Audio System is fitted. Each time the Audio System is switched on, a check is made to ensure that the codes match.
Saab 9-5 Audio System Technical data Tone controls Bass ______________________ ±10 dB at 100 Hz Treble _____________________ ±10 dB at 10,000 Hz Power output Premium __________________ 150 W 110 W at 1% THD (total harmonic distortion) and 13.5 V Prestige __________________ 200 W 150 W at 1% THD (total harmonic distortion) and 13.
IB389 Antennas Multipath propagation The Audio System has three antennas incorporated in the rear window; two for FM diversity and one for AM. Multipath propagation occurs when radio waves from an FM transmitter are reflected by, e.g. large buildings, causing them to arrive slightly later than the direct waves. This can create interference to radio reception. To avoid this problem as much as possible the system is equipped with two FM antennas, so called FM diversity.
Saab 9-5 Audio System Adjusting the frequency steps North America/Europe If the car is taken from North America to Europe, the radio’s frequency steps can be adjusted. • Press and hold (mid-segment) and switch the radio on at the same time. The preset stations will be cancelled and replaced by default frequencies. 103 Fault codes WARNING NOTE Great care should be exercised in trying to rectify a fault. If you are at all unsure, contact an authorized Saab dealer.
Saab 9-5 Audio System (This page has been left blank)
OnStar - Telematics 105 OnStar - Telematics Using OnStar................... 106 OnStar is Easy............................ OnStar Services Button.............. Emergency button ...................... White dot button ......................... System status light ..................... 106 106 107 107 107 The OnStar Center.......... 108 Connecting to the OnStar center Your personal identification number (PIN) ........................................... 108 108 The OnStar Safety and Security Plan...
OnStar - Telematics Your new vehicle comes equipped with advanced telematics hardware and one full year of Onstar Premium Service. Saab telematics is a sophisticated in-vehicle system allowing convergence of wireless communications, GPS (Global Positioning System) satellites and advanced vehicle electronics. You must activate immediately to ensure you receive your full year of service, as your prepaid subscription begins at the time of delivery.
OnStar - Telematics Emergency button In an emergency, press this button to connect with an OnStar advisor. Your call will be given the highest priority, and you will hear a tone followed by the words ”Connecting to OnStar Emergency.” An advisor will locate your Saab, find out what kind of assistance you require, and contact the nearest emergency services provider who can dispatch ambulance, fire, police or other emergency services. Please use this button only for true emergencies.
OnStar - Telematics The OnStar Center Your personal identification number (PIN) Connecting to the OnStar center When you signed up with OnStar, you were asked to provide a Personal Identification Number (PIN). You’ll need your PIN to access many of OnStar’s services. If, for example, your vehicle has been stolen, an OnStar advisor will ask for your PIN in order to provide assistance. Changing your PIN is easy.
OnStar - Telematics Roadside assistance** OnStar Med-Net*** There’s nothing worse than being stranded on the road with car trouble. No matter what the problem is (flat tire, out of gas, or engine trouble), just call OnStar. They will contact the help you need to get you quickly back on the road. OnStar MED-NET securely stores your personal medical information (e.g., physician’s name, emergency contacts, medications, chronic conditions) and, in an emergency, can quickly send it to a medical facility.
OnStar - Telematics Concierge services From the simple to the extraordinary, OnStar Concierge is always ready to help. Whether it’s tickets to that ”hard-to-get” play, or even complete planning of your next vacation, OnStar Concierge can make all the arrangements you need — at home or on the road. There is no additional cost to you for the efforts of the OnStar Concierge.
OnStar - Telematics Voice Commands Universal Commands Personal Calling is made available through your voice commands to the system. This allows you to verbally control all of the phone functions. Your OnStar wireless phone system has been programmed to respond to a wide variety of voices and accents. You should speak distinctly in a normal speaking volume. It is not necessary to exaggerate your voice or to speak loudly.
OnStar - Telematics Storing/Deleting Numbers in Memory Deleting a Number from Memory Units Remaining To delete a nametag: OnStar keeps track of the amount of calling time you have purchased and used in units. The number of total remaining units is stored within the OnStar system, and can be accessed easily. (Nametags) Storing a number Your OnStar system can store up to 20 numbers (up to 32 digits each) in memory that can be dialed by simply repeating the ”nametag.
OnStar - Telematics Contact OnStar 1 Press the OnStar White Dot button 2 Say ”Units” 3 Say ”Add” OnStar will respond ”Ready” OnStar will respond ”Verify or Add” You will be connected to OnStar for replenishment You will need your OnStar Personal Identification Number (PIN) to authorize the charge to your credit card on file. If you are not in your Saab, you may call an OnStar Advisor at 1-888-4-ONSTAR (1-888-466-7827) to request unit replenishment.
OnStar - Telematics Virtual Advisor Once you have activated Personal Calling, you can enjoy your time in your Saab even more with the OnStar Virtual Advisor. This service allows you to listen to your favorite news and information topics, such as weather reports, stock quotes and sports scores. You can even listen to your e-mail, whenever you want, without ever taking your eyes off the road. Using simple voice commands, you can browse your personal topics and skip or listen to those you choose.
OnStar - Telematics News Headlines The OnStar Virtual Advisor will provide current headlines for many different categories, including: • • • • • • International News Headlines National News Headlines Technology Headlines Business Headlines Sports Headlines Entertainment Headlines E-mail Reader The OnStar Virtual Advisor allows you to listen, and soon respond, to your e-mails any time you want. E-mail availability is based on the address(es) you provide to OnStar.
OnStar - Telematics OnStar Operation: OnStar uses existing emergency service providers and cellular and satellite technologies. OnStar requires cellular service to be available and operating for features to function properly. Personal Calling: Existing OnStar service agreement required. Additional usage charges apply for Personal Calling. Interim 2001 model year availability in select markets. For system limitations and details, call 1-800-ONSTAR-7 or visit www.onstar.com.
Interior equipment and trunk 117 IB394 Interior equipment and trunk Seats ................................ Steering wheel adjustment ..................... Rearview mirrors............. Electric windows............. Sunroof ............................ Sun visors........................ Ashtrays (accessory)...... Glove compartment ........ Cup holders ..................... Trunk ................................ Spare wheel and tools .... Fuel filler flap...................
Interior equipment and trunk Seats The following seat adjustments can be made to achieve a comfortable driving position: WARNING The seats are actuated by powerful motors. Ensure that nothing can be trapped when adjusting the seat. Bear in mind that children can be injured if they play with the electrically-operated seats Both front seats are electrically operated. On certain models the driver´s seat is equipped with a memory function.
IB403 IB402 119 IB1161 Interior equipment and trunk Legroom adjustment Backrest rake angle Lumbar support To adjust the legroom, push the lower control forward or back. To adjust the backrest, move the upper control forward or back. Turn the smaller wheel for stepless adjustment of the lumbar support. WARNING The backrest should be upright during driving, so that the safety belt, airbag and backrest can provide optimum protection in the event of emergency braking or a crash.
Interior equipment and trunk Programmable driver’s seat (certain models only) In certain models the driver´s seat is equipped with a programmable memory function. This function also includes the door mirrors. Adjust the seat and door mirrors. To save the settings, press and hold the M button and, at the same time, press one of the preselect buttons (1, 2 or 3). The SID will chime to confirm that the settings have been saved.
Ventilated front seats (standard on 9-5 V6 Arc model) Ventilated front seats, that enhance seating comfort in hot weather, are available only on 9-5 V6 Arc models. Ventilated seats are equipped with two fans that extract the moist air from between the seat and the body. The fans have three speeds and are OFF when the switch is set to 0. Electric heating, front seats (option) Both front seats have adjustable and thermostat-controlled heating of the seat cushion and backrest, available as an option.
Interior equipment and trunk Steering wheel adjustment IB1563 Fore-and-aft and tilt adjustment of the steering wheel is possible. Pull down the lever fully until you hear a click. Move the steering wheel to the desired position and then raise the lever. The lever should lock with a click. Make sure that the lever is fully locked before driving off. WARNING Horn Never adjust the steering wheel unless the car is stationary.
Interior equipment and trunk 123 2 Rearview mirror Adjusting the door mirrors 1 Day position 2 Night position 1 Select mirror 2 Use touch pad to adjust mirror Rearview mirrors The rear-view mirror has day/night positions that can be selected by means of a knob beneath the mirror. Adjust the mirror in day position. Door mirrors The passenger side door mirror is of the wide-angle ‘‘aspheric” type. The adjusting switch is on the driver’s door.
Interior equipment and trunk IB568 Rearview mirror with auto dimming function Button for angling passenger’s mirror down on reversing Cars equipped with a programmable driver’s seat also have the ability to angle the passenger’s mirror down when reversing, e.g. for a better view of the curb. After selecting reverse, press the tiny button adjacent to the doormirror switch to tilt the mirror. The mirror will be reset automatically when reverse gear is deselected.
Interior equipment and trunk 125 Electric windows • Bear in mind the pinch hazard when the side windows are being raised. Make sure that all passengers keep their heads, hands and fingers clear of the window openings before raising the windows. Serious personal injury may otherwise be caused. • Always remove the ignition key when leaving the car to avert the danger of injury arising from unattended children operating the windows.
Interior equipment and trunk IB445 Child safety: rear windows (ON/OFF) Switch for rear side window The window switches on the rear doors can be rendered inoperative by the ON/OFF switch in the panel on the center console. When the switch is ON, the rear side windows can be operated by the switch on each rear door. The switch’s back lighting will be activated. When the switch is OFF, the rear side windows can only be operated from the panel on the center console.
Interior equipment and trunk IB431 2 3 IB430 1 127 Sunroof control Manual operation of sunroof 1 To open 2 To close 3 Ventilation position To open: • Slide the control towards the rear to open the sunroof to the comfort position. To open it fully, slide the control back a second time. Press the control to stop it earlier. To close: • Slide the control forwards until the sunroof is closed. Ventilation position • Press the middle of the control (when sunroof closed).
Interior equipment and trunk Sun visor with vanity mirror Front ashtray IB434 2 IB1285 IB1180 1 Rear ashtray 1 Press soft to open/close 2 Pull out one side at an angle Sun visors The car is equipped with double sun visors. One section of the visor can be independently pivoted to the side window. A vanity mirror is provided on the back of the sun visors. The vanity mirrors are illuminated when the cover is raised.
Interior equipment and trunk WARNING The maximum combined load for the two cigarette lighter sockets is 240 W (20 A). 1 WARNING Keep the glove compartment closed when not in use. The lid could cause injury in the event of a crash. The glove compartment can be cooled by the air conditioning (ACC) system. Cold air can be directed to the glove compartment for keeping drinks cool, etc. Slide the cover towards you to admit cold air. Additional storage facilities are provided (see next page).
On the back of the front seats Console between front seats At bottom of door pillars adjacent to front-seat backrests Center armrest for rear seat IB440 On leading edge of front seats IB439 In the doors IB441 IB437 IB438 Interior equipment and trunk IB436 130
Interior equipment and trunk 131 WARNING 1 • The cup holder should not be used to hold cups made of china, glass or hard plastic as these can cause injury in the event of a crash. 2 Cup holder in fascia 1 Press symbol to open 2 Lift bottom to close • Avoid spillage, particularly of hot drinks. • Avoid putting oversized cups in the cup holder. IB444 IB1153 • Use only for paper cups or aluminium cans. Cup holder in rear armrest Press the edge to open/close.
Interior equipment and trunk Trunk Folding the rear seat, 9-5 Sedan The rear seat is split and the two sections can be folded independently. Folding down of the rear seat is easier if the front seats are not all the way back, and the rear head restraints are folded down. 1 Raise the rear seat cushions by pulling the loop located between the cushion and the backrest. A small pad will open up first. Continue pulling the loop until the entire rear seat cushion is raised. 2 Tip the seat cushion forward.
Interior equipment and trunk 133 • Place heavy items closest to the backrest and stow smaller and lighter items on top. • Secure heavy and bulky items using the four tie down points provided in the trunk. This will avert the danger of luggage flying around if the car should brake suddenly or be involved in a crash (see page 134). • When the backrest is folded down or the trunk pass-through hatch is open, even small items can be thrown around inside the car.
Interior equipment and trunk Trunk pass-through hatch 1 Fold down the armrest. 2 Raise the hatch by lifting the handle. Before loading or unloading long items, switch off the engine and apply the handbrake. This averts the danger of the car moving off suddenly if a long item were to knock the gear or selector lever into gear. IB463 A trunk pass-through hatch is incorporated in the rear seat backrest to enable long, narrow items to be carried inside the car. Items should not weigh more than 33 lbs.
Interior equipment and trunk 135 IB1868 IB1212 Safety belt located in its belt clip Folding the rear seat, 9-5 Wagon Both the narrow and wide sections of the rear seat can be folded separately. Folding is facilitated if the front seats are not located too far back. The wide section cannot be folded separately if a cargo net is mounted on the rear of the backrest. 1 Make sure that the head restraint is in the down position. For height adjustment refer to page 18.
Interior equipment and trunk WARNING • Do not travel in the back seat without ensuring that the head restraint is set at a suitable height. • Never allow anyone to sit on a folded backrest. • Check that the safety belt lock is not trapped under the seat cushions when these are raised back up. • If the car is equipped with a pull-out cargo net on the rear of the backrest, take extra care when folding the rear seat so that no one is injured by the net’s storage cassette on the right-hand side.
Interior equipment and trunk Load anchoring WARNING • Put heavy loads as low down and as far forward as possible in the luggage compartment, i.e. against the back of the rear seat. • Never stack cargo so high that any part of the cargo lies above the edge of the backrest, if a cargo guard (accessory) is not being used. • Always tie down the cargo so that it cannot be thrown forward during heavy braking or in the event of a crash.
Interior equipment and trunk Cargo bolts mounted on the longitudinal rails On the floor of the luggage compartment there are two longitudinal aluminium rails (CargoTracks™) where special cargo bolts can be mounted. The protective strip on the CargoTracks™ is removed by lifting its back edge and pulling it straight upwards. Replace the strip by pressing it down on the CargoTracks™. When the cargo bolts are not being used the protective strip should be in place.
Interior equipment and trunk 139 WARNING Cover over the fixing point for the cargo net Cargo net (accessory) The pull-out cargo net’s storage cassette is mounted on the rear of the backrest. 1 Remove the covers near the two rear fixing points in the roof. Carefully bend in the lower edge of the cover with a screwdriver. 2 Pull the cargo net out directly backwards. 3 Snap the net’s two fasteners into the two fixing points on the roof.
Interior equipment and trunk Sliding floor (accessory) WARNING To avoid personal injury take note of the following: • Do not leave children unsupervised when the sliding floor is drawn out. • Never drive the car with the sliding floor pulled out. • Always use the car’s regular cargo anchoring when transporting a cargo. • Provide protection on sharp edges to prevent damage to the anchoring straps. • The sliding floor must not be changed or modified in any way.
Loading Loading/Unloading 1 Lift the handle and pull out the sliding floor to the outer locking position. Make sure that the floor is locked correctly. 2 Put on the cargo, but make sure that it does not cover the handle. 3 Lift the handle and push in the floor to the inner locking position. Make sure that the floor is locked correctly. 4 Tie down the load with Saab’s load straps according to the instructions, see page 137. Folding down the sliding floor When the floor is not in use 1 Lift up the floor.
Interior equipment and trunk Stowage of spare wheel and tools under trunk floor Spare wheel and tools The spare wheel, together with the jack and jack handle, front towrope attachment eye and toolkit, are stowed away underneath the trunk. There is also room for a spare bulb wallet (accessory). IB1554 IB1753 142 Jack location, between spare wheel and sill WARNING Stow all tools carefully away after use, so that they cannot get loose and cause injury in the event of a crash.
IB467 IB466 Button for releasing filler flap Fuel filler flap The fuel filler flap is opened by means of a button on the driver’s door. The flap is spring-loaded, so it opens slightly automatically when released. Refueling, see page 152. To open fuel filler flap in an emergency 9-5 Sedan Opening the fuel filler flap in an emergency If the fuel filler flap fails to open after the button on the driver’s door has been pressed, it can be opened manually from inside the trunk.
Interior equipment and trunk (This page has been left blank)
Starting and driving 145 B1754 Starting and driving Ignition switch ................. Starting the engine .......... Important considerations for driving ....................... Refueling .......................... Engine Break-In Period ... Gear changing ................. Cruise control .................. Braking ............................. Traction Control System. Electronic Stability Program (ESP) ............... 146 147 149 152 155 156 164 165 167 168 Economical motoring .....
Starting and driving LOCK position ST LOC K OFF O N OFF position OFF O N Gear lever no longer locked. Certain electrical circuits operational IB1120 ST LOC K Engage reverse and turn the key to LOCK. Automatic transmission: select ”P”. The gear lever is locked. This is the only position in which the key can be removed. The parking lights, hazard warning lights and interior lighting all work. LOC K ST OFF All electrical circuits working.
Starting and driving If the car does not start NOTE Take care not to spill drinks or to drop crumbs over the ignition switch. If dirt or liquid gets into it, the switch may not operate properly. WARNING • Always remove the key before leaving the car. • Always apply the parking brake before removing the ignition key. If the text ”KEY NOT ACCEPTED” is shown on the SID, after a failed start attempt, the cause could be a fault in the transmitter in the key, or in the receiver in the ignition lock.
Starting and driving • The tail pipe of the exhaust system can become very hot during driving. Bear this in mind when loading and unloading the car. • Do not rest or sleep in the car when parked with the engine running. There is a risk of depressing the accelerator which could lead to engine damage. It is possible for air to enter the lubricating system in conjunction with an oil or oil-filter change, or if the car has been stored for some time.
Starting and driving Limp-home mode The car’s engine-management system includes a diagnostic function that checks numerous internal functions after the engine has been shut off. If a fault is detected in the throttle system, the engine-management system puts the throttle system into the limp-home mode. This limits idling control, disables the cruise-control system and limits the capacity of the A/C compressor.
Starting and driving AON 93. One of the advantages of the system is that it enables the engine to be run safely on lower-grade fuel, although not lower than AON 87. • The maximum boost pressure is adjusted automatically to the knocking or pinging tendency of the engine. Occasional, short-lived knocking when the engine is under a heavy load is perfectly normal; the extent will depend on the grade of fuel in the tank. • Isolated instances of knocking are more likely to occur with low-octane fuel.
Starting and driving 3 2 IB1289 3 Oxygen-sensor-controlled injection system 1 Engine control module 2 Oxygen sensor (lambda probe) 3 Catalytic converters battery. However, as soon as you have started the engine, it is important that it runs on all cylinders. If it is misfiring, allow it to idle for up to five minutes to give it time to settle and run smoothly. If, after this time, the engine still fails to run properly, turn off the engine and get in touch with an authorized Saab dealer for advice.
Starting and driving IB1755 Only fuel from well-known oil companies should be used. All Saab gasoline engines can be driven on fuel of grade AON 87-93. For optimum performance we recommend: Refueling WARNING • Never use fuel for any purpose other than as engine fuel. • Fuel is highly flammable and can cause severe burns. Never use an open flame in the vicinity of gasoline and do not smoke when refuelling. • Do not use the phone when refueling . Gasoline fuels are highly explosive.
Starting and driving Recommended fuel: NOTE • Fill to maximum filling capacity • Stop filling after the first time that the nozzle trips to shut off the flow of fuel • Filling capacity can differ between different fuel stations and outside temperature. Fuel tank volume when nozzle trips to shut off, may vary by 0.5 gal. (2 liters). • Do not fill fuel all the way up the filler pipe. The gasoline must be allowed room for expansion especially during hot weather.
Starting and driving Fuel (Gasoline Engine) NOTE NOTE Higher concentrations of methanol than listed above, or the use of methanolblended gasoline without suitable co-solvents and corrosion inhibitors, can damage your car’s fuel system, leading to the need for repairs which are not covered by Saab’s product warranty. The engine control module (ECM) monitoring the engine parameters also stores fault codes.
Starting and driving Canada Only Be sure the posted octane is at least 87. If the octane is less than 87, you may get a heavy knocking noise when you drive. If it’s bad enough, it can damage your engine. If you’re using fuel rated at 87 octane or higher and you hear heavy knocking, your engine needs service. But don’t worry if you hear a little pinging noise when you’re accelerating or driving up a hill. That’s normal, and you don’t have to buy a higher octane fuel to get rid of pinging.
Starting and driving Gear changing To start the engine the clutch pedal must be fully depressed. The gear positions are marked on the gear lever. Before reverse (R) can be engaged, you must lift the ring underneath the gear-lever knob. To change gear, fully depress the clutch pedal and then release it smoothly. It is inadvisable to drive with your hand resting on the gear lever, as this can increase the wear on the transmission.
Starting and driving 157 Automatic transmission • Never park the car with the selector lever in a drive position, even if the parking brake is on. • Always select "P" position and apply the parking brake when leaving the vehicle unattended. Selector lever The electronic control module for the automatic transmission receives information on engine torque and road speed, and also controls the hydraulic pressure in the transmission to ensure that gear changing is as smooth as possible.
Starting and driving IB1757 4 P R N D 4 3 L L 158 Detent positions for selector movement The detent button on the selector lever has to be pressed before the selector can be moved between certain positions. Three modes for the automatic transmission can be selected: Normal, Sport and Winter. The Normal mode, which provides the best fuel economy, is the default setting when the engine is started.
Starting and driving 159 Shift Lock override Automatic transmission, fault indicator IB1758 NOTE Park Brake Shift lock The transmission has a security function known as Park Brake Shift Lock. To move the gear selector out of the P position, the brake pedal must be depressed at the same time as the gear selector catch (detente) is pressed in. Due to electrical problems it may not be possible to move the selector out of the park position, even if the ignition is ON.
Starting and driving Overheated transmission fluid NOTE If the control module has actuated the Limp-home function for the automatic transmission, the car will remain in 5th gear when D is selected, making it very sluggish. To overcome this, move the selector lever to position L. If the automatic-transmission fluid should overheat, the following message will appear on the SID: ”TRANSMISSION OVERHEATING”. If this happens, stop the car and wait for the message to be extinguished.
Starting and driving Selector positions P To shift out of the P position you must depress the brake pedal and the ignition must be ON. The parking position (P) must only be selected when the car is at a complete standstill. The selector lever is locked and the transmission is mechanically immobilized. Always apply the parking brake after parking the car. The engine can be started. The key can be removed. R The reverse (R) position must only be selected when the car is at a complete standstill.
Starting and driving L Select position L if you wish to drive in 1st or 2nd gear. This provides maximum engine braking. The transmission shifts down from 2nd to 1st if the speed of the car drops below 20 mph (35 km/h). If the gear selector lever is moved from position D to L, a change-down to 4th gear will occur at about 110 mph (180 km/h). It will then change-down to 3rd gear at 80 mph (130 km/h), to 2nd gear at 45 mph (75 km/h) and 1st at 20 mph (35 km/h).
Starting and driving SPORT and WINTER modes To select Sport mode, press the ”S” button on the selector lever when the selector lever is in position N, D, 4, 3 or L. In this mode, gear changes will take place at higher engine speeds than in Normal mode, in other words, the transmission will change up later and change down earlier for the same throttle (accelerator) position. The Sport mode will be deselected if: • • • • The S button is pressed. The selector lever is moved to position P or R.
Starting and driving Cruise control memory. (The memory is deleted when the engine is switched off.) To re-engage the system WARNING To revert to the preset speed, slide the switch to RESUME/–. This will only operate when the car’s speed is above 25 mph (40 km/h). • Do not use the Cruise control system on wet or icy roads, in dense traffic or on winding roads.
Starting and driving Braking To avoid the brakes becoming overheated, (e.g. when negotiating long descents with a drop of several hundred feet), select a low gear to use the braking effect of the engine. If the car has automatic transmission, move the selector lever to position 1 or 2. When driving fast, you can help to prolong the life of the brakes by thinking ahead and braking harder for short periods, rather than braking more moderately over long stretches.
Starting and driving Braking with ABS brakes. When the system is operating, the brake pedal will pulsate gently and the system will make a ticking noise. Do not release the brake pedal before the car has come to a halt or the danger is past! That is critical. If the road is slippery, the ABS system will operate even when only light pressure is applied to the pedal. This means that you can brake gently to test the condition of the road and adapt your driving accordingly.
Starting and driving Traction Control System How the system works The traction control system (TCS) is designed to prevent wheelspin. This enables the car to achieve the best possible grip and, hence, maximum tractive effort, together with greater stability. The TCS system uses information from the ABS system’s wheel sensors to detect when the front (driving) wheels are rotating faster then the rear wheels. It then monitors whether one driving wheel is rotating faster than the other.
Starting and driving Electronic Stability Program (ESP) (option/certain models only) Turning the TCS off The TCS is switched on automatically when the engine is started. The system can be switched off manually by the TCS button, whereupon on the main instrument panel will come on. The TCS system cannot be switched off if the car is travelling faster than 35 mph (60 km/h). It may be necessary to switch off the system if the car has become bogged down, for instance. Press TCS to switch it on again.
Starting and driving ESP indicator light The indicator light in the rev counter comes on for a short period of time when the ESP system is operative. Operation of the ESP indicates reduced cohesion between the tires and the road, and that extra care should be taken by the driver. Turning ESP off the ESP button, whereupon the light on the main instrument panel will come on. The ESP system cannot be switched off if the car is travelling faster than 35 mph (60 km/h).
Starting and driving Economical motoring a major impact on fuel consumption after the engine has started from cold. Thus, if the car is mainly used for short journeys of 3–5 miles (5–8 km), the fuel consumption will be 60–80 % higher than normal. Factors affecting fuel consumption Fuel consumption is greatly affected by the general driving conditions, the way in which the car is driven and at what speeds, the weather, the state of the road, the condition of the car, etc.
Starting and driving • Driving in a low gear results in higher fuel consumption than in a high gear because of the higher engine speed for a given road speed. Always change up to a higher gear as soon as traffic conditions allow and use the highest gear as much as possible. • Check the air pressure in the tires once a month. Incorrect pressures increase tire wear. It is better to have slightly higher pressure than lower. • Check fuel consumption regularly.
Starting and driving • Check the anti-freeze in the engine coolant, see page 196. The car´s trip computer will warn you when there is a risk of slippery conditions. For further information on this function, see page 60. The car is equipped with tires designed to provide optimum grip on both wet and dry roads, although this has been achieved at the expense of somewhat reduced grip on snow and ice. For regular driving on snow and ice, we therefore recommend that winter (snow) tires be fitted.
Starting and driving Driving in hot weather • Always check the coolant level before starting a journey. The level should be just below the MAX mark. • At the end of a journey, if the engine has worked hard, allow it to idle for two or three minutes before switching it off. If the needle on the temperature gauge enters the red zone: 1 Bring the car to a standstill but leave the engine running. Do not remove the cap on the expansion tank even if the tank is empty.
Starting and driving Trailer weight Maximum recommended trailer weights for different gradients, with a view to comfort and drivability for manual and automatic cars, are shown on the drawing. Make sure you are familiar with the law regarding speed limits for towing, maximum trailer weights, trailer-braking requirements, and also any special driving-licence provisions (see also page 249).
Starting and driving • the A/C-compressor can be shut off • the gear-change pattern is changed • the CHECK message TRANSMISSION OVERHEATING can appear on the SID If TRANSMISSION OVERHEATING appears on the SID, stop the car as soon as it is safe to do so and wait until the warning has been extinguished. When continuing your journey, select a locked gear (1, 2 or 3) that will allow you to drive at an engine speed of about 3,000 rpm (see page 161).
Starting and driving Driving with a roof rack load The maximum permissible roof load is 220 lbs. (100 kg). Note that the roof load is included in the car’s maximum permissible load (see page 248). Strong, sturdy roof carriers designed specially for the car are available from your Saab dealer. Always secure the roof load safely. Fitting the roof carriers (accessory) 9-5 Sedan The carrier feet are marked with a top view of the car and arrow indicating their positions.
Starting and driving 177 IB1295 1 Clean the car’s roof rails. 2 Check the markings on the cross members to see which is the front and which is the rear roof carrier. 3 Place the cross members on the roof rails, on their respective sides of the center supports. The cross members must not be placed beyond the front or rear joint on the rail. Ensure that the distance between the cross members is at least 28 inches (700 mm).
Starting and driving Driving with a load The driving characteristics of the car are affected by the way it is loaded. • Place heavy loads as far forward and as low as possible in the trunk. • Secure the load to the tie downs, see page 134. • The load should be such that the car´s total weight or axle weight are not exceeded, see page 248. • Heavy loads mean that the car’s center of gravity is further back. As a result, the car will sway more during evasive steering.
Starting and driving Driving considerations with compact spare wheel/tire fitted Driving with the trunk lid/tailgate open Avoid driving with the trunk lid/tailgate partly or fully open, since exhaust fumes can be drawn into the cabin. If you must drive with the trunk lid/tailgate open, all windows and the sunroof (if fitted) must be closed and the cabin fan on at its highest speed setting.
Starting and driving Towing the car NOTE • Do not drive the car with the front towing eye in position. If it catches the curb, for example, the engine subframe could be damaged. • Refit the plastic plug in the hole when the towing eye has been removed, to keep dirt and moisture out of the threads. WARNING • Nor does the steering servo operate when the engine is off. The steering will therefore be much heavier than usual.
Starting and driving Considerations when towing the car with automatic transmission IB483 Selector lever at N (neutral) and parking lights on. Drive carefully and do not exceed the speed limit for vehicles being towed. Always try to keep the towrope taut by gently applying the brake, as necessary. This will avoid the towrope being jerked violently. Rear towing eye Rear towing eye The car has a permanently mounted towing eye at the back.
Starting and driving Jump starting and bad grounding could damage electrical systems. If your battery has run down, you may want to use another vehicle and some jumper cables to start your Saab. Follow the steps below to do it safely. WARNING – WARNING + + • They contain enough electricity to injure you. If you do not follow these steps exactly, some or all of these things can hurt you.
Starting and driving WARNING An electric fan can start up even when the engine is not running and can injure you. Keep hands, clothing and tools away from any underhood electric fan. WARNING Using a match or flame of any kind near a battery can cause battery gas to explode. You can suffer burns or be blinded. Use a flashlight if you need more light. Be sure the battery has enough water. The battery installed in your new Saab has filler caps. Be sure the right amount of water is there.
Starting and driving Saab Parking Assistance (Option) WARNING The parking aid system facilitates parking and reversing. There are four sensors in the rear bumper that detect objects up to 6 feet (1.8 metres) behind the car. The system uses four sensors in the rear bumper. These emit ultrasound signals that bounce back to the sensors off any objects behind the car.
Starting and driving 185 Parking Pressing a SID button briefly will not disengage the system, the display will simply show the previously selected function. WARNING NOTE Ice, snow and dirt can affect the sensitivity of the sensors. In such cases a continuous tone will sound warning the driver that the system cannot measure the distance to an object. You can turn the system off by pressing and holding the CLEAR button for 1.5 seconds.
Starting and driving Parking on a hill When parking on a steep hill, turn the front wheels so that they will be blocked by the curb if the car should move. Long-term parking • Run the engine to normal temperature before long-term parking. • Drain the washer-fluid reservoir and hoses. • Wash and wax the car. Clean the rubber seals on the hood, luggage compartment lid and doors, and lubricate them with glycerol (glycerin).
Car care and technical information 187 772 Car care and technical information Hood release handle ....... Engine compartment, 4-cyl. engine ................... Engine compartment, 6-cyl. (3.0t V6)................. Emission control systems Engine............................... Engine oil ......................... Transmission fluid........... Coolant ............................. Brake and clutch fluid ..... Power steering fluid ........ Air filter.............................
Car care and technical information Hood release handle WARNING Make sure not to hold your fingers between the hood and the hood safety catch if you lay the hood down but not closing it. In cold weather, when the mechanism is stiff, the hood might need to be released from twice the height to lock properly. Check that the hood is now closed securely. IB486 1 Pull the release handle. 2 The front of the hood will now spring up, providing access to the secondary safety catch.
Car care and technical information Engine compartment, 4-cyl. engine Engine compartment, 4-cyl.
Car care and technical information Engine compartment, 6-cyl. (3.0t V6) Engine compartment, 6-cyl. (3.
Car care and technical information Engine families Saab cars imported into the United States and Canada meet all applicable emission control standards. The engine family and appropriate tune-up specifications are identified on a label affixed to the left front inner fender. These engine families meet applicable EPA Federal Standards, California State Standards and Canadian Federal Standards and are equipped with the following systems: • • • • • Sequential multiport fuel injection system.
Car care and technical information ORVR (Onboard Refueling Vapor Recovery) Engine Hydrocarbon vapors formed when refueling will be recovered by the car and not released into the atmosphere. The hydrocarbons are absorbed in a evaporative emission canister. When the engine is subsequently started, the evaporative emission canister is gradually purged as air is sucked into it through a shut-off valve.
Car care and technical information 193 Engine oil Checking the oil level IB491 IB1123 Check the engine-oil level regularly. This should be done after the engine has been run to normal temperature and then allowed to cool for 2–5 minutes, with the car standing on level ground. Remove the dipstick and wipe it clean before checking the level. Engine-oil filler cap and dipstick, 4-cylinder engine Engine-oil dipstick and filler cap, 3.0t V6 4-cylinder engine 3.
Car care and technical information Oil changing The engine oil must be changed in accordance with the service program, see page 244. Oil volume and grade, see page 251. Oil changing should be carried out on a warm engine. NOTE 1 Unscrew the drain plug in the bottom of the sump and leave the oil to drain into an oil tray or other suitable receptacle for at least ten minutes. Take care, as the oil may be hot. 2 After the oil has been drained, unscrew and remove the oil filter.
Car care and technical information 195 Transmission fluid • Prolonged and repeated exposure of the skin to engine oil can cause serious skin disorders. • Avoid prolonged skin contact whenever possible. Wash the affected area thoroughly with soap and water after any contact. Manual transmission Check and top up the fluid in accordance with the service program. If original fluid cannot can be obtained for topping up (see page 254), automatic transmission fluid Dextron III (synthetic fluid) can be used.
Car care and technical information Coolant NOTE WARNING • Exercise care when adding coolant. Coolant on hot surfaces constitutes a fire risk. The expansion tank is transparent to facilitate checking of the coolant level. When the engine is cold, the coolant must not lie over the KALT/COLD mark on the expansion tank. If the message ”FILL COOLANT FLUID” is displayed on the SID, check the level of fluid in the expansion tank.
Car care and technical information Brake and clutch fluid Brake pad wear indicators WARNING The combined brake and clutch-fluid reservoir is transparent to facilitate checking of the fluid level. The level should be between the MAX and MIN marks. Top up, as necessary, with DOT 4 fluid. Do not use DOT 5 brake fluid. Use only new brake fluid from a sealed container. Check that there are no leaks in the brake system. The brake fluid level will fall somewhat as the brake pads wear.
Car care and technical information Power steering fluid Air filter WARNING WARNING Check the level of the power steering fluid in the reservoir regularly, in accordance with the service program. The wheels should point forward during the check. Clean around the cap before it is unscrewed. Clean the dipstick. Screw in the cap completely again before checking the level. The oil should lie between the MAX and MIN marks when the oil temperature is about 70°F (+20°C).
Car care and technical information 199 Battery • The battery contains corrosive sulfuric acid. Always wear a face mask or goggles when working on the battery. • If battery acid gets into the eyes or splashes the skin or clothing, wash affected area liberally with water. If acid gets into the eyes or a large quantity makes contact with the skin, seek medical help. The battery is provided with a cover to protect it from radiated heat.
Car care and technical information Charging/replacing the battery To avert the danger of short-circuiting between the positive (+) terminal on the battery and the inlet manifold on the engine, always disconnect the negative (-) battery lead first and reconnect it last. Connect the positive lead to the positive (+) battery terminal (red), and the negative lead to a good ground point, e.g. the lifting lug at the front of the engine.
Car care and technical information 201 Drive belts The alternator is situated on the right-hand side of the engine, adjacent to the bulkhead. It is driven via a Poly-V-belt from the crankshaft pulley. The Poly-V-belt also drives the water pump, the A/C compressor and the steering servo pump. NOTE Serious damage can be done to the car’s electrical system if an alternator lead is disconnected while the engine is running. The belt tension is critical and is adjusted automatically by the belt tensioner.
Car care and technical information Wipers and washers 1 Changing the windshield wiper blades Lift the wiper arm off the windshield 1 Depress the catch. 2 Pull the complete blade assembly down to free it from the wiper arm, and then lift it off the arm. IB508 2 IB506 Check and clean all wiper blades regularly. If poor wiper performance is experienced, clean the windshield with a quality glass cleaner.
Car care and technical information 203 Washers The washer-fluid reservoir holds 6.4 quarts (6 liters). When "WASHER FLUID LEVEL LOW" comes up on the SID, the reservoir is down to about 1 quart (1 liter) of fluid. Add at least 50% of washer- fluid to water to prevent freezing and for effective cleaning. IB1784 Take care not to spill washer fluid concentrate onto hot surfaces as this constitutes a fire hazard.
Car care and technical information Changing bulbs NOTE WARNING Before changing a bulb in the engine bay, switch off the engine to avoid danger of fingers and hands being injured by moving parts. The radiator fan can start up even when the engine is switched off. Xenon headlights are high tension and must therefore be changed at an authorized Saab workshop. Work involving high-tension components is potentially lethal.
Headlight bulb for high beam On cars equipped with xenon lamps the Halogen lamps are used only for high beam flasher. 1 Unscrew the cover from the back of the lamp unit. To improve accessibility to the right-hand headlight, hold aside the induction air hose. To improve accessibility to the left-hand headlight, remove the battery cover. Release the two clips along the long sides of the cover. 2 Unplug the connector. 3 To remove the spring clip, push it in and then move it to the right. 4 Remove the bulb.
Car care and technical information 1 Unscrew the cover from the back of the lamp unit. To improve accessibility to the right-hand headlight, hold aside the induction air hose. To improve accessibility to the left-hand headlight, remove the battery cover. Release the two clips along the long sides of the cover. 2 Unplug the connector. 3 To remove the spring clip, push it in and then move it to the right. 4 Remove the bulb. 5 Without touching the glass with your fingers, insert the new bulb.
Parking-light bulb (cars with halogen low beam) Parking-light bulb (cars with xenon low beam) Parking-light bulb (cars with halogen low beam) Parking-light bulb (cars with xenon low beam) The parking-light bulb is adjacent to the bulb for low beam. The parking light bulb is adjacent to the xenon lamp. 1 Unscrew the cover from the back of the lamp unit. 2 Withdraw the bulb holder. 3 Change the bulb. 207 1 Unscrew the cover from the back of the lamp unit.
Car care and technical information 2 3 1 Catch seen from engine bay, left-hand side Front turn signal bulbs To change the bulb, the complete lamp unit has to be removed. 1 Depress the catch, accessed from the engine bay. 2 Carefully pull out the lamp unit. 3 The bulb holder has a bayonet fitting. Grip the holder and twist it counterclockwise. 4 Withdraw the bulb holder from the lamp unit. 5 The bulb also has a bayonet fitting. Press in the bulb and twist it counterclockwise.
Car care and technical information 1 4 209 4 1 6 1 Lower the flap (secured with catches). 2 Squeeze the two plastic lugs and remove the bulb holder. 3 The bulb has a bayonet fitting. Press in the bulb and twist it counterclockwise. 4 Change the bulb. Trunk lid light and taillights, IB1877 The bulbs for the lamps in the rear light cluster are accessed from the luggage compartment.
Car care and technical information 2 3 3 2 2 The bulb has a bayonet fitting. Press in the bulb and twist it counterclockwise. 3 Change the bulb. Refitting the trim 1 Reset the studs by pushing back the center buttons so that they protrude by 0.2 inch (5 mm). 2 Insert the studs through the trim and tailgate panel. Press the center buttons in, flush with the collar. 3 Screw the handle back onto the trunk.
Reassembly: 1 Place the two ”hinges” in the recess in the tailgate. 2 Then push the ”hinges” into the recess and close the cover. 3 Turn the lock a quarter turn. Rear lights clusters, 9-5 Wagon 1 Open the tailgate. 2 Remove the cover by turning the two catches anticlockwise one quarter turn. 3 Remove the two screws securing the light cluster to the body. 211 IB1793 IB1228 IB1881 Car care and technical information 4 Pull the light cluster rearwards and angle it outwards (it is seated quite firmly).
Reassembly: 1 Align the fastener with the hole in the body. 2 Press the lamp unit home into the body until you hear a click. 3 Fit the screws and cover. Loading lighting, 9-5 Wagon 1 Pull down the glass cover at the outer edge. 2 Bend one of the contacts so that the bulb can be removed. 3 Change the bulb. On refitting, insert the connector-end of the lamp fitting first. IB520 IB1335 Car care and technical information IB1919 212 License-plate light 1 Undo the two screws and remove the lamp glass.
Side direction indicators 1 Slide the lamp fitting forward and pull out the back. 2 Remove the bulb. 3 Change the bulb. On refitting, make sure that the spring in the lamp fitting engages the edge of the opening in the body panel. Courtesy lights (doors and floor) and luggage-compartment lighting 1 Insert a screwdriver carefully into the slot in the end of the lamp fitting. Ease the fitting off to gain access to the bulb. 2 Bend out one of the contacts and remove the bulb. 3 Change the bulb.
Car care and technical information Other bulbs IB524 IB525 If any other bulbs need changing, you are advised to take the car to an authorized Saab dealer. Dome light, rear 1 Remove the entire overhead panel: ease out the trailing end first, and then both front edges. 2 Fit the new bulb. Glove-compartment illumination 1 Insert a small screwdriver in the slot in the end of the lamp fitting and ease it out to gain access to the bulb. 2 Bend out one of the contacts and remove the bulb.
Car care and technical information 1 2 3 4 5 215 Bulb table 7 8 9 10 # Cap Wattage 1 H7 55 2 H1 55 Fog light 3 P21W 21 Reversing lamp; side reversing lamp; rear fog lamp; cornering lamp Headlight 4 P21/5W 21/5 Stop/tail lamp 5 P21W 21 Direction indicator, front/rear 6 R10W 10 Dome light; courtesy lights; glove compartment; luggage compartment 7 R5W 5 Safety belt reminder 8 H6W 5 Reading light, overhead panel 9 T4W 4 Reading light, rear 10 WY5W/ W5W 5 Side
Car care and technical information Fuses WARNING The fuses are housed in two fuse panels: one at the end of the instrument panel on the driver’s side, and one under the hood. To check if a fuse has blown, first remove it from the panel (see below). If the filament is broken, the fuse has blown. A special tool for removing fuses is provided at the bottom of the fuse panel. Simply push the tool onto the fuse, squeeze and remove the fuse.
Car care and technical information IB1795 DICE / TWICE Maxi fuses under the hood Maxi fuses The Maxi fuses are housed in the fuse box under the hood. These fuses can be checked in the same way as the other fuses. The Maxi fuses are designed to protect the car’s electrical system from being damaged. Each Maxi fuse protects a number of electrical circuits and functions and therefore has a higher rating (amperage) than the standard fuses. No spare Maxi fuses are supplied with the car.
Car care and technical information 8 15 Trunk lighting; trunk lock; door lighting, circulation pump; parking assistant 9 15 Audio System; diagnostic instrument; CD changer 5 6 10 15 Door mirrors; heating, rear seat 6B 7 8 9 10 11 12 13 14 15 16 11 30 Central locking; electrically adjusted passenger seat 52 16B 17 18 19 20 21 22 23 24 12 AB C 1 2 3 4 13 53 54 25 26 27 28 29 30 31 55 32 33 34 35 36 7,5 Automatic transmission 20 14 30 Ignition system, engine 15 20 Preheated oxyg
Car care and technical information 28 7,5 Airbag (SRS) 29 7,5 ABS/TCS/ESP 30 7,5 Starter motor 31 7,5 Cruise control; water valve; fog lights, front 33 15 B C1 C2 D Ventilated front seats E F H I K L1 L2 7,5 Direction-indicator switch 34 30 Cigarette lighter (front/rear) 35 15 Daytime running light 36 30 Electric windows, left 37 30 Windshield wipers 38 30 Electric heating, front seats 39 20 Limp-home solenoid (automatic transmission); OnStar; telematics 5256 G J Relay
Car care and technical information Fuse box under hood Fuses # Amp Function 3 2 1 1 40 Radiator fan, high speed 2 60 ABS/TCS/ESP 3 – – 4 7,5 Load angle sensor (cars with xenon headlights) 5 15 Heater 6 10 A/C; car alarm siren 7 15 Bulb test 8 – – 9 – – 10 15 High beam headlight, left Relays 11 15 Low beam headlight left # 12 15 High beam headlight, right 1 Bulb test; head light; high beam flasher 13 15 Low beam headlight, right 2 Headlight washer 14 30
12 Horn 13 Extra lights (accessory) 14 High beam headlight 15 Low beam headlight 16 – 17 Windshield wipers 221 IB1798 Car care and technical information Location of wallet for spare bulbs and fuses (accessory)
Car care and technical information Wheels Alternative wheels and tires If you wish to fit other tires or wheels than those supplied with the car, consult your Saab dealer first as to the possibilities available. Wheels/tires combinations that are not approved by Saab can negatively affect the car´s directional stability, steering and braking in both wet and dry conditions. Do not assume that a wheel/tire combination will function properly just because it will bolt on.
Car care and technical information Rotating tires WARNING When fitting just one new pair of tires, these should be fitted to the rear wheels, as these are more critical to the directional stability of the car (e.g. on braking or in a skid). The existing rear wheels should therefore be moved to the front. Always move left rear to left front and right rear to right front, so that the direction of rotation remains the same.
Car care and technical information Uniform Tire Quality Grading (US) Quality grades can be found where applicable on the tire sidewall between tread shoulder and maximum section width. For example: Treadwear 200 Traction AA Temperature A Treadwear The treadwear grade is a comparative rating based on the wear rate of the tire when tested under controlled conditions on a specified government test course.
Car care and technical information Temperature WARNING The temperature grades are A (the highest), B, and C, representing the tire’s resistance to the generation of heat and its ability to dissipate heat when tested under controlled conditions on a specified indoor laboratory test wheel. Sustained high temperature can cause the material of the tire to degenerate and reduce tire life, and excessive temperature can lead to sudden tire failure.
Spare wheel (under panel in luggage compartment) IB534 IB1232 Car care and technical information IB1186 226 Panel hooked back, 9-5 Sedan Compact spare wheel NOTE The compact spare is light and easy to handle when changing the tire. Its use is only permitted when a standard tire has sustained a puncture. The maximum life of the tire is only 2000 miles (3,500 km). Do not exceed 50 mph (80 km/h) with the compact spare fitted. The compact spare should be inflated to 60 psi (420 kPa).
Car care and technical information Changing a wheel WARNING • The car jack is designed solely for use in changing a wheel or fitting snow chains. It must not be used to support the car during repair work or servicing. • Never crawl under a car that is supported only by a jack. • Special care must be taken if the car is on a slope – use wheel chocks! • Position chocks, one ahead and one behind, the wheel that is diagonally opposite to the one to be changed.
IB1553 Car care and technical information IB1838 228 Position for jack Positioning the jack To jack up the car, apply the jack to one of the special jacking points under the sills. Jack location, between spare wheel and sill IB1554 IB1704 The collapsible jack handle is stowed in a cloth bag by the spare wheel.
IB1130 Car care and technical information Jacking points for a trolley jack If a floor jack is used, it can be applied to the standard jacking points used by the dealer. A floor jack can lift both front wheels or both rear wheels off the ground simultaneously. A jack stand must then be applied underneath the front of the engine subframe (at the fixing point for the towrope-attachment eye) or to the rear towrope-attachment eye (or under the trailer hitch, if fitted).
Car care and technical information IB539 IB1800 Flat spotting Tightening sequence, wheel bolts WARNING If the car has been driven for several years exclusively with alloy wheels and steel wheels are now fitted, the bolt hole threads in the brake hubs should be cleaned before the thinner steel wheels are fitted. Grit, salt and rust can clog the inner threads making it impossible to achieve the correct tightening torque.
Car care and technical information Air conditioning (ACC) NOTE • The A/C system is designed for use with R134a refrigerant. • Refrigerant handling requires special equipment and special procedures for charging and draining the system. • All repairs and adjustments on the A/C system must be carried out by a Saab dealer authorized for this kind of work. • Never mix R134a and R12 refrigerants. WARNING • The A/C system is pressurized. Do not break any connections or undo A/C system components.
Car care and technical information Safety belts WARNING If the car is involved in a crash, the safety belts, belt pretensioners and other components must be inspected by an authorized Saab dealer. Never make any alterations or repairs to the safety belt yourself but visit an authorized Saab dealer. Regularly check the function of the safety belts as follows: • Hold the diagonal strap and pull it sharply. The safety belt should lock and it should not be possible to withdraw it further.
Car care and technical information Washing the car The bodywork must be washed frequently. When the car is new, the body should be washed by hand using plain cold water and a clean, soft brush, or in a brushless carwash that uses mild detergent. Automatic car washes with brushes should be avoided when the car is new. Do not use automatic car washes for the first five or six months, before the paintwork has hardened properly. Thereafter, use a high quality car wash soap added to lukewarm water.
Car care and technical information Touching up the paint Damaged paintwork should be treated as soon as it is discovered: the longer it is left, the greater the risk of corrosion. The anti-perforation warranty does not cover corrosion resulting from untreated defects. Paintwork damage sustained in a crash is usually extensive and can only be properly restored by professionals. However, you can repair small scratches and stone-chip damage yourself.
Car care and technical information IB1334 Two-coat enamel Surface-treatment composition 1 2 3 4 5 6 7 Body panel Zinc (certain panel sections only) 7.5 µm Phosphate coating Cathodic ED 28 µm Intermediate coat 35 µm Metallic base 15 µm Clear enamel /solid enamel 40 µm As the name implies, two-coat enamel is applied in two operations. The first coat, the base color, contains the pigment, metal flakes and binder.
Car care and technical information What causes rust? Preventive maintenance Steel body panels of automobiles are subject to rusting whenever air and moisture manage to penetrate the protective finish, and body panels may rust through if the process is unchecked. Rusting can occur wherever water is trapped or where the car’s panels are continuously damp. Damage to paint and undercoating by stones, gravel and minor crashes immediately exposes metal to air and moisture.
Car care and technical information 4 Inspect the undercoating and touch up if necessary. Pay particular attention to the fenders and wheel housings, which are exposed to abrasion by flying gravel, etc. If the composition has worn or flaked off, the steel must be thoroughly cleaned and dried before a fresh coat is applied. The cleaning is best done with a scraper and a steel wire brush, followed by washing with solvent. Apply the new coating thinly, as otherwise it may run off or fall off when dry.
1 2 3 4 5 6 7 8 9 10 11 12 13 14 15 16 17 18 19 20 Car care and technical information A-pillar trim: PP, PP/EPDM Windshield trim: PP, PP/EPDM Seals: EPDM C-pillar trim: ABS Rear light cluster: PMMA Rear bumper, cellular core: expanded PP; sheathing: PP/EPDM Side-window casing: PP/EPDM Fuel tank: PE Side trim: PVC A-pillar upholstery trim: PC/ABS, textile Rearview mirror: ABS Sill scuff plate: PP/EPDM Wheel-arch liner: PP Wheel cover: PA Direction-indicator lamp lens: PMMA Washer-fluid reservoir: PE Front
Car care and technical information Headlight aiming WARNING Before checking/adjusting the headlight aiming, switch off the engine to avoid danger of fingers and hands being injured by moving parts. The radiator fan can start up even when the engine is switched off. The vehicle has a visual optical headlight aiming system equipped with vertical aiming device. The aim has been preset at the factory and should normally not need further adjustments.
Car care and technical information 1 Wall or garage door 25 ft (7.6 m) between wall and headlight lens. Measurement from the ground to the low beam aiming marker on the headlight lens. Same measurent as (3) but substract 2 inches for vehicles with halogen lamps and 3 inches for vehicles with xenon lamps. If you find that the headlight needs adjustment follow these steps: 1 Open the hood and locate the vertical aiming device. 2 Locate the marker on the lens.
IB1954 IB1953 Car care and technical information Horizontal line on wall or other flat surface Correctly adjusted low beam 5 Turn on the low beam headlights and place a piece of cardboard or equivalent (although not directly on the lens) in front of the headlight not being aimed. This should allow the beam cut-off of the headlight being aimed to be seen on the flat surface. 6 Turn the vertical aiming screw until the horizontal cut-off of the headlight is aligned with the horizontal line on the wall.
Car care and technical information (This page has been left blank)
Maintenance and owner assistance 243 Maintenance and owner assistance IB1941 Maintenance schedule..... Owner assistance ............ Reporting Safety Defects (U.S.A.) ............................ Reporting Safety Defects to the Canadian government ....................
Maintenance and owner assistance Maintenance schedule The Maintenance Schedule prescribes a service program to the purchaser/operator of a Saab that is reasonable and necessary to ensure the proper emission control systems function, safety and reliability of the Saab automobile in normal use. Additional maintenance is recommended for specific components when the car is operated under certain severe conditions.
Maintenance and owner assistance Service record retention Service costs Service instruction coupons and record stubs are provided in the Saab Warranties and Service Record Booklet which accompanies this Owner’s Manual. The coupons are arranged in the order that normal service should be performed. The edge of each coupon is shaded to correspond to the type of service point: Dealer pricing practices and labor for service work vary.
Maintenance and owner assistance Change of Address Notification (U.S. and Canada) Two change of address cards are provided at the end of the Warranties and Service Record Booklet. Knowing your current address allows Saab to contact you in the event of a recall or service campaign. Please help us keep our records up to date for your own peace of mind. Service information Factory Service Manuals for the Saab 9-5 car line can be ordered through the dealer.
Specifications 247 IB603 Specifications General.............................. Engine ............................... Fuel.................................... Engine oil.......................... Engine variants ................ Electrical system.............. Drive belts......................... Manual gearbox................ Automatic transmission .. Suspension....................... Steering............................. Brake system.................... Wheels and tires .............. Plates and labels.
Specifications General Gross vehicle weight (GVW) Overall length, including bumpers: 9-5 Sedan_______________________ 9-5 Wagon ______________________ Overall width, including door mirrors ____ 190.0 in (4827 mm) 190.1 in (4828 mm) 80.4 in (2042 mm) Maximum height: 9-5 Sedan_______________________ 58.1 in (1475 mm) 9-5 Wagon ______________________ 59.1 in (1501 mm) Wheelbase _______________________ 106.4 in (2703 mm) Ground clearance __________________ approx. 6.
Specifications Luggage compartment Volume (SAE): 9-5 Sedan_______________________ 9-5 Wagon, rear seat upright ________ 9-5 Wagon, rear seat folded _________ 249 Trailer: 15.9 cu.ft. (450 litres) 31.4 cu. ft. (890 litres) 73.0 cu. ft. (2067 litres) Maximum permissible luggage-compartment load: At curb weight + 4 passengers at 154 lbs. (70 kg) _________________________ 176 lbs (80 kg) or each passenger fewer in the rear seat, the load may be increased by 110 lbs (50 kg).
Specifications Engine 4-cylinder ________________________ 3.0t V6 ___________________________ Cylinder bores ___________________ Fuel Four cylinders, twin overhead camshafts, 16 valves and two balancer shafts. V-6 engine, double overhead camshafts on each cylinder bank, 24 valves 3.54 in (90 mm) Stroke: 4-cylinder engine _________________ 3.54 in (90 mm) 3.0t V6 _________________________ 3.34 in (85 mm) Swept volume: 4-cylinder engine _________________ 139.7 cu.in (2.290 litres) 3.
Specifications Engine oil Oil recommendation: We recommend the use of oils that are available from your Saab dealer, for regular oil changes. These oils fulfill the most stringent requirements set by API and ACEA classifications. Basic recommendations for Saab engines: SAE 5W-30 or 0W-30, 5W-40. The oil should be semi or fully synthetic and fulfill grade requirements for ACEA A3/B3, API SJ or higher. In addition to API and ACEA the ILSAC GF-3 specification is approved for use in applicable markets.
Specifications Engine variants Viscosity: The viscosity of oil is classified according to the SAE standard. Nowadays, multigrade oils are always used in cars. The properties of these oils facilitate starting the car in cold weather but mean that the oil is also viscous enough to coat al moving parts under high pressures and with high outside air temperatures. Multigrade oils are graded with two viscosity’s, e.g.
Specifications Electrical system 253 Drive belts Voltage __________________________ 12 V Engine variants Battery capacity ___________________ 70 Ah Starter motor ______________________ 1.4 kW 4-cylinder, poly-V-belt ________________ 102.84 in (2612 mm) Outside length 3.0t V6, poly-V-belt __________________ 79.
Specifications Manual gearbox Automatic transmission Type ____________________________ All-synchromesh 5-speed with final drive and differential Oil ______________________________ Saab synthetic manual gearbox oil Oil capacity _______________________ 1.9 qts (1.8 litres) Oil volume (on changing) ____________ 1.6 qts (1.
Specifications Suspension Spring type, front and rear ___________ Brake system Coil springs Maximum deflection of springs: Front __________________________ 7.09 in (180 mm) Rear ___________________________ 7.87 in (200 mm) Dampers, front and rear _____________ 255 Gas-filled dampers Steering Footbrake (ABS) ____________________ Hydraulic disc brakes with vacuum servo unit. Diagonally split circuits; ventilated discs on front wheels. EBD function, see page 165.
Specifications Wheels and tires Wheel size _______________________ 6.5 x 16 or 7 x 17 2.3 Turbo Aero _____________________ Use only 6.5 x 16 or 7 x 17 only NOTE Snow chains: Contact an authorized Saab dealer if you wish to fit other wheels than those fitted as standard. Snow chains must not be fitted to the rear wheels, and may only be used with the following wheel-tire combinations: Wheels Tires 6.5 x 15_____195/65 R15 M+S (Linear only: not 2.3 Turbo Aero or 3.
Specifications 257 Plates and labels When consulting your Saab dealer, it may be necessary to quote the car’s V.I.N., engine and gearbox numbers. IB1948 US Modification identity plate. V.I.N. number, inside windshield. Certification label. Gearbox number. Engine number. Tire pressures and color codes (body & trim), label. 7 Chassis number plate. 8 Chassis number, stamped on body. 9 Vehicle Emission Control Information.
Specifications 2 | S 3 | 3 4 | E 5 | D 6 | 4 7 | 9 8 | E 9 | 6 10 11 12 | | | 2 3 045842 IB1917 position: 1 | V.I.N.
Specifications Several of the systems in your Saab car can be adjusted to better fit your individual needs Some functions are governed by legal requirements and cannot therefore be reprogrammed. Consult an authorized Saab dealer for further information. Car alarm/central locking system: • The sound level of the siren when locking/ unlocking, HIGH or LOW. • The number of blinks when locking/ unlocking, 1 to 7. • Automatic locking of the trunk when the car is driven, 1 to 8 mph (2-14 km/h), YES or NO.
Specifications (This page has been left blank)
Index Index A A/C system, fault diagnosis ________231 A/C system, maintenance _________231 ABS brakes ____________________165 ACC __________________________72 ACC functions ___________________75 ACC, automatic climate control ______72 ACC, calibration _________________80 ACC, condensation _______________81 ACC, programming _______________78 ACC, useful tips _________________80 Adjusting the steering wheel _______122 Adjustment, seats _______________118 Afterheater, V6-engine cars ________82 Air conditionin
Index Door handles ____________________38 Door mirrors ___________________123 Doors, locks & luggage compartment _37 Drive belt ______________________253 Drive belt, alternator _____________201 Drive belts, length _______________253 Driver’s seat, programmable _______120 Driving in hot weather ____________173 Driving with a load _______________178 E Electric heating seat _____________121 Electric heating, front seats ________121 Electric windows ________________125 Electrical system, technical data _
Index Light switches ___________________65 Luggage-compartment lighting ______69 M Main instrument panel _____________50 Main/dipped beam _______________65 Maintenance schedule ___________244 Manual gearbox, technical data ____254 Maxi fuses _____________________217 Milometer ______________________56 Motoring abroad ________________237 N Night Panel _____________________63 O Oil capacity, engine ______________250 Oil change, engine ______________194 Oil specification _________________250 OnStar _________
Index Spare wheel ___________________226 Spare wheel and tools ___________142 Spark plugs ____________________253 Speed rating ___________________222 Speedometer _______________ 56, 57 Starting in cold weather, ACC _______78 Starting in hot weather, ACC _______78 Steering wheel adjustment ________122 Steering, technical data __________255 Stone-chip damage, repairing ______234 Storage compartments ___________129 Sun visors _____________________128 Sunroof _______________________126 Suspension ________
Notes Notes 265
Notes
Notes 267
Notes
Notes 269
Notes
Notes 271
Notes