P R O F E S S I O N A L TYPE SUP 016 E c of teService y s o& rte ssSales re sp u co • User's and maintenance booklet We congratulate for having bought this top-quality espresso machine and thank you for choosing Saeco. Before operating the machine, we recommend to read the following instructions thouroughly which explain how to use, clean and maintain the machine. Cod. 0334.951 - Ed.03 10/00 STAMPATO SU CARTA RICICLATA.
3 25 28 29 27 10 26 11 12 13 14 4 15 9 8 16 f sy o rte cou 17 Aufheizen...
4 5 30 31 41 33 44 42 43 2 3 4 5 6 7 45 f yo rtes Aufheizen...
80 DESCRIPTION OF SYMBOLS How to use the instructions These instructions cannot anticipate every possible use of the machine. For further information or questions concerning specific situations or problems, please contact the local dealer or manufacturer directly. The warning triangle shows all important safety indications to ensure the user’s safety. The non-observance of said instructions may cause serious injuries! Save these instructions carefully and make sure to hand them to other users.
82 83 42 41 43 45 46 47 Electrical parts should never be in contact with water: danger of shortcircuit! Steam and hot water may cause burns. Never direct steam or water jets towards the body; special attention must be paid when touching the steam/hot water spout and the heating plate: danger of burns! 5 4 1 1 2 2 3 3 5 4 6 6 7 7 44 48 4 4 3 1 1 2 2 3 5 5 6 6 7 7 49 52 51 cou Warnings The machine shall only be used by adults and properly instructed persons.
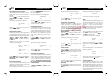
85 MACHINE CONTROLS AND PARTS 1 Coffee grounds container 16 Coffee bean container 2 Drip tray 17 Grind adjustment lever 3 Cup holder surface 18 Coffee dosage adjustment lever 4 Main switch 19 Service door 5 Power cord 20 Filling funnel 6 Coffee dispensing unit 21 Handle for assembling and disassembling of central unit 7 Steam/hot water spout with burn-protection 22 Central unit 8 Control panel 23 Coffee rest drawer 9 Steam knob 24 Swivel 86 INSTALLATION Unpacking/installation Standard
87 88 DRAINAGE / PROGRAMMING THE MACHINE Remove water tank (11) from the machine, remove its cover (12) and fill it with cold water (approx. 2.4l). A valve on the tank bottom prevents water from escaping. Before installing the water tank in the machine, make sure the coffee bean container cover is properly fitted. 31 Install the water tank, slightly pressing over it to fit the valve which will open automatically. Do not fill the tank with an excessive quantity of water.
9 90 PROGRAMMING THE MACHINE Cup heating plate connection Royal Professional is equipped with a useful cup heating plate which can be disconnected, if required. Press keys to move the asterisk to item “CUP HEATER”. Press ENT to activate this function. The following message will be displayed: "CUP HEATER "ON " " The keys allow you to change the set options “ON” or “OFF”. Temperature selection With Royal Professional a precise adjustment of the coffee temperature can be executed.
1 92 PROGRAMMING THE MACHINE By means of keys move the asterisk to item “VENDING” and select it through the ENT key. From the displayed submenu it is possible to select one of the following items by means of the same keys . On the contrary, if the hot water selection key is pressed, the submenu can be quit. The following messages will be displayed: "CODE " " ****" "1 LARGE COFFEE "TOTAL 1234.... " " "1 COFFEE "TOTAL 1234.... " " "1 SMALL COFFEE "TOTAL 1234.... " " "HOT WATER "TOTAL 1234....
93 94 RECOMMENDATIONS ENT a new value can be saved. On the contrary, by pressing ESC the new value entering is stopped and, as a result, the former counter setting shall be considered. When the set limit has been reached, the coffee dispensing stops and the following two messages are displayed: "COFFEE DISPENS. " "BLOCKED " "SELECT PRODUCT "READY FOR USE " " Reset the counters by pressing the cappuccino selection key . The rinsing cycle needs about 1 litre of water (including final rinsing).
95 BREWING coffee quantity, according to the cup dimension. The desired quantity can be selected through the selection keys . The relevant messages will be displayed. To set the quantity of coffee to be dispensed, it is necessary to press the relevant selection key till the desired quantity of coffee is obtained (max. 250 ml approx.). During this operation, the following message is displayed: "1 SMALL COFFEE " "PROGR.
97 key pressed till the desired amount is reached. Attention: cappuccino amount can only be programmed if the corresponding programming function is enabled (see page 87). 38 For cappuccino dispensing, fit suction pipe (26) of the Cappuccinatore (25) in a milk container or in another container. To prevent milk container deformation, pierce it on the top to allow air entry. Place the cup under dispenser (27) and press the cappuccino selection key.
99 45 Clean the coffee beans container periodically; this operation should be accomplished by a qualified technician! Unplug the machine. Empty the coffee container and unloose the two fastening screws. Now, the container can be removed and cleaned. 46 Carefully pull the adjustment lever upwards, previously writing the set grinding degree. 47 Turn the adjustment ring counterclockwise, until the blue marks coincide.
101 DESCALING Reset descaling message In programming function, by pressing keys , move the asterisk till the end of the line on the menu Sign. Descal and confirm the selection with ENT button. The following message will be displayed: "RESET DESCALING " "NO " By means of the same keys , it is possible to modify the value; Yes or no. Through this reset operation, the internal counters of the two water systems are reset and the message DESCALE is erased. If the function "SIGN. DESCAL.
103 TROUBLESHOOTING Trouble Possible causes Solution No message is displayed The machine is not getting power Turn the main switch on, check plug and fuse Close the service door is The service door is open The automatic coffee brewing does not start BREW UNIT MISS. BREW UNIT BLOCK. WATERTANK EMPTY COF. BEANS EMPTY The automatic coffee brewing does not start DREGDRAWER MISS.