
User`s guide


AIRSHIP © 2009
Page 41
To change the maximum number of screens available in the Playback layout, see
Resolution Settings, Playback Max Screens
in
Server Setup Tool
.
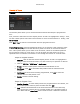
AutoScan
Activate AutoScan to scan through all available channels, using a specified display
screen layout and a specified Interval. Click this button and you are prompted for the
Screen Layout (number of Channels) and the Scan Time Interval in seconds.
When you click OK, the AutoScan button changes color to indicate that AutoScan is
active. The channels will cycle in numerical order as configured. To deactivate AutoScan,
click on the AutoScan button. You will need to choose another display screen layout to
see more channels than the AutoScan configuration allowed.
Note: This feature is sometimes called Tour Mode or MUX Mode.
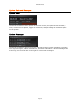
Snapshot
This button will take and store a snapshot of the current frame of the orange
highlighted, currently selected channel. The snapshot image is presented to you
immediately in a pop-up window.
After closing the image window, you can access the snapshots via the Playback or Tools
function. Please see Snapshot Viewer for further details.
Schedule
Once a Schedule has been configured, this button activates or deactivates the Schedule.
The button changes color when the Schedule is active.
When the schedule is turned on, recording on ALL the cameras stop irrespective of
the alarm state and the schedule takes effect immediately. A message box asks you
to confirm this is ok.
When the Schedule is active, none of the cameras can be manually turned on for
recording or alarm.
When the schedule is turned off, the current state of recording and alarm on all the
cameras stays as is at the time schedule was deactivated. So, alarms and recordings
will continue through their durations unless manually turned off.
Settings
The button provides access to System Configuration options. Please see the
Configuration chapter for complete details.