Sage Accpac CRM 5.
© Copyright 2005 Sage Technologies Limited, publisher of this work. All rights reserved. No part of this documentation may be copied, photocopied, reproduced, translated, microfilmed, or otherwise duplicated on any medium without prior written consent of Sage Technologies Limited. Use of the software programs described herein and this documentation is subject to the End User Licence Agreement enclosed in the software package, or accepted during system sign-up.
Contents Chapter 1: Introduction Introduction ................................................................... 1-1 Chapter Summary ......................................................... 1-2 Chapter 2: Getting Started Prerequisites .................................................................. 2-1 Mobile Devices ................................................................ 2-2 Enabling Users............................................................. 2-2 URLs for Accessing CRM ................
Managing Leads, Opportunities, and Cases ...................................... 3-10 Reporting .................................................................... 3-11 Running a Report .......................................................... 3-11 Dashboard .................................................................... 3-13 Synchronizing with Microsoft Outlook ...................................... 3-14 Now you can… ...............................................................
Chapter 1 Introduction This guide is for Users and System Administrators. Please note that while the document refers to Sage CRM, CRM, or the CRM system throughout, all functionality covered is also relevant to Sage CRM MME, Sage Accpac CRM, and Softline Accpac CRM. We assume that: Users operate PDA devices or WAP-enabled mobile phones. Familiarity with using Sage CRM over a standard Web browser would also be helpful, although not essential.
Introduction infrared connection through your mobile phone or an integrated data connection. Chapter Summary The table below gives a summary of each chapter. Chapter Summary Getting Started Outlines the steps that users and system administrators need to take in order to access CRM from a PDA or mobile phone. Working with CRM from a PDA How to work with CRM from a PDA. Working with CRM from a Mobile Phone How to work with CRM from a mobile phone.
Chapter 2 Getting Started In this chapter you will learn about: Mobile devices supported by CRM. URLs for accessing CRM. Making devices known to CRM. Customizing Wireless Mobile screens. Prerequisites To use CRM's Wireless Mobile solution, you need: CRM installed on a server with a valid Wireless Mobile license key. Mobile devices for users. To have enabled users for mobile access.
Mobile Devices Mobile Devices In addition to all WAP-enabled mobile phones, CRM's Wireless Mobile solution supports the following PDA devices: Device Example Pocket PC HP iPAQ Other Any other mobile device with a browser that supports WML 1.1 Enabling Users All users who want to access CRM from a mobile device need to be enabled to do so. To enable a user for mobile: 1. Select Administration | Users | Users. 2.
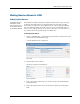
Making Devices Known to CRM Making Devices Known to CRM Setting Up New Devices It is unlikely that you will need to set up any new devices, as most of them are set up in CRM by default. When Wireless Mobile is installed, a number of mobile device types are set up by default. The default devices should be sufficient for the range of mobile devices that you will use to access CRM. However, you can specify additional devices if required.
Making Devices Known to CRM 5. Select the XSL transformation file your device requires from the XSL File Name list. 6. Select an alternative device from the Based On Device list if the device you are setting up is not included on the Devices list in Administration | Customization | | Screens. 7. If your device uses a unique markup language to send information to CRM, type the language name in the HTTP Accepts field. 8.
Making Devices Known to CRM Field Description type of markup language it uses. HTTP Content Type This is similar to the HTTP Accepts field. Specifying a markup language in this field ensures that when CRM sends back a reply to the device, it tells it which markup language it is sending. Supports HTML Frames Specify whether or not the device you are setting up supports HTML frames. Device Image Extension Specify the image extension (.jpg, .gif, .png, etc) to be used with the device.
Making Devices Known to CRM Device Input form 2. Type a user agent in the Type A New User Agent field. User Agent field 3. Click the Add button. The user agent is mapped to the device. Mapping Unassigned User Agents There may be some user agents specified in CRM that have not yet been mapped to devices. To map an unassigned user agent: 1. From Administration | Advanced Customization | Devices, select the View Unassigned User Agents button. The Unassigned User Agents page is displayed.
Wireless Mobile Screen Customization Wireless Mobile Screen Customization Customizing PDA Screens Note: This section does not apply to WAP screens. WAP screen customization is described in the Customizing WAP Screens section later in this chapter. A typical CRM installation includes default user interfaces for different types of mobile devices. However, you may want to further customize some areas. You should carefully consider the way in which you do this.
Wireless Mobile Screen Customization To enable/disable the availability of a block to mobile: Note: An EIS or DPP license is required for block customization. 1. Select Administration | Customization | | Blocks, and open the Maintain Block Definition page for the block you want to enable or disable for mobile users. 2. Select or uncheck the Available To Mobile checkbox and click the Save button.
Wireless Mobile Screen Customization WAP Communication List WAP Communication To Do List WAP Opportunity Search Box WAP Opportunity Summary WAP Opportunity Grid WAP Opportunity Detail Box WAP Case Search Box WAP Case Summary Screen WAP Case Detail Box WAP Case Grid WAP Case Progress Box Wireless Mobile Guide 2–9
Now you can… Now you can… 2–10 Sage CRM List the mobile devices supported by CRM. Get URLs for accessing CRM. Make devices known to CRM. Customize Wireless Mobile screens.
Chapter 3 Working with CRM from a PDA In this chapter you will learn about: Logging on and logging off. Basic screen elements. Searching for information. Adding customer information. Managing your calendar. Managing leads, opportunities, and cases. Viewing reports. Select a Dashboard for your PDA. Synchronizing with Microsoft Outlook. Logging On You can reach the Logon page in this way: 1. Open your Web browser and enter the URL given to you by your system administrator.
Logging Off 2. Enter your User Name and Password and click the Log On button. You are logged on. By default, a successful logon displays the My CRM Calendar for today. CRM Calendar Logging Off To log off: 1. Select the Log Off main menu button at the top of the screen. You are also automatically logged off if you close the browser window or navigate to another site within the same browser window.
Moving Around Moving Around To effectively move around a CRM system using a PDA, you need to be aware of the different areas of the screen. The Basic Screen Elements This section explains the different areas of a Wireless Mobile screen for PDAs. Menu Button Action Button Context Area Context List Hypertext Link Menu Buttons. You can move directly from one work area to another using the Menu Buttons at the top of the screen. Menu Buttons remain the same regardless of the context you are working in.
Finding Information Finding Information This section explains how to perform a basic search and gives some examples of how to find specific information. To find information: 1. Click on the Find menu button. 2. Select the item you want to search for from the context list. Options available are Company, Person, Case, Opportunity, and Lead. 3. Type in one or more search criteria if you want to. 4. Click on the Find action button to start the search. 5.
Finding Information Search results A list of people matching your search criteria is displayed. 3. Click on the hypertext link for Bill Jones. The Person Summary page is displayed. Example: Finding an Opportunity To find an opportunity that is linked to a particular company: 1. Click on the Find menu button, and select Company from the list in the context area. 2. Type Design Right in the Company Name field and select the Find action button. 3.
Adding Customer Information Opportunity linked to a Company 5. Click on the status icon to view the opportunity details. Adding Customer Information This section explains how to add customer information and gives an example of adding a new contact to an existing company. To add information: 1. Click on the New button from the top of the screen. 2. Select the item you want to create from the context list. Options available are Company, Person, Individual, Case, Opportunity, Communication, and Lead.
Adding Customer Information Company – Add Person 3. Select the New button from the context area. 4. Complete the person details and select the Save button in the context area. Note: You can link opportunities, cases, leads, and communications to companies in the same way.
Doing Your Work Doing Your Work You can schedule tasks and appointments for yourself or for a colleague that are not linked to any particular entity. You can also create appointments and tasks that are linked to specific companies, people, opportunities, cases, and leads. This section provides an example of both and it provides an overview of how to manage your personal calendar. Navigating Your Calendar When you log onto CRM your daily Calendar is displayed.
Doing Your Work − Select the time the appointment is due to take place. − Then fill in the details. − You need to scroll down to complete all the fields. − You can assign it to a colleague by selecting their name from the User field. − When you save it, the communication is saved in your (or your colleague's) My CRM work area. New Appointment Clicking on a specific date on the weekly and monthly views takes you to the daily view for that day.
Managing Leads, Opportunities, and Cases Managing Leads, Opportunities, and Cases To create a new lead, opportunity, or case: 1. Click on the New menu button, and select Lead, Opportunity, or Case from the list in the context area. New Opportunity 2. Type the details in the input form. You'll need to scroll down to complete all of the details 3. Select the Save action button from the context area. Alternatively, you can find a specific person or company and link the lead, case, or opportunity to it.
Reporting To update an existing lead, opportunity, or case: 1. Find the lead, opportunity, or case and open the Summary page. Opportunity Summary page 2. Select the Edit action button from the context area. 3. Make the changes and select the Save action button from the context area. Reporting CRM includes sample reports in various categories, for example Sales and Customer Care. You can run the reports on your PDA by selecting the Reports button. Running a Report To run a sample report: 1.
Reporting Select Report page 4. Click on the hypertext link of the report you want to run. The report is displayed. Cases Open By Company Report - Chart You may need to scroll down to view the full report details.
Dashboard Note: You can run any reports that you have created in CRM from your desktop on your mobile device. You run them in the same way as you run sample reports. Dashboard You can define the Dashboard you want displayed on your PDA from your desktop. To select a Dashboard for your PDA: 1. From your desktop, open My CRM | Dashboard. 2. Select the Dashboard you wish to view on your PDA from the Dashboard drop-down list. The Dashboard Content page is displayed. 3.
Now you can… Synchronizing with Microsoft Outlook You can synchronize Microsoft Outlook appointments, tasks, and contact information with CRM appointments, tasks, and contact information using your PDA. To do this: 1. Ensure that synchronization capabilities are set up between your desktop and PDA. (Refer to the documentation accompanying your PDA for details on how to synchronize with your desktop.) 2.
Chapter 4 Working with CRM from a Mobile Phone In this chapter you will learn about: Moving around and logging on. Finding contact information. Managing your Calendar. Finding and progressing a Sales Opportunity. Finding and progressing a case. Moving Around You must be familiar with the navigation elements on your WAP-enabled mobile phone before you can log onto and work with CRM.
Finding Contact Information http://companyipaddress/yourserver/yourapp 2. Bookmark the link. The CRM Logon page is displayed. CRM Logon page 3. Select the Logon edit box, and enter your Logon ID and press on the left hand button below OK. When the CRM Logon page is displayed, enter your Password and click on the left hand button. 4. Scroll down and select the Logon link at the end of the page. The CRM main menu is displayed. CRM Main Menu You can now start using CRM.
Finding Contact Information Searching for a Person To look up a person's phone and address details: 1. Select the Person link from the Main Menu. 2. When the Person Search page is displayed, select the Last Name edit box. 3. Enter the first letter of the person's last name and select the Search link at the end of the page. The Person Search result page is displayed, showing a list of all the people in CRM who match the search criteria. 4. Select the link of the person whose details you want to view.
Finding Contact Information Searching for a Company The procedure for finding a company is similar to the procedure for finding a person. To search for a company: 1. From the Main Menu, select the Company link. 2. When the Company Search page is displayed, select the Company Name edit box. The Text input screen is displayed. 3. Enter the first letter of the company name and then select the Search link.
Doing Your Work Doing Your Work You can keep track of your appointments and tasks in calendar or list mode. Navigating your Communications List To display your current list of tasks and appointments: 1. Select Communication from the Main Menu. The Communication Search page is displayed. Communication Search page You can set View Mode to Day or Week, and you can set the Status to Pending, Complete, Cancelled or All.
Doing Your Work The Communication Summary page for the communication is displayed. When you scroll down the page you can view the status, action (type), date/time, and details of the communication. In addition, you can select: − The Continue link to return to the list of Communications that were returned from your search. − The Edit link to change the status of the Communication. − The Main Menu link to return to the Main Menu. Navigating your Calendar To navigate to your Calendar: 1.
Doing Your Work Changing the Status of a Communication As well as viewing information on your tasks and appointments, you can update their status. To change the status of a meeting from Pending to Complete: 1. Open the Communication Summary page. Communication Summary page 2. Select Edit from end of the page. The Communication Edit page is displayed. Communication Edit page 3. Change the Status to Complete, and select Save. The status of the communication is changed to Complete.
Finding and Progressing an Opportunity Finding and Progressing an Opportunity There are a number of ways to find an opportunity, as follows: From the Company Summary page, select the Opportunity link to view a list of Opportunities associated with that company. From the Person summary page, select the Opportunity link to view a list of Opportunities associated with that person. From the Main Menu, select Opportunity, choose the search criteria you wish to apply, and select the Search link.
Finding and Progressing a Case Opportunity Progress 8. Change the Status to Won and the Stage to Sale Closed. Add a tracking note providing additional information, and click the Save link. The sales opportunity is updated. Finding and Progressing a Case There are a number of ways to find a case, as follows: From the Company Summary page, select the Case link to view a list of cases associated with that company.
Now you can… 4–10 Sage CRM Manage your calendar. Find and progress a Sales Opportunity. Find and progress a case.
Chapter 5 WAP Browsing CRM from a PDA In this chapter you will learn about: Prerequisites for WAP browsing CRM from a PDA. Setting up a connection to an ISP from a PDA. Establishing a connection to the Internet. Using a WAP browser to access CRM from a PDA. Prerequisites The main benefits of using a WAP browser on your PDA rather than your mobile phone are: Quicker response times—this is because you are accessing the Internet directly, instead of going through a WAP gateway.
Setting Up a Connection Setting Up a Connection The following steps focus specifically on connection settings for the iPAQ Pocket PC, but it is possible to set up a connection from any PDA device. Refer to your PDA user guide for device-specific instructions. To set up a connection: 1. From your iPAQ, select Start | Settings | Connections and click on the Connections tab at the bottom of the screen. Connections tab 2.
Setting Up a Connection My Connection – Page One Page two of the My Connection screen is displayed. The default settings on this page should be suitable, but you can change them if you wish. My Connection – Page Two 6. Click on the Finish button. 7. Open the Modem Connections screen and click on the Dialing tab at the bottom of the page. 8. Make sure that the values in the Local Settings fields are correct, and click the Dialing Patterns button. Modem Connections screen 9.
Connecting Dialing Patterns screen 10. Click OK. You are now ready to use a WAP browser from your PDA. Connecting The following steps describe how to connect to the Internet from an iPAQ (but you can do this from any PDA device) using your mobile phone as the "modem". Refer to your PDA user guide for device-specific instructions. To connect to the Internet: 1. Align your WAP phone and your iPAQ so that their infrared ports are facing each other. 2.
WAP Browsing from a PDA WAP Browsing from a PDA To start WAP browsing from a PDA: 1. Open the WAP browser. 2. Type in the URL supplied by your System Administrator for accessing CRM via a dial-up connection. Once the CRM welcome screens have displayed, you can log on as normal. CRM Logon 3. The CRM Main Menu is displayed. CRM Main Menu Now you can… Explain the prerequisites for WAP browsing CRM from a PDA. Set up a connection for an ISP from a PDA. Establish a connection to the Internet.
CRM Document Version Code: IMP-WMG-ENG-580-1.