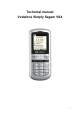
Technical manual Vodafone Simply Sagem VS4 1
You have just purchased a SAGEM phone. We congratulate you! In order to use your phone efficiently and safely, we recommend that you read this handbook carefully. Your phone can be used internationally in the various networks (GSM 900 MHz, DCS 1800 MHz or PCS 1900 MHz) depending on the roaming arrangements with your operator. Some services described in this guide may not be available from the network or when roaming, or may require a specific subscription.
CONTENTS 1. 2. INTRODUCTION ................................................................................................. 7 1.1 Your Vodafone Simply Mobile Phone ........................................................ 7 1.2 About the Vodafone SIM card.................................................................... 7 THE SIXBASIC MENUS...................................................................................... 8 2.1 Home button – grey area ...........................................
7. 8. 9. 4 NAVIGATION .....................................................................................................26 7.1 The three fixed keys "Home", "Contacts", "Log" .......................................26 7.2 Left and right menu keys ..........................................................................26 7.3 The "Hello" key .........................................................................................26 7.4 The Goodbye and back key....................................
9.9 Receiving, viewing and forwarding Multimedia messages (MMS) ............50 9.9.1 Receiving and viewing MMS ........................................................ 50 9.9.2 Forward MMS .............................................................................. 51 9.10 Receiving vCards......................................................................................51 9.11 Reminder display ......................................................................................51 9.
12.6 Printing the phonebook.............................................................................76 12.7 Closing the "Vodafone Phonebook Manager"...........................................76 12.8 Some useful tips .......................................................................................76 13. TROUBLESHOOTING .......................................................................................78 14. INDEX...................................................................................
1. 1.1 INTRODUCTION Your Vodafone Simply Mobile Phone Congratulations on choosing a Vodafone Simply mobile phone. Once you have read the brief instructions, there should be no problem understanding the most important functions of your new mobile phone. Please note that the pictures included in this manual are not contractual: your phone and its screen may not look exactly like the ones shown in this guide.
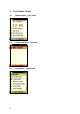
2. THE SIXBASIC MENUS 2.1 Home button – grey area 2.2 Contacts button – red area 2.
2.4 Settings – grey area 2.5 Call screen – green area 2.
The menus Call/Home • Ring tone • Settings • Tips/SOS Contacts • Add new contact • Phonebook – Call – Message − View Log − Add reminder ⋅ Birthday ⋅ Anniversary ⋅ Other − Edit Number − Edit Name − Delete Contacts Log • Write Text − Options ⋅ Send ⋅ Insert Quick Text ⋅ Change Input Mode ⋅ Save in Draft Msgs ⋅ Delivery Report ⋅ Input Language ⋅ Tips • Send Voice Msg (depending on model) − Voicemail ⋅ Call − Missed Calls − Received Msgs − Sent Msgs − Draft Msgs − Dialled Calls 10
Settings • Ringer Settings • Ring Tone • Alarm clock • Display My No. • Top3 Contacts • SIM Backup • Keypad Tone • Time & Date • Language • Voicemail No. • Hide Caller ID • Call Divert • Call Waiting • Call Barring • Power Saving • Contrast • Security − Change My PIN − Ask for My PIN1 − Call Barring Password • Area Info • Network Selection • Master Reset • SIM services 1 Only when SIMcard allows you to switch off PINCode.
3.
4. 4.1 AN INITIAL OVERVIEW The keys Key for setting the ring tone Volume key Left menu key Up/Down key Right menu key Mobile on/off Goodbye and back key Hello Keypad lock on/off Log Contacts Home Key to call your Voicemail directly (long press) Switch from upper case to lower case 4.
3. Area Info In the bottom part of the home screen a welcome message is displayed. If you select the "Tips" key, the Phone Tour tips is displayed. If you select the "Hide" key, the "Welcome message" disappears and the home screen is displayed. 4.
USB connection for a PC Headset with microphone 15
5. 5.1 INITIAL OPERATION Inserting the SIM card The Vodafone SIM card lives beside the phone battery. Ensure that the phone is switched off and the charger is not connected. Turn the phone around and. remove the cover by sliding it downwards. If the battery has already been inserted, it must be removed. Insert the Vodafone SIM card in the card holder. Position the slanted side of the card as shown in the diagram on the phone. The contacts must point downwards here.
5.2 Phone’s IMEI number If you need to tell someone your phone’s IMEI number (this unique to your phone), you will find it by removing the back cover. Turn the phone around and. remove the back cover by sliding it downwards. Remove the upper part. You will see you phone’s IMEI number on the label. 5.3 Charging the battery Your phone is provided with energy by a rechargeable Li-Ion battery. Before using a new battery for the first time, you must charge it for at least 3 hours.
Important: There is a risk of explosion if the battery is not replaced properly or if it is exposed to fire. Do not short-circuit the battery. The battery does not contain any parts that can be replaced. Do not open the battery casing under any circumstances. Use only the appropriate chargers and batteries as recommended by your Vodafone dealer. Used batteries must be disposed of properly. If you plan to not use the phone for a longer period you should take the battery out. 5.
5.6 Entering the PIN number In some countries you will be asked to enter your PIN number. This is the personal code for your SIM card. Enter the code given to you by Vodafone. For security reasons, these numbers do not appear on the display. To confirm, press the left menu key for OK or the # key (right bottom of the keypad). When you switch the phone on after inserting the SIM card, you will be asked if you want to copy the contact information stored on this SIM card to your phonebook.
6. MAKING CALLS, RECEIVING CALLS, MAILBOX QUERY, EMERGENCY CALLS 6.1 Recommendation Your mobile phone has an integrated aerial. For the best possible reception, please make sure you do not cover the upper part of the phone with your hand. 6.2 Making calls Enter the number of the person you want to call. Press the "Hello" key or scroll down to "Call" and press the left menu key. You can speak when the person you are calling answers.
Please note: You can also make calls directly from your phonebook or from the Log area (see § 9.6.2.2 "Calling the sender of the message", page 39). Redial If the line you are calling is engaged, you can initiate a call redial. After calling an engaged line, the display will show the message "Call again". Confirm this with "Yes" or else press "No". Activating and deactivating hands-free mode You can switch the mobile phone into hands-free (loudspeaker) mode using the left menu key "Speaker".
6.3 Receiving calls When your phone rings, the number of the person calling you is shown in the display if the number is conveyed by the network. If the number is stored in the phonebook, the name of the person calling you is displayed. Please note: You can switch off the ring tone while it is ringing by pressing the right menu key "Silence". Press the "Hello" key. The connection is then made and you can speak.
6.4 Adjusting the ring tone profile Use the top right key to choose a ring tone profile. The corresponding setting is shown in the display.
• Normal • Vibrate • Silent 6.5 Checking your voicemail When you’ve got a voicemail message to listen to, the Home button will flash blue. Press it, and you’ll see a voicemail alert on the Home screen: • Press “Listen” to listen to your message. • Otherwise you can press and hold the “1” key to connect you to your voicemail. • You can also listen to it by pressing the Log button and selecting “Voicemail” and then “Call”.
You will see that the counter has increased to 1,2,3, etc. (depending on availability of your network operator). Your SIM card has a pre-set number for the answering service (depending on your network operator). If you want to change this number, proceed as follows: press "Settings" on the start display and go to the menu item "Voicemail No.". Select this menu item using "Select" and enter the mailbox number. If no number is entered for the Voicemail, the phone will prompt you to enter one. 6.
7. NAVIGATION Fixed keys and the menus shown in the display give you full control over all of the functions of your mobile phone. The simply phone also equipped with a "zoom font", which works like a roll-over effect of clickable links on a web site; when you navigate to a menu item, the text will enlarge slightly to improve the readability and help you to recognize where you are quickly on the menu. 7.
7.6 The Tips function The word "Tips" sometimes appears above the right menu key. This tip will give you valuable information on the navigation, operation and functions of your mobile phone.
8. YOUR CONTACTS Menu overview. Contacts • Add new contact • Select a contact to find the following options − Call − Message − View Log − Add reminder ⋅ Birthday ⋅ Anniversary ⋅ Other − Edit Number − Edit Name − Delete Contact 8.1 Viewing the phonebook The phonebook is viewed directly with the "Contacts" key. It is displayed automatically when a call has been made or received from a number that is not saved. If so, the phone will prompt you to save the number in your phonebook.
Just enter the name and then the phone number. To each contact one number can be attached. If different connection types exists for one contact, i.e. "Mobile" or "Work", they can be saved by creating a new contact. How to enter letters using the keypad: Press one of the keys from "1" to "0", if necessary several times, until the desired character appears. Under the "1" key, you will find punctuation marks and special characters such as the "at" symbol "@".
How to set dialling delays: To make a call in an automatic telephone system, it may be necessary to include delays between the digits in the phone number. This is done with the "*"-key. If you press the "*"-key while entering the numbers you’ll be shown a menu with which you can insert pauses: "p" means a pause of 3 seconds, "w" a pause of 5 seconds. 8.1.
Please note: When a contact is viewed, it also shows information on when you last communicated with this contact, whether in the form of a conversation on the phone or by means of a text message. 8.2.1 Add reminder When you view contacts, additional information on birthdays, anniversaries and other important dates can be added. Just go to the menu item "Add Reminder" and enter the date. Under the menu item "Other" you can add personal notes to a date.
8.2.2 Edit number To edit an existing number entry go to that contact, select it using the left menu key and then scroll to the menu item "Edit Number". Select it using the left menu key. Select the number and change it. Confirm your changes with "Save". 8.2.3 Edit name To edit the name of an existing contact, go to that contact, select it with the left menu key and then scroll to the menu item "Edit Name". Select it using the left menu key. Enter a new name and confirm your entry with "OK".
8.2.4 Delete Contact If you want to delete a contact, go to that contact, select it using the left menu key and scroll to the menu item "Delete Contact". Select it using the left menu key. Use then the left menu key again and delete the contact. To delete more than just one contact, scroll to the end of the "Contact" menu. When "Delete Contact" is in focus, "Select" opens a dialogue which says "To delete contacts one by one select a contact and press 'Delete'". "OK" launches now the "Delete Wizard".
8.3 Top 3 contacts The three names with which you have the most contact (incoming and outgoing) can be shown in the first three positions in the phonebook. Just go to Settings in the Home screen, scroll to the menu item "Top3 Contacts" and activate this option. 8.4 Copying contact information from another SIM card You can copy contact information from another SIM card to the phonebook. Switch the mobile phone off, remove the Vodafone SIM card and replace it with the other SIM card.
9. LOG When new messages are received, the Home screen is split and they are displayed on the bottom of the screen. The Home key is flashing. All the new events are stored in the Log menu. 9.1 Viewing the Log menu You can view the Log menu directly with the "Log" key. Menu overview. • Write Text • Send Voice Msg − Voicemail ⋅ Call − Missed Calls − Received Msgs − Sent Msgs − Draft Msgs − Dialled Calls − Received Calls 9.
• reminders for specific dates • alarm messages when the memory for text messages, contacts is full or almost full • the reception of vCards 9.3 The flashing Home key A flashing Home key indicates a new event. The flashing ends when you have pressed the Home key. Just press the Home key, then use the Up/Down key to go to the displayed message and select it with the left menu key. 9.4 The notification tone When a new message arrives, this is also signalled by a notification tone.
Entering a new Voicemail number Your SIM card already has a pre-set Voicemail number. If you want to change this number, then proceed as follows: on the start display, press "Settings" and scroll to menu item "Voicemail No.". Select this menu item with "Select" and enter the Voicemail number. 9.
9.6.1 Missed Calls The last unanswered calls (up to 20) are saved in this folder with the number of the caller (if sent), the caller’s name (if the name of the caller is saved in the phonebook) and the time of call. Under the "Options" menu item, you can access a new menu. If the name of the caller is displayed, you have the possibilities to write a text, to make a call, to view details or to delete the notification of the missed call.
9.6.2 Received Messages This folder contains text, MMS and voice messages you have received. Select the message with the left menu key. The message is then displayed. From the message, you can send other messages directly and make calls to the message sender. 9.6.2.1 Answering a message with a new message After pressing "Read" with the left menu key select "Reply" with the left menu key. In the window that now opens, you can write a text message in reply.
9.6.2.3 Forwarding messages You can forward messages you have received. To do so, select "Options" with the right menu key and then the menu item "Forward" with the left menu key. The message will then be displayed. With the left menu key, select "Options" then the menu item "Send". The phonebook will be displayed. Use the Up/Down key to scroll to the contact to whom you wish to forward the message and select this contact with "Send". You will then be asked if you now want to send the message.
9.6.5 Outgoing Calls The last calls (up to 20) you have made are saved with the number you dialled, the name of the contact you called (if the name of this contact is saved in the phonebook) and the time of the call. From the call display, you can make calls and send messages. Proceed as described in the section 9.6.1 "Missed Calls", page 38. 9.6.
9.7 Text messages (SMS) The mobile phone can send and receive text messages. Text messages are sent via SMS (Short Message Service). 9.7.1 Create message Press the Log key, then use the Up/Down key to go to the "Write Text" menu item and select it with the left menu key. The Message Editor will appear. Alternatively, you can open the Message Editor in the phonebook.
9.7.2 Sending messages You send messages from the Message Editor by pressing "Options" and then go to "Send". This process can be simplified by pressing the Green key, which will automatically send the SMS. When no contact has been previously selected, you can also send messages from the open Message Editor by selecting "Options" with the left menu key, then using the left menu key to select "Send".
Press the key with the letter you want on it (regardless of the position of the letter on the key) and write the word by pressing each key for the letter you want just once, until the word is complete (without worrying about what is on the display). The word is shown directly under the entry field. If the complete word is written correctly, select it with the left menu key to confirm it (this adds a space) and continue with the next word.
How to enter punctuation marks and special characters: Punctuation marks and special characters are entered using the "1" key. The default character is a full stop. If you want to enter other characters, change to manual mode with the "*" key. You can then keep pressing the "1" key until you get to the character you want. The characters appear in the following sequence: .,?!:;() You can also enter these and other symbols with the "#" key. A list of special characters will then be displayed.
9.7.4 Entering Quick Text With the Quick Text function, you can add standard phrases to your message. To do this, in the Message Editor, select "Options" with the left menu key. Scroll to "Insert Quick Text". A list of standard phrases will then be displayed. Scroll to the phrase you want and select "View" with the left menu key. The selected phrase is now displayed in the Quick Text Editor. If you now wish to insert it into your message, confirm this by selecting "Insert" with the left menu key.
Changing Quick Text phrases: If you want to edit the phrase, then press "Edit" with the right menu key and change the suggested phrase. You get to the Options menu via "Options" using the left menu key. Use the Up/Down key to go to the menu item you want and select it with the left menu key. "Save and Insert" The new phrase is added to the Quick Text directory and inserted into your message. The old phrase is replaced. "Change Input" Here, you can change the entry mode (see § 9.7.
"Input Language" Here, select the dictionary (see § 9.7.3 "Predictive Input T9™", page 43) to be used in the Input Assistant. Please note: Quick Text phrases must not contain more than 140 characters. Quick text phrases are displayed in the same language as the phone language. 9.7.
9.7.6 Drafts You can write a message as a draft and save it for sending at a later time. Press the Log key, use the Up/Down key to go to the menu item "Write Text" and select this with the left menu key. The Message Editor will appear. Write your message. Then select "Options" with the left menu key and scroll to the menu item "Save in Draft Msgs". Your message will now be saved in the Draft messages folder.
Activate the confirmation of delivery and confirm your choice with "Select". If your message was successfully received by the other party, you will receive a notification confirming the date and time of receipt. 9.7.8 Input language The default language for creating a text message is the same as the language set for the telephone display. This is also the language of the dictionary available.
9.9.2 Forward MMS An MMS you have received can be forwarded to others. To do so, select "Options" with the right menu key, then scroll to the menu item "Forward" and select this with the left menu key. With the left menu key, select "Options" then choose the menu item "Send". The phonebook will be displayed. Scroll with the Up/Down key to the contact to whom you wish to forward the message then select this contact with "Send". You will then be asked if you wish to send the message now.
10. SETTINGS Menu overview. Settings • Ringer Settings • Ring Tone • Alarm Clock • Display My No. • Top3 Contacts • SIM Backup • Keypad Tone • Time & Date • Language • Voicemail No. • Hide Caller ID • Call Divert • Call Waiting • Call Barring • Power Saving • Contrast • Security − Change My PIN − Ask for My PIN1 − Call Barring Password • Area Info • Network Select • Master Reset • SIM services In the "Settings" menu, you can adapt the mobile phone to your individual requirements.
10.1 Ringer Settings If you want to set the ring tone volume to "Loud", "Normal", "Vibrate" or "Silent", then, under "Settings", go to the menu item "Ringer Settings" and select either "Loud" or "Normal". In addition to this, it is possible to choose "Vibrate" or "Silent". The current mode is highlighted and has a "check" mark before. The two ringer modes (Loud/Normal) have two configurable options: Volume and Vibrate, that can be accessed through the right menu key "Edit".
Activating and deactivating the vibrating alert: You can switch the vibrating alert on and off as you wish for the ring tone settings "Loud" and "Normal". To do this, you can go to the menu item "Ringer Settings" and select either "Loud" or "Normal", and then the right menu key "Edit". Under the menu item "Vibrate" switch the vibrating alert on or off. Confirm your selection with the left menu key. 10.
Scroll over the individual ring tone displays to listen to a sample. Confirm your selection with the left menu key. 10.3 Setting an alarm The mobile phone has an alarm clock function. To activate the alarm, under "Settings", go to the menu item "Alarm Clock". Activate the alarm with "Select", select the day (today, tomorrow or a specific date) or a repetition for every day and then enter the alarm time.
If you have selected the 12-hour format in the "Time & Date" menu, you will be asked when entering a number below 12 if you mean morning or afternoon. Confirm your choice with "Select". On the Home start-up display, a small alarm symbol will be shown to signify that the alarm is activated. When the alarm time is reached, an alarm will sound. On the display, you will be given the option of stopping the alarm or switching to "Snooze" mode. Make your selection with the left or right menu key.
How to activate and deactivate your number being shown on the display: Under "Settings", select the menu item "Display my number", then the menu item "On" or "Off". 10.5 Activating your Top 3 contacts You can have the 3 persons you contact most frequently displayed at the start of your phonebook. To activate this option, under "Settings", go to the menu item "Top 3 Contacts" and switch it on. Confirm with "Select".
10.6 SIM Backup If you select the SIM synchronisation, when switching on the phone you will be asked if you want to synchronise your SIM and phone contacts. To activate this option, under "Settings", go to the menu item "SIM Backup" and switch it on. Confirm with "Select". The phone will restart. 10.7 Activating keypad tones If you want to hear a tone when you use the keys on your mobile phone, under "Settings", go to the menu item "Keypad Tone". Switch the keypad tone on and confirm your selection.
10.8 Entering the time and date Under "Settings", go to the menu item "Time & Date", then you can set the time, the format in which the time is shown, set the date and select to display or not the date on the home screen. Under the menu item "Set Time", you can enter the current time. With the "Clear" key, you can completely reset the time. Confirm your entry with "OK". Please note: if the time is set to the 12-hour format, you can only enter hours from 1-12.
Under the menu item "Display Date", you can select to display or hide the date on the Home screen. 10.9 Language settings Your mobile phone has been set to the language of the Vodafone network in which you acquired your mobile phone and Vodafone SIM card. The phone menu information is shown in this language. If you want the phone menu to be shown in another language, then, under "Settings", go to the menu item "Language" and select the language you want. Confirm your selection with the left menu key.
10.11 Activating and deactivating Caller ID display to other users during a call To do this, under "Settings", select the menu item "Hide Caller ID". Then select the menu item "On" or "Off". Under the menu item "Check Status", you can check whether your number will be displayed or not to another user. 10.
If you want to divert the call to another number, select "Divert to New No.". You can now enter a number and confirm it with "OK". Alternatively, with the left menu key "Contact", you can call up the phonebook and select a number there. Scroll to the number you want and confirm it. If you want to switch call divert off again, under "Settings", go to the menu item "Call Divert" and then to the menu item "Cancel Divert".
If you want to check whether you have activated call divert, under "Settings" go to the menu item "Call Divert" and then to the menu item "Check Status". The mobile phone makes contact with the mobile network and then shows you the current status. 10.13 Activating the Call Waiting function If a second caller is trying to reach you during a telephone conversation, the mobile phone can inform you of this to you with an alert tone.
You can put the following kinds of barring on calls: • All Incoming Calls • All Outgoing Calls • Outgoing International Calls • Outgoing if abroad • Incoming if abroad If you want to activate one of these functions, under "Settings", go to the menu item "Call Barring" and then select the type of call barring. If you want to deactivate this function, under Setting, go the menu item "Call Barring" and then select "Cancel All". You will be asked for your password for this function.
10.15 Activating power saving mode To extend the battery run time on your mobile phone, you can activate Power saving mode. In this mode, the time for which the display is illuminated is reduced. To do this, under "Settings", go to the menu item "Power Saving" and select this with the left menu key. Then switch the mode on and confirm your selection with the left menu key.
10.17 Security 10.17.1 Changing your PIN number If you want to change your PIN number, go to the menu item "Security" and select it with the left menu key. Select "Change My PIN", enter your old PIN, then enter the new PIN twice. Confirm with "OK". 10.17.2 PIN request When you switch on your mobile phone, because of the default setting, you will be asked to enter your PIN number (This depends on the country – please ask your Vodafone Shop or dealer).
10.17.3 Call Baring Password If you want to change the password for the call baring function, go to the menu item "Security", select "Call Baring Passw." and enter the old password first. Confirm it with "OK", then enter the new password twice. (Use the Up/Down key to go to the second entry field.) If you mistyped the password, you have to retype the password twice again and confirm your entries with the left menu key. 10.
10.19 Network selection Your phone selects by default the appropriate network when travelling abroad. If needed you can select manually the network. To do this, under "Settings", go to "Netw. Select" and activate the option "Manual". The mobile phone will then search for all available networks and will offer you a choice. Scroll to the network you want and confirm your selection with "Select". 10.
11. THE MOBILE PHONE CRADLE Your Vodafone Simply mobile phone comes with a convenient charging cradle. You can assemble it quite easily. As soon as you take the cradle out of the box, follow the indications on the sticker on the cradle to see how to place your charging cable in the cradle. To set up the charging cradle, turn it over and press the end of the charging connector in, until it clicks in place. Press the cable into its holders and feed it out of the back.
12. CONNECTING THE MOBILE PHONE TO YOUR PC The "Vodafone Phonebook Manager" is a software program for use with your PC to easily manage contacts of your mobile phone. The system requirement is a PC with Windows XP or Windows 2000 (Service Pack 3 or higher). Connecting the mobile phone to your PC and Installing the "Vodafone Phonebook Manager" Ensure your phone is charged before connecting – if the phone runs out of charge this will cause an unexpected disconnection of the application.
Please note: some features of your mobile phone are blocked when connected to your PC. This ensures data can be properly exchanged between your PC and the mobile phone. You will be blocked from sending messages, making phone calls and viewing entries and reminders on your mobile phone during data exchange. However, you can receive phone calls and messages. 12.1 Adding new contacts To add new contacts, click on "Add Contact", then enter the name and number and save the new entry with "Save".
Using the reminders tab. You can also add important reminders to each entry, such as birthdays, anniversaries, etc., and will then be reminded by your mobile phone on this date. You can add up to 50 reminders for each entry [and in total i.e. only 50 reminders in total are available]. Birthdays and anniversaries will remain stored in your mobile phone – i.e. you will be reminded again next year. Other reminders will be deleted once their date passes.
12.2 Copying contacts from an old SIM card to your mobile phone If you want to transfer the information from your old SIM Card1 to your new mobile phone you can do this easily using the "Vodafone Phonebook Manager". Proceed as follows: Before connecting your phone to PC, remove the battery and Vodafone SIM card from your mobile phone (see Chapter 5 "Initial operation", page 16). Then insert the old SIM card followed by the battery. Your phone will prompt you to copy the contacts to your phone.
To do so, click on "Restore" button in the menu. An overview of the previous three backup files of your contacts will be displayed, including the date of backup.
Choose the preferred backup file and click on "Restore". The "Vodafone Phonebook Manager" will then update your contacts including reminders on your mobile phone. None of your current contacts in your phone will be deleted during this process. 12.4 Selecting Options Under the menu item "Options", you can make several changes to make it easier and safer to use the "Vodafone Phonebook Manager".
12.5 Connecting several mobile phones The software supports the use of multiple Vodafone Simply phones. The software does not support the use of other mobile phones. However, you can import contacts from other SIM cards to your Vodafone Simply (see above). Please note: You cannot connect multiple phones to the PC at the same time. Security note: To ensure access to your contact information is keep private from other users of the PC ensure that you have set-up an individual account setup in Windows. 12.
Recharging the battery while the mobile phone and PC are connected The battery of your mobile phone will not recharge while connected to your PC. Offline mode You cannot use this application in offline mode – the phone must be connected to your PC. You can however still access your csv file in My documents folder if you need quick access to an important number and don’t have your phone handy.
13. TROUBLESHOOTING Problem: You cannot switch the mobile phone on. Action: Charge the phone for at least 15 minutes before switching it back on again. Check whether the message "Charging" is displayed. If so, the mobile phone is charging. If not, disconnect the charger, then connect it again. Check whether the message "Charging" is now displayed. If you still cannot switch the mobile phone on, then disconnect the charger, connect it again and repeat this procedure several times.
Problem: Incorrect PIN code Action: An incorrect PIN code has been entered. Important: take care when entering the code. Three incorrect PIN codes will block the SIM Card. Please note: if no PIN code has been entered after a few seconds, the phone is automatically switched off. Problem: The message "SIM blocked" appears Action: You have entered three incorrect PIN codes. Enter your PUK code to unblock your SIM Card.
Problem: You cannot receive calls Action: Try to make a call to check whether the mobile phone and the networks are operational. Check the call is working and end the call. Check whether call divert is activated and, if so, deactivate it. Check and deactivate the incoming calls restriction if necessary. If the problem persists, please contact the technical helpdesk.
Problem: What does it mean if my "Home" key is flashing? Action: Press the "Home" key and check to see if you have received any new text messages, reminders or other messages and read them. A voicemail number indicates that there is a new voice message in your mailbox. Call your voicemail and follow the instructions given. Problem: How do I free up memory to receive new messages? Action: Try to be careful when managing the memory.
Problem: The mobile phone has been exposed to moisture or liquid. Action: Switch the mobile phone off. Remove the battery and the SIM card and dry them with a cloth. Do not apply heat! Place the mobile phone in an upright position for several hours in a place with plenty of freely circulating air. Do not attempt to take the mobile phone apart! After letting the phone stand for several hours, switch it on. If this does not work, contact customer service.
14. INDEX Alarm ................................................55 Messages .................37, 40, 51, 60, 80 Area info ...........................................67 MMS ...........26, 35, 39, 40, 50, 51, 108 Automatic redial................................21 Navigation........................................ 26 Battery ..............................................78 Password ......................................... 67 Battery charging ...............................
15. CERTIFICATION AND SAFETY INFORMATION FOR THE UNITED STATES AND COUNTRIES USING FCC STANDARDS 15.1 FCC Part 15 statement This device complies with part 15 and part 24 of the FCC rules. Operation is subject to the following two conditions: (1) this device may not cause harmful interference, and (2) this device must accept any interference, including interference that may cause undesired operation.
The exposure standard for wireless mobile phones employs a unit of measurement known as the Specific Absorption Rate, or SAR. The SAR limit set by the FCC and Health Canada is 1.6 W/kg1. Tests for SAR are conducted using standard operating positions accepted by the FCC with the phone transmitting at its highest certified power level in all tested frequency bands.
Hospitals: Mobile phones should be switched off whenever you are requested to do so in hospitals, clinics or health care facilities. These requests are designed to prevent possible interference with sensitive medical instruments. Gas stations: Obey all posted signs with respect to the use of wireless devices or other radio equipment in locations with flammable material and chemicals. Switch of your wireless device whenever you are instructed to do so by authorized staff.
15.5 FDA consumer information on wireless phones The US Food and Drug Administration (FDA) provides consumer information on wireless phones at: http://www.fda.gov/cellphones/qa.html. Following are safety related questions and answers discussed at this web site: Do wireless phones pose a health hazard? The available scientific evidence does not show that any health problems are associated with using wireless phones. There is no proof, however, that wireless phones are absolutely safe.
The National Institutes of Health participates in some interagency working group activities, as well. FDA shares regulatory responsibilities for wireless phones with the Federal Communications Commission (FCC). All phones that are sold in the United States must comply with FCC safety guidelines that limit RF exposure. FCC relies on FDA and other health agencies for safety questions about wireless phones. FCC also regulates the base stations that the wireless phone networks rely upon.
Again, the scientific data do not demonstrate that wireless phones are harmful. But if you are concerned about the RF exposure from these products, you can use measures like those described above to reduce your RF exposure from wireless phone use. What about children using wireless phones? The scientific evidence does not show a danger to users of wireless phones, including children and teenagers.
Get to know your wireless phone and its features such as speed dial and redial. When available, use a hands free device. Position your wireless phone within easy reach and where you can grab it without removing your eyes from the road. If you get an incoming call at an inconvenient time, if possible, let your voice mail answer it for you. Let the person you are speaking with know you are driving; if necessary, suspend the call in heavy traffic or hazardous weather conditions.
16. CARE AND SAFETY INFORMATION Safety Never attempt to disassemble your phone. You alone are responsible for how you use your phone and any consequences of its use. As a general rule, always switch off your phone wherever the use of a phone is prohibited. Use of your phone is subject to safety measures designed to protect users and their environment. Do not use your phone in damp areas (bathroom, swimming pool...). Protect it from liquids and other moisture.
Road safety Do not use your phone when driving. In order to give your full attention to driving, stop and park safely before making a call. You must comply with any current legislation. The Packaging To facilitate the recycling of packaging materials, please obey the sorting rules instituted locally for this type of waste. The Batteries Spent batteries must be deposited at the designated collection points.
17. WARRANTY You must always use your phone for the purpose for which it was designed, under normal operating conditions. Sagem Communication declines all responsibility for any use outside of the scope of its designed purpose and for any consequences of this use. The software program developed by SAGEM remains the exclusive property of Sagem Communication. It is therefore highly prohibited to modify, translate, decompile or disassemble this software program or any part thereof.
customer files, programs or data. The information or operating elements and the contents of files will not be re-installed in any case in the event of loss. Sagem Communication may decide, at its option, to repair the phone with new or reconditioned parts, replace the phone with a new phone or, in any dispute, a phone in good working condition.
In the cases of warranty exclusion and of expiry of the warranty period, Sagem Communication shall draw up an estimate to be given to the customer for acceptance before any call-out. The repair and carriage costs (there and back) given in the accepted estimate will be charged to the customer. These provisions are valid unless a special written agreement has been made with the customer.
18.
The Vodafone Simply mobile phone comprises a unique, innovative design and user interface developed by the Vodafone Group and manufactured by SAGEM exclusively for Vodafone. This mobile phone is the subject of European Community Design Application No. 257621 and GB Patent Application No. 0425365.4 filed in the name of Vodafone Group Plc. Other patents are being applied for. ©Vodafone Group 2006.
Additional Information can be found on the website of the World Health organisation (http://www.who.int/emf). Advice for limiting exposure to radio frequency (RF) fields For individuals concerned about limiting their exposure to RF fields, the World Health organisation (WHO) provides the following advice: Precautionary measures: Present scientific information does not indicate the need for any special precautions for the use of mobile phones.
19. END USER LICENCE AGREEMENT (EULA), FOR THE SOFTWARE CONTEXT AND ACCEPTATION OF THE AGREEMENT You have acquired a mobile Phone device ("DEVICE"), manufactured by Sagem Communication, Mobile Communication Business Group (SAGEM), that includes software either developed by SAGEM itself or licensed third party Software suppliers ("SOFTWARE COMPANIES") to SAGEM with the rights to sub-license it to the purchaser of the device.
therefore agree that, if you elect to download a licence from the Internet which enables your use of Secure Content, Suppliers may, in conjunction with such licence, also download onto your DEVICE such Security Updates that a Secure Content Owner has requested that SOFTWARE SUPPLIERS distribute. SAGEM and SOFTWARE SUPPLIERS will not retrieve any personally identifiable information, or any other information, from your DEVICE by downloading such Security Updates.
Speech/Handwriting Recognition. If the SOFTWARE includes speech and/or handwriting recognition component(s), you should understand that speech and handwriting recognition are inherently statistical processes; that recognition errors are inherent in the processes; and that errors can occur in the component's recognition of your handwriting or speech, and the final conversion into text..
Links to Third Party Sites. The SOFTWARE may provide you with the ability to link to third party sites through the use of the SOFTWARE. The third party sites are not under the control of SAGEM. Neither SAGEM nor its affiliates are responsible for (i) the contents of any third party sites, any links contained in third party sites, or any changes or updates to third party sites, or (ii) webcasting or any other form of transmission received from any third party sites.
RESPONSIBILITIES SUPPORT AND INFORMATION Should you have any questions concerning this EULA, or if you desire to contact SAGEM ]for any other reason, please refer to the address provided in the documentation for the DEVICE. NO LIABILITY FOR CERTAIN DAMAGES. EXCEPT AS PROHIBITED BY LAW, SAGEM SHALL HAVE NO LIABILITY FOR ANY INDIRECT, SPECIAL, CONSEQUENTIAL OR INCIDENTAL DAMAGES ARISING FROM OR IN CONNECTION WITH THE USE OR PERFORMANCE OF THE SOFTWARE.
20. TECHNICAL SPECIFICATIONS Vodafone Simply Specification GENERAL CHARACTERISTICS Model VS4 Size Dimension (LxWxH, mm) 111.5 x 46.8 x 14.7 mm Weight (g) < 90 g 3 Volume (cm ) 69 SAR value 1.25 W/kg Distance for body worn operation 2.
Data Transfer Serial RS232 No IrDA (Obex or other standard) No Bluetooth No SynchML No USB Yes: USB 1.1 full speed without charge WiFi (802.11b,a) No PC synchronisation PC application (Contacts management only) embedded in the mobile phone (auto-install & auto-run): no CD-ROM required.
Embedded Games No (No game) Downloadable Games / Applications No (No game) Java No OTA Downloads No Real time Downloads No CALL MANAGEMENT Voice features Voice dialing & commands No Voice commands Mute Mode Yes Integrated handsfree mode Yes Address book features Call group No Personal information management (vCard) VCard: reception only Ringtone / Icon customisation No Internal phone book (positions) at least 500 Advanced Features Conference call No Call list (dialed, received and
Personal Management Features Calculator No Alarm Clock Yes Stop watch No Agenda No To Do No , but reminder(s) can be associated to Phonebook entry Currency converter No Compatible Accessories Data cord USB data cable, full speed with charge (not in-box accessory) Battery charger Yes (in-box accessory) Mono hands free kit Yes (in-box accessory) Desktop holder (passive cradle) Yes (in-box accessory) Cigar lighter adapter Yes (not in-box accessory) CD-ROM No: USB driver and PC applicatio
21.