DODOSIM 206 FSX Home Edition USER MANUAL (ENGLISH) Document version: 30-04-09/1 This document and the flight simulation software described within are for home entertainment use only. Copyright© 2009 DodoSim. All Rights Reserved.
Important note: Throughout this manual, owners, users and pilots are frequently referred to in the male gender. DodoSim recognises that piloting and simulation use are not the sole preserves of men and that women play a significant role within the aviation industry and flight simulation hobby. The use of male pronouns is used to aid grammatical legibility and should be read as to infer him/her, he/she, etc. wherever used.
DODOSIM 206 FSX - USER MANUAL 1 INTRODUCTION ................................................................................................................................................................1 1.1 2 WHAT DOES THE DODOSIM 206 FSX OFFER BEYOND THE STANDARD FSX HELICOPTERS?............................................2 INSTALLATION AND SET-UP.........................................................................................................................................7 2.
5.4 5.5 5.6 5.7 5.8 WEAR AND DAMAGE ....................................................................................................................................................74 EMERGENCIES ...............................................................................................................................................................75 PROBLEMS CAUSED AFTER MODIFICATION ...................................................................................................................
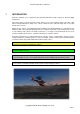
DodoSim 206 FSX User Manual 1 INTRODUCTION Welcome and thank you for purchasing the DodoSim 206 FSX helicopter add-on for Microsoft Flight Simulator X! This add-on has been developed from scratch, taking over a year and utilising many new features that Microsoft Flight Simulator X (FSX) offers. Much of what has been achieved simply was not possible with previous versions.
DodoSim 206 FSX User Manual 1.1 WHAT DOES THE DODOSIM 206 FSX OFFER BEYOND THE STANDARD FSX HELICOPTERS? Whilst the casual player may assume that FSX’s helicopter simulation appears realistic, the truth is that many compromises were made in realism, primarily for user friendliness and accessibility. For example; FSX’s default 206 is far too stable and easy to fly. Anyone with FSX and a joystick can fly it comfortably within minutes.
DodoSim 206 FSX User Manual Flight Dynamics: More authentic handling: The helicopter exhibits a pendulum tendency at low airspeeds due to the interaction of the fuselage mass and the rotor system and a slight instability in the hover means that the pilot must constantly work with the controls to hold a steady position. Torque-Induced Yaw: The pilot must counter the tendency of the transmission to turn the aircraft in opposition to the rotors at low airspeeds using the anti-torque, (rudder), pedals.
DodoSim 206 FSX User Manual Aircraft Supplemental Systems: Generator load power requirement: Electrical systems drawing power from the generator cause a demand on the engine. Exhaust gas temperature increases, tightening operating margins. Anti-icing power requirement: Use of anti-icing draws compressor air from engine causing increase in exhaust gas temperature, reduced power output and higher torque reading, reducing the operating envelope in cold and high conditions.
DodoSim 206 FSX User Manual Cumulative wear: Aircraft systems will fail according to misuse. This may take several flights to occur as wear information is accrued and recorded. Oil temperatures and pressures slowly degrade as wear occurs, culminating in lit annunciator lights, (where applicable), prior to subsequent failure. Systems that can fail according to cumulative wear are: Engine – will fail mechanically if run repeatedly over-temperature during start-up procedures, (known as a “hot-start”.
DodoSim 206 FSX User Manual Cumulative wear / User timer failure mode: Can be switched to user preference. Optional Failure hints: Can be enabled/disabled according to user preference. Fixes for Inherent FSX Bugs: Realistic battery drain: The default aircraft’s tendency to drain the battery too quickly when the master switch is on and the engine-driven generator is not running has been fixed.
DodoSim 206 FSX User Manual 2 INSTALLATION AND SET-UP 2.1 REQUIREMENTS The DodoSim 206 FSX requires the following: 2.2 • Microsoft Windows XP SP2/SP3 or Vista 32/64 bit • Microsoft Flight Simulator X SP2, Acceleration or Flight Simulator X Gold INSTALLATION To install the software, double-click the Setup.exe program to run the auto-installer. The helicopter will then be installed in the “Microsoft Flight Simulator X\SimObjects\Rotorcraft” sub-directory.
DodoSim 206 FSX User Manual 2.3 UNINSTALLING The DodoSim 206 FSX should be removed via the Windows Control Panel’s “Add/Remove Programs” applet. Simply deleting the files from with the Flight Simulator X directory structure will not remove it completely and should you attempt to re-install it at a later date, the installer will refuse to run and you will receive a message informing you that a version of the software already exists.
DodoSim 206 FSX User Manual 2.4 SET-UP 2.4.1 FSX Realism Configuration For proper operation and to provide the best experience, the DodoSim 206 FSX requires that your FSX installation be configured for the greatest level of realism. From within Flight Simulator X’s Aircraft Realism settings, set all aircraft realism sliders to maximum and ensure “auto-rudder” is disabled as shown: Important note: Refer to section 3.4.
DodoSim 206 FSX User Manual Configure your controller as shown: Note that in the above image the throttle has been reversed. This is optional and has been performed so that power is increased as the lever is pulled back rather than pushed forward, as is correct for helicopter operation. Important note: The above illustration shows a “Rotary 1” axis connected to the “Propeller axis” event. This event is used by FSX to control the helicopter engine throttle.
DodoSim 206 FSX User Manual Set all the axis Null Zones to minimum and your Axis Sensitivities to maximum. I.e.: 2.4.3 Keyboard Set-Up Every on-screen click-able function on the 2D cockpit panels can be mapped to a simulation key binding, allowing custom cockpit builders or users with plenty of joystick buttons to operate cockpit functionality without having to interact with the on-screen panels via the mouse or keyboard.
DodoSim 206 FSX User Manual Fuel Valve Engine 1 fuel valves (open/close) Hydraulics Switch Concorde nose & visor (retract) Caution Lights Bright/Dim Concorde nose & visor (extend) Anti-Ice Switch Carb heat/eng anti-ice (on/off) GPS / Nav Switch Nav 1/GPS (toggle) Dir / Gyro Switch Cowl flaps (close incrementally) Warning Mute Button Tail wheel (lock/unlock) Over-Temp Test Button Ballast valve (open/close) Annunciator Test Button Tail hook (up / down) HTR Rotary Spoilers (arm), Spoilers (extend/retract) Cau
DodoSim 206 FSX User Manual Hint: Note that you do not have to map all of the functions to keys or joystick buttons if you do not want to. However, in order to perform the turbine start procedure without a specialist hardware controller, you will have to map at least the starter button and idle release switch to keys or joystick buttons. You can then operate these functions whilst using the mouse pointer in the 2D cockpit to adjust the throttle opening.
DodoSim 206 FSX User Manual 3 AIRCRAFT DESCRIPTION 3.1 OVERVIEW The DodoSim 206 FSX is a single-engine gas turbine powered light utility helicopter. It has a twobladed “teetering” main rotor head and a two-bladed tail rotor, providing anti-torque and steering control. The aircraft seats a pilot, (in the front starboard seat), plus four passengers. (One in the front port seat, three in the back, facing forward.
DodoSim 206 FSX User Manual 3.2 VARIANTS The DodoSim 206 FSX is supplied as three aircraft painted in differing liveries and labelled with unique registration numbers. The software contains a persistent statistics and cumulative wear feature that records and maintains information about the individual aircraft based upon the default registration numbers, (the “tail numbers”), or registration numbers set by the user via the aircraft selection dialog.
DodoSim 206 FSX User Manual Low skids 3.2.2 High Skid Configuration When operating out of non-prepared landing areas, where rocks, foliage or uneven surfaces may prove a potential hazard, the aircraft can be outfitted with high skids to provide greater ground clearance for both the underside of the helicopter and the vulnerable tail rotor. High skids Copyright© 2009 DodoSim. All Rights Reserved.
DodoSim 206 FSX User Manual 3.2.3 Amphibious Configuration When outfitted with buoyant floats, the aircraft is capable of operating from water. Due to the larger surface contact area, the floats are also perfectly suited to providing sure-footing when operating from sand, snow and other non-solid surfaces. Buoyant floats Pilot Information: The large buoyant floats have a significant effect on the aircraft’s handling.
DodoSim 206 FSX User Manual When using the hoist or operating in confined spaces, removing the doors significantly improving pilot or spotter visibility. Important note: The hoist is only operable in FSX Acceleration. Static line slung loads are only able to be carried within an FSX mission. Copyright© 2009 DodoSim. All Rights Reserved.
DodoSim 206 FSX User Manual 3.3 THE COCKPIT 3.3.1 Cockpit Views The DodoSim 206 FSX comes fitted with both 2D and 3D “virtual” cockpits. 3D “virtual” cockpits 2D cockpit panels The aircraft can be flown from either the 2D or 3D cockpit view. The 3D cockpit view can be panned using a joystick hat switch, keyboard presses or a virtual view controller like the highly recommended TrackIR from NaturalPoint.
DodoSim 206 FSX User Manual The 2D and 3D cockpits are synchronised, meaning that all switches that are functional on one are functional on the other, and actions performed on one are mirrored on the other. DodoSim FS9 Advanced 206 users: Note that there is no-longer a requirement to save a flight in the 2D cockpit, or switch to the 2D (or 3D) cockpit after loading a flight before the advanced dynamics works.
DodoSim 206 FSX User Manual Moving the cyclic left or right will cause the main rotor to be deflected in either direction respectively. At slow speeds the helicopter will begin to gain speed in that direction but the tendency of the fuselage and vertical stabiliser, (the “tail fin”), will cause it to try and weathervane, turning the nose into the direction of travel. Similarly, power may need to be adjusted to retain height. 3.3.2.
DodoSim 206 FSX User Manual 3.3.3 Cockpit Buttons and Switches In additional to the flight controls, the pilot interacts with four other control clusters when operating the helicopter, these are: 3.3.3.1 The Front Panel This contains all the gauges the pilot requires to monitor during starting, flight and shutting down. The gauges shall be discussed later. For now, we shall concentrate on the switches and buttons; 1 2 3 4 6 5 1.
DodoSim 206 FSX User Manual 4. GPS/Nav switch - This switch determines which navigational system drives the direction indicator gauge; either the Nav 1 radio, or the GPS device. 5. Fuel Valve - This electrical switch causes a solenoid to open the fuel valve and allow fuel to reach the engine. Note that this switch “fails safe”; i.e. If electrical power is lost the fuel valve remains open and fuel continues to flow to the engine. 6.
DodoSim 206 FSX User Manual battery power must be of sufficient voltage. 3.3.3.3 The Overhead Panel Located in the ceiling between the pilot and front passenger seats, the overhead panel contains the circuit breakers and sub-systems switches, which isolate aircraft electrical systems from the battery and generator electrical buses: 1 2 3 4 6 5 8 9 13 14 7 12 10 11 1.
DodoSim 206 FSX User Manual 4. Position Light switch - This switch controls the aircraft’s external position lights. (The red port and green starboard lights, plus the white light at the far end of the tail boom.) 5. Instrument Light switch - This switch turns the cockpit lighting system on or off and is for use at night or other poor lighting conditions. Important note: In a real aircraft, this is a variable knob allowing the lighting intensity can be set.
DodoSim 206 FSX User Manual dynamics and it is no-longer required to be switched on before take-off, though it could form part of your check-list procedure. Dynamics features are controlled by the difficulty level set by the heater rotary and those features applicable to the setting are active all of the time. 11. Pitot Heat - This switch is used to energise the electrical heater element in the pitot tube on the nose of the aircraft.
DodoSim 206 FSX User Manual 3.3.3.4 The Collective Head Located on the end of the collective lever, the collective head contains several electrical and a single mechanical switch; 1 2 3 4 5 1. Landing Light switch - The landing light switch is used to turn the spotlights mounted in the underside of the aircraft’s nose on and off in order to illuminate the ground when landing or manoeuvring close to the ground, (i.e. when hover-taxiing.) The switch has three positions.
DodoSim 206 FSX User Manual shutting down the engine. When the throttle is advanced past the latch the button “pops out.” The pilot has to push the button back in again to be able to close the throttle below the latch point. Pilot Information: The latch operates at approximately 6% of the throttle axis movement. Note that this does not equate to 6% of the total fuel flow. Different Fuel Control Units (FCUs) meter fuel differently depending on how far the throttle is opened.
DodoSim 206 FSX User Manual off to avoid causing failures or undue wear and damage. 3.3.4 Cockpit Instruments The cockpit instruments are located on the front panel and are used by the pilot to monitor the aircraft’s flight, navigation, engine, transmission, fuel and electrical systems; 19 13 12 14 10 1 2 3 4 11 15 6 9 5 17 & 16 3.3.4.1 18 8 7 Flight Instruments 1.
DodoSim 206 FSX User Manual 3.3.4.2 Navigation Instruments 6. Horizontal Situation Indicator (HSI)- The HSI combines both the directional gyro and VOR display, indicating the relative deviation to the tuned VOR localiser radio transmitter. 7. VOR Indicator – The VOR instrument displays the relative course deviation to or from the tuned VOR localiser. 8. ADF Indicator – The ADF indicator is used to locate the direction to the tuned NonDirectional Beacon (NDB.
DodoSim 206 FSX User Manual 3.3.4.4 Transmission Instruments 14. Transmission Oil Temperature & Pressure - This dual gauge displays both the temperature and pressure of the transmission oil. If the transmission has sustained damage due to misuse, (i.e. repeated or sustained over-torquing), then these gauges could be your first indication that it may be on the way to failing. 3.3.4.5 Fuel System Instruments 15. Fuel Level - This gauge displays the aircraft’s fuel level.
DodoSim 206 FSX User Manual IV. ENGINE CHIP- Illuminates when the magnetic trap in the engine oil system detects particles of metal. Indicative of moderate to serious engine wear. V. BATTERY HOT - Indicates that the battery temperature has reached 140 degrees, usually during repeated start attempts. If the engine is not running then the battery should be switched off and be left for several minutes to cool down. VI.
DodoSim 206 FSX User Manual Important note: If this flashing SC FAIL annunciator is observed then it is unlikely that SimConnect can be restarted other than by completely rebooting FSX. The helicopter will not operate correctly whilst this condition persists. To save your position during a long flight; use slew mode to put the helicopter on the ground and then save the flight before restarting FSX. 3.3.5 3.3.5.
DodoSim 206 FSX User Manual 3.3.5.2 Rotor Brake The DodoSim 206 FSX is fitted with a rotor brake intended for use to aid slowing the rotor system after landing and engine shutdown. To operate the brake: 1. Map a key or joystick button to the “Rotor brake (apply)” function within FSX’s keyboard settings. 2. While the rotor is slowing after the engine has been shutdown, repeatedly press the mapped key to apply the brake. Or: 3. In the 3D virtual cockpit, click on the rotor brake lever to operate, i.e.
DodoSim 206 FSX User Manual 3.4 FEATURES 3.4.
DodoSim 206 FSX User Manual Important note: Effect of “General Realism” slider on flight behaviours: The “General Realism” slider in FSX’s “Aircraft->Realism Settings” dialog can be used to scale the magnitude of all flight dynamics behaviours such as instabilities and torque-induced yaw. Setting it to maximum will give the most realistic response, (assuming the Difficulty Level enables the behaviour), while minimum will dampen the response entirely.
DodoSim 206 FSX User Manual Note that due to the aerodynamic nature of the fuselage and vertical stabiliser, (the “tail fin”), the effects of torque-induced yaw diminish as airspeed increases, to the point where little or no left pedal input is required above forward speeds of about 40 knots. Torque-induced yaw is only present when the engine is physically driving the rotor system, (since if there is no “action”, then there can be no “equal and opposite reaction.
DodoSim 206 FSX User Manual 3.4.1.4 Increased Low Speed Sensitivities At low or hovering speeds the helicopter’s cyclic and anti-torque pedal controls become more sensitive and have a greater effect on the helicopter’s behaviour. Pilots must be finely attuned to the behaviour of the aircraft at these low speeds and constantly make small subtle changes to the controls, anticipating their effects. Over-control can result in “Pilot Induced Oscillation” otherwise.
DodoSim 206 FSX User Manual 3.4.1.6.1 Engine Failures If the engine fails, power output will cease immediately and thrust from the rotor system will be lost. Combustion will continue so long as fuel is flowing. Since this combustion is taking place in a critically damaged engine, it is uncontrolled and considered a fire. Flames may be visible from the exhaust stack and the pilot may perceive a vibration when flying in the 3D virtual cockpit view.
DodoSim 206 FSX User Manual 3.4.1.6.2 Main Transmission Failure The DodoSim 206 FSX models a one-way “sprag” clutch failure when the main transmission fails due to continued or repeated over-torque. Failure of this clutch prevents the engine output shaft from driving the main and tail rotors and thrust will be lost.
DodoSim 206 FSX User Manual 3.4.1.6.3 Tail Rotor Transmission Failure The tail rotor transmission failure models a physical breakdown of the tail rotor gearbox and can occur after repeated or prolonged aggressive tail rotor pedal inputs. Indications of a failure are a high speed grinding noise and loss of tail rotor control. The pilot must land immediately.
DodoSim 206 FSX User Manual drop and the Power Turbine (N2) and rotor RPM (NR) needles will stabilise as the governor regains control. Important note: The clutch connecting the Power turbine (N2) and Rotor shaft (NR) can be thought of as a one-way bearing: i.e. The N2 can drive the NR up and the NR can drive the N2 down, but failures notwithstanding, the N2 cannot drive the NR down and the NR cannot drive the N2 up. However: Friction within the clutch does enable one to drag slightly on the other. 3.4.1.
DodoSim 206 FSX User Manual your maximum permitted speed (VNE) in order to avoid loosing control due to Retreating Blade Stall.) 3.4.1.12 Effect of Wind on Horizontal Stabiliser The horizontal stabiliser is the small “wing” situated midway along the tail boom. Its purpose is to provide stability in the pitch axis during forward flight.
DodoSim 206 FSX User Manual Relative wind Whilst tail rotor VRS does not in itself prove a serious problem for the skilled pilot, slow corrective action may cause the helicopter to yaw to the right enough that the relative wind azimuth moves into the weathervane region between 120° and 240°, where a right yaw could accelerate quickly. 3.4.1.13.
DodoSim 206 FSX User Manual 3.4.1.14 Rotor Droop on Torque Application Increasing collective pitch creates greater drag on the rotor blades and the rotor RPM will drop if engine power is not increased to compensate for the drag. The engine’s Fuel Control Unit (FCU) includes a governor that attempts to automatically compensate for rotor RPM fluctuations by increasing or decreasing fuel as required to produce greater or lesser power. However, sudden increases in drag, (i.e.
DodoSim 206 FSX User Manual 3.4.1.17 Timed Procedure Adherence The helicopter’s gas turbine engine creates an enormous amount of heat and can go from ambient temperatures to many hundreds of degrees in the first few seconds of combustion. The pilot must take care to allow this heat to dissipate throughout the engine and transmission systems before taking off to avoid thermally shocking bearings and oil pathways. Failure to do so will likely cause excessive engine wear and reduce longevity.
DodoSim 206 FSX User Manual 3.4.1.19 Manual Cued Engine Start Trainer Mode The manual start-up and shut-down mode operate similarly to the automatic procedure described above, except that after highlighting the required input on the panel the helicopter waits for the pilot to perform the action before progressing to the next step. As with the fully automatic sequences, the pilot can abort the sequence at any time by pressing the flashing “T” Trainer icon.
DodoSim 206 FSX User Manual 3.4.2 Persistent Data The DodoSim 206 FSX introduces a revolutionary feature to Microsoft Flight Simulator helicopters; Persistent Data. As you operate and fly the helicopter, the software stores detailed information about the aircraft in a data file. This file records information such as the number of engine starts, hours flown, fuel added, wear and damage accrued, etc.
DodoSim 206 FSX User Manual Settings” for more details.) Should you wish to let a friend try their hand at flying the DodoSim 206 FSX on your PC without changes to your persistent data occurring, you can simply use the “Aircraft->Select Aircraft” menu option to temporarily change the tail number and then change it back afterwards. Once changed, the software will start saving a new persistent data file utilising the new tail number, with initial data copied from the previous state.
DodoSim 206 FSX User Manual Cumulative wear and damage is stored for the following attributes: Engine wear due to operation above temperature limits, (usually incurred during “hot starts”.) Engine oil temperature and pressure degradation, which is calculated relative to engine wear. Engine wear due to dirty fuel, caused by clogging and bypassing of the fuel filter. Engine mechanical failure, due to wear having passed a critical limit.
DodoSim 206 FSX User Manual The pilot can elect to perform three levels of service on three specific sub-systems of the aircraft: the engine, main transmission and tail rotor transmission. These are: Inspection – The service engineer visually inspects the system for signs of wear and will report his findings but does not conduct any repairs.
DodoSim 206 FSX User Manual 3.4.5 Costings The use of Persistent Data enables fuel use and aircraft servicing selections to be charged for and the charges accumulated over time to provide an operating efficiency based upon accumulated cost against flying time.
DodoSim 206 FSX User Manual Simulator X Files” folder. Should this file be deleted, it will be recreated containing the default cost values the next time the DodoSim 206 FSX is reloaded within FSX. Important note: Costings are presented for entertainment use only. No inference is to be taken as to the actual operating cost of a real helicopter. 3.4.
DodoSim 206 FSX User Manual Other failures are only available when the helicopter is placed in “Timed Failures” mode as opposed to “Cumulative Wear” mode, (which is set in the DodoSim 206 FSX Settings dialog, accessed from the “Add-ons” menu.) When in Cumulative Wear mode, pilot misuse causes wear and eventual failure of the engine, main and tail transmission systems and simulated aircraft servicing and maintenance is required to correct them.
DodoSim 206 FSX User Manual 3.5 SETTINGS The DodoSim 206 FSX contains Settings options in addition to those provided through the standard FSX menus in order to provide additional user configurability for functionality specific to the DodoSim product. The Settings dialog is accessed via the Add-ons menu: The settings are stored in the “Dodosim 206 FSX.cfg” file within the the “My Documents\Flight Simulator X Files” folder.
DodoSim 206 FSX User Manual 3.5.2 Controls This section is used to tailor the aircraft’s configuration to specific hardware: Collective throttle has mechanical idle stop and release (no map-able micro-switch) This option should be selected if you are using a custom made collective lever that includes a mechanical idle release latch, which negates the need for a software stop and the associated button event action.
DodoSim 206 FSX User Manual 3.5.
DodoSim 206 FSX User Manual 4 FLYING THE DODOSIM 206 FSX Flying a helicopter in real life is not difficult. Almost anyone can learn to do it with practice and a good instructor. It is a lot like driving a car in that the skills you require seem overbearing at first, but after a few hours begin to become second nature and by the time you have passed your test have become subconscious reflexes which you no-longer notice.
DodoSim 206 FSX User Manual pilot opens the throttle to begin delivering fuel. The fuel then ignites and literally explodes within the combustion chamber. Due to the fact that the starter motor is forcing air in through the compressor section, the exhaust gases created from the expanding explosion within find it easier to exit through the rear of the engine between the vanes of the power turbine, turning it as they do so.
DodoSim 206 FSX User Manual 15. Warning horn mute button DEPRESS to silence engine out siren 16. Raise collective lever – observe warning horn sound, then lower 17. Annunciator test button DEPRESS to test annunciator lights – confirm all segments light 18. Turbine Over-Temp (TOT) light test DEPRESS to test – confirm TOT light illuminates 19. Aft fuel pump CB to IN 20. Fore fuel CB to IN 21. Anti-collision light switch to ON 22. Throttle to FULLY CLOSED – press idle release if necessary 23.
DodoSim 206 FSX User Manual 26. Starter button CONTINUE TO HOLD – Observe N1 rise and rotor speed increase. 27. Monitor Exhaust Gas Temperature – if over yellow band then cut fuel by fully closing the throttle and depressing the idle release latch or closing the fuel valve, continue to motor starter, do not release until temperature decreased into the yellow band. 28. At 58% N1 – Observe ENG OUT annunciator light extinguishes RELEASE STARTER BUTTON - 29.
DodoSim 206 FSX User Manual 25. Open the throttle slowly and smoothly until combustion commences. Important note: This can most easily be accomplished when not using a joystick axis to control the throttle by left-clicking in area A in the throttle window. A B C See the previous section “Cockpit Buttons and Switches – The Collective Head” for more information on throttle use and mouse throttle control. 26.
DodoSim 206 FSX User Manual 4.1.1.3.2 Tail Winds Moderate to strong tail winds can prevent the exhaust gases from escaping the engine via the exhaust stack during start-up. For this reason, engine starts should not be performed with a tail wind of any strength. If you have to do it, monitor the EGT carefully during the start procedure.
DodoSim 206 FSX User Manual 4.1.3 Hovering and Slow-Speed Flight Helicopters are by their very nature unstable and hovering requires constant attention and control inputs. You should not expect to be able to remove your hands and feet from the controls and for the helicopter to remain stationary. It is suggested that you learn to hover the helicopter in steps, utilising the various difficulty levels. (Refer to the table in the Difficulty Settings section for more information.
DodoSim 206 FSX User Manual cushion the final touchdown. When performed incorrectly and the collective is lowered too far, the helicopter can end up oscillating in altitude as the pilot over-controls by first decreasing collective and then reapplying it. Note that at high altitude the helicopter may not have enough power to hover without over-torquing. Always ensure you have adequate excess thrust required for hovering before landing.
DodoSim 206 FSX User Manual insufficient to maintain height and the helicopter will begin to sink. Therefore, an increase in power using the collective lever is required to compensate. As the helicopter transitions into forward flight, between approximately 12 and 24 knots the rotor encounters Transverse Flow (see section 3.4.1.16), and a distinct pitch up and roll to the right occurs. Positive opposing cyclic input will be required to overcome this behaviour.
DodoSim 206 FSX User Manual In forward flight, the advancing rotor blade, (the blade travelling towards the direction of the helicopter’s travel), meets the air at a greater speed that the retreating blade, (the one travelling away from the direction of the helicopter’s travel), and consequently generates more lift. The “dissymmetry of lift” causes the helicopter to tend to roll towards the left. The pilot must apply greater right cyclic inputs to maintain a level attitude as airspeed increases. 4.1.4.
DodoSim 206 FSX User Manual Pilot Information: Excessive and unnecessary helicopter noise causes complaints from the public and contributes to increasing pressure on local airports to close down or cease helicopter operations. Consideration should be shown by the pilot to reduce the noise generated by the rotors when operating around airfields and over populated areas by avoiding aggressive manoeuvring and the 85-120 kts and 250-750 fpm descent noise abatement region.
DodoSim 206 FSX User Manual 4.2 EMERGENCY PROCEDURES 4.2.1 Auto-Rotation Auto-rotation enables a helicopter to safely land when the engine is no longer driving the rotor blades due to either failure of the engine, transmission system, or an intentional reduction of engine power by the pilot, (for the purpose of practicing emergency landings.
DodoSim 206 FSX User Manual Practice auto-rotations are usually performed by reducing the throttle to approximately 70% travel, which reduces N2 to about 90%, disconnecting the transmission drive train, rather than reducing the throttle all the way back to idle. The reason for this is that if the pilot needs to bring the power back in to recover in the hover or abort the practice auto-rotation for any reason, the turbine does not have to spool up so far and torque and temperature spikes can be avoided.
DodoSim 206 FSX User Manual If either of these conditions have occurred or are believed to be about to occur, the pilot should press the idle release latch and close the throttle fully whilst continuing to hold the starter button down. The starter button can be released once EGT is observed to have dropped below 812°C once again. The pilot should not motor the starter to bring the temperature down any further.
DodoSim 206 FSX User Manual 4.2.3.2 Tail Transmission Failure In the event of a tail transmission failure, all tail rotor thrust is lost. The pilot will be unable to use the tail rotor to either affect the helicopter’s heading or compensate for torque-induced yaw. Since torque-induced yaw is only generated when the engine is turning the rotors, the best course of action is for the pilot to throttle the engine back to idle and auto-rotate to a landing.
DodoSim 206 FSX User Manual 5 TROUBLESHOOTING 5.1 INSTALLATION “I’ve installed it and many of the gauges just show blank black circles and a lot of the switches in the 2D cockpit are missing. What’s wrong?” It is almost certain that you have a corrupt SimConnect installation caused by an old version of the Microsoft Visual Studio 2005 (VS2005) runtime libraries, upon which SimConnect depends, that broke backward compatibility.
DodoSim 206 FSX User Manual Check that your throttle is fully closed. You cannot introduce fuel until the engine is running fast enough that the expanding combustion gases will be driven out the exhaust. “I’m doing everything right, but the temperature climbs past the yellow area every time during a start.
DodoSim 206 FSX User Manual You have likely damaged either the engine, main or tail transmissions. If you are in “Cumulative Wear” mode then you need to access the “Service helicopter” menu dialog to remedy the problem, or if you are in “Timers” mode then you need to reset the failed component using the DodoSim Failures menu dialog. “When I change from a lower Difficulty Level to a higher one, my engine/transmission fails. Why?” Lower difficulty levels do not allow mechanical failures.
DodoSim 206 FSX User Manual FSX plays sounds depending on which window view is currently in focus. Only clicking within the 3D portion of the window selects focus, not when you click on a 2D panel. (Since 2D panels can be opened in any view window.) 5.8 MISCELLANEOUS “I’m using custom scenery and I find that the ‘Fuel Purchased’ dialog opens the moment I land anywhere.
DodoSim 206 FSX User Manual 6 FREQUENTLY ASKED QUESTIONS “Where can I get on-line support for this?” Please visit www.dodosim.com and follow the relevant link to the DodoSim support forum. We aim to reply to all support requests as soon as possible, but occasionally there can be a delay. In many cases our dedicated testers and customers are able to answer questions quicker than we can! “Is this the same as DodoSim Advanced 206 for Flight Simulator 2004?” No.
DodoSim 206 FSX User Manual Yes, you are free to add your own gauges. However, replacement of default DodoSim 206 FSX gauges may render it inoperable or display incorrect readings. DodoSim cannot offer support to users who modify the product and then find it doesn’t work. You should retain a back-up of the installation files so that it can be returned to the default, working state. Copyright© 2009 DodoSim. All Rights Reserved.
DodoSim 206 FSX User Manual 7 CUSTOM ACTIONS FOR MISSION BUILDERS The DodoSim 206 FSX implements several custom actions which can be utilised by FSX mission builders to expand the user experience to include failures specific to the DodoSim 206 FSX: 1. DodoSim_ForceTimerFailures_ON – This switches the helicopter into Timer failure mode, (as opposed to Cumulative Wear mode), so that engine, main and tail transmission systems can be failed without effecting the user’s wear and damage persistent data. 2.
DodoSim 206 FSX User Manual 23. DodoSim_ClearAllFailures – Clears all failures. When either the set Timer failure mode, difficulty level or Failure Hints actions are set, the user is unable to change the setting whilst the mission is running. All settings and failures set by the mission using these custom actions are automatically cleared when the mission ends. Copyright© 2009 DodoSim. All Rights Reserved.
DodoSim 206 FSX User Manual 8 NOTES FOR COCKPIT BUILDERS 8.1 MAPPING SWITCHES TO EVENTS USING FSUIPC It is possible for home cockpit builders to use the FSUIPC add-on by Pete Dowson to link hardware switches directly to simulator switch states. In order for switch inputs to be interpreted correctly and DodoSim 206 FSX programming to operate correctly, you must map your switches to the input events listed in the section 2.4.3 “Keyboard Set-Up”.
DodoSim 206 FSX User Manual 9 FURTHER READING AND RESOURCES 9.1 INTERNET Come and join the Internet’s largest and most dedicated group of helicopter simulator enthusiasts at www.hovercontrol.com, where you’ll find forums dedicated to simulator training, home cockpit building, aircraft and scenery creation and of course DodoSim’s support forum. 9.
DodoSim 206 FSX User Manual 10 CREDITS 3D model and 2D panels and gauge graphics: Mark Adams Gauge, systems and dynamics code, sounds and effects, user manual: Simon Robbins GUI translations: Jean Sylvestre (Française) Manual translations by: Christian Gandon (Française) Thanks to beta testers: Jess Jellen, Jean Sylvestre “Uncle” Tedd Jones, Adrian Lindsay (Plus others who prefer anonymity) Special thanks to: Chris Gaeth and www.hovercontrol.com for hosting the test and support forum www.dodosim.
DodoSim 206 FSX User Manual www.dodosim.com Copyright© 2009 DodoSim. All Rights Reserved.