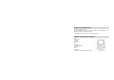
50009 Digital Music Player Owner’s Manual © 2008 Sakar International, Inc. All rights reserved. Windows and the Windows logo are registered trademarks of Microsoft Corporation. All other trademarks are the property of their respective companies.
Table of Contents Key Features ..........................................................................................................4 What your digital music player includes:..................................................................4 Computer System Requirements ............................................................................5 A Quick look at your digital music player .................................................................5 The Button Functions.............................
Introduction Thank you for purchasing the 50009 digital music player, voice recorder and USB memory device. This new generation digital portable device supports multiple music formats including MP3, WMA and WAV. Music Express software allows you to upload and download music to and from your digital music player, create audio and MP3 CDs, organize your songs in playlists, rip music from audio or MP3 CDs and much more. Please read this manual carefully before using your new player.
Key Features • • • • • Support multiple audio formats Firmware upgrade available online. USB disk with no driver required. Record/Replay- record external audio sources through the microphone and save them as audio files in WAV format. Scheduled power-off – set sleep mode and power save mode.
Computer System Requirements MS Windows 98SE/2000/XP/Vista (The driver for Windows98 can be found in an extra folder on the installation disk – see Technical Specifications section of this manual). For MS Windows 2000, XP or Vista no extra driver is required. A Quick look at your digital music player 1. Lock 2. Menu mode 3. Previous 4. Start/Stop 5. Vol 6. LCD Screen 7. Headphones input 8. Microphone 9. Next 10. USB Port 11.
The Button Functions 1. 2. 3. 4. 5. 6. Previous – previous track/fast backward Next – next track/fast forward Menu mode – option button to access menus and sub-menus/save the record (Record mode) Vol - adjust volume, press this key and then press the Previous or Next key to decrease or increase volume Start/Stop – on/ play/ pause/ stop/ off Press and release: i. Play/ Stop (Music mode) ii.
The Modes There are 4 modes: Play Music, Record, Voice, and Settings . The main menu: To enter into the main menu from another menu, press and hold down the Menu mode button until the main menu appears on the LCD. To enter into a mode: 1. Select a mode using the last or next button. 2. Press the Menu mode button to confirm your selection.
Play Music What is MP3? MP3 is an audio file format that compresses sound files to up to 1/10th of their original size without affecting sound quality. This sound compression means that an MP3 file takes up much less space on a computer hard disk than a file extracted from an audio CD (WAV file). 1. From the main menu, briefly press the Next or Previous button to select Play Music mode. 2. Briefly press the Menu mode button. 3. Using the Next or Previous buttons, choose the desired track. 4.
The following information will be displayed on the screen: The number of tracks available, the track number selected and its duration. Playing music 1. Connect the earphone to the EARPHONE port 2. Set the HOLD button to unlock 3. Press the PLAY button to turn on the player 4. Press the PREV/NEXT button to access the Play Music mode 5.
In the Playing mode: Press the PREV/NEXT to go forward or back a track Press and hold the PREV/NEXT to fast forward or fast rewind Press the PLAY button to pause playing To adjust the volume level, press the VOL button and then press the PREV button to decrease the volume or press the NEXT button to increase the volume. ● ● ● ● The Lyric Function You can program your player to display the lyrics of a song while playing. 1.
In the playing mode, the user can change the settings of Repeat, Equalizer, and Replay. Repeat mode: In Play mode, briefly press the Menu mode button to enter into the playing submenu. Press the PREV/NEXT to select the Repeat option. Briefly press the Menu mode button to enter into the Repeat mode options. Press the PREV/NEXT button to select one mode Briefly press the Menu mode button to confirm.
Equalizer mode: In Play mode, briefly press the Menu mode button to enter into the playing submenu. Press the PREV/NEXT and select the Equalizer option. Briefly press the Menu mode button to enter the Equalizer mode options Press the PREV/NEXT button to select one mode and then briefly press the Menu mode button to confirm your choice. There are six modes to select: natural, classical, jazz, rock, pop and DBB.
Press the Stop button on a playing song. You are now in the Stop mode. In the Stop mode you can change the folder settings and delete files. Folder mode: In Stop mode, briefly press the Menu mode button to enter into the Stop submenu. Press the PREV/NEXT to select the LOCAL FOLDER option. Briefly press the Menu mode button to enter into the local folder. Press the PREV/NEXT button to choose the different folders in the same level. Press the VOL button to enter into the folders in the lower level.
● Briefly press the Menu mode button to confirm your choice. Record mode 1. 2. Press and hold the Play button until the player turns on. After the Welcome screen the Main Menu will appear. 3. Press the PREV/NEXT button to select the REC Record mode. 4. Briefly press the Menu mode button to enter into the Record mode.
5. Briefly press the Play button to start recording. 6. 7. Press the Play button again if you wish to pause the recording. Press and hold the Menu mode button to save the file. Voice mode 1. Press and hold the Play button until the player turns on. 2. After the Welcome screen the Main Menu will appear. 3. Press the PREV/NEXT button to select the RPL Voice mode.
4. Briefly press the Menu mode button to enter into the Voice mode. 5. Press the Play button to start playing 6. Press the VOL button and then press the PREV/NEXT button to decrease/increase the volume.
Note: The VOICE mode also has the Repeat and Replay features. Setting up the system 1. Press and hold the Play button until the player turns on. 2. After the Welcome screen the Main Menu will appear. 3. Press the PREV/NEXT button to select the Setting mode. 4. Briefly press the Menu mode button to enter the Setting mode in order to view or change the setup of your system. The Settings available are: Language, Power off, Backlight, Contrast, Memory info, Firmware version, Default, Exit.
(Language): To choose different languages (English, Simple Chinese, Trad Chinese, French, German, Italian, Dutch, Portuguese or Spanish) • In language setting, press the PREV/NEXT button to select the language option • Briefly press the Menu mode button to save the language selected (Power off): To set time for auto power off. • In Power off setting, press the PREV/NEXT button to change the power off time.
Connecting the player to your computer Connect one end of the provided USB cable to your player and the other end of the cable to your computer. The following icon will appear on the screen of your player. Once you have connected your player to your computer, your player will appear as a removable disk. We recommend saving a copy of files that you transfer to avoid losing them in the event of a keying error.
Music Express Software installation 1. Insert the Software CD that came with your Digital Music Player into the CD-ROM drive. Make sure that your Digital Music Player is NOT connected with the computer. 2. On the “Music Express" screen, click the “Next” button.
3. Please review the license terms and click the “I Agree” button to continue.
4. Let the “Music Express” installer create the folder where the program will be installed to, and then click “Install”.
5. Click “Finish” to let the “Music Express” installer finish the installation program. To launch “Music Express” double click on the program icon on your desktop.) 6. Congratulations!! You have successfully installed the “Music Express” software.
Opening and Registering your Music Express software Digital Music Player Registration Make sure that your Digital Music Player is NOT connected with the computer. Note: The first time you open “Music Express” the wizard will open automatically requesting device installation. 1. Select the Music Express icon on the desktop to open your software.
2. A Welcome screen will appear asking you to register. You may register online by clicking the “Register Online” button. Fill in the form that appears and send. To register at a later time click the “Continue” button.
3. A “Digital music player installation wizard" screen will appear, click the “Next” button.
4. Select your Digital Music Player model and click the “Next” button.
5. Insert a name for the Digital Music Player device and click the “Next” button. This is the name that will appear on the application when your device is plugged in.
6. Now it is time to plug your Digital Music Player to the USB port. Plug the one end of the USB cable to your device and the other end to the USB port of your computer.
7. Once the computer recognizes that you plugged in your device, an “Install now” button will show, press it.
8. When the installation is done, a message will come up saying that the device has been successfully registered.
The next time you plug in your Digital Music Player device, it will automatically open “Music Express” and display its contents in “My music player” mode. (For more information please refer to the help file in the software) Device Auto-Detect The Device Auto-Detect detects your Digital Music Player as soon as you plug it into the USB port.
To disable the Auto-Detect on startup, right click on the Auto-Detect icon in the notification area and press "Preferences" or press the "Preferences" button in "Music Express" main window and uncheck the check box. To reset the Auto-Detect to launch at system start up do one of the following: • Right click on the Auto-Detect icon in the notification area, press "Preferences" and check the check box.
Using “Music Express” software Get Music Mode Click the “Get Music” button on the “Main Menu" window or in any other mode to rip an audio or MP3 CD, to find music on your computer or to copy music from any removable drive.
Rip an Audio (This feature requires Windows XP or higher.) 1. 2. 3. 4. 5. 6. Rip music from a music CD, copy it to your computer and add it to your music library. Click the “Rip CD” button in the “Get music” mode. Click the “Load CD” button to load the CD from the CD drive. Note: The default name of the CD can be changed. Mark the songs you want to rip (to choose all of the songs on the CD press the “Select all” button) Press the “Browse” button to choose the folder you want to copy songs to.
Find music on your computer Scan your computer for music files and add them to your music library. 1. Click the “Find music” button in the “Get music” mode. 2. Select a search type: a. Quick search- Search in “My music” folder. This is recommended. b. Full search- Search all hard drives in this computer. c. Custom search- Search a selected folder. 3. Add songs to a playlist: a. Create new playlist. b. Choose from an existing playlist. c. Don’t add songs to any playlist. 4. Click the “Begin search” button.
Copy music from removable drive Copy music files from any removable drive connected with your computer to add them to your music library. 1. 2. 3. 4. 5. 6. Make sure the removable drive is connected with your computer. Click the “Copy music from removable driver” button in the “Get music” mode. Select the removable drive from the drives list. Choose a playlist to add the songs to: a. Create a new playlist. b. Choose from an existing playlist. c. Don’t add songs to any playlist.
My Music Mode Listen, view and organize all of your music files in playlists using the My Music Mode. Playlist Click the “All Music” playlist in the “My Playlists” window to view all of the songs on your computer. The songs will appear in the “view playlists” window on the right.
Create a new Playlist 1. Click the Create button to create a new playlist 2. A dialogue box will appear; Insert a playlist name and press OK. 3. The new playlist will now be listed in the “My playlists” window. Add music files to a Playlist 1. Select the music file/files you wish to add from the “All Music” playlist or another existing playlist. 2.
View songs in a playlist View an existing playlist by clicking the playlist name from the “My playlists” window. The playlist will open on the right side in the “View playlist” window. Play music file from playlist Play a song from a playlist by double clicking on the song in the “View playlist” window or by choosing the song from the “View playlist” window and pressing the play button in the “Music player controls”. Once the song ends, the next song on the list will play. Music Player Controls: 1.
4. Playback slider– Play a song from a specific point. The Playback slider indicates the playback progress of the selected item. You can move the slider and determine where to start playback. 5. Volume slider- Control the volume level by moving the slider right to increase the volume or left to decrease the volume. 6. Previous- Play the previous song in the playlist. 7. Next- Play the next song in the playlist.
Remove songs from playlist Remove a selected song or a group of songs from the playlist. 1. Choose the song you wish to remove from the playlist. (In order to select more than one song, press the CTRL button and select the songs you wish to remove.) 2. Press the “Remove” button. Note: The song is removed from the playlist but not from your computer. Song Properties Modify song properties by adding Artist/Album/Genre information. 1. Click the “Song properties” button, and the properties window will open.
Rename an existing playlist 1. Choose the playlist you wish to rename. 2. Click the “Rename” button. 3. A dialogue box will appear; then insert the new name you wish to give the playlist and press OK. Delete a playlist 1. Choose the playlist you wish to remove. 2. Click the “Delete playlist” button. 3. A window will appear asking you to confirm your wish to permanently delete the playlist. If you wish to delete the playlist press “Yes”, if not press “Cancel”.
The “All Music” Playlist The top playlist in the “My playlists” window is a default playlist called “All Music” it contains all the music on your player, and cannot be deleted. Note: The “All music” playlist can be sorted by Title/Artist/Length/File name. Click on the column header you wish to sort by. To update it go to the “Get Music” mode and click the “Find Music” button. Create MP3 CDs (This feature requires Windows XP or higher). Burn an MP3 music CD from a playlist you created in “My music” mode. 1.
Create Audio CDs (This feature requires Windows XP or higher). 1. 2. 3. 4. 5. Burn an audio music CD from a playlist you created in “My music” mode. Choose the “Create audio CD” button in the main menu or in any mode on the bottom left. Choose a playlist from the playlists list and press the “Next” button. Mark the songs you want to burn from the playlist. Make sure you have a blank CD in the drive before pressing the “Begin burn” button.
Add music files to your Digital Music Player portable device In order to choose music to upload into your Digital Music Player you need to drag the music from the “My playlists” window into the “View playlist” window.
Save songs as Playlist After you transferred the selected songs to the Digital Music Player you can save the songs as a new playlist. 1. Press the 2. Insert a new playlist name. “Save as playlist” button. 3. The new playlist will appear in the “My playlists” window. Play songs transferred to your Digital Music Player Songs cannot be played directly from your player through the application.
The higher the compression is, the lower the music quality will be, but more files will be fit on the digital music player. Note: When using compression, copy the files to the MP3 player will be slower. 1. No compression- The music file is copied straight from your computer without compression. 2. Low compression- The music file is less than half of its original size allowing for more than the double amount of music. 3.
Installation Guide of “Win98Driver” for Digital Music Player Windows98 Operation System If you are running under Win98, you will not be able to install the “Music Express” software. However, you will be able to use your MP3 Player as a removable hard disk. In order for the device to be recognized by the PC you will need to install the correct Win98 driver. The driver for Win98 is included on the installation CD that came with the player.
2) Right click on the Music Express icon that appears with your CD-ROM drive. Select “Open” and choose the Win98Driver folder.
3) Double-click the “Win98Driver” folder and run the “AvidDriverSetup.
ERROR: stackunderflow OFFENDING COMMAND: ~ STACK: