Please read this manual carefully first in order to get the most out of your Discovery Kids Wrist Cam Watch. Your Wrist Cam Watch can be used as a low-resolution digital camera and as a web cam (to chat over the Internet). This camera is equipped with a 16Mb built-in ROM, therefore you are able to use it to take up to 152 low-resolution photos (under QCIF mode and high compression). Please note that in order to speak with friends and colleagues over the Internet, you will need a PC headset and microphone.
Table of Contents About Your Wrist Cam Watch...............................................................................4 Computer System Requirements........................................................5 Installing or Replacing the Batteries .................................................5 Getting Started.....................................................................................................7 Wrist Watch Cam Modes.....................................................................
About Your Wrist Cam Watch The following items are included with your Discovery Kids Wrist Cam Watch.
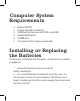
Computer System Requirements • • • • • • Windows 2000/XP Pentium-based PC (or equivalent) 80 MB hard disk free space and 32 MB or more RAM Available USB Interface CD-ROM Drive Color display (24 bit or higher recommended) Installing or Replacing the Batteries You will need a small Phillips head screwdriver—the type found in a jeweler’s or eyeglass kit. 1. Remove the wrist band so you can access the battery compartments. 2. Use a small Phillips head screwdriver to loosen the screw.
3. Insert 2 "AAA" batteries. Make sure the "+" and "-" ends are inserted correctly, as indicated in the battery compartment. 4. Close each battery cover and tighten each screw. 5. Replace the wrist band. Note: When the battery power is low you will hear a beeping sound when you press the shutter button. Before you replace the batteries, please make sure to download any photos that may be in the memory of the camera. Any stored images will be lost when the batteries are removed.
• Dispose of batteries safely, following guidelines for your area. Auto Energy-Save Mode In order to conserve battery power, if the camera is not used within 30 seconds after turning it on, the camera will automatically enter into energy saving mode. This will prolong the life of the batteries. To wake up the camera from the energy saving mode, simply press the CAMERA MODE button.
12:00 50/60 Hd Ld Clock mode Turn camera off Self timer Continuous shoot mode Delete All Delete last photo Hi - CIF mode (100k pixels resolution) Lo - QCIF mode (25K pixels resolution) 50Hz or 60Hz fluorescent lighting frequency High compression ratio (higher compression means you may store more photos) Low compression ratio Note: When scrolling through the CAMERA MODE, if you do not press any button within 5 seconds, the LCD display will jump back to the counter and the LCD screen will display how many
To Set the Time The Wrist Cam Watch has a 12 hour time display. 1. Press the MODE button to choose your setting. Press it the following number of times according to which display you want to set: a. Two times to enter the month b. Three times to enter the date c. Four times to enter the hour ( "A" =AM/"P"=PM) d. Five times to enter the minute 2. Use the SET button to scroll through and select the correct numbers or setting. 3. Press the MODE button to enter your setting.
Using Your Camera When taking pictures, aiming the lens as shown here will allow the lens to record your images right side up. When you wear the Watch Cam on your hand, pay attention to the LENS IMAGE direction when taking your photos. To achieve the best clarity, make sure that the distance between the camera and the subject is 5'. Taking Photos 1. Press the CAMERA MODE select button one time to activate the camera.
4. When the digital camera is at full capacity, the LCD display will show "0" photos left to take. You will hear the camera "beep" twice. You will not be able to take any more photos. 5. Before you can take any more photos you will need to follow the instructions to download your photos or delete them. Note: When taking photos, the louder "beep" indicates a successful photo shot and a low sounding "beep" will indicate the last photo taken was not taken properly. Auto-Shoot Mode 1.
continuous shooting mode and do not release the Shutter Button until you want to stop shooting. The camera will beep once for each photo taken till the Shutter button released or the memory is full. 3. Under the continuous shooting mode, the photos are taken in CIF & QCIF modes and saved as a video format. Note: Under the Continuous Shoot Mode, the shooting may fail due to poor lighting. If so the continuous shooting will stop.
Single Photo 1. Press the Camera mode select button to select the " " icon shown on the LCD display. As you scroll through the icons this will be the second trash can that appears. You will recognize it because it has one handle on the lid. 2. Within 5 seconds press the Shutter button once. This will delete the last photo taken. Your Photo Options Storage The number of photos that can be taken by the camera will vary upon the selection of resolution and compression.
Resolution The resolution status will always show on the LCD display in small characters to the right of the time display. "HI" means CIF mode 352 x 288 Pixels, "LO" means QCIF mode 176 x 144 pixels. The HI mode will allow you to take 19 photos and the LO mode will allow you to take 76 photos. 1. Press the CAMERA MODE select button to select icon on LCD display. 2. Press the shutter button once to switch between the HI mode or the LO mode.
should set the fluorescent lamp frequency to that in your region. Selecting 60Hz Press the CAMERA MODE selection button to check the current frequency selection. If the LCD display shows 60 it means the present frequency is set for 50Hz. Press the Shutter button to change the frequency to 60 Hz. Selecting 50Hz If the LCD shows 50 it means the present is set for 60Hz. Press the Shutter button to change the frequency to 50Hz.
3. On the "Spy Shot Photo Manager" screen, click the "Next" button. 4. Please review the license terms and click the "Agree" button to continue. 5. Let the "Spy Shot Photo Manager" installer create the folder where the program will be installed, and then click "Install".
6. Click "Finish" to let the "Spy Shot Photo Manager" installer finish the installation program. 7. This will automatically launch the Install shield for the camera driver. Click "Next" to continue.
8. Once the program has finished installing you will have to restart your computer. 9. When you receive this message your have successfully installed the "Spy Shot Photo Manager" software, the "PhoTags WebCam Express" and the Camera driver.
Downloading Photos Before downloading your pictures make sure you have installed the software from the CD. Download your photos as often as possible. Photos may be lost when the batteries run low. Use the "Spy Shot Photo Manager" program to import photos from your camera. Connecting to your computer 1. Plug the labeled end of the USB cable into the socket marked on your computer. This is normally located on your computer hard drive. If the port is not labeled, see your computer users guide. 2.
5. Click on the "Get Photos" button on the Main Menu. 6. The "Get photos from Spy Shot camera" window will appear. with the correct name of your camera device selected in the “Active devices” list in the “Express” mode. Click the “Next” button to proceed. NOTE: for Win XP users- the “JL 2005A Camera” device name appears twice on the “Active device list”. If the selected device does not download your photos try selecting the second “JL 2005A Camera” device name.
8. The photos you have just imported will appear in the "Select Photos" mode’s main window.
Recording Video Clips You can use your Wrist Cam Watch to capture short movies called AVI files. The length of time you can record an AVI while the camera is connected to your computer will vary, depending on how much hard drive space you will use to save the file. Please take note that these AVI files take up a lot of hard drive space. This is done through the PhoTags WebCam Express program. This next section will walk you though capturing an AVI file. 1.
2. Click the "Pause" button to hold the recording. To continue recording click the "Capture" button again. 3. To finish recording click the "Stop" button. 4. The videos will be automatically saved into a default directory. You can view them in the “Playback” window. Note: To learn how to capture JPEG snapshots from your WebCam or from your existing AVI movies, go to the "Take Snapshots" section in the Quick Start help.
1. Start Yahoo Messenger. 2. Select the "tools" listing on the top of the toolbar. Go to the drop down menu and select the listing for "start my webcam". 3. You will see a window appear with the video that you currently shooting. Now people who have your Yahoo login name will be able to se your video.
Troubleshooting Question: I have taken photos, but my computer says "No photos in camera." What do I do? Answer: First, ensure that you have taken photos with your camera. Press the shutter button a few times to take some sample photos and try again. If you still get a no photos error, this indicates that the software was not installed correctly or you may not meet the minimum system requirements. At least a Pentium II 300 MHz, AMD Athlon 300 MHz, or a Celeron 400 MHz or higher, at least 64 MB of RAM.
hardware and then Device Manager. If the camera is installed correctly, there will be a category listed for "Imaging Devices" and clicking on the "+" next to it should reveal your camera. If not, you will likely see "Digital Still Camera" under "Other Devices" with a brightly colored marking next to it indicating it is not functioning correctly. Right click on the non functioning device and select uninstall. If a warning pops up, press OK. 6. Restart your computer again.
Can’t find what you are looking for? Fill out an online ticket and one of our technical support team members will answer your questions. Or call 877-397-8200 to access our technical support information on the phone. For question on warranty information please email warranty@sakar.com. Technical Specifications Product Type: Digital Camera Electronic Coupling Element: CMOS Sensor 100 K Pixels Image Resolution: 352*288 Pixels (CIF) 176*144 Pixels (QCIF) Lens: f=3.6mm F2.
One Year Warranty This warranty covers for the original consumer purchaser only and is not transferable. Products that fail to function properly UNDER NORMAL USAGE, due to defects in material or workmanship. Your product will be repaired or (at our discretion) replaced at no charge (excluding shipping, handling and insurance charges). Contact Sakar International for details.
FCC Notice This device complies with part 15 of FCC Rules. Operation is subject to the following two conditions: (1) This device may not cause harmful interference, and (2) This device must accept any interference received, including interference that may cause undesired operation. Warning: Changes or modipcations to this unit not expressly approved by the party responsible for compliance could void the user’s authority to operate the equipment.
© 2006 Discovery Communications, Inc. All rights reserved. Windows and the Windows Logo are registered trademarks of Microsoft Corporation. All other trademarks are the property of their respective companies.