
Operation Manual


-5-
Press LEFT or RIGHT button to highlight the Clock icon , and press MODE
button to display the Clock interface.
3. Press the FM/CLOCK button on the unit one or several times to display the
Clock interface.
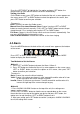
Changing the Display Mode of the Clock
On the Clock screen, press SET button on the back of the unit, a menu appears on
the screen, press LEFT or RIGHT button to select the option on the screen, then
press SET button to confirm your selection.
The menu is:
Back: Choose it to return the Clock screen.
Analog Clock/ Digital Clock: Choose it to change the display mode of the Clock
(Analog/Digital).
Color Inverse: Choose it to exchange the color of the background and user
interface.
Setting the Clock
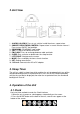
1. Press the MODE button on the back of the unit.
2. Press LEFT or RIGHT button to highlight the Setting icon , and press MODE
button to enter the Setting menu.
3. Press LEFT or RIGHT button to highlight the ‘Time’ option.
4. Press SET button, the Hour is around by a rectangle, then press LEFT or
RIGHT button to change the digit.
5. After setting the Hour, press SET, LEFT and RIGHT buttons to set the Minute
and Second.
6. After your setting, press SET button till the color of ‘Time’ option changes to
yellow, that means you have exit the time setting.
7. Use the LEFT/RIGHT buttons to highlight the ‘Time Format’, and press SET,
LEFT and RIGHT buttons to select the time display format you desire.
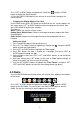
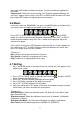
4.2 Radio
Press the MODE button on the back of the unit; several icons appear at the bottom
of the screen.
Press LEFT or RIGHT button to highlight the Radio icon , and press MODE
button to start the Radio . Or you can press the FM/CLOCK button to start the
Radio. For the first searching, a picture appears on the screen: