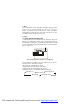
DVP-7010MKII PORTABLE 7" LCD MONITOR AND DVD PLAYER PDF created with FinePrint pdfFactory Pro trial version http://www.fineprint.
NOTICE: This Product incorporates copyright protection technology that is protected by method claims of certain patents and other intellectual property rights owned by Macrovision Corporation and other rights owners. Use of this copyright protection technology must be authorized by Macrovision Corporation, and is intended for home and other limited viewing uses only unless authorized by Macrovision Corporation. Reverse engineering or disassembly is prohibited.
A. Introduction Thank you for choosing the 7 ” portable DVD player. The main features include a 7" Wide Screen (16:9 Aspect Ratio) Liquid Crystal Display (LCD) monitor and a DVD player. The unit applies the latest state of the art electronics and is designed for use in hotels, offices or your home. The unit is constructed to provide years of reliable, trouble-free service, and is compact so that you can take it with you anywhere and is designed for quick and easy installation.
battery incorrectly. Replace the battery only with the same or equivalent type, in order to protect the environment,please dispose the battery properly. Do not use the unit in temperatures higher than 104 degrees Fahrenheit or 40 degrees Celsius. 4.Disassemble Do not attempt to disassemble the cabinet. There is a risk of electric shock and/or exposure to Laser Radiation. Contact qualified service personnel if your system needs repair. 5.
C. Contents 1. 1 x 7’’ LCD Monitor & DVD Player Combo 2. 1 x AC to DC Adapter 3. 1 x Remote Control with battery (CR2025) 4. 1 x Instruction Manual 5. 1 x Audio/Video Cable 6. 1 x Cigarette Lighter Adapter 7. 1 x Rechargeable Battery D. Powering and installation 1. Powering the system indoors (Refer to Figure 1) Plug one end of the AC to DC adapter into the DC 9~12V jack on the right side of the main unit, then plug the other end into the 110~240V AC power outlet. 2.
E. Controls, Indicators, and Connectors 1. Unit View (Refer to Figure 2) Figure 2 8) Power On/Off Switch 9) Brightness Up/Down Control 10) Volume Up/Down Control 11) Headphone Jack 1 12) Headphone Jack 2 13) E-Port 14) AV In/Out Switch 15) AV Jack 16) DC 9~12V Jack 1) MENU Button 2) Up/Down/Left/Right/OK Buttons 3) Open Button 4) Previous/Next/Pause/ Stop/Play Buttons 5) Screen Mode Button 6) Remote Sensor 7) Power Indicated LED 6 PDF created with FinePrint pdfFactory Pro trial version http://www.
2. Remote Control View (Refer to Figure 3) 1) Setup Button 2) Up Button 3) Skip- Button 4) Enter Button 5) Reverse/Left Keypad 6) DOWN Button 7) Numeric Button 8) Display Button 9) Zoom Button 10) Subtitle Button 11) Skip+ Button 12) A-B Repeat Button 13) Forward/Right Keypad 14) 1/All Repeat Button 15) Stop Button 16) Menu Button Figure 3 17) Audio Button 18) Angle Button 19) Play/Pause Button F.
G.
H. Menu A DVD is divided into sections called titles and chapters. When you play a DVD, a root menu of the disc will appear on the screen of your TV or Monitor. The contents of the menu vary from disc to disc. Press MENU during playback to display the menu. Some DVDs only allow you to select disc playback options using the DVD root menu. I. Display 1. PLAYING TIME AND REMAINING TIME a.
2. ANGLE During playback of a disc, press ‘ANGLE’ to display the available angles for discs containing multi-angles*, with the current angle number (1) and the total number of angles (2) displaying. Press ‘ANGLE’ to select another angle, then press again to exit and return to the normal viewing angle. The angle display will disappear automatically if the ‘ANGLE’ button is not pressed again within 3 seconds. *NOTE: Not all discs contain this feature. Angle Subtitle 3.
Zoom Audio Language 5. ZOOM During playback press ‘ZOOM’ to enlarge the picture by 2X, 3X or 4X with the current zoom multiple. (1)Press “zoom”one time ,the picture will be enlarged 2X. (2)Press “zoom” a second time ,the picture will be enlarged 3X. (3)Press “zoom” a 3rd time ,the picture will be enlarged 4X. (4)Press “zoom” a 4th time ,the picture will return to normal size. 6. A-B REPEAT a. During playback press a first time ‘A-B’ to set the Starting Point A. b.
7. 1/ALL REPEAT a. During playback press ‘1/ALL REPEAT’ constantly to see the repeat mode as right. Chapter: Repeat the current chapter Title: Repeat the current title All: Repeat all chapters and titles Off: Resume normal playback The ‘Chapter’ repeat display shows below for example: Single Elapsed When Playing Audio CDs Chapter Repeat J. Playing Audio CDs When playing an audio CD press the DISPLAY button constantly on the remote to view time information.
Total Elapsed: Total Remain: Display Off: The current track playing and the total time that the CD has been playing. The current track playing and the amount of time remaining on the CD. The CD time Information will not be displayed. Take ‘Single Elapsed’ display as a example shown above: USING THE REPEAT FEATURE The default mode for the Repeat feature is OFF. Pressing REPEAT consecutively changes the repeat options: • Track- repeats the track that is playing. • All- repeats the disc that is playing.
4. Use the ( NEXT ) button to move to the next song. Press the (PREVIOUS) button twice to move to the beginning of the previous song. USING THE REPEAT FEATURE The default mode for the Repeat feature is OFF. Pressing REPEAT consecutively changes the repeat options: • Single • Repeat One (repeat playback of a song) • Repeat Folder (repeat playback of a specific folder) • Repeat Off (normal playback) As you toggle through the options, the repeat mode changes.
L. Playing JPG file 1) Load the JPG Disc into tray. 2) Select JPG file by pressing “UP/DOWN” button. 3) You can preview the JPG file by pressing “Play” or “ENTER”. 4) Pressing the “Left Key“ will rotate the picture90 degrees counterclocckwise. Pressing the “Right Key“ will rotate the picture clockwise. 5) When browsing the photos, you can reverse the photo horizontally by pressing “Up” key,or you can reverse the photos vertically by pressing “Down” key.
l. When “COMPRESS TO CENTER V” is displayed on the screen, the picture will refresh from right and left to center. m. When “WINDOW H” is displayed on the screen, the picture will refresh from four window’s top side to bottom side. n. When “WINDOW V” is displayed on the screen, the picture will refresh from four window’s left side to right side. o. When “WIPE FROM EDGE TO CENTER” is displayed on the screen, the picture will refresh from 4 edges to center.
M. Setup 1. General Setup Page 1)With no disc inside the player, press ‘SETUP’ to display the Main screen of the Setup Menu on the screen and “General Setup Page” appears. At the same time, “ ” is highlighted. Press ‘SETUP’ again to exit the Setup Menu and the unit will resume it’s last playback mode. 2)Press the ENTER button, “TV Display” is highlighted. 3) Press the or button to select the other menus in general setup page. 4) Press to enter the sub menu.
c). Screen Saver *On: Enables screen saver *NOTE: The DVD player will enter the Screen Saver mode after approximately five minutes if the same image remains on the screen.*Off: Disables screen saver (off) d). Last Memory *On: The unit will return to the last position on the disc. *Off: The unit will not return to the last position on the disc. Note: The Last position memory function only effect when switching AV In/Out switch. 2.
Old Password or the Default Password, the New Password, and the Confirmed New Password. Press ENTER to confirm the change. Note: In case you forget newly-input password, you can use 3308 as a password. 4. Preference Page 1) With no disk inside press “SETUP” to enter Setup menu, use the or button to select “Preference Page”and is highlighted. Press ENTER to enter the preference page. 2)Press the ENTER button, “Audio” is highlighted. 3)Press the or button to select the other menus in the preference page.
1 KID SAFE (Kid safe) 2 G (General audiences) 3 PG (Parental guidance suggested) 4 PG 13 (Parents strongly cautioned) 5 PGR (Parents very strongly cautioned) 6 R (Restricted) 7 NC-17 (No one 17 and under admitted) 8 ADULT (Adult) NOTE: The level of 8 Adult is the factory default. e) Default Select ‘Default’ by pressing the or button in preference page. And Press to enter the sub menu. Press ENTER to make the setting return to the factory-set mode.
Figure 4 2. AV In Using “AV Jacks” connecting to a Game or Camcorder. ( Refer to Figure 5) a. Slide the AV In/Out switch to In. b. Connect one end of the supplied audio/video cable ’s black (1/8” stereo plug) plug into the unit’s DVD’s AV jack, and connect the other end to the AUDIO OUTPUT jacks on your Game or Camcorder through an optional RCA cable(white = left channel, red = right channel, Yellow = Video). Figure 5 21 PDF created with FinePrint pdfFactory Pro trial version http://www.fineprint.
Using “E Port” connecting to a TV Tuner or Game Pad. 1) Receiving TV Programs with Optional TV Tuner Box( Refer to Figure 6) Please refer to the specific operations described in the TV Tuner Box. Figure 6 2) Playing Games with Optional Game Pad( Refer to Figure 7) Please refer to the specific operations described in the Game Pad. Figure 7 Note: Please don’t use the “AV Jack” and “TV Port” at the same time when “AV IN” mode. 3.
Note: Optional wired headphone may be used with the unit. Simply plug in the headset to either Headphone 1 jack or Headphone 2 jack on the right side of the DVD.( Refer to Figure 8) Figure 8 Plugging into Headphone jack 1 disables the internal speakers. O. Specifications Compatible DISC: DVD/CD/MP3 Signal system: PAL Panel size: 7 inch Frequency response: 20 Hz to 20 kHz Video output: 1 Vp-p/75 Ohm, unbalanced Audio output: 1.
P. Rechargeable Battery Installation and Use The player utilizes a set of long-life Ni-Mh batteries for a portable power supply. Ni-MH batteries feature high storage capacity and low level of degradation. This means the Ni-MH batteries do not have “Memory Effect” and thus can be recharged safely regardless of whether the battery is fully or only partially discharged. Please fully charge the battery prior to first use.
Installing the Battery Pack: 1. First, make sure the player is in “Power Off” mode and that the AC power supply has been disconnected. 2. Close the player cover. 3. Align the battery pack with the player module’s front edge. 4. Push the battery towards the rear of player until it locks into position. The lock position is indicated by a click. The unit will fit snugly to the player. 5. Push the battery plug into the DVD player DC input jack. Installing the DVD Player Battery Removing the Battery Pack: 1.
This symbol on the product or in the instructions means that your electrical and electronic equipment should be disposed at the end of its life separately from your household waste.There are separate collection systems for recycling in the EU. For more information, please contact the local authority or your retailer where you purchased the product. 26 PDF created with FinePrint pdfFactory Pro trial version http://www.fineprint.
DVP-7010RBL TRAGBARER LCD-MONITOR 7“ MIT DVD-PLAYER
HINWEIS: Dieses Produkt verwendet Kopierschutztechnologien, welche durch Patente oder sonstige Urheberrechte im Besitz der Macrovision Corporation und von anderen Eigentümern geschützt sind. Die Verwendung dieser Kopierschutztechnologie bedarf der Autorisierung durch die Macrovision Corporation und ist ausschließlich für den Gebrauch im Heimbereich und andere begrenzte Anwendungszwecke vorgesehen, sofern keine Erlaubnis der Macrovision Corporation vorliegt.
A. Einleitung ...............................................................................4 B. Hinweise und Warnungen ......................................................4 C. Inhalt ......................................................................................6 D. Stromanschluss .....................................................................6 E. Bedienelemente, Anzeigeelemente und Anschlüsse.............7 F. Disk laden und abspielen .......................................................
A. Einleitung Wir danken Ihnen für den Kauf dieses tragbaren DVD-Players. Zu den Hauptmerkmalen gehören ein Breitbildschirm von 7“ (Format 16:9), ein LCD-Monitor und ein DVD-Player. Das Gerät verwendet modernste Elektronik und ist für den Einsatz in Hotels, Büros oder auch zuhause gedacht. Das Gerät ist so konstruiert, dass es jahrelang zuverlässig und problemfrei funktioniert, und es ist so kompakt, dass Sie es überall hin mitnehmen und schnell und einfach installieren können.
Es ist gefährlich, wenn die Batterie falsch eingelegt wird. Die Batterie nur durch die Gleiche oder eine entsprechende ersetzen. Zum Schutz der Umwelt die Batterie bitte korrekt entsorgen. Das Gerät nicht bei Temperaturen über 40 Grad Celsius verwenden. 4. Zerlegen Versuchen Sie nicht, das Gerät zu zerlegen. Es besteht das Risiko eines Stromschlags und/oder Sie können der Laserstrahlung ausgesetzt werden. Wenden Sie sich bitte an einen qualifizierten Servicetechniker, wenn das Gerät repariert werden muss.
C. Inhalt 1. 1 x 7’’ LCD Monitor mit DVD-Player 2. 1 x Netzteil 3. 1 x Fernbedienung mit Batterie (CR2025) 4. 1 x Bedienungsanleitung 5. 1 x Audio-/Video-Kabel 6. 1 x Adapter für Zigarettenanzünder 7. 1 x Akku D. Stromanschluss 1. Stromanschluss in Gebäuden (siehe Abb. 1) Stecken Sie das eine Ende des Netzteils in die DC-Buchse 9~12V an der rechten Seite des Geräts und stecken Sie das andere Ende in eine Steckdose mit 110~240V Wechselstrom. 2. Stromanschluss des Systems im Auto (siehe Abb.
E. Bedienelemente, Anzeigeelemente und Anschlüsse 1. Geräteansicht (siehe Abb.
2. Fernbedienung (siehe Abb. 3) 1) Setup (Einrichten) 2) Auf 3) Zurückspringen 4) Eingabe ENTER 5) Rückwärts/Links 6) AB 7) Zifferntaste 8) Display 9) Zoom 10) Untertitel 11) Vorwärtsspringen 12) A-B wiederholen 13) Vorwärts/Rechts 14) 1/ALLES wiederholen: 15) Stopp 16) Menü 17) Audio 18) Kameraperspektive 19) Wiedergabe/Pause F. Disk laden und abspielen Dieser Abschnitt beschreibt die Bedienung über die Fernbedienung.
G.
H. Menü Eine DVD ist in Abschnitte unterteilt, die Titel und Kapitel genannt werden. Wenn Sie eine DVD abspielen, wird das Hauptmenü auf dem Bildschirm des Fernsehgeräts oder Monitors angezeigt. Der Inhalt des Menüs hängt von der DVD ab. Um das Menü während des Abspielens anzuzeigen, die Taste MENU drücken. Bei einigen DVDs können die Abspieloptionen nur über das DVD-Hauptmenü gewählt werden. I. Display 1. SPIELZEIT UND VERBLEIBENDE ZEIT a.
2. ANGLE (Kameraperspektive) Während des Abspielens einer DVD auf „ANGLE“ drücken, um die vorhandenen Kameraperspektiven anzuzeigen*, wobei die Nummer der aktuellen Perspektive (1) und die Gesamtanzahl der Perspektiven (2) angezeigt wird. „ANGLE“ drücken, um eine andere Perspektive zu wählen, dann nochmals drücken, um die Funktion zu schließen und zur normalen Perspektive zurückzukehren.
Sprachversion Zoom 5. ZOOM Während des Abspielens „ZOOM“ drücken, um das Bild 2X, 3X oder 4X zu vergrößern. (1) „ZOOM“ einmal drücken. Das Bild wird 2x vergrößert. (2) „ZOOM“ ein zweites Mal drücken. Das Bild wird 3x vergrößert. (3) „ZOOM“ ein drittes Mal drücken. Das Bild wird 4x vergrößert. (4) „ZOOM“ ein viertes Mal drücken. Das Bild wird wieder in Normalgröße angezeigt. 6. A-B WIEDERHOLEN a. Während des Abspielens, „A-B“ drücken, um den Startpunkt A zu wählen. b.
7. 1/ALLES WIEDERHOLEN a. Während des Abspielens „1/ALLES WIEDERHOLEN“ drücken, um die verschiedenen Wiederholmöglichkeiten, wie hier gezeigt, zu durchlaufen. DVD-Wiederholungsarten: Chapter (Kapitel): wiederholt das aktuelle Kapitel Title (Titel): wiederholt den aktuellen Titel All (Alles): wiederholt alle Kapitel und Titel Off (Aus): kehrt zum normalen Abspielen zurück.
Single Elapsed: Die Nummer des aktuellen Tracks und die Laufzeit des Tracks werden auf dem Bildschirm angezeigt. Single Remain: Die Nummer des aktuellen Tracks und die verbleibende Zeit werden angezeigt. Total Elapsed: Der Nummer des aktuellen Tracks und die Gesamtspielzeit bis jetzt werden angezeigt. Total Remain: Die Nummer des aktuellen Tracks und die auf der CD verbleibende Zeit werden angezeigt. Display Off (Aus): Die Zeitdaten der CD werden nicht angezeigt. Das obige Beispiel zeigt „Single Elapsed“.
1. Die Taste /▲/ oder /▼/ drücken, um einen Ordner aus der Ordnerliste links im Bild zu wählen. 2. ENTER drücken, um den markierten Ordner zu wählen. Die im Ordner vorhandenen Titel werden angezeigt. 3. Mit der Taste /▲/ oder /▼/ einen Titel aus der Liste wählen. ENTER drücken, um den markierten Titel zu wählen und ihn abzuspielen. 4. Mit der Taste / >>/ (VOR) zum nächsten Titel gehen. Die Taste /<
L. Wiedergabe einer JPG-Datei 1) Laden Sie die JPG-Disk in den Schublade. 2) Wählen Sie die JPG-Datei mit der Taste „AUF/AB“. 3) Sie können die JPG-Datei ansehen, wenn Sie „Play“ oder „ENTER“ drücken. 4) Durch Drücken der Taste „LINKS“ wird das Bild um 90 Grad nach links gedreht. Durch Drücken der Taste „RECHTS“ wird das Bild nach rechts gedreht.
l. Mit „COMPRESS TO CENTRE V“ wird das Bild von rechts und links zur Mitte hin eingeblendet. m. Mit „WINDOW H“ wird das Bild in vier Fenstern von oben nach unten eingeblendet. n. Mit „WINDOW V“ wird das Bild in vier Fenstern von links nach rechts eingeblendet. o. Mit „WIPE FROM EDGE TO CENTER“ wird das Bild von den vier Seiten zur Mitte hin eingeblendet.
M. Setup (Einrichten) 1. Allgemeines Einrichtmenü 1) Ohne DVD im Gerät die Taste „SETUP“ drücken, um das Hauptmenü für die Einrichtung aufzurufen. Das Hauptmenü „General Setup Page“ wird angezeigt. Das Symbol „ “ ist markiert. „SETUP“ noch einmal drücken, um das Einrichtmenü zu verlassen. Das Gerät kehrt in den letzten Wiedergabebetrieb zurück. 2) Die Taste ENTER drücken. „TV Display“ ist markiert. 3) Die Taste /▲/ oder /▼/ drücken, um die anderen Menüs aus dem Hauptmenü zu wählen.
c). Screen Saver (Bildschirmschoner) * On (Ein): Aktiviert den Bildschirmschoner. *HINWEIS: Der Bildschirmschoner des DVD-Players wird aktiviert, wenn dasselbe Bild für ca. fünf Minuten angezeigt wird. *Off (Aus): Der Bildschirmschoner wird deaktiviert (off). d). Last Memory (Speicherung der letzten Position) * On (Ein): Das Gerät kehrt zur letzten Position auf der DVD zurück. * Off (Aus): Das Gerät kehrt nicht zur letzten Position auf der DVD zurück.
Hinweis: Falls Sie das neue Passwort vergessen, können Sie 3308 als Passwort verwenden. 4. Voreinstellungen 1) Ohne DVD im Gerät „SETUP“ drücken, um das Einrichtmenü aufzurufen. Mit der Taste /<>/ „Preference Page“ (Präferenzsseite) wählen. ist markiert. ENTER drücken, um die Präferenzseite aufzurufen. 2) Die Taste ENTER drücken. „Audio“ (Ton) ist markiert. 3) Die Taste /▲/ oder /▼/ drücken, um die anderen Menüs für die Voreinstellung aufzurufen. 4) />>/ drücken, um das Untermenü aufzurufen.
1 KID SAFE (für Kinder geeignet) 2 G (allgemeines Publikum) 3 PG (möglichst im Beisein der Eltern anzusehen) 4 PG 13 (Überprüfung durch die Eltern dringend empfohlen) 5 PGR (Überprüfung durch die Eltern äußerst dringend empfohlen) 6 R (eingeschränkt) 7 NC-17 (nicht für unter 17-jährige freigegeben) 8 ADULT (nur für Erwachsene) HINWEIS: Stufe 8 – nur für Erwachsene – ist werkseitig eingestellt. e) Standardeinstellung „Default“ wählen. Dazu die Taste /▲/ oder /▼/ auf der Präferenzseite drücken.
abb. 4 2. AV In Eine Spielekonsole oder einen Camcorder über die „AV-Buchsen“ anschließen (siehe Abb. 5) a. Den Schalter AV In/Out auf In stellen. b. Das Ende des mitgelieferten Audio-/Videokabels mit dem schwarzen Stecker (1/8“ Stereostecker) in die AV-Buchse des DVD-Players stecken und das andere Ende an den Buchsen AUDIO OUTPUT an Ihrer Spielekonsole oder Ihres Camcorder über ein optionales RCA-Kabel (weiß = linker Kanal, rot = rechter Kanal, gelb = Video) anschließen. Abb.
3. Anschluss eines Kopfhörers Hinweis: Das Gerät kann wahlweise mit einem über Kabel angeschlossenen Kopfhörer verwendet werden. Den Kopfhörer einfach an Buchse Headphone 1 oder Headphone 2 rechts am DVD-Player anschließen. ( siehe Abb. 8) Wenn der Kopfhörer an Buchse Headphone 1 angeschlossen wird, wird der interne Lautsprecher abgeschaltet. O.
P. Einsetzen und Verwenden des Akkus Das Gerät verwendet einen Satz Li-Polymer-Akkus mit langer Lebensdauer als tragbare Stromquelle. Li-Polymer-Akkus haben eine hohe Speicherkapazität und verschlechtern sich sehr langsam. Das bedeutet, dass Li-Polymer-Akkus keinen „Memory-Effekt“ aufweisen und somit sicher wieder aufgeladen werden können, auch wenn der Akku nicht vollständig entladen ist. Bitte laden Sie den Akku vor der ersten Verwendung vollständig auf.
Einsetzen des Akkus: 1. Der DVD-Player muss ausgeschaltet und vom Netz getrennt sein. 2. Den DVD-Player zuklappen. 3. Den Akku mit der Vorderkante des Geräts ausrichten. 4. Den Akku zur Rückseite des Geräts hin schieben, bis er einrastet. Wenn der Akku diese Position erreicht, ist ein Klicken zu hören. Der Akku sitzt dicht am Gerät. 5. Den Akkustecker in die DC-Buchse des DVD-Players stecken. Einsetzen des Akkus am DVD-Player Abnehmen des Akkus: 1.
Dieses Symbol am Produkt bzw. in der Bedienungsanleitung bedeutet, dass dieses elektrische oder elektronische Gerät am Ende seiner Lebensdauer nicht im normalen Hausmüll entsorgt werden darf. Innerhalb der EU gibt es separate Sammelsysteme für das Recycling. Für weitere Informationen wenden Sie sich bitte an Ihre Kommunalverwaltung oder den Händler, von dem Sie das Produkt erworben haben.