
Installation Sheet
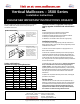

Table Of Contents

SALSBURY INDUSTRIES
1010 East 62
nd
Street, Los Angeles, CA 90001-1598
Phone: 1-800-624-5269 Int’l Phone: 323-846-6700
Fax: 1-800-624-5299 Int’l Fax: 323-846-6800
www.mailboxes.com engineering
@mailboxes.com
Copyright © 2016 Salsbury Industries. All rights reserved. (Rev. 04, 5/3/16)
Arrow Lock Guard – 3500 Series
Installation Instructions
IMPORTANT !
After installing the mailboxes, contact your local postmaster – the
USPS will provide and install its own master lock on your mailbox
unit. Hardware for installing the master lock is included in the
plastic bag. Please provide the hardware and these instructions to
the USPS representative when they arrive to install the lock.
INSTRUCTIONS FOR THE USPS REPRESENTATIVE:
1.) Unlock and open the door marked ‘U.S. MAIL’, and pull the
top frame forward, exposing all of the mailboxes.
2.) Remove the Key from the Arrow Lock so the lock’s bolt is
extended.
3.) Rest the Arrow Lock on the pre-installed Lock Bracket
BOTTOM TAB with the bolt facing up and the keyway
facing outward (see sketch at right and Photo #3).
4.) Insert the key through the large hole in the Lock Bracket
and into the Arrow Lock, and then turn the key so the bolt
retracts. Now push the lock into place under the Top Tab of
the Lock Bracket (see Photo #4).
5.) Insert the two long screws through the Lock Bracket holes
and through the holes in the Arrow Lock (see sketch). Do
not attach the nuts yet.
6.) Place the Lock Guard (Photo #6) over the Arrow Lock so
the long screws are through its holes, and the Lock Guard
rests on TOP of the frame (as shown in sketch).
7.) Attach the Lock Nuts to the long screws and tighten using
a Phillips screwdriver and an open-end or socket wrench.
8.) Screw the short Self-tapping Screws through the Lock
Guard and the holes in the frame.
9.) Push the frame closed.
10.) Turn and remove the Arrow Lock Key, locking the unit.
Close and lock the ‘U.S. MAIL’ door.
BOTTOM
TAB
Step 3
LOCK
GUARD
LOCK
BRACKET
Step 3
FRAME
Long
Screws
Step 5
Step 6
Short
Screws
Step 8
LARGE
HOLE in
LOCK
BRACKET
Step 4
BOTTOM
TAB
Step 3
LOCK
GUARD
LOCK
BRACKET
Step 3
FRAME
Long
Screws
Step 5
Step 6
Short
Screws
Step 8
LARGE
HOLE in
LOCK
BRACKET
Step 4
Arrow
Lock Key
Arrow
Lock Key
PHOTO #4
PHOTO #3
Top Tab
Retracted bolt
PHOTO #6