RECTANGLE TRAMPOLINE ASSEMBLY INSTRUCTIONS GB NL D F TRAMPOLINE SPECIFICATIONS: TRAMPOLINE SIZE AMOUNT OF SPRINGS 153 x 214cm 214 x 305cm 244 x 396cm 36 56 80 WWW.SALTATRAMPOLINES.
GB User manual 2 NL Gebruikshandleiding 19 D Gebrauchsanweisung 36 F Manuel d’utilisation 51 For video instructions please scan the QR code or visit the website: www.saltatrampolines.
INTRODUCTION GB Before you begin use of this trampoline, be sure to carefully read all the information Provided to you in this manual. Just like any other type of physical recreational activity, Participants can be injured. To reduce the risk of injury, be sure to follow appropriate safety rules and tips.
INFORMATION ON USE OF THE TRAMPOLINE GB Initially, you should get accustomed to the feel and bounce of the trampoline. The focus must be on the fundamentals of your body position and you should practice each bounce (the basic bounces) until you can do each skill with ease and control. To brake a bounce, all you need to do is flex your knees sharply before they come in contact with the mat of the trampoline. This technique should practiced while you are learning each of the basic bounces.
ACCIDENT CLASSIFICATION GB Mounting and Dismounting: Be very careful when getting on and off the trampoline. DO NOT mount the trampoline by grabbing the frame pad, stepping onto the springs, or by jumping onto the mat of the trampoline from any object (i.e. a deck, roof, or ladder). This will increase your chances of getting injured! DO NOT dismount by jumping off the trampoline and landing on the ground regardless of the makeup of the ground.
GB Weather Conditions: Please be aware of the weather conditions when using the trampoline. If the mat of the trampoline is wet, the jumper could slip and injure him or herself. If it is to windy, jumpers could lose control. Limiting Access: When the trampoline is not in use, always store the access ladder in a secure place so that unsupervised children cannot play on the trampoline. TIPS TO REDUCE THE RISK ACCIDENTS Jumper’s role in accident prevention The key here is to stay in control of your jumps.
TRAMPOLINE SAFETY INSTRUCTIONS GB JUMPERS: - Do not use trampoline if you have consumed alcohol or any drugs - Remove all hard sharp objects from person before using trampoline - You should climb on and off in a controlled and careful manner. Never jump on or off the trampoline and never use the trampoline as a device to bounce onto or into another object. - Always learn the basic bounce and master each type of bounce before trying more difficult types of bounces.
TRAMPOLINE PLACEMENT GB The minimum overhead clearance required is 24 feet (7.3 meters). In terms of horizontal clearance, please ensure that no hazardous objects are near the trampoline such as tree limbs, otherrecreational objects (i.e. swing sets, swimming pools), electrical power wiring, walls, fences, etc.
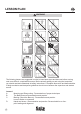
LESSON PLAN GB WARNING The following lessons are suggested in order to learn basic steps and bounces before moving onto more difficult, complicated bounces. Before actually getting on and using the trampoline, you should read and understand all safety instructions. A complete discussion and demonstration of body mechanics and trampoline guidelines should occur between the supervisor and student as well. Lesson 1 A. Mounting and Dismounting - Demonstration of proper techniques B.
GB Lesson 2 A. Review and practice of techniques learned in Lesson 1 B. Knee Bounce-Demonstration and practice. Learn the basic down to knee and back up before trying half twist to left and right C. Seat Bounce -Demonstration and practice. Learn basic seat bounce then add a knee bounce, hands and knees; repeat Lesson 3 A. Review and practice skills and techniques learned in previous lessons B.
BASIC TRAMPOLINE BOUNCES THE BASIC BOUNCE GB 1. Start from standing position, feet shoulder width apart and with bead up and eyes on mat. 2. Swing arms forward and up and around in a circular motion. 3. Bring feet together while in mid-air and point toes downward. 4. Keep feet shoulder width apart when landing on mat. KNEE BOUNCE 1. Start with basic bounce and keep it low 2. Land on knees keeping back straight, body erect and use your arms to maintain balance 3.
ASSEMBLY INSTRUCTIONS GB To assemble this trampoline all you need is our special spring loading tool provided with this product. During periods of non-use. This trampoline can be easily disassembled and stored. Please read the assembly instructions before beginning to assemble the product. PRIOR TO ASSEMBLING Please refer to page for part descriptions and numbers. The assembly steps use these descriptions and numbers as reference for your convenience. Make sure that you have all parts listed.
GB DIAGRAM FOR PARTS: 1 2 3A 3A 4A 4B 5 6 7 12 8 9
GB STEP 1 – ASSEMBLING THE MAIN FRAME A. Ensure button pins are fully located. Slide all Leg Extensions (5) onto the Leg Base(6) as shown. B. Two people will be necessary at this point to assemble the trampoline. One person lifts the Support Assembly from step A to a standing position and inserts one of the sockets of the Top Rail with Sockets (3) into the Vertical Leg Extension portion of the Support Assembly.
GB STEP 2 - Trampoline Mat Assembly When Attaching springs to the trampoline mat, Please be careful. You will need another person to help you with this portion of the assembly. CAREFUL-When attaching the Springs, the Connector Points can become pinch points since the trampoline is tightening up. A. Lay out the Trampoline Mat (1) inside the frame B. How to use the spring special tool. STEP I : Position the spring on the eyelet of the jumping mat, attach tool and link up to the end of the spring hook.
GB C. On the drawing below is showed how to assemble the trampoline mat. 1. Use 2 springs in each corner. 2. Use 2 springs equally spaced along each edge. This will equalise the mat 3. Assemble remaining springs. TIP: Use equal amounts along each edge to keep the mat tension equal.. 4. Final result when all springs are placed depending the quantity of springs.
GB D. If you notice that you have skipped a hole and V Ring connection, recount and remove or attach any springs required to maintain the count of springs. STEP 3-Safety placard Attachment A. 16 Using the tie wrap, attach the Safety Instruction Placard (8) to the trampoline. The tie wrap should go around the Vertical Frame joint and the Top Rail to ensure that it doesn’t slide off the trampoline.
GB STEP 4-Frame Pad Assembly A. Lay the Frame Pad (2) over the trampoline so that the springs and the steel frame is covered. Please ensure that the Frame Pad covers all metal parts. B. Tie the straps on the inner and outer side of the trampoline pad (2) located under the side of the pad. Attach the outer side to the trampoline frame and the inner side on the V-ring shape ot the trampoline mat (1).
CARE AND MAINTENANCE GB This trampoline was designed and manufactured with quality materials and craftsmanship. If proper care and maintenance is provided, it will provide all jumpers with years of exercise, fun, and enjoyment as well as reduce the risk of injury. please follow the guidelines listed below: This trampoline is designed to withhold a certain amount of weight and use. Please make sure that only one person at any one time uses the trampoline.
INTRODUCTIE NL Lees voor gebruik van de trampoline deze handleiding met informatie zorgvuldig door. Net als bij elke andere vorm van fysieke activiteiten bestaat er een risico op letsel. Volg alle veiligheidsvoorschriften en tips om het risico op letsel te verkleinen.
INFORMATIE OVER HET GEBRUIK VAN DE TRAMPOLINE NL In eerste instantie moet je wennen aan het gevoel en de vering van de trampoline. De focus moet liggen op de basis van je lichaamshouding en je moet elke (basis-)sprong met gemak en controle uit kunnen voeren. Het enige wat je hoeft te doen om een sprong af ter remmen is je knieën scherp buigen voordat ze in contact komen met de mat van de trampoline.
ONGEVAL CLASSIFICATIE NL Op- en afstappen: Wees zeer voorzichtig bij het op- en afstappen van de trampoline. Bij het opstappen van de trampoline nooit de pad vastgrijpen, op de veren stappen of vanaf een ander object (bijvoorbeeld dak of ladder) op de trampoline springen. Dit verhoogt de kans op verwondingen. Bij het verlaten van de trampoline niet vanaf de trampolinemat op de grond springen. Dit ongeacht de samenstelling van de grond.
NL Weersomstandigheden: Wees u bewust van de weersomstandigheden bij het gebruik van een trampoline. Als de mat van de trampoline nat is kan de springer uitglijden en zichzelf verwonden. Als er een harde wind staat kan de springer zijn controle verliezen. Beperking van de toegang: Wanneer de trampoline niet wordt gebruikt, altijd de ladder op een veilige plaats bewaren, zodat kinderen niet op de trampoline kunnen spelen zonder toezicht .
TRAMPOLINE VEILIGHEIDSINSTRUCTIES NL SPRINGERS: Maak geen gebruik van de trampoline als u alcohol of drugs gebruikt hebt - Verwijder alle harde en scherpe voorwerpen die u bij zich draagt voordat u de trampoline gebruikt - Het in en uit klimmen moet op een gecontroleerde en zorgvuldige manier gebeuren. Spring nooit in of uit de trampoline en gebruik de trampoline niet als een springplank om op een ander object te springen.
PLAATSING VAN DE TRAMPOLINE NL Boven de trampoline moet minstens 7,3 meter aan ruimte zijn en de trampoline moet op minimaal 2 meter afstand van obstakels worden geplaatst. Zorg ervoor dat er rond de trampoline geen gevaarlijke voorwerpen zoals takken, andere recreatieve objecten (bv zwembaden, schommels etc.), stroomkabels, muren en hekken zijn.
SPRONGEN NL WARNING De volgende stappen zijn bedoeld om de basissprongen te oefenen voordat er meer ingewikkelde/moeilijkere sprongen uitgevoerd worden. Voor het gebruik van de trampoline eerst de veiligheidsvoorschriften doorlezen en begrijpen. Stap 1 A. B. C. D.
NL Stap 2 A. Oefen de sprongen en technieken van stap 1 B. Oefen de kniesprong. Leer de basisvaardigheden van de kniesprong voordat je probeert om een halve draai naar links of rechts te maken C. Oefen de zitsprong Leer de basisvaardigheden van de zitsprong en probeer er dan een kniesprong aan toe te voegen., Blijf dit herhalen Stap 3 A. Oefen alle sprongen en vaardigheden uit de vorige stap B.
BASIS SPRONGEN OP DE TRAMPOLINE DE BASIS SPRONG KNIE SPRONG NL 1. Ga recht op staan, voeten op schouderbreedte uit elkaar en de hielen omhoog. De ogen gericht op de mat. 2. Zwaai de armen naar voren en omhoog in een ronddraaiende beweging. 3. Breng de voeten bij elkaar als je omhoog springt en wijs met de tenen naar beneden. 4. Houd de voeten weer op schouderbreedte uit elkaar bij landing op de mat 1. Begin met de basissprong maar blijf laag. 2.
MONTAGE INSTRUCTIES NL Het enige wat je bij deze trampoline nodig hebt om het te monteren is de speciale verenspanner die meegeleverd wordt. In de periodes dat de trampoline niet gebruikt wordt kan deze gemakkelijk gedemonteerd en opgeslagen worden. Lees voor montage de instructies! Voor het monteren Hiervoor verwijzen we u naar de pagina voor de onderdeelbeschrijving en nummers. De montage stappen maken gebruik van deze beschrijvingen en nummers als referentie voor uw gemak.
NL ONDERDELEN SCHEMA: 1 2 3A 3B 4A 4B 5 6 7 8 9 29
NL STAP 1 – Montage van het hoofd frame 1. Zorg ervoor dat alle knoppennen goed bevestigd zijn 2. Voor deze stap zijn 2 personen nodig. Een persoon houdt de gemonteerde poten in verticale positie en verbindt ze met de framebuizen van de pootverbinding (3). Je hebt nu 2 poten die bij elkaar gehouden worden door het bovenste frame – element.
NL STAP 2 – Montage van de springmat Wees voorzichtig wanneer u de veren aanbrengt aan de springmat. Bij deze stap heeft u een tweede persoon nodig. LET OP – Bij het installeren van de veren is er bij de aansluitpunten beknellingsgevaar, ook kunnen de veren wegspringen en leiden tot verwondingen A. Plaats de mat in het midden van het frame B.
NL C. Op de tekening hier beneden wordt getoond hoe u de springmat moet monteren 1. Gebruik 2 veren in iedere hoek 2. Gebruik 2 veren op gelijke afstanden. Dit egaliseert de mat 3. Bevestig de overgebleven veren Tip: Gebruik gelijke hoeveelheden langs elke rand om de spanning op de mat gelijk te houden. 4.
NL D. Als u zich realiseert dat u een oog overgeslagen heeft, tel dan opnieuw na en corrigeer de verkeerd geplaatste veren. Stap 3 - Veiligheidslabel A. Met behulp van een kabelbinder bevestigt u het veiligheidslabel aan de trampoline.
NL Stap 4 – Montage van het randkussen A. Leg het randkussen over de trampoline zodat alle veren en het frame bedekt zijn. Zorg ervoor dat het randkussen alle metalen onderdelen afdekt. B. Maak de elastieken vast aan de binnen- en buitenzijde van het randkussen. Bevestig de buitenste bevestiging middels het elastiek aan het frame van de trampoline en bevestig de binnenste bevestiging met elastiek aan de V ringen van de springmat.
ONDERHOUD EN VERZORGING NL Deze trampoline is ontworpen en vervaardigd met hoogwaardige materialen en vakmanschap. Met de juiste zorg en onderhoud zijn de springers jarenlang verzekerd van lichaamsbeweging en plezier. Om de kans op verwondingen te verkleinen volg dan de onderstaande richtlijnen. Deze trampoline is ontworpen voor een bepaalde belasting en frequentie van gebruik. Zorg ervoor dat slechts een persoon op een bepaald moment gebruik maakt van de trampoline.
EINFÜHRUNG D Lesen Sie vor dem Gebrauch des Trampolins diese Gebrauchsanweisung mit allen Informationen gut durch. Wie bei allen Arten von körperlichen Betätigungen, besteht Verletzungsgefahr. Befolgen Sie die Sicherheitsregeln und Tipps, um das Verletzungsrisiko zu verringern. - Ein unsachgemäßer und falscher Gebrauch des Trampolins ist gefährlich und kann zu ernsthaften Verletzungen führen! Durch die Federung wird der Springer in ungewohnte Höhen und Körperhaltungen kata pultiert.
INFORMATIONEN ZUR BENUTZUNG DES TRAMPOLINS D Gewöhnen Sie sich zuerst an das Gefühl und das Springen auf dem Trampolin. Konzentrieren Sie sich auf die grundlegenden Körperpositionen und üben Sie jeden Sprung (die Grundsprünge), bis Sie ihn einfach und kontrolliert ausführen können. Um einen Sprung zu bremsen, müssen Sie Ihre Knie scharf beugen, bevor dies e mit der Trampolinmatte in Berührung kommen. Diese Technik soll geübt werden, während Sie die einzelnen Grundsprünge lernen.
UNFALL KLASSIFIKATION D Auf- und absteigen: Sie sollten beim auf- und absteigen vom Trampolin sehr vorsichtig sein. Steigen Sie NICHT auf das Trampolin indem das Rahmenpolster zu ergreifen, auf die Federn zu treten oder von irgendeinem Gegenstand (z.B. einer Terrasse, einem Dach oder einer Leiter) auf der Trampolin zu springen. Dies erhöht Ihre Verletzungsgefahr! Steigen Sie NICHT vom Trampolin, um auf den Boden zu springen, unabhängig vom Aufbau des Bodens.
D Schlechte Wartung des Trampolins: Ein Trampolin in schlechtem Zustand erhöht Ihre Verletzungsgefahr. Bitte überprüfen Sie das Trampolin vor jeder Benutzung auf durchgebogene Stahlrohre, eine abgenutzte Matte, lose oder gebrochene Federn und die allgemeine Stabilität des Trampolins. Wetterbedingungen: Bitte beachten Sie die Wetterbedingungen bei der Benutzung des Trampolins. Wenn das Trampolin feucht oder nass ist, kann der Springer ausrutschen und sich verletzen.
TRAMPOLIN SICHERHEITSANWEISUNGEN D SPRINGER: - - Verwenden Sie das Trampolin nicht, wenn Sie Alkohol oder Drogen konsumiert haben. Legen Sie alle harten und scharfen Gegenstände ab, bevor Sie das Trampolin verwenden. Das Auf- und Absteigen sollte kontrolliert und vorsichtig erfolgen. Springen Sie niemals auf das Trampolin hinauf oder von dem Trampolin herunter. Verwenden Sie dieses niemals als Vorrichtung, um auf oder in andere Objekte zu springen.
TRAMPOLIN D Es ist ein Freiraum von mindestens 7,3m Höhe erforderlich. Bezüglich des seitlichen Freiraums stellen Sie bitte sicher, dass keine gefährlichen Gegenstände wie Äste, andere Freizeitgeräte (z.B. Schaukel, Swimmingpool), Stromkabel, Wände, Zäune etc. in der Nähe des Trampolins sind.
LEHRPLAN D WARNUNG Die folgenden Lektionen werden zum Lernen der grundlegenden Schritte und Sprünge vorgeschlagen, bevor zu schwierigeren, komplizierteren Sprüngen übergegangen wird. Lesen und verstehen Sie alle Sicherheitshinweise, bevor Sie tatsächlich auf das Trampolin steigen und es benutzen. Außerdem sollte zwischen der Erwachsene und dem Benutzer eine vollständige Diskussion und Vorführung von Körperbewegungen und Trampolin-Sicherheitshinweisen stattfinden. Lektion 1 A. B. C. D.
MONTAGEANLEITUNG D Für den Zusammenbau dieses Trampolins benötigen Sie nur unser im Lieferumfang enthaltene spezielles Federspannwerkzeug. Dieses Trampolin kann in Zeiten dieses nicht benutzt wird, einfach auseinander gebaut und verstaut werden. Bitte lesen Sie die Anleitung zum Zusammenbau, bevor Sie damit beginnen. VOR DEM ZUSAMMENBAU Schlagen Sie auf dieser Seite die Teilebeschreibung und Teilenummern nach.
D ÜBERSICHT DER KOMPONENTEN: 1 2 3A 3b 4a 4B 5 6 7 44 8 9
D SCHRITT 1 – Rahmen Plan 1. Stellen Sie sicher, das alle Tasten gut befestigt sind. 2. Sie werden die zweite Person benötigen. Eine Person hält die montierte Beine im vertikalen Position und steckt diese mit der Rahmen der Beinverbindung (3). Sie sollen jetzt 2 Beine haben die verbindet werden bei die obere Schiene. Schließen Sie jetzt die obere Rahmenrohre (4) mit der Rahmen wie unten abgebildet.
D SCHRITT 2 – Befestigung der Trampolin Matte Beim Anbringen der Federn an der Trampolinmatte, seien Sie bitte vorsichtig. Sie werden die zweite Person benötigen, die Ihnen bei diesem Teil des Zusammenbaus hilft. ACHTUNG: Federn können bei falscher Handhabung herausspringen und Sie ernsthaft verletzen! A. Breiten Sie die Trampoline Matte im Inneren des Rahmens aus. B. Wie man das Federspanner benutzt: SCHRITT I: Feder in die Öse der Matte einführen, Werkzeug am anderen Ende des Hakens der Feder ansetzen.
D C. Wählen Sie Ihre Anzahl der Federn. 1. Verwenden Sie 2 Federn in jeder Ecke 2 Verwenden Sie 2 Federn gleichmäßig entlang jeder Kante. Dies wird die Matte gleichsetzen 3 Montieren Sie die restlichen Federn Tipp: Verwenden Sie gleiche Mengen entlang jeder Kante um die Spannung der Springmatte gleich zu halten.
D. Wenn Sie merken, dass Sie eine Öse ausgelassen haben, zählen Sie noch einmal nach und korrigieren Sie alle falsch angebrachten Federn. SCHRITT 3 – Sicherheitsetikett A. 48 Verwenden Sie den Kabelbinder um das Sicherheitsetikett an der Trampolin zu befestigen.
D SCHRITT 4-MONTAGE DER RAHMENPOLSTERUNG A. Rahmenpolster (2) über das Trampolin legen, damit die Federn und der Stahlrahmen abgedeckt sind. Stellen Sie sicher, dass alle Metallteile bedeckt sind. B. Machen Sie den Gummi fest um das Inner und der Außen Seite of Rahmenpolsterung. Schlinge die äußere befestigung mit den Gummi an dem Rahmen des Trampolins und befestigen Sie die Innen befestigung mit den Gummi an den V-Ringe von den Trampolin Matte.
PFLEGE UND WARTUNG D Dieses Trampolin wurde aus qualitativ hochwertigen Materialien und mit handwerklichem Können hergestellt. Wenn es richtig gepflegt und gewartet wird, kann es den Springern jahrelang für Übungen, Spaß und Unterhaltung zur Verfügung stehen. Zugleich wird die Verletzungsgefahr gemindert. Bitte folgen Sie den folgenden Anweisungen: Das Trampolin ist dafür ausgelegt, einem bestimmten Gewicht und bestimmter Benutzung standzuhalten.
INTRODUCTION F Avant de commencer à utiliser ce trampoline, assurez-vous de lire attentivement toutes les informations fournies dans ce manuel. Comme toutes les autres activités physiques récréatives, le trampoline est une activité à risque. Pour réduire tout risque de blessure, respectez les consignes de sécurité.
INFORMATIONS SUR L’UTILISATION DU TRAMPOLINE F Avant tout, vous devez vous habituer à la sensation et aux sauts de base du trampoline. L’accent doit être mis sur les principes fondamentaux de la position de votre corps et vous devriez vous exercer à pratiquer chaque saut (sauts de base) jusqu’à ce que vous puissiez en avoir la maîtrise parfaite. Pour vous arrêter, pliez les genoux au moment où vous touchez le tapis de saut du trampoline, afin d’amortir le rebond dû à l’effet des ressorts.
CLASSIFICATION DES ACCIDENTS F Montage et démontage : Soyez très prudent lorsque vous montez et démontez le trampoline. NE PAS monter le trampoline en vous appuyant sur l’armature en acier, en marchant sur les ressorts ou en sautant sur le tapis à partir de n’importe quel objet (ex : échelle, toit ou pont). Cela augmentera vos chances de blessure ! NE PAS démonter en sautant sur le trampoline et en atterrissant sur le sol indépendamment de la matière dont ce dernier est recouvert.
F Conditions météorologiques : Vérifiez les conditions météorologiques avant toute utilisation du trampoline. Si la toile de saut du trampoline est humide, le sauteur pourrait glisser et se blesser. Si le vent souffle trop fort, le sauteur pourrait perdre l’équilibre. Limitation d’accès : Lorsque le trampoline n’est pas utilisé, toujours garder l’échelle d’accès à un endroit sûr afin que les enfants ne puissent pas jouer sur le trampoline en votre absence.
TRAMPOLINE SAFETY INSTRUCTIONS F SAUTEURS : - - Ne montez pas sur le trampoline si vous avez consommé de l’alcool ou de la drogue. Débarrassez-vous des objets tranchants avant d’utiliser le trampoline. Vous devez monter et descendre du trampoline prudemment. Ne jamais sauter ou bondir sur le trampoline et ne jamais utiliser le trampoline comme appui pour atterrir sur un autre objet. Toujours apprendre les sauts de base et en avoir la maîtrise parfaite avant d’essayer des figures plus complexes.
DISPOSITION DU TRAMPOLINE F La hauteur minimum requise est de 24 pieds (7,3 mètres). En termes d’espace horizontal, assurez-vous qu’aucun objet dangereux ne se trouve aux alentours du trampoline, tel qu’une branche d’arbre, d’autres objets de loisir (par ex : balançoires, piscines), des câbles électriques, un mur, une clôture etc.
PLAN DE COURS F AVERTISSEMENT Les leçons suivantes sont suggérées dans le but d’apprendre les figures et mouvements de base, avant de passer à des figures et mouvements plus complexes. Avant de monter sur le trampoline et de l’utiliser, vous devez lire et comprendre toutes les consignes de sécurité. Une rencontre de travail (description des mouvements corporels et des consignes à respecter sur le trampoline) doit également être tenue entre le moniteur et l’apprenant. Leçon no.
F Leçon no. 2 A. Révision et pratique des techniques apprises dans la leçon n° 1 B. Saut groupé - Démonstration et pratique. Apprenez des mouvements tels que la chandelle et le saut groupé avant d’essayer la demi-vrille à gauche et à droite C. Saut assis - Démonstration et pratique. Apprenez le saut assis puis associez-le au saut groupé; ajoutez les mains et ainsi de suite Leçon no. 3 A. Révision et pratique des techniques apprises dans la leçon précédente B.
SAUTS DE BASE DU TRAMPOLINE LA CHANDELLE LE SAUT DE GENOU F 1. Commencez en position debout, les pieds à la largeur des épaules, la tête tournée vers le bas et les yeux rivés vers le tapis. 2. Balancez les bras vers l’avant et le haut, puis dans un mouvement circulaire. 3. Vos jambes doivent être collées et les orteils tendus lorsque vous êtes en l’air. 4. Pour décoller du tapis de saut, poussez sur vos jambes, et lancez votre corps dans les airs en balançant vos bras vers le haut. 1.
CONSIGNES DE MONTAGE F Pour monter ce trampoline, vous avez besoin de notre outil spécial de réarmement des ressorts livré avec le produit. Pendant les périodes de non-utilisation. Ce trampoline peut être facilement démonté et entreposé. Veuillez lire les consignes de montage avant de commencer à monter le produit. AVANT LE MONTAGE Reportez-vous à la page pour les numéro et descriptions des pièces. Les étapes de montage utilisent ces numéros et descriptions comme référence pour vous faciliter la tâche.
F SCHEMAS DES PIECES: 1 2 3A 3A 4A 4B 5 6 7 61 8 9
F ETAPE N° 1 - MONTAGE DE LA STRUCTURE A. Vérifiez que les broches sont correctement fixées. Insérez les rallonges (5) dans les tubes d’appui en forme de W (6) tel qu’indiqué sur le schéma B. A cette étape, il est plus pratique d’être deux pour pouvoir monter le trampoline. Une personne soulève le tube en forme de W monté à l’étape A et insère les tubes en arc de cercle munis d’un embout en T (3) dans les rallonges fixées sur les tubes en W.
F ÉTAPE 2 - Montage du tapis du trampoline Soyez prudent lorsque vous fixez les ressorts au trampoline. Cette phase nécessite également l’intervention de deux personnes. ATTENTION - Lors de l’armement des ressorts, les fentes destinées à recevoir ces derniers pourraient vous coincer les doigts. A. Fixez le tapis de saut (1) à la structure B. Comment utiliser l’outil spécial d’armement des ressorts.
F C. Le schéma ci-dessous indique clairement comment monter le tapis de saut du trampoline. 1. Utilisez 2 ressorts dans chacun des angles. 2. Accrochez les ressorts les uns en face des autres dans chacune des extrémités du trampoline. Cela permet d’équilibrer. 3. le tapis de saut Accrochez les ressorts restants. ASTUCE : La règle de base lors de l’accroche des ressorts est de répartir la tension de façon uniforme sur le tapis de saut.
F D. Si vous avez sauté un trou et un triangle de fixation, refaites le compte et décrochez ou fixez le ressort nécessaire pour maintenir le nombre de ressorts. ÉTAPE 3 - Fixation de l’étiquette signalétique A. 65 A l’aide d’un cordon, attachez l’étiquette signalétique (8) au trampoline. Le cordon doit être enroulé entre le tube avec embout en T et le tube en W afin de s’assurer qu’il ne glisse pas sur le trampoline.
F STEP 4-Frame Pad Assembly A. Posez le coussin de protection (2) sur le trampoline de sorte que les ressorts et l’armature en acier soient couverts. Assurez-vous que le coussin de protection couvre toute la partie supérieure de l’armature en acier. B. Attachez les sangles sur les côtés intérieur et extérieur du coussin de protection (2) situé sur le côté du coussin. Attachez le côté extérieur à la structure du trampoline et le côté intérieur au triangle de fixation du tapis de saut (1).
SOINS ET ENTRETIEN F Ce trampoline a été conçu et fabriqué avec des matériaux de qualité et un haut niveau de technicité. S’il est bien entretenu, il peut garantir aux sauteurs des années d’exercices, de plaisir et d’amusement, tout en réduisant tout risque de blessure. Veuillez suivre les consignes ci-dessous pour un entretien approprié : Ce trampoline est conçu pour supporter un certain poids et pour un certain usage. Assurez-vous qu’une seule personne à la fois utilise le trampoline.