Notice © 2000 Compaq Computer Corporation COMPAQ and the Compaq logo Registered in U.S. Patent and Trademark Office. Microsoft and Windows are trademarks of Microsoft Corporation. All other product names mentioned herein may be trademarks or registered trademarks of their respective companies. Compaq shall not be liable for technical or editorial errors or omissions contained herein. The information in this document is subject to change without notice.
Contents Contents Getting Started Quick Setup . . . . . . . . . . . . . . . . . . . . . . . . . . . . 1 About the software . . . . . . . . . . . . . . . . . . . . . . . 2 Installing the software. . . . . . . . . . . . . . . . . . . . . 4 Cable and power connections . . . . . . . . . . . . . . . 5 Component locations . . . . . . . . . . . . . . . . . . . . . 6 Control Panel features. . . . . . . . . . . . . . . . . . . . . 7 Where to go from here . . . . . . . . . . . . . . . . . . . .
Copying Positioning the document. . . . . . . . . . . . . . . . . 25 Basic Copying . . . . . . . . . . . . . . . . . . . . . . . . . 27 Additional copy settings. . . . . . . . . . . . . . . . . . 28 Scanning Positioning the document. . . . . . . . . . . . . . . . . 31 Scanning with the computer. . . . . . . . . . . . . . . 33 Scanning with the scan button . . . . . . . . . . . . . 34 Scanning to a folder . . . . . . . . . . . . . . . . . . . . . 35 Scanning to Email . . . . . . . . . . . . . . . . . . . . .
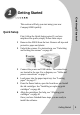
1 Getting Started Getting Started This section will help you start using your new Compaq A3000 quickly. Quick Setup First, follow the Quick Setup poster. If you have misplaced the poster, simply follow these steps: 1 2 3 4 5 6 Remove the A3000 from the box. Remove all tape and protective paper and plastic. Unlock the scanner. For instructions, see “Unlocking and locking the scanner” on page 45. Connect the power and USB cables. The connections are located in the rear.
About the software Although your Compaq A3000 can be used as a standalone copier, you will derive the greatest benefit from your A3000 by connecting it to your computer and installing the included software.
With the utility software, you can access your printer properties, change your default settings, and set your scanning applications. Getting Started MediaBrowser 2000 Use Media Browser to manage your images. Create picture albums, enhance your images, and post your albums to the internet. ReadIRIS (OCR) With ReadIRIS, you can scan documents and convert them to text. Once they are converted, you can load the text files into your favorite word processor for editing.
Installing the software Before you start, make sure your computer meets or exceeds the system requirements for the drivers and application programs you want to install. See the System Requirements listed above. To install the Compaq A3000 software: 1 2 3 Important: Make sure you have followed the steps on the Quick Setup poster, or those described in “Quick Setup” on page 1. Turn on your computer and let it complete its start up into Windows. Windows will then detect new hardware.
If the CD does not run automatically, you will need to start it yourself: Getting Started 5 a From the Windows Start button, click Start > Run. b Type x:\setup.exe (where x is the drive letter for your CD-ROM drive, usually d, e, or f) c Click OK. When the A3000 setup screen appears, follow the onscreen instructions to complete the software installation.
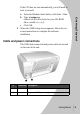
Component locations Take a moment to become familiar with the main components of your A3000. 6 • • • • • Chapter 1 # Component Description 1 Front door 2 Control Panel Controls the functions of the A3000 (see the next page). 3 Scanner cover Covers the scanner glass. Lift or remove to scan. 4 Input tray latches Press down on the two latches to open the input tray. Used when adjusting the paper width, loading envelopes, or clearing paper jams.
Control Panel features The A3000 control panel is described below: Button Description 1 Power Turns the power on or off. 2 Form Feed Use to continue printing after reloading the paper tray when it runs out of paper during a print job. Also removes paper if paper does not exit after printing. 3 Setup Provides access to the system setup mode. Use the menu button to cycle through all setup menus, and the Up/Down buttons to permanently change the settings.
Where to go from here If you want to get started using your A3000 right away, you can jump to the following sections in this guide: • To learn about the A3000 Settings Utility software for your computer, see the next chapter “Using the Settings Utility” on page 9. • For information on printing, see “Printing” on page 17. • To make copies, see “Copying” on page 25. • To learn how to scan, see “Scanning” on page 31.
2 Using the Settings Utility Using the Settings Utility The Compaq A3000 Settings Utility allows you to change the default settings of your A3000. For instance, if you make a copy by pressing the Black Copy or Color Copy button, the default copy settings will be used. You can customize settings to suit your preferences. You can always make a temporary change for a specific job (such as changing the contrast while performing a copy).
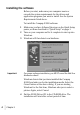
The Monitor icon The Monitor icon not only provides you with a fast and easy way to access many of the A3000 features...it provides you feedback as well: • The normal monitor icon indicates the A3000 is connected and communicating properly. • An icon with a Red “X” indicates the unit is not connected or there is some other problem. • An animated icon shows that the PC is assisting the A3000 in a task, such as scanning.
Print Settings Using the Settings Utility Select the Print button from the main settings window to access the Print Settings. The Print Settings gives you access to the Control Program and the Printer Properties. These dialogs allow you to control printing functions such as cartridge alignment and cleaning, paper size, orientation, etc. For more information on using the Control Program and Printer Properties, see page 19. Copy Settings The Copy Settings window controls how the A3000 makes copies.
Copy Quality Select a default quality for Black copies, and a default quality for Color copies. Use a lower quality setting for fast copies and less ink usage. Copy Contrast The Copy Contrast setting controls the lightness or darkness of the copy. You can select a default contrast for Black copies and one for Color copies. Paper Type The paper type makes a big difference, especially when making color copies.
Defaults To reset all of the copy settings to the A3000 shipping defaults, press this button. Using the Settings Utility Scan Settings The Scan Settings window controls the scan type and contrast and the Scan To list. Scan To Menu When you press the Scan button on the A3000, a Scan To menu appears on the LCD display panel. The first two menu entries are User Folder and Email. You can add up to six (6) additional menu options for scanning to your favorite applications.
By default, the User Folder is set to store scanned images to the My Pictures folder, which is usually located in your My Documents folder. You can change this to any folder you wish. Type in a new folder name where you would like your scanned files to be stored, or press the […] button to browse for an existing folder. Scan To Email The second Scan To menu entry is always Email.
Scan To Applications Using the Settings Utility Once an image is scanned, the A3000 can launch your favorite image processing applications. You can define up to six (6) additional Scan To applications. For each application, you must select an entry number, a name to appear on the LCD menu, the path to the application, and a file type. These are described below. Scan To Entry To store an entry, first select the number you wish to assign to that entry.
Note: ReadIRIS must be installed to convert your scanned files into the text (TXT) or word processing (RTF) formats. ReadIRIS is normally installed as part of the A3000 software installation. Select a file type that is compatible with your selected application. For graphics programs like Paint or Adobe Photoshop, choose one of the graphics file formats (BMP, TIFF, or JPG). For word processing programs like Microsoft Word, choose TXT or RTF.
3 Printing Printing This chapter provides some basic steps for printing a document. The exact steps for printing from different software applications may vary. Refer to your software application's user manual for detailed printing steps. Loading paper First, you will need to load paper for printing. 1 Place up to 100 sheets of paper (depending on thickness) against the right side of the input tray, with the print side facing you.
b Load the paper, squeeze the release tab and slide the paper guide to the edge of the paper. c Important: Raise the input tray and press it firmly against the back of the A3000. Ensure both latches are securely fastened. Otherwise, you may experience misfeeds or paper jams. Printing a document To print a document: 1 2 3 Note: Start a program and create a document, or open an existing document that you want to print. Open the program's File menu. Select Print… or Print Setup from the File menu.
Accessing the Control Program 1 Printing To monitor job status, install, align or clean cartridges, or change other options, access the Compaq A3000 Control Program: Click on the Windows Start menu button: Start > Programs > Compaq A3000 > Compaq A3000 Control Program. -or2 Note: Right click on the A3000 Monitor icon in the bottom right corner of the taskbar (the system tray), then select Control Program from the menu that appears.
To change the default printer properties for all applications, access the Printer Properties from the Settings Utility. You can do this two ways: 1 Left click on the A3000 Monitor icon in the system tray. Click on the Print button, and then click on the Properties button to view the Printer Properties. -or- 2 Right click on the A3000 Monitor icon, and select Properties from the displayed menu.
Loading specialty papers Make sure: 10 envelopes • The print side is facing you and the paper guide is adjusted against the side of the envelopes. • The stamp location is in the upper left corner. • The envelopes are loaded vertically against the right side of the rear input tray. 10 greeting cards, index cards, postcards, or photo cards • The print side is facing you and the paper guide is adjusted against the side of the cards.
Choosing settings for specialty papers When your printer software was installed, the Printer Properties settings were set to the default settings. Use the default settings for printing most documents on plain paper. To change your printer settings for printing on specialty papers, use the following table: When you are printing on this specialty paper: Click this Printer Properties tab: Envelopes Paper To make these selections: From the Paper Size area, scroll to select the appropriate envelope size.
When you are printing on this specialty paper: Click this Printer Properties tab: Banner paper Paper From the list of Paper Sizes, select Banner or Banner A4. Iron-On transfers Document/Quality From the Paper Type area, select Iron-On Transfer. To make these selections: Printing Note: We recommend printing on plain paper before printing on the actual iron-on transfer. Transparencies Document/Quality From the Paper Type area, select Transparency.
24 • • • • • Chapter 3
4 Copying Copying The Compaq A3000 offers two ways to copy a document. You can copy: • Using black only • Using full color You can copy a document even while your A3000 is printing a previous print job. Your copies will print after the job has completed printing. Likewise, you do not have to wait for your copy to finish printing before starting another copy. The A3000 will beep when it has finished scanning. This is your signal that it is safe to place another document on the scanner for copying.
Positioning a thin document To scan a thin document, such as a sheet of paper or photograph: • Lift the top cover of the A3000. • Place your document face down on the glass. Align it along the left and top edges, so it occupies the corner. • Close the top cover. Positioning a thick item To scan a thick item, such as a book or other object: • Lift the top cover of the A3000 until it is at a 90 degree angle. The cover will be straight up and down. • Pull the cover gently upward.
Caution: Copying • Place your document face down on the glass. Align it along the left and top edges so it occupies the corner. • When you have completed your scan, replace the cover by sliding the cover hinges into their slots. While the cover is removed, do not look directly at the scanner lamp. The light can be bright for your eyes. Always use the scanner cover when possible. Basic Copying To make a single copy with the default settings, simply press the Start button.
Changing the copy mode The LCD will display the current copy mode, either BLACK or COLOR. To change the mode, press either the Black Copy or Color Copy button. Note: Once you are in the BLACK copy mode, pressing the Black Copy button will make a black copy, just as if you had pressed the Start button. Likewise, pressing the Color Copy button while in the COLOR copy mode starts a color copy. Adjusting the quality You can select from three different copy qualities for each copy mode.
Adjusting the contrast If you need to lighten or darken your copy, use the contrast setting. To adjust the contrast: 2 3 Press the Menu button until Contrast: appears on the LCD display. Use the Up and Down arrow buttons to decrease or increase the contrast. A contrast bar will display the current contrast value...a smaller bar indicates a lighter copy, and a larger bar indicates a darker copy.
Using different paper types The quality of your copies will depend on the type of paper you use. In most cases, you will use plain copy paper. If you use glossy paper (for photos) or transparencies, you should change the A3000 paper type setting. To change the paper type: 1 Press the Menu button until Paper: appears on the LCD display. 2 Use the Up and Down arrow buttons to select your paper type, either Plain, Glossy, or Transp. (for Transparency).
5 Scanning Scanning The Compaq A3000 offers two ways to scan a document. You can scan: • Using your computer • Using the Scan button You can scan a document while your A3000 is printing a previous print job, but not while you are making copies. Making copies requires the use of the scanner. The driver supports scanning from the bundled applications on the CD as well as all your favorite scanning programs. Important: The scanner is locked for shipping.
• Place your document face down on the glass. Align it along the left and top edges, so it occupies the corner. • Close the top cover. Positioning a thick item To scan a thick item, such as a book or other object: • Lift the top cover of the A3000 until it is at a 90 degree angle. The cover will be straight up and down. • Pull the cover gently upward. The cover will pull out of the hinge slots. Gently store the cover on a nearby table or desk. • Place your document face down on the glass.
• When you have completed your scan, replace the cover by sliding the cover hinges into their slots. Caution: Scanning While the cover is removed, do not look directly at the scanner lamp. The light can be bright for your eyes. Always use the scanner cover when possible. Scanning with the computer To scan and save files on the PC, the Compaq A3000 provides a standard TWAIN interface for scanning documents. TWAIN is a common scanner interface supported by many application programs.
5 The Compaq A3000 scanning dialog will appear, as shown below. 6 Optionally, you can select the Preview button. This will perform a quick preview scan of your document. Once the preview is complete, you can move and size the dashed box to select the exact area of your document you wish to scan. Push the Scan button to perform the scan. 7 Note: Pay attention to the Image Size indicated on the dialog.
3 Note: Scanning 4 Select the Scan To destination. Use the up and down arrow buttons to cycle through the available choices. For a full description of the scan destinations, see below. Press Start. The A3000 will then contact your computer and perform the scan. If you have not scanned or copied any documents within the previous 30 minutes, there will be a delay of approximately one minute while the scanner warms up. Otherwise, the scan will proceed immediately.
Scanning to Email The second Scan To menu destination is Email. This option will scan documents directly into your email program, and either convert the document to text for editing, or attach the documents as graphic images. To use this option, you must have an email program installed on your computer, and it must support MAPI (a special mail interface). Examples of MAPI email programs include Microsoft Outlook Express, Microsoft Outlook, and Eudora.
Scanning to applications Scanning The remaining Scan To menu options are for defining your own Scan To destinations. You can define up to six (6) applications, numbered 3 through 8.
38 • • • • • Chapter 5
6 Maintaining your A3000 Maintaining your A3000 Using the Control Program The Control Program lets you monitor your A3000 and install or replace print cartridges. To open the Control Program from the Start menu, click: Start > Programs > Compaq A3000 > Compaq A3000 Control Program Then Click the... Cartridges tab to: Status tab to: • Monitor the status of your print job. • Cancel your print job. • Print a test page. • • • • Install or replace print cartridges.
Installing or replacing print cartridges 1 2 Black Cartridge (on right side) • Standard Yield P/N 12A1970 • High Yield P/N 12A1975 Color Cartridge (on left side) • Standard Yield P/N 12A1980 • High Yield P/N 12A1985 Photo Cartridge (replaces Black on right side) • P/N 12A1990 Make sure the Power is On (the LCD display is not blank). Lower the front cover. The ink cartridge carrier moves to the center loading position unless the printer is busy.
6 Maintaining your A3000 7 From the A3000 control panel, use the Yes/Start and No/Stop buttons to answer the questions displayed on the LCD. You will need to know: a If you replaced the left or right cartridge b The type of cartridge installed (color, black, or photo) c If it was a new cartridge, and if so, is it Standard or High Yield capacity If you installed a new cartridge, an Alignment page will print. Follow the instructions on the LCD screen to complete the cartridge installation.
The test page that prints is similar to the one shown below: In this example, in alignment group A, 16 comes closest to forming a straight line. 42 • • • • • Chapter 6 4 From each alignment group on the test page, find the number under the alignment pattern that comes closest to forming a straight line. For example, in sample group A, the arrow points to the pattern that comes closest to forming a straight line.
Cleaning print nozzles 1 2 Cyan, magenta, yellow, and black purge lines (shown here in black and white) print when ink is forced through the print nozzles to unclog them. If any of these colors do not print, you may need to replace your print cartridge. 4 Maintaining your A3000 3 Load plain paper in the printer. From the Control Program’s Cartridges tab, select Clean Print Nozzles. For help, see page 39. Alternatively, you can use the front panel to clean the cartridges: a Press the Setup button.
• If the print quality of both lines is not satisfactory after running the test three times, wipe the print cartridge nozzles. For help, see the next section. Wiping print nozzles and contacts If print quality does not improve after cleaning the print nozzles (see page 43), you may need to wipe dried ink from the nozzles. The nozzles are located on the bottom of the ink cartridge. To desolve any dried ink, hold a damp cloth against the nozzles for about three (3) seconds. Gently blot and allow to dry.
Unlocking and locking the scanner Maintaining your A3000 When the A3000 is shipped, the scanner is locked to prevent movement and possible damage. Before you can use the scanner or make copies, it must be unlocked. To unlock or lock the scanner: 1 2 3 4 Note: Turn the power Off by pressing the Power button. Open the front door. In the upper-left hand corner there is a sliding lever: a To unlock the scanner, push the lever inward (away from you) until it stops.
Preparing the A3000 for shipment If you need to transport or ship the A3000, please make sure you: • Remove both print cartridges. For instructions, See “Installing or replacing print cartridges” on page 40. • Lock the scanner. For instructions, See “Unlocking and locking the scanner” on page 45. • Place the unit in its original packaging. If that is not possible, use a large box and plenty of packing material. • Remember to reinstall the print cartridges after unpacking.
7 Troubleshooting Troubleshooting This section presents procedures for resolving operational errors, and explains what you can do to solve them. Select a category from the list in the left margin that best describes your problem. When your A3000 is not working properly, first make sure that: • The power supply is plugged into the A3000 and a properly grounded electrical outlet. • The power is turned On. • The USB cable is plugged into the A3000 and your computer.
• The A3000 is plugged in and turned On. • Your printer port is set to a USB port. To check your printer port and change it if necessary: 1 From the File menu of your software application, select Print. 2 Check your printer port in the Where area. If you are still experiencing problems: 3 Unplug the power cable from the A3000, wait 10 seconds, and plug it back in. 4 Restart Windows. A blank page ejects after appearing to print • Make sure your ink cartridges are installed.
• The A3000 is set as the default printer. Troubleshooting • The print job is not being held or paused in the print queue. To check the printer status: 1 From the Printers folder, double-click the Compaq A3000 icon. 2 Click the Printer menu and make sure no check mark appears next to the Pause Printing option. • Print a test page. If the test page prints, the printer is functioning properly. Check your application.
• The back sheet feeder tray is securely latched on both sides. If you are not sure, open the tray by pressing on both latches, and then close it again by snapping the tray back into place. • The left paper guide does not cause the paper to bow in the sheet feeder, and that it also prevents the paper from moving side to side. • The A3000 is on a flat, level surface. There is a paper jam Try removing the paper from the sheet feeder.
• Your application is designed to print envelopes. Check the user documentation that came with your application. Troubleshooting Document prints with poor quality This section describes ways to solve printing mistakes and problems with poor print quality. Print quality is poor at the edge of page The A3000 cannot print in the extreme margins of a page. Use these minimum settings: • Left and right margins: 6.35 mm (0.25 in.) each for all paper sizes except A4 For A4 size paper - 3.37 mm (0.133 in.
• The print quality setting is appropriate for the paper type. If you are printing on regular paper, select Black Normal or Color Normal. • The print nozzles are clean . For help, see page 43. Printed pages have alternating bands of light and dark print (intermittent printing) • Make sure Enable Buffer Mode is selected on the Options tab of the Control Program. • Select the High 1200dpi Print Quality setting on the Document/Quality tab of Printer Properties. • Your printer may have communications problems.
Colors on the printout are faded Troubleshooting • Check the ink level graphic on the Cartridges tab of the Control Program. Your print cartridge may be low on ink. • Clean the print nozzles. For help, see page 43. • Wipe the print nozzles and contacts if the colors still seem faded. For help, see page 44. Transparencies, photos, and envelopes This section describes ways of solving problems with transparencies, photos, or envelopes. Envelopes or specialty papers do not feed For help, see page 50.
Error messages For some problems, an error message will be displayed on the A3000 LCD. These messages, and their possible solutions, are described below. PAPER JAM For help, see “Paper misfeeds or jams” on page 49. ADD CARTRIDGES No cartridges are installed. Open the front cover and install new cartridges. For help, see "Installing or replacing print cartridges"on page 40 INK LOW Your print cartridge is running out of ink. Purchase a new print cartridge.
Troubleshooting • Run the A3000 Settings Utility. If it is already running, right-click on the icon in the system tray and select Shutdown before running it again. For help in programming your Scan To menu, See “Scan To Menu” on page 13. WAITING FOR PC You have initiated a task that requires assistance from the PC, such as pressing the Scan button. The A3000 is waiting for the PC to wake up or become available. It will wait for approximately two minutes.
• Make sure the ink cartridges are correctly installed and snapped into place. • Verify the scanner lock (on the left) is in the unlocked position. • Close the front access door. • Open the back paper input tray by pressing down on both latches. Clear any paper jams and close the tray again. • Plug the power cord back in. WARM UP This is not an error. The scanner lamp is warming up after a period of inactivity and will take less than a minute to complete.
Appendix • Notices • Safety information Electronic emission notices Federal Communications Commission (FCC) compliance information statement This equipment has been tested and found to comply with the limits for a Class B digital device, pursuant to Part 15 of the FCC Rules. Operation is subject to the following two conditions: (1) this device may not cause harmful interference, and (2) this device must accept any interference received, including interference that may cause undesired operation.
Industry Canada compliance statement This Class B digital apparatus meets all requirements of the Canadian Interference-Causing Equipment Regulations. Avis de conformité aux normes d’Industrie Canada Cet appareil numérique de la classe B respecte toutes les exigences du Règlement sur le matériel brouilleur du Canada.
Index Index A about the software 2 add cartridges 54 add new hardware wizard 4 aligning cartridges 41 applications scan to 15, 37 arrow buttons 7 B banding 52 banner paper loading 21 settings 23 beeps while copying 25 black copy button 7 blank page 48 BMP file defined 15 buttons described 7 C cancel add new hardware 4 cancel button 7 cards loading 21 settings 22 cartridge part numbers 40 cartridges aligning 41 installing 40 preserving 44 refilling 44 removing 40 replacing 40 CD software 2 cleaning print
Energy Star 58 entry scan to 15 envelopes loading 21 settings 22 error add cartridges 54 ink low 54 memory full 54 paper feeding 50 paper jam 50, 54 paper out 55 PC not available 55 power down 55 printer 56 printer offline 48 printing 47 program scan tos 54 scan motor 56 system busy 54 unlock scanner 56 waiting for PC 55 warm up 56 error messages troubleshooting 54 exit tray extending 6 F file types defined 15 supported scan to 15 filenames of scanned files 13, 35 foils loading 21 settings 23 folder scanni
N name of scanned files 35 no button 7 notices Energy Star 58 Japanese VCCI 58 safety information 58 nozzles cleaning 43 wiping 44 O OCR 3 opening front cover 40 input tray 17 operating systems supported 3 P page blank 48 paper copy size 29, 30 copy type 12 feed problem 50 jam 50, 54 loading 17 misfeeds 49 properties 20 specialty banner paper 21 cards 21 envelopes 21 iron-on 21 photo paper 21 types 30 paper guide 17, 18 paper out 55 papers specialty settings 22 part numbers of cartridges 40 PC not availa
R ReadIRIS 3, 16 red X 10, 47 refilling cartridges 44 removing cartridges 40 cover 26, 32 requirements system 3 right cartridge 40 RTF defined 15 S safety information 58 saving settings 10 scan 13 contrast 16 defaults 16 settings 13 scan button 7 using 34 scan motor error 56 scan to applications 15 display name 15 email 14 entry 15 file types 15 menu 13 user folder 13 scan type 16 scanned filenames 35 scanner cleaning glass 45 driver 2 lamp 27, 33 locking 46 settings 37 shipping 46 unlock 56 62 • • • • •
Y yes button 7 Index TWAIN 37 defined 33 TXT defined 15 types paper 30 U unlock scanner 56 unlocking scanner 1, 31, 45 up button 7 USB connection 5 USB cable connecting 47 user folder 13 scan to 13 utilities 2 utility settings 9 W waiting for PC 55 warm up 56 of scanner 27, 35 window main settings 10 Windows supported versions 3 wiping print nozzles 44 wizard add new hardware 4 X X red 10, 47 • • • • Index • 63
64 • • • • • Index