DellTM Laser MFP 1600n User’s Guide Click the links to the left for information on the features, options, and operation of your machine. For information on other documentation included with your machine, see "Finding Information" on page 3. To order replacement toner cartridges or supplies from Dell: 1 Double-click the what icon (????) on your desktop. kGHH 2 Visit Dell's website, or order Dell printer supplies by phone. www.dell.
Notes, Notices, and Cautions NOTE: A NOTE indicates important information that helps you make better use of your machine. NOTICE: A NOTICE indicates either potential damage to hardware or loss of data and tells you how to avoid the problem. CAUTION: A CAUTION indicates a potential for property damage, personal injury, or death. ____________________ Information in this document is subject to change without notice. © 2003 Dell Inc.. All rights reserved.
Finding Information What are You Looking for? • Drivers for my machine • My User’s Guide Find It Here Driver and Utilities CD You can use the CD to install/uninstall/reinstall drivers or access your User’s Guide. For details, see "Software Overview" on page 33. Readme files may be included on your CD to provide last-minute updates about technical changes to your machine or advanced technical reference material for experienced users or technicians.
What are You Looking for? Find It Here • Latest drivers for my Dell Support Website machine The Dell Support Website provides several online tools, including: • Answers to technical service and support questions • Solutions - Troubleshooting hints and tips, articles from • Documentation for my technicians, and online courses machine • Upgrades - Upgrade information for components, such as memory • Customer Care - Contact information, order status, warranty, and repair information • Downloads - Drivers • R
Dell Printer Configuration Web Tool Have you ever sent a print job to the network printer down the hall, only to find it didn't print because of a paper jam or an empty paper tray? One of the features of the Dell Printer Configuration Web Tool is the Email Alert Setup, which sends you, or the key operator, an email when the printer needs supplies or intervention.
Copy Printer Settings Quickly clone the printer's settings to another printer or printers on the network just by typing each printer's IP address. NOTE: You must be a network administrator to use this feature. Printing Statistics Keep track of printing trends, such as paper usage and types of jobs being printed. Printer Information Get the information you need for service calls, inventory reports, or the status of current memory and engine code levels.
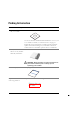
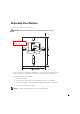
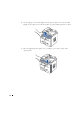
Unpacking Your Machine 1 Select a location for your machine. CAUTION: The machine requires at least two people to lift it safely. {GG HH • Leave enough room to open the machine tray, covers, doors, and options. It is also important to allow enough space around the machine for proper ventilation.
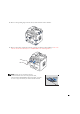
2 Remove all items from the box except the machine. Make sure you have the following items. If there is a missing item, contact the retailer where you bought the machine: 3K Cartridge AC Power Corda Driver and Utility CDb Owner's Manual Telephone Line Corda Setup Diagram Operator Panel Coverc Terminatorc a. The appearance of the power cord and the telephone line cord may differ according to your country’s specifications. b.
4 Remove the packing tape from the front, back and sides of the machine. 5 Remove the label completely from the scanner module by gently pulling it. The scan unlock switch automatically moves FORWARD to the unlock position. NOTE: When you are moving the machine or do not intend to use it for a long period of time, move the switch BACKWARD to the lock position, as shown. To scan or copy a document, the switch must be unlocked.
6 If your language is not already displayed on the operator panel, remove the attached English operator panel cover from the machine, by gently pulling it upwards, as shown. 7 Place the supplied operator panel cover, according to your country, gently on the operator panel.
About Your Machine These are the main components of your machine. The following illustrations show the standard Dell Laser MFP 1600n and an optional Tray 2 attached: Front View Automatic Document Feeder Document Cover Document Guides Document Input Tray Operator Panel (See page 13.
Rear View Rear Cover Control Board Cover Network Port Rear Output Slot (Face Up) USB Connector Optional Tray2 Cable Connector FAX Jack Power Switch AC power Cord Connector Phone Jacka a 12 If you use this machine in the serial countries, such as Germany and Sweden, this socket may not be blocked.
Operator Panel Button Functions ❶ Copy Keys ❷ Common Keys ❹ Scan Keys ❸ Fax Keys Copy ❶ 1 2 3 4 5 6 7 8 9 * 0 # Allows you to use copy layout features, such as Auto Fit, Clone, Collation, 2-sided, 2/4 Up (multiple pages on a sheet), and Poster copying. Selects the number of copies. Makes a copy smaller or larger than the original document. Adjusts the copy quality. Adjusts the brightness of the documents for the current copy job. Starts a copy.
❷ Enters Menu mode and scrolls through the menus available. Confirms the selection on the display. Exits the menu and returns to Standby mode. Stops an operation at any time. In Standby Mode, clears/cancels the copy options, such as the contrast, the image quality, the copy size, and the number of copies. ❸ Allows you to store frequently-dialed fax numbers using a one, two or three-digit speed dial or group number for automatic dialing and edit the stored numbers.
Installing the Toner Cartridge 1 Open the front cover. 2 Remove the 3K Cartridge from its bag. Hold the toner cartridge by the handle and gently shake it from side-to-side to distribute the toner. Thoroughly rolling the cartridge will assure the maximum copies per cartridge. CAUTION: To prevent damage, do not expose the toner cartridge to light for more than a few minutes. CAUTION: If left exposed for more than a few minutes, cover it with a piece of paper.
3 Slide the toner cartridge into the machine aligning it with the labeled arrows, until it locks firmly into place. 4 Close the front cover.
Loading Paper You can load approximately 250 sheets of plain paper in the paper tray. For faxing, you can use A4-, Letter-, Legal sized paper only. For copying or PC-printing, you can use many different types and sizes of paper; see "Paper Handling" on page 37. NOTE: After you load the paper, you need to set up your machine for the paper type and size you loaded. See page 56 and page 57 for the paper used in copying and faxing, or page 65 for PC-printing.
3 If you load longer sizes of paper, such as Legal-sized paper, press and unlatch the guide lock, and then slide the paper length guide out completely to extend the paper tray to its full length. 4 Flex the sheets back and forth to loosen them, and then fan them out. Do not fold or crease the print media. Align the edges on a level surface. 5 Insert the paper stack into the paper tray with the side you want to print facing down.
6 Do not exceed the maximum stack height indicated by the paper limit mark on the left side wall of the tray. Paper overloading may cause paper jams. 7 Slide in the length guide until it lightly touches the end of the paper stack. For paper smaller than Letter size, adjust the inner paper length guide so that it lightly touches the paper stack.
8 Pinch the paper width guide, as shown, and move it towards the stack of paper until it lightly touches the side of the stack. NOTE: Do not push the paper width guide far enough to cause the materials to warp. If you do not adjust the paper width guide, it may cause paper jams. 9 20 Insert and slide the paper tray back into the machine.
Making Connections Connecting the Telephone Line 1 Plug one end of a telephone line cord into the FAX Jack and the other end into an active wall jack. FAX Jack To the wall jack To connect a telephone and/or answering machine to your machine, remove the dummy from the Phone Jack ( ) and plug the telephone or answering machine into the Phone Jack.
If you use this machine in the serial countries, such as Germany, Sweden, Denmark, Austria, Belgium, Italy, France or Switzerland, you must remove the dummy from the Phone Jack ( ) and insert the supplied terminator. Connecting the Printer Cable Connecting the Printer Locally A local printer is a printer connected to your computer using a USB cable. If your printer is attached to a network instead of your computer, skip this step and go on to "Connecting the Printer to the Network" on page 23.
2 Connect a USB cable to the USB connector on your printer. 3 Plug the other end of the cable into a USB port on the back of the computer, not the USB keyboard. Connecting the Printer to the Network 1 Make sure the printer, computer, and any other attached devices are turned off and unplugged. 2 Plug one end of the Ethernet cable into the Ethernet network port on the printer. 3 Plug the other end of the cable into a network LAN drop or hub. The printer automatically adjusts for the network speed.
Turning the Machine On CAUTION: The fusing area at the rear part of the inside of your machine becomes hot once the machine is turned on. CAUTION: Be careful not to be burned when you access this area. CAUTION: Do not disassemble the machine when it is turned on. If you do, it may give you an electric shock. To turn the machine on: 1 Plug one end of the power cord into the socket at the back of the machine and the other end into a properly grounded outlet.
Changing the Display Language To change the language that displays the operator panel display, follow these steps: 1 Press
Power Save Mode The Power Save mode allows your machine to reduce power consumption when it is not in actual use. You can turn this mode on by selecting the length of time for which the machine waits after a job is printed before it switches to a reduced power state. 1 Press
Software Overview After setting up your machine and connecting it your computer, you must install the drivers. The drivers are available on the CD packaged with your machine. The CD-ROM contains the following: • Dell MFP drivers- lets your computer communicate with your printer. To use your machine as a printer in Windows, you must install the MFP driver(s). For information about installing the MFP drivers in Windows, see page 34.
• Memory: 64 MB • CPU: Pentium II 233 or higher • Required software: Internet Explorer 4.01 Recommended • Disk space: 220 MB for installation • Memory: 128 MB • CPU: Pentium II 400 or higher • Required software: Internet Explorer 5.5 Installing Dell Software for Local Printing A local printer is a printer attached to your computer using a USB cable.
3 If necessary, select a language by pressing the Language button on the main screen. 4 Select Personal Installation. 5 Select Typical Installation to install the MFP drivers for printing and scanning, and user’s guide as default settings. To install only selected software, select Custom Installation. If you want to use a PS driver, select Custom Installation. You can change the destination directly. 6 When the installation is completed, you may print a test page.
2 Insert the supplied Dell software CD. 3 If necessary, select a language by pressing the Language button on the main screen. 4 Select Network Installation. 5 If you want to install the printer on this computer or network server, select Install printer on this computer, and click Next. If you want to install the Dell software in the remote computers on the same network, select Install printer on remote computer. The network administrator’s ID and password are required.
6 The list of printers available in the network appears. Select the printer you want to install from the list and then click Next. If you do not see your printer in the list, click Update to refresh the list or click Add Printer to add your printer to the network. To add the printer to the network, enter the port name and an existing IP address for the printer. (What????) If you want to install it on a server, select the I am setting up this printer on a server check box.
8 The next screen shows the MFP drivers installed in your computer. You can change the printer name. You can also set this printer to be shared on the network and/or set the printer as a default printer. Click Next. 9 When the installation is completed, you may print a test page. Click Finish. Assigning a Printer IP Address (introduction required!!!) Before using the printer in the network, you must set an IP address, subnet mask, and gateway for the printer.
2 Insert the supplied Dell software CD. 3 If necessary, select a language by pressing the Language button on the main screen. 4 Select SetIP Address Utility. The list of printers available in the network displays. 5 Select the printer you want to assign an IP. The printer’s default IP address can be found on the Configuration page for the printer. 6 When you finish setting the IP address for the printer, exit the program.
Removing Dell Software You should remove the MFP drivers if you are upgrading the software or if your driver installation fails. You can remove the software using the CD or the Windows uninstallshield. NOTE: Before removing, close all programs. You must restart your computer after removing the drivers. 40 1 From the Start menu, select Programs→ DELL→ DELL Laser MFP 1600n→ Dell MFP Software Uninstall. 2 Select the software you want to remove.
Pa p e r H a n d l i n g Print Media Guidelines Storing Print Media Identifying Print Media Sources and Specifications Selecting an Output Location Loading Print Media in the Paper Tray Using the Bypass Tray Setting the Paper Type Setting the Paper Size
Print Media Guidelines Print media is paper, card stock, transparencies, labels, and envelopes. Your machine provides high quality printing on a variety of print media. Selecting the appropriate print media for your machine helps you avoid printing problems. This chapter provides information on how to help you make print media selections, how to care for the print media, and how to load it in the standard Tray1, optional Tray2 or Bypass tray.
Smoothness The degree of smoothness of paper directly affects print quality. If the paper is too rough, the toner does not fuse to the paper properly, resulting in poor print quality. If the paper is too smooth, it can cause paper feeding problems. Smoothness needs to be between 100 and 300 Sheffield points; however, smoothness between 150 and 250 Sheffield points produces the best print quality.
Unacceptable Paper The following papers are not recommended for use with the machine: • Chemically treated papers used to make copies without carbon paper, also known as carbonless papers, carbonless copy paper (CCP), or no carbon required (NCR) paper • Preprinted papers with chemicals that may contaminate the machine • Preprinted papers that can be affected by the temperature in the machine fuser • Preprinted papers that require a registration (the precise print location on the page) greater than ±
• Make sure the paper is properly loaded in the source. • Flex paper back and forth. Do not fold or crease the paper. Straighten the edges on a level surface. Selecting Preprinted Forms and Letterhead Use the following guidelines when selecting preprinted forms and letterhead paper for the machine: • Use grain long papers for best results. • Use only forms and letterhead printed using an offset lithographic or engraved printing process. • Choose papers that absorb ink, but do not bleed.
Printing on Letterhead Check with the manufacturer or vendor to determine whether the preprinted letterhead you have chosen is acceptable for laser machines. Page orientation is important when printing on letterhead. Use the following table for help when loading letterhead in the print media sources.
Transparencies Try a sample of any transparencies you are considering using with the machine before buying large quantities: • Use transparencies designed specifically for laser printers. Transparencies must be able to withstand temperatures of 205°C (401°F) without melting, discoloring, offsetting or releasing hazardous emissions. • Avoid getting fingerprints on the transparencies, which can cause poor print quality.
– Contain windows, holes, perforations, cutouts or embossing – Use metal clasps, string ties, or metal folding bars – Have an interlocking design – Have postage stamps attached – Have any exposed adhesive when the flap is in the sealed or closed position – Have nicked edges or bent corners – Have rough, cockle, or laid finishes • Use envelopes that can withstand temperatures of 205°C (401°F) without sealing, excessive curling, wrinkling, or releasing hazardous emissions.
Labels Your machine can print on many labels designed for use with laser printers. These labels are supplied in letter size, A4 size, and legal size sheets. Label adhesives, face sheet (printable stock), and topcoats must be able to withstand temperatures of 205°C (401°F) and pressure of 25 pounds per square inch (psi). You can load one label sheet.
Card Stock Card stock is single ply, and has a large array of properties, such as the moisture content, thickness, and texture, that can significantly affect print quality. See Identifying print media sources and specifications for information on the preferred weight for the grain direction of print media.
Identifying Print Media Sources and Specifications The following tables provide information on standard and optional sources, including the print media sizes you can select from the paper size menu and supported weights. NOTE: If you use a print media size not listed, select the next larger size. Print Media Sizes and Support Legend Dimensions Y- indicates Support Bypass Tray (Standard Tray1 and Optional Tray2) Print Media Size A4 Paper Tray 8.27 x 11.7 in.
Legend Dimensions Paper Tray Y- indicates Support (Standard Tray1 and Optional Tray2) Print Media Size Envelope COM-10 Bypass Tray 4.12 x 9.5 in. - Y - Y - Y - Y (105 x 241 mm) Envelope DL 4.33 x 8.66 in. (110 x 220 mm) EnvelopeC5 6.38 x 9.01 in. (162 x 229 mm) Custom 3 x 5 in. to 8.5 x 14 in.
Print Media Types and Weights Print Media Paper Card stock-maximum (grain long) a Card stock-maximum (grain short) a Transparencies Type Print Media Weight Standard Tray1 and Optional Tray2 Bypass Tray 60-135 g/m2 grain long 60-135 g/m2 grain long (16-36 lb bond) (16 to 36 lb bond) Index Bristol 163 g/m2 (90 lb) 120 g/m2 (67 lb) Tag 163 g/m2 (100 lb) 120 g/m2 (74 lb) Cover 176 g/m2 (65 lb) 135 g/m2 (50 lb) Index Bristol 199 g/m2 (110 lb) 163 g/m2 (90 lb) Tag 203 g/m2 (125 lb) 163 g
Selecting an Output Location The machine has two output locations; the front output tray (face down) and the rear output slot (face up). Front Output Tray Rear Output Slot To use the front output tray, make sure that the rear cover is closed. To use the rear output slot, open the cover. NOTE: If paper coming out of the front output tray has problems, such as excessive curl, try printing to the rear output slot. NOTE: To avoid paper jams, do not open or close the rear cover while the machine is printing.
If necessary, expand the paper support extension to keep print media from falling off the front output tray. Printing to the Rear Output Slot (Face up) Using the rear output slot, paper comes out of the machine face up. Printing from the Bypass tray to the rear output slot provides a straight paper path.
To use the rear output slot: 1 Open the rear cover by pulling it upward. CAUTION: The fusing area at the rear part of the inside of your machine is hot when powered. Be careful not to get burned when you access this area. 2 52 If you do not want to stack the printed pages on the rear output slot, close the rear cover. The pages stack on the front output tray.
Loading Print Media in the Paper Tray You can load approximately 250 sheets of plain paper in the standard Tray1 or the optional Tray2. If you purchased the optional Tray2, see page 189 for installing instructions. For faxing, you can use A4-, Letter-, Legal sized paper only. For copying or PC printing, you can use many different types and sizes of paper; see page 47. Complete these instructions to load print media into the standard Tray1 or optional Tray2. These trays are loaded the same way.
NOTE: You can load up to 150 sheets of previously printed paper. The printed side should be facing up with an uncurled edge at the top side. If you experience problems with paper feed, turn the paper around. Note that the print quality is not guaranteed. Using the Bypass Tray Use the Bypass tray to print transparencies, labels, envelopes or postcards in addition to making quick runs of paper types or sizes that are not currently loaded in the paper tray. Postcards, 3.5 by 5.83 in.
CAUTION: Make sure to open the rear output slot when you print on transparencies. If not, they may tear while exiting the machine. For envelopes, load a sheet with the flap side face down and with the stamp area on the top left side. The end of the envelope with the stamp area enters the Bypass tray first. NOTICE: Never use envelopes with stamps, clasps, snaps, windows, coated linings, or self-stick adhesives. These envelopes may severely damage the machine.
3 Open the rear cover to use the rear output slot. 4 After printing, close the rear cover. Setting the Paper Type After loading paper in the paper tray or the Bypass tray, you need to set the paper type using the operator panel buttons. This setting will apply to Fax and Copy modes. For faxing, you can only set the paper type to the Plain Paper. For PC-printing, you need to select the paper type in the application program you use. 1 Press
Setting the Paper Size After loading paper in the paper tray, you need to set the paper size using the operator panel buttons. This setting will apply to Fax and Copy modes. If you load paper in the Bypass Tray and set the paper size, this setting will apply to Copy mode. For PC-printing, you need to select the paper type in the application program you use. 1 Press
58 Paper Handl ing
Printing Printing a Document Printer Settings Printing on Both Sides of the Paper Printing Multiple Pages on One Sheet of the Paper Printing a Reduced or Enlarged Document Fitting Your Document to a Selected Paper Size Printing Posters Printing Booklets Using Watermarks Using Overlays Using the Status Monitor
Printing a Document Your printer prints a document using the GDI, PCL or PS printer driver. When you install the Dell software, your printer automatically install the GDI and PCL printer drivers. Installing the PS printer driver is your choice. See page 35. Once you install the printer drivers, you can select the printer driver when you print a document.
The basic print settings are selected within the Print window. These settings include the number of copies and print range. Make sure that your machine is selected. ▲ Windows XP 3 Select the printer driver you want to use from the Print window. 4 To take advantage of the printer features provided by your printer, click Preferences or Properties, depending on the program or operating system in the application’s print window and go to step 4.
Cancelling a Print Job There are two ways to cancel a print job: To stop a print job from the operator panel: Press the button. Your printer finishes printing the page that is moving through the printer and deletes the rest of the print job. Pressing the button cancels only the current job. If more than one print job is in the printer’s memory, you need to press the button once for each job.
Printer Settings You can use the printer properties window, which allows you to access all of the printer options you need when using your printer. When the printer properties are displayed, you can review and change whatever settings needed for your print job. The printer properties window may differ, depending on the printer driver you select and your operating system. For details about selecting printer driver, see page 60.
Layout Tab The Layout tab provides options for you to adjust how the document appears on the printed page. The Layout Options includes advanced printing options, such as Multiple Pages per Side and Poster. You can also use Duplex(Double-Sided Printing) in this tab. See page 60 for more information on accessing your software application. The preview image shows the sample page with the settings you currently specified.
Paper Tab Use the following options to set the paper handling needs when you access the printer properties. See page 60 for more information about accessing printer properties. Click the Paper tab to access the paper properties. ➊ ➋ ➌ ➍ ➎ Property Description ➊ Copies Copies allows you to choose the number of copies to be printed. You can enter up to 999. ➋ The Size option allows you to choose the size of paper loaded in the paper tray.
Property ➌ Source Description Make sure that Source is set to the corresponding paper tray. The Manual Feed source is used when printing to special materials. You need to load one sheet at a time into the Bypass tray. See page 54. If the paper source is set to Auto Select, the machine automatically picks up print materials according to the following order: the Bypass tray and the paper tray. ➍ Type Make sure that Type is set to Printer Default.
Graphics Tab Use the following graphic options to adjust the print quality for your specific printing needs. See page 60 for more information about accessing printer properties. Click the Graphics tab to display the properties shown below. ➊ ➋ ➌ Property Description ➊ Resolution You can select the printing resolution by choosing from 1200 Image Quality (Best), 600 dpi (Normal) or 300 dpi (Draft). The higher the setting, the sharper the clarity of printed characters and graphics.
Property ➍ Advanced Description You can set advanced settings by clicking the Advanced Options button. Options Darkness Use this option to lighten or darken the image appearance in your print. • Normal: This setting is for normal documents. • Lighter: This setting is for bolder line widths or darker gray scale images. • Darker: This setting is for finer line width, higher definition in graphics and lighter gray scale images.
Extras Tab See page 60 for more information about accessing your software application. Click the Extras tab to access the following features: ➊ ➋ ➌ Property Description ➊ Watermark You can create a background image of text to print on each page of your document. See "Using Watermarks" on page 78. ➋ Overlay Overlays are often used to take the place of preprinted forms and letterhead paper. See "Using Overlays" on page 81. ➌ Output Options Print Order: You can set the sequence for the pages to print.
Using a Favorite Setting The Favorites option, which is visible on each properties tab, allows you to save the current properties settings for future use. To save a Favorites item: 1 Change the settings on each tab, as needed. 2 Enter a name for the item in the Favorites input box. 3 Click Save. To use a saved setting, select it from the Favorites drop-down list. To delete a favorite setting item, select it from the list and click Delete.
Printing on Both Sides of the Paper You can print on both sides of the paper automatically. Before printing, decide how you want your documents oriented. The options are: • Long Edge, which is the conventional layout used in book binding, or portrait. • Short Edge, which is the type often used with calendars, or landscape. 2 2 3 3 2 5 2 3 5 5 3 5 ¼ Long Edge ¼ Short Edge NOTE: Do not print on both sides of labels, transparencies, envelopes, or thick paper.
72 Pri nt in g 3 From the Duplex(Double-Sided Printing) section, select either None, Long Edge, or Short Edge. 4 Click the Paper tab and select the paper source, size and type. 5 Click OK and print the document.
Printing Multiple Pages on One Sheet of the Paper You can select the number of pages to print on a single sheet of paper. To print more than one page per sheet, the pages will appear decreased in size and arranged on the sheet. You can print up to 16 pages on one sheet. 1 When you change the print settings from your software application, access the printer properties. See page 60. 2 From the Layout tab, choose Multiple Pages per Side on the Type drop-down list.
6 Click OK and print the document. Printing a Reduced or Enlarged Document You can scale your print job on a page. 1 When you change the print settings from your software application, access the printer properties. See page 60. 2 From the Layout tab, select Reduce/Enlarge on the Type drop-down list. 3 Enter the scaling rate in the Percentage input box. You can also click the ▲ or ▼ button. 74 Pri nt in g 4 Click the Paper tab and select the paper source, size and type.
Fitting Your Document to a Selected Paper Size You can scale your print job to any selected paper size regardless of the digital document size. This can be useful when you want to check fine details on a small document. 1 When you change the print settings from your software application, access the printer properties. See page 60. 2 From the Layout tab, select Fit to Page on the Type drop-down list. 3 Select the correct size from the Target Page drop-down list.
Printing Posters You can print a single-page document onto 4, 9, or 16 sheets of paper, for the purpose of pasting the sheets together to form one poster-size document. 1 When you change the print settings from your software application, access the printer properties. See page 60. 2 From the Layout tab, select Poster on the Type drop-down list. 3 Configure the poster option: You can select the page layout from 2x2, 3x3, or 4x4.
Specify an overlap in millimeters or inches to make it easier to reconstruct the resulting poster. 0.1 inches 0.1 inches 4 Click the Paper tab and select the paper source, size and type. 5 Click OK and print the document. You can complete the poster by reconstructing the results. Printing Booklets The Booklet printing feature allows you to print your document on both sides of the paper and arranges the pages so that the paper can be folded in half after printing to produce a booklet.
3 Click the Paper tab, and select the paper source, size and type. 4 Click OK and print the document. 5 After printing, fold and staple the pages. 8 9 Using Watermarks The Watermark option allows you to print text over an existing document. For example, you may want to have large gray letters reading “DRAFT” or “CONFIDENTIAL” printed diagonally across the first page or all pages of a document.
Creating a Watermark 1 When you change the print settings from your software application, access the printer properties. See page 60. 2 Click the Extras tab and click Edit in the Watermark section. The Edit Watermarks window appears. 3 Enter the text message you want to print in the Watermark Message box. The message displays in the preview image window. The preview image is provided so that you can see how the watermark will appear on the printed page.
Editing a Watermark 1 When you change the print settings from your software application, access the printer properties. See page 60. 2 Click the Extras tab and click Edit in the Watermark section. The Edit Watermarks window appears. 3 Select the watermark you want to edit on the Current Watermarks list, and change the watermark message and the options. 4 Click Update to save the changes. 5 Click Ok.
Using Overlays What is an Overlay? An overlay is text and/or images stored in the computer hard disk drive (HDD) as a special file format that can be printed on any document. Overlays are often used to take the place of preprinted forms and letterhead paper. Rather than using preprinted letterhead, you can create an overlay containing the exact same information that is currently on your letterhead.
4 In the Edit Overlays window, click Create Overlay. 5 In the Create Overlay window, type a name of up to eight characters in the File name box. Select the destination path, if necessary. (The default is C:\Formover). 6 Click Save. You can see the name on the Overlay List. 7 Click OK or Yes until you complete creating. The file is not printed out; it is stored in your computer.
Using a Page Overlay After an overlay has been created, it is ready to be printed with your document. To print an overlay with a document: NOTE: The resolution of the overlay document must be the same as that of the document you will print with the overlay. 1 Create or open the document you want to print. 2 When you change the print settings from your software application, access the printer properties. See page 60. 3 Click the Extras tab.
6 If necessary, click Confirm Page Overlay When Printing. When this box is checked, a message window appears each time you submit a document for printing, asking you to confirm your wish to print an overlay on your document. Answering Yes to the window means that the selected overlay will be printed with your document. Answering No to the window cancels overlay printing. If this box is empty and an overlay has been selected, the overlay will be automatically printed with your document.
Using the Status Monitor The Local Status Monitor displays the status of the printer (Printer Ready, Printer Offline, and Error-Check Printer), the name of the job printed and the toner level for your printer. You can order toner cartridge from the Status Monitor. If you are a network user, you can access the Network Status Monitor Center which shows the status of all the printers available in the network.
86 Pri nt in g
Copying Loading Paper for Copying Selecting Paper Tray Preparing a Document Making Copies From the Scanner Glass Making Copies From the Automatic Document Feeder (ADF) Setting Copy Options Using Special Copy Features Changing the Default Settings Setting the Time Out Option
Loading Paper for Copying The instructions for loading print materials are the same whether you are printing, faxing, or copying. For further details, see page 17 for loading paper in the paper tray and page 54 for loading paper in the Bypass tray. Selecting Paper Tray After loading the print media for copy output, you have to select the paper tray you will use for the copy job. 1 Press
– Wrinkled or creased paper – Curled or rolled paper – Torn paper • Remove all staples and paper clips before loading documents. • Make sure any glue, ink or correction fluid on the paper is completely dry before loading documents. • Do not load documents containing different sizes or weights of paper. • Do not load booklets, pamphlets, transparencies or documents having other unusual characteristics.
2 Place the document face down on the scanner glass and align it with the registration guide on the top left corner of the glass. 3 Close the document cover. NOTE: Leaving the cover open while copying may affect the copy quality and toner consumption. NOTE: If you are copying a page from a book or magazine, lift the cover until its hinges are caught by the stopper and then close the cover. If the book or magazine is thicker than 30 mm, start copying with the cover open.
Making Copies From the Automatic Document Feeder (ADF) 1 Load up to 50 pages of the documents face up with top edge in first into the ADF and adjust the document guides to the document size. 2 Make sure that the bottom of the document stack matches the paper size marked on the document input tray. 3 Customize the copy settings including the number of copies, copy size, contrast, and image quality by using the operator panel buttons. See "Setting Copy Options" on page 88.
Setting Copy Options The buttons on the operator panel let you customize all the basic copy options; contrast, image quality, copy size and number of copies. Set the following options for the current copy job before pressing to make copies. NOTE: If you press while you set the copy options, all of the options you have set for the current copy job will be canceled and return to their default status. Or, they automatically return to their default status after copying.
Reduced/Enlarged Copy Using the (▼or ▲)button, you can reduce or enlarge the size of a copied image, from 25 percent to 400 percent when you copy original documents from the scanner glass or from 25 percent to 100 percent from the ADF. Note that the zoom rate available is different depending on the document loading method. NOTE: When you make a reduced copy, black lines may appear at the bottom of your copy. To select from the predefined copy sizes: 1 Press (▼or ▲).
Using Special Copy Features NOTE: Some features may not be available depending on where you loaded the document, on the scanner glass or in the Automatic Document Feeder. You can use the following copy features using the button on the operator panel: • Auto Fit: Automatically reduces or enlarges the original image to fit on the paper currently loaded in the machine. See page 90. • Clone: Prints multiple image copies from the original document on a single page.
Clone Copying This special copy mode can be applied when you load a document using only the scanner glass. If a document is detected on the ADF, the Clone copying feature does not work. NOTE: You cannot adjust the copy size using the (▼or ▲) button while making a clone copy. To make the Clone copying: 1 Load the document to be copied on the scanner glass, and close the cover. 2 Press . 3 Press or the scroll button ( or ) until “Clone” displays on the bottom line.
2-side Copying You can copy a 2-sided document on one page of A4, Letter, or Legal-sized paper. When you copy using this feature, the machine prints one side on the upper half of the paper and the other side on the lower half without reducing the original. This feature is helpful for copying a small-sized document, such as a name card. If the original document is larger than the printable area, some portions may not be printed.
2-up or 4-up Copying 2 The 2 or 4-up copying feature is available only when you load documents in the ADF. 1 NOTE: You cannot adjust the copy size using the (▼or ▲) button for making a 2 or 4-up copy. NOTE: 2-up copy reduces your original document by 50 percent. 4-up copy reduces the document by the following rates depending on the paper loaded: 76 percent for Letter, 81 percent for A4 and 95 percent for Legal.
6 Press to begin copying. Your original document is divided into 9 portions. Each portion is scanned and printed one by one in the following order: Changing the Default Settings The copy options, including contrast, image quality, copy size, and the number of copies, can be set to the most frequently used modes. When you copy a document, the default settings are used unless they are changed by using the corresponding buttons on the operator panel.
Setting the Time Out Option You can set the time the machine waits before it restores the default copy settings, if you do not start copying after changing them on the operator panel. 1 Press
96 Copy ing
Scanning Scanning Overview Scanning from Operator Panel Scanning using WIA driver
Scanning Overview Scanning with your machine lets you turn pictures and text into digital files on your computer. Then you can fax or e-mail the images, display them on your web site, or use them to create projects that you can print out using an image editing program such as PaperPort which came with your machine. Your machine provides TWAIN and WIA drivers for scanning an image.
Scanning using WIA driver Your machine also supports Windows Image Acquisition (WIA) driver for scanning an image. WIA is one of the standard components provided by the Windows Me and XP and works for a digital camera and scanner. Using the WIA driver, you can scan an image .???... compared with TWAIN driver...... Please give us a brief information on what the difference is between TWAIN and WIA in an end user’s view. NOTE: WIA driver works only on Windows Me, XP and Loghorn (What???).
10 0 Scanning
Fa x i n g Setting the Machine ID Entering Characters Using the Number Keypad Setting the Time and Date Changing the Clock Mode Setting Sounds Toll Save Mode Setting up the Fax System Sending a Fax Receiving a Fax Automatic Dialing Other Ways to Fax Additional Features
Setting the Machine ID In most countries, you are required by law to indicate your fax number on any fax you send. The Machine ID, containing your telephone number and name or company name, will be printed at the top of each page sent from your machine. 1 Press
Entering Characters Using the Number Keypad As you perform various tasks, you may need to enter names and numbers. For example, when you set up your machine, you enter your name or your company’s name and telephone number. When you store one, two or three digit speed dial or group dial numbers, you may also need to enter the corresponding names. To enter alphanumeric characters: 1 When you are prompted to enter a letter, locate the button labeled with the character you want.
Changing Numbers or Names If you make a mistake while entering a number or name, press the left ( ) button to delete the last digit or character. Then enter the correct number or character. Inserting a Pause With some telephone systems, you must dial an access code (9, for example) and listen for a second dial tone. In such cases, you must insert a pause in the telephone number. You can insert a pause while you are setting up speed or group dial numbers.
4 To select “AM” or “PM” for 12-hour format, press the asterisk ( button. ) or the sharp ( When the cursor is not under the AM or PM indicator, pressing the asterisk ( sharp ( ) button immediately moves the cursor to the indicator. ) ) or the You can change the clock mode to 24-hour format (e.g. 01:00 PM as 13:00). For details, see page 113. 5 Press
Setting Sounds You can control the following sounds: • Speaker: You can turn on or off the sounds from the telephone line through the speaker, such as a dial tone or a fax tone. When this option set to Com, the speaker is on until the remote machine answers. • Ringer: You can adjust the ringer volume. • Key Sound: When this option set to On, a key tone sounds each time any key is pressed. • Alarm Sound: You can turn the alarm sound on or off.
Toll Save Mode Using the Toll Save mode, you can set your machine so all the document prescanned throughout the day are sent during a preset time slot, when the call charge is lowered. This Toll Save mode helps you to take advantage of lower long distance rates at night, for example. NOTE: The toll-saving time slot may vary depending on your contract with a long distance phone company. To turn the Toll Save mode on: 1 Press
Setting up the Fax System From the Fax Setup menu, you can configure many settings for the fax system. Changing the Fax Setup Options 1 Press
Option Description Ring To Answer You can specify the number of times the machine rings, 1-7, before answering an incoming call. Contrast You can select the default contrast mode to fax your documents lighter or darker. • Lighter works well with dark print. • Normal works well with standard typed or printed documents. • Darker works well with light print or faint pencil markings. Redial Term Your machine can automatically redial a remote fax machine if it was busy.
Sending a Fax Loading an Original Document You can use the Automatic Document Feeder (ADF) or the scanner glass to load an original document for faxing. Your ADF can load up to 50 sheets at a time. Using the scanner glass, you can load one sheet at a time. To fax a document using the Automatic Document Feeder (ADF): 1 Load up to 50 pages of documents face up with top edge in first into the ADF and adjust the document guides to the document size.
To fax a document from the scanner glass: NOTE: Make sure that no document is in the ADF. If any document is detected in the ADF, it has priority over the document on the scanner glass. NOTE: To get the best scan quality, especially for colored or gray scaled images, use the scanner glass instead of the ADF. 1 Open the document cover. 2 Place the document face down on the scanner glass and align it with the registration guide on the top left corner of the glass.
Adjusting the Document Resolution The default document settings produce good results when setting typical text based documents. However, if you send documents that are of a poor quality, or contain photographs, you can adjust the resolution to produce a higher quality fax. 1 Press . 2 By pressing or the scroll button ( or ), you can choose from Standard, Fine, Super Fine, Photo and Color. 3 When the mode you want to use displays, press
2 Adjust the document resolution to suit your fax needs (see page 120). If you need to change the contrast, see page 116. 3 Enter the remote fax phone number using the number keypad. You can use one, two or three-digit speed or group dial numbers. For details, see "Automatic Dialing" on page 127. 4 Press . 5 When the document is loaded from the scanner glass, the display shows “Another Page?” on the top line after the document is scanned into the memory.
Confirming Transmissions When the last page of your document has been sent successfully, the machine beeps and returns to Standby mode. If something goes wrong while sending your fax, an error message appears on the display. For a listing of error messages and their meanings, see page 169. If you receive an error message, press to clear the message and try to send the document again. You can set your machine to print a confirmation report automatically each time sending a fax is completed.
Receiving a Fax About Receiving Modes NOTE: To use the Ans/Fax mode, attach an answering machine to the Phone Jack ( back of your printer. ) on the NOTE: If you do not want other people to view your received documents, you can use the secure receiving mode. In this mode, all received faxes are stored in the memory. For further details, see page 136. • Fax mode: The machine answers an incoming call and automatically goes into receive mode.
Receiving Automatically in the Fax Mode Your machine is preset to the fax mode at the factory. When you receive a fax, the machine answers the call on a specified number of rings and automatically receives the fax. To change the number of rings, see "Available Fax Setup Options" on page 116. If you want to adjust the ringer volume, see "Setting Sounds" on page 114.
Receiving Manually Using an Extension Telephone This features works best when you are using an extension telephone connected to the Phone Jack ( ) on back of your machine. You can receive a fax from someone you are talking to on the extension telephone without having to go to the fax machine. When you receive a call on the extension phone and hear fax tones, press the keys “*9*” (star nine star) on the extension telephone. The machine receives the document. Press the buttons slowly in sequence.
2 Press the scroll button ( or ) until you see “DRPD Mode” on the bottom line and press
Automatic Dialing Speed Dialing You can store up to 200 frequently dialed numbers in one, two or three-digit speed dial locations (0-199). Storing a Number for Speed Dialing 1 Press on the operator panel. 2 Press or the scroll button ( or ) to display “Store&Edit” on the bottom line of the display. Press
Sending a Fax using a Speed Number 1 Load the document(s) face up with top edge in first into the ADF. OR Place a single document face down on the scanner glass. For details about loading a document, see page 118. 2 Adjust the document resolution to suit your fax needs (see page 120). If you need to change the contrast, see page 116. 3 Enter the speed dial number. • For a one-digit speed dial number, press and hold the appropriate digit button.
4 Press
5 Enter the group number you want to edit or select the group number by pressing the scroll button ( or ). 6 Press
Searching Sequentially through the Memory 1 Press . 2 Press
Other Ways to Fax Redialing To redial the number you last called: Press . When a document is loaded in the ADF (Automatic Document Feeder; see page 118), the machine automatically begins to send. For the document loaded on the scanner glass, the display asks if you want to load another page. Select “1:Yes” to add.
7 When you finish entering fax numbers, press . The document is scanned into the memory before transmission. The display shows the memory capacity and the number of pages being stored in the memory. For documents loaded on the scanner glass, the display asks if you want to load another page. Select “1:Yes” to add. Otherwise, select “2:No” 8 The machine begins sending the document in the order of the numbers you entered.
If you set a time earlier than the current time, the document will be sent at that time the following day. 10 Press
8 Press
3 Press the scroll button ( or ) until you see the fax job you want to cancel, and press
3 Enter the four-digit passcode and press
Message Confirmation This report shows the fax number, the number of pages, the elapsed time of the job, the communication mode, and the communication results. You can set up your machine to automatically print the message confirmation report after each fax job. See page 116. Junk Fax Number List This list shows up to 10 fax numbers specified as junk fax numbers by using the Junk Fax Setup menu; see page 139.
Using Advanced Fax Settings Your machine has various user-selectable setting options for sending or receiving faxes. These options are preset at the factory, but you may need to change them. To find out how the options are currently set, print the System Data list. For details about printing the list, see "Printing Reports" on page 137. Changing Setting Options 1 Press
Option Description Junk Fax Setup Using the Junk Fax Barrier feature, the system will not accept faxes sent from remote stations. Their numbers are stored in memory as junk fax numbers. This feature is useful for blocking any unwanted faxes. Select Off to turn the feature off. Anybody can send you a fax. Select On to turn the feature on. You can set up to 10 fax numbers as junk fax numbers. After storing the numbers, you do not receive any faxes from the registered stations.
Tr o u b l e s h o o t i n g Clearing Document Jams Clearing Paper Jams Clearing LCD Error Messages Solving Problems
Clearing Document Jams When a document jams while it passes through the Automatic Document Feeder (ADF), “Document Jam” appears on the display. NOTE: To prevent document jams, use the scanner glass for thick, thin or mixed documents. Input Misfeed 16 0 1 Remove the remaining documents from the ADF. 2 Open the ADF cover. 3 Rotate the bushing on one end of the ADF roller toward the ADF ( ➀ ) and remove the roller from the slot( ➁ ). Pull the document gently away from the ADF. 4 Close the ADF cover.
Exit Misfeed 1 Remove the remaining documents from the ADF. 2 Open the document cover and turn the release knob to remove the misfed documents from the ADF output tray. 3 Close the document cover. Then load the documents back into the ADF. Roller Misfeed 1 Remove the remaining documents from the ADF. 2 Open the document cover.
Clearing Paper Jams When a paper jam occurs, “Paper Jam” appears on the display. Refer to the table below to locate and clear the paper jam. Message Location of Jam Go to [Paper Jam 0] Open/Close Door In the paper feed area below. In the optional Tray2 page 167. [Paper Jam 1] In the paper exit area page 164. In the fuser area or around the toner cartridge page 165. In the Bypass tray page 167.
3 Remove the jammed paper by gently pulling it straight out. If there is any resistance and the paper does not move when you pull or if you cannot see the paper in this area, skip to the fuser area around the toner cartridge. See page 165. 4 Insert the paper tray into the machine until it snaps into place. 5 Open and close the front cover to resume printing.
In the Paper Exit Area 1 Open and close the front cover. The jammed paper automatically exits the machine. If the paper does not exit, continue to step 2. 16 4 2 Gently pull the paper out of the front output tray. Skip to step 6. 3 If there is any resistance and the paper does not move when you pull or if you cannot see the paper in the front output tray, open the rear cover.
4 Remove the jammed paper by gently pulling it straight out. 5 Close the rear cover. 6 Open and close the front cover to resume printing. In the Fuser Area or Around the Toner Cartridge NOTICE: The fuser area is hot. Take care when removing paper from the machine. 1 Open the front cover and lightly pull the toner cartridge straight out.
16 6 2 Remove the jammed paper by gently pulling it straight out. 3 Replace the toner cartridge and close the front cover. Printing automatically resumes.
In the Bypass Tray “Bypass Jam” appears on the display when you try to print using the Bypass tray and the machine does not detect paper, due to no paper or improper paper loading. The error message may also occur when the paper is not properly fed into the machine through the Bypass tray. In that case, gently pull the paper straight out of the machine. In the Optional Tray2 1 Pull the optional Tray2 open. 2 Remove the jammed paper from the machine.
3 Pull the standard Tray1 open. 4 Pull the jammed paper straight up and out. 5 Insert Tray1 into the machine until it snaps into place. 6 Open and close the front cover to resume printing. Tips for Avoiding Paper Jams By selecting the correct paper types, most paper jams can be avoided. When a paper jam occurs, follow the steps outlined in "Clearing Paper Jams" on page 162. 16 8 • Follow the procedures in "Loading Print Media in the Paper Tray" on page 53.
Clearing LCD Error Messages Display Meaning [Bypass Jam] A paper jam has occurred in the Bypass tray or Clear the paper jam. See page 162. the machine detects non-feeding from the Load paper in the Bypass tray. Bypass tray. Cancel ? Your machine’s memory is full and cannot store the document to send a fax into its memory. 1:Yes 2:No Suggested solutions To cancel the fax job, press the 1 button to accept “Yes.” If you want to send the pages that were stored, press the 2 button to accept “No.
Display Meaning [Hsync Error] A problem has occurred in the Laser Scanning Unplug the power cord and plug it back in. If Unit (LSU). the problem persists, please call for service. [LSU Error] Suggested solutions The toner cartridge is not installed. Install the toner cartridge. See page 15. Your machine cannot connect with a remote machine or has lost contact because of a problem with the phone line. Try again. If the problem persists, wait an hour or so for the line to clear and try again.
Display Meaning Suggested solutions Power Failure The power has been turned off and then on and the machine’s memory has not been saved. You need to start the job again which you were trying to do before the power failure. Registered The group dial location is already registered with another speed dial number. Select another group dial location. Retry Redial? The machine is waiting for a specified time interval to redial a previously busy station.
Solving Problems The following chart lists some conditions that may occur and the recommended solutions. Follow the suggested solutions until the problem is corrected. If the problem persists, please call for service. Paper Feeding Problems Condition Suggested solutions Paper is jammed during printing. Clear the paper jam. See page 162. Paper sticks together. • Ensure that there is not too much paper in the paper tray.
Printing Problems Condition Possible cause Suggested solutions The printer does not print. The printer is not receiving Check the power cord connections. Check the power switch and power. the power source. The printer is not selected as the default printer. Select Dell Laser MFP 1600n as your default printer in your Windows. Check the printer for the following: • • • • The front or rear cover is not closed. Paper is jammed. No paper is loaded. The toner cartridge is not installed.
Condition Possible cause Half the page is blank. The page orientation setting may be incorrect. The paper size and the paper size settings do not match. The printer prints, The printer cable is loose or but the text is wrong, defective. garbled, or incomplete. The wrong printer driver was selected. Suggested solutions Change the page orientation in your application. See page 64. Ensure that the paper size in the printer driver settings matches the paper in the tray.
Printing Quality Problems The inside of the machine may be dirty or improper paper loading may reduce the print quality. See the table below to clear the problem. Condition Suggested solutions Light or faded print If a vertical white streak or faded area appears on the page: • The toner supply is low. You may be able to temporarily extend the toner cartridge life. See page 152. If this does not improve the print quality, install a new toner cartridge.
Condition Suggested solutions Vertical lines If black vertical streaks appear on the page, the drum inside the toner cartridge has probably been scratched. Install a new toner cartridge. See "Installing the Toner Cartridge" on page 15. AaBbCc AaBbCc AaBbCc AaBbCc AaBbCc Gray background AaBbCc AaBbCc AaBbCc AaBbCc AaBbCc Toner smear If the amount of background shading becomes unacceptable: • Change to lighter weight pages. See "Paper Specifications" on page 206.
Condition Suggested solutions Background scatter Background scatter results from bits of toner distributed on the printed page. • The paper may be too damp. Try printing with a different batch of paper. Do not open packages of paper until necessary so that the paper does not absorb too much moisture. • If background scatter occurs on an envelope, change the printing layout to avoid printing over areas that have overlapping seams on the reverse side. Printing on seams can cause problems.
Condition Suggested solutions Wrinkles or creases • Ensure that the paper is loaded properly. • Check the paper type and quality. See "Paper Specifications" on page 206. • Turn over the stack of paper in the paper tray. Also try rotating the paper 180° in the paper tray. Back of printouts are dirty Check for leaks in the toner. Clean the inside of the machine. See page 149. Black pages A Loose toner 17 8 Tro u b le s h o ot in g • The toner cartridge may not be installed properly.
Condition Suggested solutions Character Voids Character voids have white areas where they should be solid black: • If you are using transparencies, try another type of transparency. Because of the composition of the transparency, some character voids are normal. • You may be printing on the wrong surface of the paper. Turn over the stack of paper in the paper tray. • The paper may not meet paper specifications. See "Paper Specifications" on page 206.
Fax Problems Condition Suggested solutions The machine is not working, there is no display and the buttons are not working. • Unplug the power cord and plug it in again. • Ensure that there is power to the electrical receptacle. No dial tone sounds. • Check that the phone line is connected properly. See page 21. • Check that the phone socket in the wall is working by plugging in another phone. The numbers stored in the memory do not dial correctly.
Copying Problems Condition Suggested solutions Copies are too light or too dark. Use the button to darken or lighten the background of the copies. Smears, lines, marks or spots appear on copies. • If defects are on the original, press the button to lighten the background of your copies. • If no defects are on the original, clean the scanner glass and underside of the document cover. See page 150. Copy image is skewed.
Scanning Problems Condition Suggested solutions The scanner does not work. • Make sure that you place the document to be scanned face down from the scanner glass, or face up in the Automatic Document Feeder. • There may not be enough available memory to hold the document you want to scan. Try the Prescan function to see if that works. Try lowering the scan resolution rate. • Check that the USB cable is connected properly. • Make sure that the USB cable is not defective.
Troubleshooting PS Errors The following situations are PS language specific and may occur when several printer languages are being used. NOTE: To receive a printed or screen displayed message when PS errors occur, open the Print Options window and click the desired selection next to the PostScript errors section. Problem Possible Cause Solution PostScript file can not be The PostScript option may not be Print a configuration page and verify that the PS version printed. installed.
18 4 Tro u b le s h o ot in g
Networking About Sharing the Printer on a Network Setting Up the Locally Shared Printer Setting Up a Network-connected Printer
About Sharing the Printer on a Network If you work in a networked environment, you can connect your printer to the network. Locally-shared Printer You can connect the printer directly to a selected computer, which is called the “host computer” on the network. The printer can then be shared by other users on the network through a Windows 98, Me, 2000, XP, or NT 4.0 network machine connection. Wired Network-connected Printer Your printer has a built-in network interface. For details, see page 23.
Setting Up the Client Computer 1 Right-click the Start button and click Explore. 2 Open your network folder in the left column. 3 Right-click the shared name and click Capture Printer Port. 4 Select the port you want, check the Reconnect at log on box and then click OK. 5 Click the Start button and point to Settings and then Printers. 6 Double-click your printer icon. 7 Click the Printer menu and point to Properties. 8 Click the Details tab and point to the printer port and then click OK.
5 Double-click your printer icon. 6 Click the Printer menu and point to Properties. 7 Click the Ports tab and point to Add Port. 8 Click Local Port and point to New Port. 9 Fill in the Enter a port name field and enter the shared name. 10 Click OK and point to Close. 11 For Windows NT 4.0, click OK. For Windows 2000/XP, click Apply and point to OK. Setting Up a Network-connected Printer You have to set up the network protocols on the printer to use it as your network machine.
Printing a Network Configuration Page The Network Configuration page shows how the network interface card on your printer is configured. The default settings which are suitable for most applications are enabled. 1 Press
Static Addressing To enter the TCP/IP address from your printer’s operator panel, take the following steps: 1 Press
Restoring the Network Configuration You can return the network configuration to its default settings. 1 Press
14 6 Ne t wo r ki ng
Maintenance Clearing the Memory Cleaning Your Machine Maintaining the Toner Cartridge Consumables and Replacement Parts Ordering Supplies Printer Settings Utility
Clearing the Memory You can selectively clear information stored in your machine’s memory. 1 Press
Cleaning Your Machine To maintain the print quality, follow the cleaning procedures below, each time the toner cartridge is replaced or if print quality problems occur. NOTE: While cleaning the inside of the machine, be careful not to touch the transfer roller (located underneath the toner cartridge). Oil from your fingers can cause print quality problems.
3 With a dry and lint-free cloth, wipe away any dust and spilled toner from the toner cartridge area and the toner cartridge cavity. CAUTION: To prevent damage to the toner cartridge, do not expose it to light for more than a few minutes. Cover it with a piece of paper, if necessary. Do not touch the transfer roller inside the machine. 4 Reinsert the toner cartridge and close the front cover. 5 Plug in the power cord and turn the machine on.
3 Wipe the surface of the scanner glass and ADF glass until it is clean and dry. 1 2 3 4 1 White Sheet 2 Document Cover 3 ADF Glass 4 Scanner Glass 4 Wipe the underside of the white document cover and white sheet until it is clean and dry. 5 Close the document cover. Maintaining the Toner Cartridge Storing the Toner Cartridge Store the toner cartridge in the original packaging until you are ready to install it.
Expected Cartridge Life The life of the toner cartridge depends on the amount of toner that print jobs require. When printing text at IDC 5 percent coverage, a new toner cartridge lasts an average of 5,000 pages. (The original toner cartridge supplied with the machine lasts an average of 3,000 pages.) The actual number may be different depending on the print density of the page you print. If you print a lot of graphics, you may need to change the cartridge more often.
Replacing the Toner Cartridge When the toner eventually runs out, only blank pages print when a print job or copy job are sent. In that case the incoming faxes are only saved in the memory and not printed. At this stage, the toner cartridge needs to be replaced. NOTE: You can also set the machine to continue printing a received fax. See page 156. Order an extra toner cartridge so you will have it on hand when the current cartridge no longer prints satisfactorily. See page 157 to order toner cartridges.
3 Unpack the new toner cartridge and hold the toner cartridge by the handle and gently shake it from side-to-side to distribute the toner. Save the box and the cover for shipping. 15 4 4 Slide the new toner cartridge in aligning it with the labeled arrows, until it locks firmly into place. 5 Close the front cover.
Setting the Notify Toner Option If you have set the Notify Toner menu option to On, your machine automatically sends a fax to your service company or the dealer to notify them that your machine requires a new toner cartridge when the toner cartridge needs to be replaced. The fax number was preset by your dealer when you bought your machine. 1 Press
Printing in the Toner Low Status When the toner cartridge is nearly empty, the machine saves the incoming faxes in the memory without printing them. If you want to print the fax in the toner low status, you can set the machine to continue printing even though the print quality is not so good. 1 Press
Ordering Supplies You can order supplies using the Dell Toner Reorder Program window, the Status Monitor, or Dell Printer Configuration Web Tool. If your printer is connected to a network, type your machine’s IP address in your Web browser or open the Network Status Monitor Center (see page 85.) to launch the Dell Printer Configuration Web Tool and click the toner supplies link. To purchase other parts, except for the toner cartridge, contact Dell.
Printer Settings Utility Using the Printer Settings Utility window, you can set up fax system data options, create and edit Phonebook entries on desktop. You can also configure the destination launches when you use the