SAMSUNG LASER PRINTER User’s Guide
This manual is provided for information purposes only. All information included herein is subject to change without notice. Samsung Electronics is not responsible for any damages, direct or indirect, arising from or related to use of this manual. © 2003 Samsung Electronics Co., Ltd. All rights reserved. • ML-1710 Series and Samsung logo are trademarks of Samsung Electronics Co., Ltd. • Centronics is a trademark of Centronics Data Computer Corporation.
CONTENTS Chapter 1: INTRODUCTION Special Features .................................................. Printer Components ............................................. Front View ..................................................... Inside View .................................................... Rear View ...................................................... 1.2 1.4 1.4 1.5 1.5 Understanding the Control Panel ............................ 1.6 On Line/Error and Toner Save LEDs ................... 1.
Chapter 3: USING PRINT MATERIALS Choosing Paper and Other Materials ....................... 3.2 Sizes and Capacities ....................................... 3.3 Guidelines for Paper and Special Materials .......... 3.4 Selecting the Output Location ................................ 3.5 Printing to the Top Output Tray (Face down) .... 3.5 Printing to the Rear Output Tray (Face up) ....... 3.6 Loading Paper ..................................................... 3.7 Using the Tray ..............................
Chapter 5: MAINTAINING YOUR PRINTER Maintaining the Toner Cartridge ............................. 5.2 Redistributing Toner ........................................ 5.3 Replacing the Toner Cartridge .......................... 5.4 Cleaning the Printer ............................................. 5.5 Cleaning the Outside ....................................... 5.5 Cleaning the Inside ......................................... 5.5 Consumables and Replacement Parts ..................... 5.
Chapter 7: APPENDIX Using Your Printer with a Macintosh ....................... Installing Software for Macintosh ...................... Printing a Document ....................................... Using Advanced Printing Features ..................... 7.2 7.2 7.4 7.6 Using Your Printer in Linux ................................... Installing the Printer Driver ............................. Changing the Printer Connection Method ........... Using the Configuration Tool ...........................
Environmental and Safety Consideration Laser Safety Statement The printer is certified in the U.S. to conform to the requirements of DHHS 21 CFR, chapter 1 Subchapter J for Class I(1) laser products, and elsewhere, is certified as a Class I laser product conforming to the requirements of IEC 825. Class I laser products are not considered to be hazardous.
Ozone Safety During normal operation, this machine produces ozone. The ozone produced does not present a hazard to the operator. However, it is advisable that the machine be operated in a well ventilated area. If you need additional information about ozone, please contact your nearest Samsung dealer. Power Saver This printer contains advanced energy conservation technology that reduces power consumption when it is not in active use.
Radio Frequency Emissions FCC regulations This device has been tested and found to comply with the limits for a Class B digital device, pursuant to Part 15 of the FCC rules. These limits are designed to provide reasonable protection against harmful interference in a residential installation. This equipment generates, uses and can radiate radio frequency energy and, if not installed and used in accordance with the instructions, may cause harmful interference to radio communications.
Declaration of Conformity (European Countries) Approvals and Certifications The CE marking applied to this product symbolizes Samsung Electronics Co., Ltd. Declaration of Conformity with the following applicable 93/68/EEC Directives of the European Union as of the dates indicated: January 1, 1995: Council Directive 73/23/EEC Approximation of the laws of the member states related to low voltage equipment.
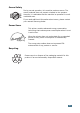
WARNING • Do not disassemble the printer. Doing so may give you an electric shock. • If you continuously print many pages, the surface of the output tray may become hot. Be careful not to touch the surface, especially for children.
1 INTRODUCTION Congratulations on the purchase of your Printer! This chapter includes: • Special Features • Printer Components • Understanding the Control Panel
Special Features Your new printer is equipped with special features that improve the print quality, giving you a competitive edge. You can: Print with excellent quality and high speed • You can print at 600 dots per inch (dpi). See page 4.16. • Prints 17 pages-per-minute (Letter size), 16 pages-per-minute(A4 size). Handle paper flexibly • Standard 250-sheet tray and a 1-sheet Manual Feeder support various sizes and types of paper.
Save your time and money • Allows you to use the Toner Save mode to save toner. See page 4.8. • Allows you to print multiple pages on one single sheet of paper to save paper (N-Up printing). See page 4.10. • This printer meets Energy Star guidelines for energy efficiency. Print in various environments • You can print in Windows 95/98/Me/NT 4.0/2000/XP. • Your printer is compatible with Linux and Macintosh. • Your printer comes with both the Parallel and the USB interface. INTRODUCTION 1.
Printer Components Front View Output Support Top output tray (Face down) Control Panel Front Cover Manual Feeder guide Power switch Tray Manual Feeder Paper level indicator 1.
Inside View 1 Toner cartridge Front Cover Rear View Rear output tray (Face up) Parallel port Power receptacle Parallel port USB port INTRODUCTION 1.
Understanding the Control Panel On Line/Error and Toner Save LEDs LED Description If the On Line/Error lights green, the printer is ready to print. If the On Line/Error lights red, the printer is experiencing an error, such as jammed paper, the open cover or the empty toner cartridge. See “Troubleshooting Error Messages” on page 6.18. If you press the Cancel button while the printer is receiving data, the On Line/Error LED blinks red to cancel printing.
LED Description 1 If the On Line/Error and Toner Save LEDs blink, your system has some problems. To solve the problem, see “Troubleshooting Error Messages” on page 6.18. Cancel button Function Description Printing demo page In Ready mode, press and hold this button for about 2 seconds until all LEDs blink slowly, and release. Manual feeding Press this button each time you load a sheet of paper in the manual feeder, when you select Manual Feed for Source from your software application.
NOTE 1.
2 Setting Up Your Printer This chapter provides step by step information on setting up your printer.
Unpacking 1 Remove the Printer and all accessories from the packing carton. Make sure that the printer has been packed with the following items: Toner Cartridge Power Cord CD-ROM Setup Guide Notes: • If any items are missing or damaged, notify your dealer immediately. • Components may differ from one country to another. • The CD-ROM contains the printer driver, the User’s Guide, and the Adobe Acrobat Reader program. 2 Carefully remove all of packing tapes from the printer. Tape 2.
Selecting a Location 100 mm (3.9 in.) (3.9 in.) 482.6 mm(18.8 in.) 100 mm 954.6 mm(37.5 in.) 100 mm Clearance Space (3.9 in.) Select a level, stable place with adequate space for air circulation. Allow extra space for opening covers and tray. The area should be well-ventilated and away from direct sunlight or sources of heat, cold, and humidity. See the image below for clearance space. Do not place the printer close to the edge of your desk or table! 552 mm(21.7 in.) •Front: 482.
Installing the Toner Cartridge 1 Grasp the front cover and pull it toward you to open. Note: Because the printer is very light, it may be moved when you use it; for example, when opening/closing the tray or installing/ removing the toner cartridge. Be careful not to move the printer. 2 Remove the toner cartridge from its bag and remove the paper covering the cartridge. 3 Gently shake the cartridge from side to side to distribute the toner evenly inside the cartridge.
4 Locate the cartridge slots inside the printer, one on each side. 2 5 Grasp the handle and insert the cartridge in the printer until it snaps into place. 6 Close the front cover. Make sure that the cover is securely closed. If the cover is not firmly closed, printing errors may occur when you print. Note: When printing text at 5% coverage, you can expect a toner cartridge life of approximately 3,000 pages (1,000 pages for the toner cartridge that is shipped with the printer).
Loading Paper You can load approximately 250 sheets of paper in the tray. 1 Pull the tray out of the printer. Note: Because the printer is very light, it may be moved when you use it; for example, when opening/closing the tray or installing/ removing the toner cartridge. Be careful not to move the printer. 2 Push down the pressure plate until it locks in position. 3 Prepare a stack of paper for loading by flexing or fanning them back and forth. Straighten the edges on a level surface. 2.
4 Load paper with the print side facing down. 2 Make sure that all four corners are flat in the tray. 5 Pay attention to the paper limit mark on the left inside wall of the tray. Paper overloading may cause paper jams. Note: If you want to change the paper size in the tray, see “Changing the Paper Size in the Tray” on page 2.8. 6 Slide the tray back into the printer. SETTING UP YOUR PRINTER 2.
Changing the Paper Size in the Tray 1 Pinch the rear guide as shown below to adjust for the paper length. 2 Pinch the side guide as shown and slide it to the left flush against the paper. Notes: • Do not push the width guide far enough to cause the material to warp. • If you do not adjust the width guide, it may cause paper jam. 2.
Connecting a Printer Cable To print from your computer, you need to connect your printer to your computer with either a parallel interface cable or a Universal Serial Bus (USB) cable. If you are a Macintosh user, you can use only a USB cable. Using a Parallel Cable Note: To connect the printer to the parallel port of the computer requires a certified parallel cable. You will need to buy a IEEE1284 compliant cable. 1 Make sure that both the printer and the computer are turned off.
Using a USB Cable Note: Connecting the printer to the USB port of the computer requires a certified USB cable. You will need to buy a USB 1.1 compliant cable that is within 3m in length. 1 Make sure that both the printer and the computer are turned off. 2 Plug the USB printer cable into the connector on the back of the printer. To the USB port on your computer 3 Connect the other end of the cable to the USB port on your computer. See your computer User’s Guide if you need help.
Turning the Printer on 1 Plug the power cord into the power receptacle on the back of the printer. 2 Plug the other end into a properly grounded AC outlet and turn on the printer using the power switch. To the AC outlet CAUTION: • The fusing area at the rear portion of the inside of your printer is hot when powered. Be careful not to be burned when accessing this area. • Do not disassemble the printer when it is powered. Doing so may give you an electric shock. SETTING UP YOUR PRINTER 2.
Printing a Demo Page Print a demo page to make sure that the printer is operating correctly. 1 Hold down the Cancel button for about 2 seconds to print a demo page. 2 The Demo page shows the printer’s current configuration. 2.
Installing Printer Software The supplied CD-ROM contains Windows printing software, Macintosh printing software, Linux printing software, on-line User’s Guide and Acrobat Reader to view the User’s Guide. If you are printing from Windows You can install the following printer software using the CD-ROM. • Printer driver for windows. Use this driver to take full advantage of your printer’s features. See page 2.15. • Status Monitor allows you to see the printing status of the printer. See page 4.26.
Printer Driver Features Your printer drivers will support the following standard features: • Paper source selection • Paper size, orientation and media type • number of copies Table below lists a general overview of features supported by your printer drivers. Printer Driver Feature Win9x/Me Win2000/XP NT4.
Installing Printer software in Windows System Requirements Verify the following: • At least 32 MB (Windows 9x/Me), 64 MB (Windows 2000/NT), 128 MB (Windows XP) or more of RAM is installed on your PC. • There is at least 300 MB of free disk space on your PC. • All applications are closed on your PC before beginning installation. • You have one of the following operating systems: Windows 95, Windows 98, Windows Me, Windows NT 4.0, Windows 2000 or Windows XP. • Internet Explorer 5.0 or later.
3 Choose the installation type. •Auto Install: Installs the common software for your printer, such as printer driver, and User’s Guide. This is recommeded for most users. •Custom Install: Allows you to choose the language of the software and the components you want to install. After selecting the language and the component(s), click Next. •View User’s Guide: Opens Samsung ML-1710 Series User’s Guide.
5 When the test page prints out correctly, click Yes. If not, click No to reprint it. 6 To register yourself as a user of Samsung Printers, select the checkbox and click Finish. You are now accessed to the Samsung web site. Otherwise, just click Finish. NOTES: • When you want to use your printer with the parallel cable, remove the USB cable and connect the parallel cable. Then repair the printer driver; select Start → Programs → Samsung ML-1710 Series → Printer Maintenance → Repair → Printer.
Repairing the Printer software Repair is required if your installation fails. 1 From the Start menu, select Programs. 2 Select Samsung ML-1710 Series and then Printer Maintenance. 3 Select Repair and then click Next. NOTE: If your printer is not connected to the computer, the Connect Samsung ML-1710 Series window opens. After connecting the printer, click Next. 4 Select the components you want to reinstall and click Next. 5 If you select Printer, follow steps 4 and 5 on page 2.16.
Removing the Printer software 1 From the Start menu, select Programs. 2 Select Samsung ML-1710 Series and then Printer Driver Maintenence . 3 Select Remove and then click Next. 4 Select the components you want to remove and click Next. 5 When you are asked to confirm your selection, click OK. 6 Aftern the software is removed, click Finish. Changing the Display Language After installation of the software, you can change the display language.
Viewing the User’s Guide After installing the printer software, you can view User’s Guide in PDF format at any time from your Windows desktop. 1 From the Start menu, select Programs. 2 Select Samsung ML-1710 Series and View User’s Guide. Adobe Acrobat automatically runs and then the User’s Guide opens. NOTE: If your computer doesn’t have Adobe Acrobat, selecting the View User’s Guide option automatically installs Adobe Acrobat for you. After installing is complete, repeats step 1 and 2. 2.
3 Using Print Materials This chapter will help you understand types of paper you can use with this printer and how to properly load paper in the tray for the best print quality.
Choosing Paper and Other Materials You can print on a variety of print materials, such as plain paper, envelopes, labels, transparencies and so on. See “Paper Specifications” on page 7.21. To get the best possible print quality, use only high-quality copier-grade paper. When you choose print materials, consider the followings: • Desired outcome: The paper you choose should be appropriate for the project. • Size: You can use any size paper that fits easily within the paper adjusters of the paper feeder.
Sizes and Capacities Input Source/Capacitya Size Tray Manual Feeder Letter (8.5 x 11 in.) 250 1 Legal (8.5 x 14 in.) 250 1 Executive (7.25 x 10.5 in.) 250 1 Folio (8.5 x 13 in.) 250 1 A4 (210 x 297 mm) 250 1 B5 (182 x 257 mm) 250 1 A5 (148 x 210 mm) 250 1 A6 (105 x 148 mm) 250 1 - 1 1 1 1 1 1 - 1 1 Letter (8.5 x 11 in.) A4 (210 x 297 mm) - 1 1 Card stocksb - 1 Plain Paper 3 Envelopesb No. 10 (4.12 x 9.5 in.) Monarch (3.87 x 7.5 in.
Guidelines for Paper and Special Materials When selecting or loading paper, envelopes, or other special materials, keep these guidelines in mind: • Attempting to print on damp, curled, wrinkled, or torn paper can cause paper jams and poor print quality. • Use cut-sheet paper only. You cannot use multi-part paper. • Use only high-quality, copier grade paper for the best print quality. • Do not use paper that has been already printed on or that has been fed through a photocopier.
Selecting the Output Location The printer has two output locations: the rear output tray and the top output tray. Top output tray Rear output tray 3 To use the top output tray, be sure the rear output tray is closed. To use the rear output tray, open it. Notes: • If paper coming out of the top output tray has problems, such as excessive curl, try printing to the rear output tray. • To avoid paper jams, do not open or close the rear output tray while the printer is printing.
Printing to the Rear Output Tray (Face up) The printer always prints to the rear output tray if it is open. Paper comes out of the printer face-up, and each time a sheet of paper comes out, it falls down from the printer. Printing from the Manual Feeder to the rear output tray provides the straight paper path. Opening the rear output tray might improve the output quality with the following: • envelopes • labels • transparencies To open the rear output tray: 1 Open the rear door by pulling it down.
2 If you do not want to print to the rear output tray then close the tray. The pages will stack on the top output tray. 3 Loading Paper Proper paper loading helps prevent paper jams and ensure trouble-free printing. Do not remove the tray while a job is printing. Doing so may cause a paper jam. See “Sizes and Capacities” on page 3.3 for acceptable paper size and capacities for each tray. The paper level bar on the front of the paper tray shows the amount of paper currently in the tray.
Using the Manual Feeder If you select Manual Feed in the Source option, you can manually load paper in the manual feeder. Manually loading paper can be helpful when you want to check the print quality after each page is printed. If you experience a paper jam from the tray, load one sheet of paper at a time into the manual feeder. 1 Load the print material in the manual feeder with the print side up. Adjust the paper guide against the print material without bending the paper.
In Manual Feed mode, you can’t cancel a print job by pressing the Cancel button. To cancel a print job in Manual Feed mode: 1 Turn the printer off. 2 Double-click the icon at right bottom of the window. 3 Double-click this icon to view the queue of the print jobs. 3 Select a job you want to cancel. 4 For Windows 9x/Me, select Cancel Printing from Document menu. For Windows NT/2000/XP, select Cancel from Document menu. 5 When the jobs are removed from the list. Turn the printer on.
Printing on Envelopes Guidelines • Only use envelopes recommended for laser printers. Before loading envelopes in the manual feeder, make sure that they are undamaged and are not stuck together. • Do not feed stamped envelopes. • Never use envelopes with clasps, snaps, windows, coated lining, or self-stick adhesives. These envelopes may severely damage the printer. 1 Open the rear output tray. Load the envelopes into the manual feeder with the flap side down.
3 When you print on envelopes, you must select Manual Feed for Source from the software application, and then select the correct paper size and type. For details, see page 4.6. 4 Press the Cancel button to start feeding. Note: Please be careful when you open the rear cover. The inside of the printer maybe hot. 5 Printing is started. Close the rear output tray after the printing is completed. USING PRINT MATERIALS 3.
Printing on Labels Guidelines • Only use labels recommended for laser printers. • Verify that the labels’ adhesive material can tolerate fusing temperature of 200°C (392°F) for 0.1 second. • Make sure that there is no exposed adhesive material between the labels. Exposed areas can cause labels to peel off during printing, which can cause paper jams. Exposed adhesive can also cause damage to printer components. • Do not feed a sheet of label through the printer more than once.
3 When you print on labels, you must select Manual Feed for Source from the software application, and then select the correct paper size and type. For details, see page 4.6. Note: Please be careful when you open the rear cover. The inside of the printer maybe hot. 4 Press the Cancel button to start feeding. Printing is started. Close the rear output tray after the printing is completed.
2 Adjust the guide to fit the width of the transparencies. 3 When you print on transparencies, you must select Manual Feed for Source from the software application, and then select the correct paper size and type. For details, see page 4.6. Note: Please be careful when you open the rear cover. The inside of the printer maybe hot. 4 Press the Cancel button to start feeding. Printing is started. Close the rear output tray after the printing is completed.
Printing on Card Stock or Custom-sized Materials Postcards, 3.5 by 5.83 in.(index) cards and other custom-sized materials can be printed with this printer. The minimum size is 76 by 127mm(3.0 by 5.0 in.) and the maximum size is 216 by 356mm(8.5 by 14 in.). Guidelines • Always insert the short-edge into the Manual Feeder first. If you want to print in landscape mode, make this selection through your software. Inserting paper long-edge first may cause a paper jam. • Do not print on media smaller than 76mm (3.
3 When you print on card stocks or the custom-sized paper, you must select Manual Feed for Source from the software application, and then select the correct paper size and type. For details, see page 4.6. Note: If the size of your print material is not listed in the Size box in the Paper tab of the printer driver properties, click Add Custom button and set the size manually. See page 4.6. 4 Press the Cancel button to start feeding. Printing is started.
1 Load letterheads into the tray you want to use, as shown in the figures below. Adjust the guides to fit the width of the paper stack. Load with the design face down, bottom edge towards the printer. 3 Load with the design face up, top edge towards the printer. 2 When you print, configure the paper source, type and size properly in the software application. For details, see page 4.6. USING PRINT MATERIALS 3.
NOTE 3.
4 Printing Tasks This chapter explains the printing options and common printing tasks.
Printing a Document The following procedure describes the general steps required for printing from various Windows applications. The exact steps for printing a document may vary depending on the application program you are using. Refer to the User’s Guide of your software application for the exact printing procedure. 1 Open the document you want to print. 2 Select Print from the File menu. The Print window is displayed (It may look slightly different depending on your application).
4 Now you see the Samsung ML-1710 series Properties window, which allows you to access all the information you will need when using your printer. The Layout tab is first displayed. The preview image shows the sample page with the settings you currently specified. 4 If necessary, select the Orientation option. The Orientation option allows you to select the direction in which information is printed on a page. •Portrait prints across the width of the page, letter style.
7 When you complete setting the properties, click OK until the Print window is displayed. 8 Click OK to start printing. Notes: • Most Windows applications will override settings you specify in the printer driver. Change all print settings available in the software application first, and change any remaining settings using the printer driver. • The settings you change remain in effect only while you are using the current program. To make your changes permanent, make them in the Printers folder.
The printer will finish printing the page that is moving through the printer and delete the rest of the print job. Pressing Cancel cancels only the current job in the printer. If more than one print job is in the printer memory, Cancel must be pressed once for each job. To stop a print job from the Printers folder 1 From the windows Start menu, select Settings. 2 Select Printers to open the Printers window, and doubleclick the Samsung ML-1710 Series icon.
Setting Paper Properties Use the following options to set the basic paper handling needs when you access the printer properties. See page 4.2 for more information on accessing printer properties. Click the Paper tab to access various paper properties. ➀ ➁ ➂ ➃ Property Description ➀ Copies allows you to choose the number of copies to be printed. You can enter up to 999. ➁ Size option allows you to choose the size of paper you loaded into the tray.
Property ➂ Description Make sure that Source is set to the corresponding paper tray. Manual Feed source is used when you use the Manual Feeder to print using special materials. You have to load one sheet at a time into the the printer. see page 3.8. If the paper source is set to Auto Select, the printer automatically selects paper from the Manual Feeder first and then from the Tray. ➃ Make sure the Type is set to Printer Default.
Using the Toner Save Mode Toner Save mode allows the printer to use less toner on each page. Selecting this option will extend the life of your toner cartridge and reduce your cost per page, but will reduce print quality. There are two ways to enable the Toner Save mode: From the Control Panel Press the Cancel button on the control panel. The printer must be in Ready mode (On Line/Error green LED is on). • If the Toner Save LED is on, the mode is enabled and the printer uses less toner to print a page.
From the software application 1 To change the print settings from your software application, access the printer properties. See page 4.2. 2 Click the Graphics tab, and select the Toner Save option. You can select from: •Printer Setting: If you select this option, this feature is determined by the setting you’ve made on the control panel of the printer. •On: Select this option to allow the printer to use less toner on each page. •Off: If you don’t need to save toner to print a document, select this option.
Printing Multiple Pages on One Sheet of Paper (N-Up Printing) You can select the number of pages to print on a single sheet of paper. To print more than one page per sheet, the pages will appear decreased in size and arranged on the sheet. You can print up to 16 pages on one sheet. 1 To change the print settings from your software application, access the printer properties. See page 4.2. 2 From the Layout tab, choose Multiple Pages per Side in the Type drop-down list.
4 Select the page order, if necessary. 1 2 1 3 2 1 3 1 3 4 2 4 4 3 4 2 Right then Down Down then Right Left then Down Down then Left 5 Click the Paper tab, select the paper source, size and type. 6 Click OK and print the document. 4 PRINTING TASKS 4.
Scaling Your Document You can scale your print job on a page. 1 To change the print settings from your software application, access the printer properties. See page 4.2. 2 From the Layout tab, select Reduce/Enlarge in the Type drop-down list. 3 Enter the desired scaling rate in the Persentage input box. You can also click the or button. 4 Click the Paper tab, select the paper source, size and type. 5 Click OK and print the document. 4.
Fitting Your Document to a Selected Paper Size A This printer feature allows you to scale your print job to any selected paper size regardless of the digital document size. This can be useful when you want to check fine details on a small document. 1 To change the print settings from your software application, access the printer properties. See page 4.2. 2 From the Layout tab, select Fit to Page in the Type dropdown list. 4 3 Select the correct size from the Target Paper drop-down list.
Printing Posters This feature allows you to print a single-page document onto 4, 9, or 16 sheets of paper, for the purpose of pasting the sheets together to form one poster-size document. 1 To change the print settings from your software application, access the printer properties. See page 4.2. 2 Click the Layout tab, select Poster in the Type drop-down list. 3 Configure the poster option: You can select the page layout from 2x2, 3x3, or 4x4.
Specify an overlap in millimeter or inch to make it easier to reconstruct the resulting poster. 4 Click the Paper tab, select the paper source, size and type. 5 Click OK and print the document. You can complete the poster by reconstructing the results. 4 PRINTING TASKS 4.
Setting Graphic Properties Use the following Graphic options to adjust the print quality for your specific printing needs. See page 4.2 for more information on accessing printer properties. Click the Graphics tab to display the properties shown below. ➀ ➁ ➂ Property ➀ Resolution ➁ Toner Save 4.16 PRINTING TASKS Description You can select the printing resolution by choosing from 600 dpi (Normal) or 300 dpi (Draft). The higher the setting, the sharper the clarity of printed characters and graphics.
Property ➂ Description You can set advanced settings by clicking the Advanced Options button. Advanced Options 4 Darkness Use this option to lighten or darken the image appearance in your print. • Normal: This setting is for normal documents. • Light: This setting is for bolder line widths or darker gray-scale images. • Dark: This setting is for finer line width, higher definition in graphics, and lighter grayscale images.