SAMSUNG LASER PRINTER User’s Guide ML-2550 Series
This manual is provided for information purposes only. All information included herein is subject to change without notice. Samsung Electronics is not responsible for any changes, direct or indirect, arising from or related to use of this manual. © 2003 Samsung Electronics Co., Ltd. All rights reserved. • ML-2550, ML-2551N, ML-2552W and Samsung logo are trademarks of Samsung Electronics Co., Ltd. • PCL and PCL 6 are trademarks of Hewlett-Packard company.
CONTENTS Chapter 1: INTRODUCTION Special Features .................................................. 1.2 Printer Components ............................................. 1.5 Front View ..................................................... 1.5 Rear View ...................................................... 1.6 Chapter 2: SETTING UP YOUR PRINTER Unpacking .......................................................... 2.2 Selecting a Location ........................................ 2.
Paper Menu ................................................... 3.7 Layout Menu ................................................. 3.10 Graphics Menu .............................................. 3.12 Printer Menu ................................................. 3.13 Setup Menu .................................................. 3.13 PCL Menu ..................................................... 3.16 PostScript Menu ............................................ 3.17 EPSON Menu ................................
Using Watermarks .............................................. Using an Existing Watermark ........................... Creating a Watermark .................................... Editing a Watermark ...................................... Deleting a Watermark .................................... 5.18 5.18 5.19 5.20 5.20 Using Overlays ................................................... What is an Overlay? ....................................... Creating a New Page Overlay ..........................
Appendix A: USING YOUR PRINTER MACINTOSH WITH A Installing Software for Macintosh ........................... A.2 Creating a Desktop Printer .................................... A.4 Creating a Desktop Printer for the SPL Driver ..... A.4 Creating a Desktop Printer for the PS Driver ....... A.4 Printing a Document ............................................ A.6 Using Advanced Printing Features .......................... A.8 Appendix B: USING WINDOWS POSTSCRIPT DRIVER Installing PPD Files ..............
Appendix E: USING YOUR PRINTER ON A NETWORK About Sharing the Printer on a Network .................. E.2 Setting Up a Locally Shared Printer ........................ E.3 In Windows 9x/Me .......................................... E.3 In Windows NT 4.0/2000/XP ............................ E.4 Setting Up a Network-Connected Printer ................. E.5 Configuring Network Parameters on the Control Panel ................................................. E.
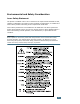
Environmental and Safety Consideration Laser Safety Statement The printer is certified in the U.S. to conform to the requirements of DHHS 21 CFR, chapter 1 Subchapter J for Class I(1) laser products, and elsewhere, is certified as a Class I laser product conforming to the requirements of IEC 825. Class I laser products are not considered to be hazardous.
Ozone Safety OZONE During normal operation, this machine produces ozone. The ozone produced does not present a hazard to the operator. However, it is advisable that the machine be operated in a well ventilated area. If you need additional information about ozone, please contact your nearest Samsung dealer. Power Saver This printer contains advanced energy conservation technology that reduces power consumption when it is not in active use.
Canadian Radio Interference Regulations This digital apparatus does not exceed the Class B limits for radio noise emissions from digital apparatus as set out in the interference-causing equipment standard entitled “Digital Apparatus”, ICES-003 of the Industry and Science Canada.
Declaration of Conformity (European Countries) Approvals and Certifications The CE marking applied to this product symbolises Samsung Electronics Co., Ltd. Declaration of Conformity with the following applicable 93/68/EEC Directives of the European Union as of the dates indicated: January 1, 1995: Council Directive 73/23/EEC Approximation of the laws of the member states related to low voltage equipment.
Wireless devices that may be in your system are only qualified for use in the European Union or associated areas if a CE mark with a Notified Body Registration Number and the Alert Symbol is on the system label. The power output of the wireless device or devices that may be embedded in you printer is well below the RF exposure limits as set by the European Commission through the R&TTE directive.
extremities) is typical. This device should be used more than 20 cm (8 inches) from the body when wireless devices are on and transmitting. This transmitter must not be collocated or operation in conjunction with any other antenna or transmitter. Some circumstances require restrictions n wireless devices. Examples of common restrictions are listed below: Radio frequency wireless communication can interfere with equipment on commercial aircraft.
xiii
WARNING • Do not disassemble the printer. Doing so may give you an electric shock. • If you continuously print many pages, the surface of the output tray may become hot. Be careful not to touch the surface, especially for children.
1 INTRODUCTION Congratulations on the purchase of your printer! This chapter includes: • Special Features • Printer Components
Special Features Your new printer is equipped with special features that improve the print quality, giving you a competitive edge. You can: Print with excellent quality and high speed • You can print at 1200 dots per inch (dpi). See page 5.25. • Your printer prints 25 pages-per-minute (Letter size), 24 pages-per-minute (A4 size). Handle paper flexibly • A 100-sheet Multi-Purpose Tray supports letterheads, envelopes, labels, transparencies, custom-sized materials, postcards, and heavy paper.
Save your time and money • This printer allows you to use Toner Save mode to save toner. See page 5.9. • You can print on both sides of the paper to save paper (double-sided printing). See page 5.11. • You can print multiple pages on one single sheet of paper to save paper (N-Up printing). See page 5.13. • Preprinted forms and letterheads can be printed on plain paper. See “Using Overlays” on page 5.21.
Print in various environments • You can print in Windows 95/98/Me/NT 4.0/2000/XP. • Your printer is compatible with Linux and Macintosh. • Your printer comes with both the Parallel and USB interfaces. You can also use a network interface. ML-2551N and ML-2552W comes with a built-in network interface, 10/100 Base TX. ML-2552W also has a wireless network interface. But, you need to add the optional network interface card to ML-2550.
Printer Components 1 Front View Top output tray (Face down) Output Support Control Panel (see page 3.2) Top Cover Toner cartridge Multi-Purpose Tray Tray1 (500-sheet paper feeder) Optional Tray2 (500-sheet paper feeder) Paper level indicator Control board cover (needed to access the control board to install printer options) INTRODUCTION 1.
Rear View Power switch Wireless network antenna port (ML-2550, ML-2551N:Option ML-2552W:Standard) Network port (ML-2550:Option ML-2551N, ML-2552W: Standard) USB port Rear output tray (Face up) Parallel port Power receptacle Optional Tray2 cable connector * The figure above shows a ML-2552W. 1.
2 SETTING UP YOUR PRINTER This chapter provides step by step information on setting up your printer.
Unpacking 1 Remove the Printer and all accessories from the packing carton. Make sure that the printer has been packed with the following items: Toner Cartridge Power Cord CD-ROM Setup Guide NOTES: • If any items are missing or damaged, notify your dealer immediately. • Components may differ from one country to another. • The CD-ROM contains the printer driver, the User’s Guide and the Adobe Acrobat Reader programme. 2 Carefully remove all of the packing tapes from the printer. 2.
3 Pull the paper tray out of the printer. Remove the packing tapes from the tray. 2 Selecting a Location Select a level, stable place with adequate space for air circulation. Allow extra space for opening covers and trays. The area should be well-ventilated and away from direct sunlight or sources of heat, cold, and humidity. Do not set the printer close to the edge of your desk or table. Clearance Space Front: 482.
Installing the Toner Cartridge 1 Open the top cover. Pull up on the handle to open the cover. 2 Remove the toner cartridge from its bag. Don’t use a knife or other sharp objects as they might scratch the drum of the cartridge. 3 Locate the sealing tape at the end of the toner cartridge. Carefully pull the tape completely out of the cartridge and discard it. NOTE: • The sealing tape should be longer than 550 mm when correctly removed.
4 Gently shake the cartridge from side to side to distribute the toner evenly inside the cartridge. 2 CAUTIONS: • To prevent damage, do not expose the toner cartridge to light for more than a few minutes. Cover it with a piece of paper, if left exposed for more than a few minutes. • If toner gets on your clothing, wipe it off with a dry cloth and wash clothing in cold water. Hot water sets toner into fabric. 5 Locate the cartridge slots inside the printer, one on each side.
7 Close the top cover. Make sure that the cover is securely closed. NOTE: When printing text at 5% coverage, you can expect a toner cartridge life of approximately 10,000 pages (5,000 pages for the toner cartridge that is shipped with the printer). Loading Paper You can load approximately 500 sheets of paper in the tray. 1 Pull the tray out of the printer. 2.
2 Prepare a stack of paper for loading by flexing or fanning them back and forth. Straighten the edges on a level surface. 2 3 Load paper with the print side facing down. You can load previously printed paper. The printed side should be facing up with an uncurled edge at the top side. If you experience problems with paper feed, turn the paper around. Make sure that all four corners are flat in the tray. SETTING UP YOUR PRINTER 2.
4 Pay attention to the paper limit mark on the left inside wall of the tray. Paper overloading may cause paper jams. NOTE: If you want to change the paper size in the tray, refer to “Changing the Paper Size in the Tray” below. 5 Slide the tray back into the printer. Changing the Paper Size in the Tray If you load long paper in the tray, you should adjust the paper guides to the paper length. 1 Push the back plate of the tray outwards completely so that it can extend the length of the tray. 2.
2 Squeeze the tab on the paper length guide and adjust it, so that it fits to the desired paper size marked at the bottom of the tray. 2 3 Squeeze the paper width guide and adjust it to the desired paper size marked at the bottom of the tray. NOTES: • Do not push the width guide far enough to cause the material to warp. • If you do not adjust the width guide, it may cause paper jams. SETTING UP YOUR PRINTER 2.
Connecting a Printer Cable For Local Printing To print from your computer in a local environment, you need to connect your printer to the computer with either a parallel interface cable or a Universal Serial Bus (USB) cable. If you are a Macintosh user, you can use only the USB cable. Using a Parallel Cable NOTE: To connect the printer to the parallel port of the computer requires a certified parallel cable. You will need to buy a IEEE1284 compliant cable.
Using a USB Cable NOTE: Connecting the printer to the USB port of the computer requires a certified USB cable. You will need to buy a USB 2.0 compliant cable that is within 3 m in length. 1 Make sure that both the printer and the computer are turned off. 2 Plug the USB printer cable into the connector on the back of the printer. To the USB port on your computer 3 Connect the other end of the cable to the USB port on your computer. See your computer User’s Guide, if you need help.
For Network Printing You can attach your ML-2551N or ML-2552W printer to a network using an Ethernet cable (UTP cable with RJ.45 connector). ML-2552W also has a network antenna which allows you to use a wireless LAN interface. If you are a ML-2550 user, you need to install the optional network interface card. For a ML-2551N printer, you can replace the network interface card to one supporting the wireless LAN interface. For details about installing the card, see page F.6.
2 Set the antenna upright. 2 NOTE: After connecting the printer, you need to configure the network parameters on the control panel. See page E.6. You can use the software supplied with the card. Refer to the software User’s Guide. Turning the Printer On 1 Plug the power cord into the power receptacle on the back of the printer. 2 Plug the other end into a properly grounded AC outlet and turn on the printer using the power switch.
Printing a Demo Page Print a demo page to make sure that the printer is operating correctly. 1 Press the Menu button ( ) on the control panel until you see “Information” on the bottom line of the display. 2 Press the Enter button ( ) to access the menu. 3 Press the scroll button ( or ) until you see “Demo Page” on the bottom line. 4 Press the Enter button ( ). A demo page showing the printer’s features and capabilities prints out.
Installing Printer Software The supplied CD-ROM contains Windows Printing software, Macintosh Printing software, Linux Printing software, Win RCP, on-line User’s Guide, and Acrobat Reader to view the User’s Guide. If you are printing from a Windows Using the supplied CD-ROM, you can install: • SPL printer driver for Windows. Use this driver to take full advantage of your printer’s features. Go to page 2.17 for information about installing the Samsung SPL printer driver.
Printer Driver Features The Samsung ML-2550 series printer drivers will support the following standard features: • Paper source selection • Paper size, orientation and media type • Number of copies Table below lists a general overview of features supported by the your printer drivers. SPL Driver Feature PostScript Win 2000/XP Win 9x Win NT4.0 Mac Win 2000/XP Win 9x Win NT4.
Installing Printer Software in Windows System Requirements Verify the following: Item Operating system RAM Free disk space Requirements Windows 95/98/Me/NT 4.0/2000/XP 95/98/Me 32 MB NT 4.0/2000 64 MB XP 128 MB 95/98/Me 200 MB NT 4.0/2000 200 MB XP 200 MB At least Internet Explorer 5.0 All applications should be closed on your PC before beginning installation. ng ML-2150 Ser msu ies Sa Installing printer software 1 Place the CD-ROM in the CD-ROM drive.
3 Click Install the Samsung Software on your PC. 4 Click Next. 5 When the installation is completed, click Finish. 2.
Reinstalling Printer Software 1 From the Start menu, select Programs. 2 Select Samsung ML-2550 Series, and then Samsung ML-2550 Series Driver Maintenance. 3 The Samsung ML-2550 Series Driver Maintenance window appears. Click Repair and then click Next. 4 When reinstallation is done, click Finish. Removing Printer Software 1 From the Start menu, select Programs. 2 Select Samsung ML-2550 Series, and then Samsung ML-2550 Series Driver Maintenance.
Changing the Display Language After installing the software, you can change the display language. 1 From the Start menu, select Programs. 2 Select Samsung ML-2550 Series and Language Selection. 3 Select the desired language from the Printer Driver drop-down list, and click OK. Once you have installed the Remote Control Panel programme, this list is activated. You can select a language for the programme.
4 Check CD-ROM drive and click Browse. Choose x:\USB (where x is the drive letter for the CD-ROM drive) and click Next. 2 5 Click Next. The USB driver will be installed. 6 When the installation is completed, click Finish. 7 When the language selection window appears, select the appropriate language. NOTE: If you already installed the printer software, this window doesn’t appear. 8 Follow the instructions on the window to complete the printer software installation. For more details, see page 2.17.
MEMO 2.
3 USING THE CONTROL PANEL This chapter describes how to use the printer’s control panel.
Understanding the Control Panel The control panel on the top right side of your printer has the display and the nine buttons. Display: displays the printer status and job in progress. Buttons Display Message Description Ready • The printer is on-line and ready to print. • If you press On-Line/Continue, the printer switches to off-line. Offline • The printer is off-line and cannot print. • If you press On-Line/Continue, the printer switches to on-line. Printing XXX * xxx is the current emulation.
3 Buttons Button Description • Press to switch between on-line and off-line. • In menu mode, press to return to ready mode. You can check the printer status according to the button backlight. On Green Blinking The printer is on-line and can receive data from the computer. • When the backlight slowly blinks, the printer is receiving data from the computer. • When the backlight fast blinks, the printer is receiving and printing data. If you want to pause printing, switch the printer to off-line.
Button Description In menu mode, press to scroll through submenu items or setting options. Pressing ❿ moves you to the next option and pressing ➛ sends you back to the previous option. • Press to cancel the current print job. • In menu mode, press to return to ready mode. In menu mode, press to go back to the upper menu level. Press to enable or disable Toner Save mode. • If the button backlight is on, the mode is enabled and the printer uses less toner to print a document.
3 Using Control Panel Menus A number of menus are available to make it easy for you to change printer settings. The diagram on page 3.6 shows the menus and all of the menu items available in each menu. The items in each menu and the values you can select are described in more detail in the tables beginning on page 3.7. Accessing Control Panel Menus 3 You can control your printer from the printer’s control panel. You can also set the control panel menus while the printer is in use.
Overview of Control Panel Menus The control panel menus are used to configure the printer for your environment. The control panel provides access to the following menus. Information Paper Layout (See page 3.7) Configuration Menu Map Demo Page PS3 Font List PCL Font List EPSON Fonts (See page 3.7) Tray Source Media Size Custom Width Custom Height Media Type Tray Chaining (See page 3.10) Orientation Duplex Duplex Margin Simplex Margin Copies Setup (See page 3.
3 Information Menu This menu contains printer information pages that give details about the printer and its configuration. Item Explanation Configuration The configuration page shows the printer’s current configuration. See page 6.2. Menu Map The menu map shows the layout and current settings of the control panel menu items Demo Page The demo page allows you to check if your printer properly performs printing.
Item Explanation Values: Letter, Legal, A4, Executive, JIS B5, ISO B5, No. 10 Env., Monarch Env., DL Env. , C5 Env., C6 Env. , Folio, A5, A6,Custom Media Size * Letter for USA, A4 for Europe and Asia Select the paper size currently loaded in the tray. Values: A4:210 mm/ Letter:215 mm * Letter for USA, A4 for Europe and Asia Custom Width Select the paper size currently loaded in the tray. This Menu is shown when Media size value is set up by custom.
3 Item Explanation Values: Off, On* Tray Chaining When you select any other value except Auto Select from Tray Source and the selected tray is empty, the printer automatically prints from other trays. If this menu item is set to Off, the On-Line/Continue button backlight blinks in orange and the printer doesn’t work until you insert paper into the specified tray. USING THE CONTROL PANEL 3.
Layout Menu Use the Layout menu to define all settings relating to output. (*: the default setting) Item Explanation Values: Portrait*, Landscape Choose the default orientation of print image on the page. Orientation Landscape Portrait Values: Off*, Long Edge, Short Edge To print on both sides of paper, choose the binding edge as followings. • Long Edge: Flip on long edge. Prints pages to read like a book. • Short Edge: Flip on short edge. Prints pages to read by flipping over like a note pad.
3 Item Explanation Values: Top/Left:5.0* , Short/Long: 0* In this menu, you can set the margin of print materials for double-sided printing. • Top Margin: Set the top margin, from 0.0 to 9.9 mm.(increasing by 0.1mm) Duplex Margin • Left Margin: Set the left margin, from 0.0 to 9.9 mm.(increasing by 0.1mm) • Short Binding: Set the bottom margin of the rear side for short binding, from 0.0 to 22 mm.(increasing by 1mm) • Long Binding: Set the right margin of the rear side for long binding, from 0.
Graphics Menu Use the Graphics menu to change settings affecting the quality of the printed characters and images. (*: the default setting) Item Explanation Values: 300dpi-Draft, 600dpi-Normal*, 1200dpi-Best Specify the number of dots printed per inch (dpi). The higher the setting, the sharper the clarity of printed characters and graphics. Resolution • Select 300dpi-Draft to print a draft document. • If your print jobs are mostly text, select 600dpi-Normal for the highest quality output.
3 Printer Menu This menu allows you to reset the printer settings or cancel the current job. Item Explanation Default Set This menu item allows you to restore the printer’s factory default settings. Current Job You can cancel the current print job and remove it from the printer buffer. Setup Menu Use the Setup menu to configure a variety of printer features.
Item Explanation Values: Off, On* This item determines whether or not the printer continues printing when it detects the paper mismatching to your paper setting. Auto Continue • Off: If the paper mismatch occurs, the message will remain on the display and the printer will remain off-line until you insert the correct paper. • On: If the paper mismatches, an error message will display. The printer will go offline for 30 seconds and automatically clear the message and continue printing.
3 Item Explanation Values: 0 ~ 300 sec Job Time Out *15 sec You can set the time length the printer waits before printing the last page of a print job that does not end with a command to print the page. When a print time-out occurs, the printer prints the page in the print buffer. This item is only available if the optional serial interface card is installed in your printer. For details, see page F.6.
PCL Menu This menu sets the PCL emulation configuration. You can set the font type, symbol type, lines per page, and point size. (*: the default setting) Item Explanation Values: PCL1* ~ PCL54 You can select the standard font to be used in PCL emulation. Typeface • PCL1~PCL7’s interval between letters is fixed, and PCL8~PCL45’s interval is proportional to the font type and point size. You can adjust the font size of PCL1~PCL7 using the Pitch item, and PCL8~PCL45 can do using Point Size item (see page 3.
3 Item Explanation Values: 4.00 ~ 999.75 (0.25 unit) Point Size *12 When you select one between PCL8 and PCL45 from the Typeface menu, you can determine the font size by setting the height of the characters in the font. Values: Regular*, Dark Courier This item lets you select the version of Courier font to use. PostScript Menu This menu provides you with the Print PS. Error menu item.
EPSON Menu This menu sets the EPSON emulation configuration. (*: the default setting) Item Explanation Values: SANSERIF*, ROMAN Font You can select the standard font will use in EPSON emulation. Values: On, Off* Auto Wrap Character Set This item determines whether or not the printer automatically performs line feed when the data overflows the printable area of the print material.
3 Network Menu This menu lets you set the network interface card’s configuration . (*: the default setting) Item Explanation Values: Yes, No* Config Network Set whether or not you want to configure network values. If you select Yes, you can configure TCP/IP,AppleTalk and Netware menu. Values: Yes, No* Config TCP Select whether you want to set the IP address item or not. If you select Yes, you can configure IP address item.
Item Subnet Mask Explanation You can set this item only when you set IP Get Method to Static. This item lets you enter the subnet mask manually. Press the scroll button to set the value of the 1st byte between 0 and 255, and then press the Enter button. For the 2nd to the 4th byte, you can set the value in the same way. Gateway You can set this item only when you set IP Get Method to Static. This item lets you enter the gateway manually.
3 Item Explanation Values:Auto*,EN_8022,EN_8023,EN_II, EN_SNAP You can select this item only when you set Config Netware to Yes. This item lets you select IPX Frame Type. IPX Frame Type • Auto:You can set the frame type automatically. • EN_8022: Select this value to use the IEEE 802.2 frame type. • EN_8023:Select this value to use the IEEE 802.3 frame type. • EN_II :Select this value to use the ETHERNET II frame type. • EN_SNAP:Select this value to use the SNAP frame type.
MEMO 3.
4 USING PRINT MATERIALS This chapter will help you understand types of paper you can use with your printer and how to properly load paper in the different paper trays for the best print quality.
Choosing Paper and Other Materials You can print on a variety of print materials, such as plain paper, envelopes, labels, transparencies and so on. See “Paper Specifications” on page G.3. To get the best possible print quality, use only high-quality copier-grade paper. When you choose print materials, consider the following: • Desired outcome: The paper you choose should be appropriate for the project. • Size: You can use any size paper that fits easily within the paper adjusters of the paper tray.
Sizes and Capacities Input Source/Capacity*a Size Tray1 or optional Tray2 MultiPurpose Tray Manual Feed 500 500 500 500 500 500 200 100 100 100 100 100 100 100 1 1 1 1 1 1 1 Plain Paper Letter (8.5 x 11 in.) Legal (8.5 x 14 in.) Executive (7.25 x 10.5 in.) Folio (8.5 x 13 in.) A4 (210 x 297 mm) B5 (182 x 257 mm) A5 (148 x 210 mm) 4 Envelopes - 10 10 10 10 10 1 1 1 1 1 - 25 25 1 1 Letter (8.5 x 11 in.) A4 (210 x 297 mm) - 50 50 1 1 Card stocks*b - 10 1 Bond*b - 10 1 No. 10 (4.
Guidelines for Paper and Special Materials When selecting or loading paper, envelopes, or other special materials, keep these guidelines in mind: • Attempting to print on damp, curled, wrinkled, or torn paper can cause paper jams and poor print quality. • Use cut-sheet paper only. You cannot use multi-part paper. • Use only high-quality, copier grade paper for the best print quality. • Do not use paper that has been already printed on or that has been fed through a photocopier.
Selecting the Output Location The printer has two output locations; the rear output tray and the top output tray. Top output tray Rear output tray 4 To use the top output tray, be sure that the rear output tray is closed. To use the rear output tray, open it. NOTES: • If paper coming out of the top output tray has problems, such as excessive curl, try printing to the rear output tray. • To avoid paper jams, do not open or close the rear output tray while the printer is printing.
Printing to the Rear Output Tray (Face up) The printer always prints to the rear output tray if it is open. Paper comes out of the printer face-up, with the last page on top. Printing from the Multi-Purpose Tray to the rear output tray provides the straight paper path.
2 Pull the extender to extend the output tray to its full-length position to hold longer paper. 3 If you do not want to stack the printed pages on the rear output tray, slide the extender to its place and close the tray. The pages will stack on the top output tray. 4 NOTE: The rear output tray can hold up to 100 sheets of paper. If the tray is overloaded with printed pages, it may fall from the printer. Remove the pages so that the tray is not overloaded.
Using the Tray1 or the Optional Tray2 The Tray1 and the optional Tray2 can hold up to 500 sheets of paper. See “Sizes and Capacities” on page 4.3 for acceptable paper size and capacities of each tray. Tray1 Optional Tray2 Load a stack of paper into the tray and print. For details about loading paper in the Tray1 or the optional Tray2, see “Loading Paper” on page 2.6. Using the Multi-Purpose Tray Multi-Purpose Tray is located in the front of your printer.
• Load only one size of print material at a time in the Multi-Purpose Tray. • To prevent paper jams, do not add paper when there is still paper in the Multi-Purpose Tray. This also applies to other types of print materials. • Print materials should be loaded face up with the top edge going into the Multi-Purpose Tray first and be placed on the centre of the tray. • Do not place objects on the Multi-Purpose Tray. Also avoid pressing down or applying excessive force on it.
3 Prepare a stack of paper for loading by flexing or fanning them back and forth. Straighten the edges on a level surface. 4 Place paper on the centre of the tray with the print side face up. If you want to print on previously printed paper from the Multi-Purpose Tray, the printed side should be facing down with an uncurled edge to the printer. If you experience problems with paper feed, turn the paper around. NOTE: Make sure that you have not loaded too much print materials.