
User's Manual


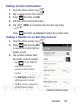

Table Of Contents
- Samsung Galaxy Discover
- Section 1: Getting Started
- Section 2: Understanding Your Device
- Section 3: Memory Card
- Section 4: Call Functions and Contacts List
- Section 5: Entering Text
- Section 6: Contacts
- Section 7: Messages
- Section 8: Multimedia
- Section 9: Applications and Development
- Applications
- Browser
- Calculator
- Calendar
- Camera
- Google Chrome
- Clock
- Downloads
- Gallery
- Gmail
- Google +
- Latitude
- Local
- Maps
- Messaging
- Messenger
- Navigation
- People
- Phone
- Play Books
- Play Magazines
- Play Music
- Play Store
- Downloading a New Google Application
- Launching an Installed Google Application
- Android Development
- Search
- Settings
- Talk
- Voice Dialer
- YouTube
- Section 10: Connections
- Section 11: Changing Your Settings
- Accessing Settings
- Wi-Fi Settings
- Bluetooth settings
- Data Usage
- More... Settings
- Call Settings
- Sound Settings
- Display Settings
- SD Card & Device Storage
- Battery Usage
- Applications
- Accounts and Synchronization
- Location Services
- Security
- Language and Input Settings
- Back up and Reset
- Date and Time
- Accessibility Settings
- Developer Options
- Google Search Settings
- About Phone
- Software Update
- Section 12: Health and Safety Information
- Exposure to Radio Frequency (RF) Signals
- Specific Absorption Rate (SAR) Certification Information
- FCC Part 15 Information to User
- Smart Practices While Driving
- Battery Use and Safety
- Samsung Mobile Products and Recycling
- UL Certified Travel Charger
- Display / Touch-Screen
- GPS & AGPS
- Emergency Calls
- Care and Maintenance
- Responsible Listening
- Operating Environment
- Restricting Children's Access to Your Mobile Device
- FCC Notice and Cautions
- Other Important Safety Information
- Section 13: Warranty Information
- Index

DRAFT
Internal Use Only
90
3. Press and then tap
Add to contacts
➔
CREATE NEW
CONTACT
or select the Contact entry from the on-screen list.
•
If you're updating an existing contact, tap the entry from the list and
proceed to step 5.
4. Tap a destination type (
Google
or
Corporate
) (depending on
where you want to save the new contact information).
5. Tap the
Name
field and enter a name for this contact using the
displayed keypad.
6. Tap the image icon and select a photo for this contact.
Selections are:
Take photo
or
Choose photo from Gallery
.
7. Tap the label button (to the right of the
Phone
field) and scroll
through the list to select a category such as
MOBILE
(default),
WORK
,
HOME, MAIN, WORK FAX, HOME FAX, PAGER
,
OTHER
, or
CUSTOM
.
Note:
These label entries can change and are dependant on the
selected destination type (ex: the Other and Custom might not
appear with an Exchange ActiveSync account destination type).
8. Enter additional fields as desired.
9. Tap (
DONE
) to complete and store the new entry.
– or –
Press and then tap
Discard
to delete the current entry.
Note:
For further details about how to enter characters, see “Text
Input Methods” on page 75.