3 chapter This chapter explains how to send and receive faxes from the front panel of the SF-530 series. This chapter also demonstrates how to use the advanced fax features and change the settings on the fax system.
Setting up Standalone Fax System Setting Volume Ringer Volume You can adjust the volume of the ringer to your desired volume. 1. Press ➛ or ❿ in Standby mode. The display shows the current ringer volume setting. RINGER VOLUME[3] 2. Press ➛ or ❿ until you find the desired loudness. Four levels are available; 0~3. You will hear the selected volume and the display will show the level. Setting ‘0’ turns the ringer off. The machine will work normally even if the ringer is set to off. 3.
Setting Alert Tones You can choose an alarm tone to sound when an error occurs (ALARM VOLUME) or when any key is pressed (KEY VOLUME). 1. Press Setup on front panel. The display shows the first setup menu; FAX NUMBER/NAME. 2. Press ➛ or ❿ until ‘VOLUME SETUP’ appears, then press Start/Enter. The display shows ‘ALARM VOLUME’. 3. Press Start/Enter to access the Alarm Volume menu. To access the Key Volume menu, press ➛ or ❿ until ‘KEY VOLUME’ appears, then press Start/Enter. 4.
6. When setting is done, press Start/Enter to save the setting. You can exit from setup mode at any time by pressing Stop. The machine returns to Standby mode without saving the setting you have already changed. Selectable Options These instructions assume you have followed the steps on page 3.2 under ‘Setting an Option’ and the machine is prompting you to change one of the options listed here. • LANGUAGE — You can select the display language.
• AUTO REDUCTION — When receiving a document as long or longer than the paper loaded in your machine, the machine can reduce the data in the document to fit into your recording paper size. Original Received data Turn this feature on to reduce an incoming page that may need to be divided into two pages with only a few lines on the second page.
• STAMP RCV. NAME—Allows the machine to automatically print the page number, and the date and time of the reception at the bottom of each page of a received document. Select ON to enable. Select OFF to disable. • RCV. START CODE — The remote receive start code allows you to initiate fax reception from an extension phone plugged into the EXT. jack on the back of your machine. If you pick up the extension phone and hear fax tones, enter the remote code and the machine will start receiving.
• DRPD MODE — “Distinctive Ring” is a telephone company service which enables a user to use a single telephone line to answer several different telephone numbers. The particular number someone uses to call you on is identified by different ringing patterns, which consist of various combinations of long and short ringing sounds. This feature is often used by answering services who answer telephones for many different clients and need to know which number someone is calling in on to properly answer the phone.
Sending a Fax Preparing Documents for Faxing or Copying To fax or copy documents that are printed on standard letter or A4 size paper, follow these guidelines. • Do not attempt to feed the following types of documents into the machine: - wrinkled, curled, or folded paper - chemically processed paper (pressure-sensitive paper, carbon-coated paper, etc.) - coated paper (glossy, etc.) - thin paper (onion skin, airmail paper, etc.) - thick paper - small or short paper (such as a label, voucher, etc.
Setting Document Resolution and Contrast We recommend sending documents printed using a typewriter, felt tip pen, black ink, or laserwriter. The paper should be white or very light, and of normal weight – not cardboard. Blue lines on a ruled pad do not fax well. To send normal documents, there is no need to adjust the resolution and the contrast. To send documents with unusual contrast characteristics, including photographs, adjust the resolution and contrast.
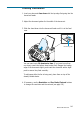
Loading Documents 1. Load your document face down with the top edge first going into the document feeder. 2. Adjust the document guides for the width of the document. 3. Slide the sheet down into the document feeder until it is in the feed area. Document guide You can insert up to 20 sheets at a time. If you insert more than one sheet, ensure the bottom sheet enters first. Stagger the leading edge of the document slightly, and insert the document with a slight push to ensure they feed smoothly.
Sending a Fax Automatically 1. After loading a document, enter the number of the remote fax using the keypad. One-touch or speed dialling is also available if you have already stored the number into a one-touch or speed dial number. For information on storing and using numbers in the memory, see page 3.19. If you make a mistake while entering a number, press Search/Delete to delete the number. 2. Press Start/Enter when the number appears correctly on the display.
Last Number Redialling Press Redial/Pause with a document loaded in the feeder, the machine begins to send. The redial memory in your machine retains the last 5 numbers called. To search through the redial memory, do as follows: 1. Press and hold Redial/Pause for about 2 seconds. 2. Press ➛ or ❿ to search through the memory until you find the desired number. 3. When the desired number appears on the display, press Start/Enter to dial.
Voice Request If you are sending or receiving a document and need to speak to the other person during the same phone call, use Voice Request to alert the person at the remote site. You can also respond to a Voice Request made by the person at the remote end. Sending a Voice Request 1. Press OHD/V.Req while a document is being sent or received. Voice Request signal is stored and then sent to the remote fax machine after the document has been sent or received. 2.
Receiving a Fax About Reception Modes Your machine has four reception modes: • In FAX mode, the machine answers an incoming call and immediately goes into receive mode. • In AUTO mode, the machine answers an incoming call expecting to receive a fax. If the machine does not sense a fax signal, it will continue to sound the ringing tone to tell you it is a phone call. If you do not lift the handset during the ringing, the machine will switch to automatic fax reception mode.
The current reception mode is displayed when the machine is in Standby mode. 08-DEC 15:30 FAX Current reception mode If you seldom use the fax line for voice conversations, set your machine to receive a fax automatically by selecting FAX mode. Loading Paper for Receiving Faxes The instructions for loading paper in the paper input tray are the same whether you are printing, faxing, or copying, except that faxes can only be printed on letter-, A4-, or legal-sized paper. See “Loading Paper” on page 1.
Receiving in AUTO Mode 1. Press and hold down Rcv.Mode/Contrast on the front panel repeatedly until the display shows ‘AUTO’. 2. When you get a call, the machine answers it. If a fax is being sent, the machine goes into reception mode. If the machine does not detect a fax signal, it will continue ringing to tell you it is a phone call. You should pick up the handset to answer the call, or it will switch to automatic reception mode.
Receiving Manually in TEL Mode You can answer calls using the handset, and start the machine to receive a fax. 1. Press and hold down Rcv.Mode/Contrast repeatedly until the display shows ‘TEL.’ 2. When the telephone rings, pick up the handset and answer it. 3. If you hear a fax tone, or if the person on the other end asks you to receive a document, press Start/Enter. 4. Replace the handset. The machine begins receiving and returns to Standby mode when the reception is complete.
Making a Copy Copying Overview The resolution is automatically set to S.FINE while the copy feature is in use. However, the contrast can be changed to produce optimal copy quality for a particular document containing faint markings, dark image, photographs, or other halftone images. • Copy quantity : 1 to 99 copies of the document can be made. • Custom sizing: You can reduce or expand the image size by 1% increments from 50% to 200%.
Using Advanced Copy Features You can adjust the quantity, size, and print order for copying. Take the following steps: 1. Load your document face down with the top edge first going into the document feeder. If necessary, press Rcv. Mode/Contrast to change the contrast. For details on the Contrast, see page 3.8. 2. Press Copy (Copy/Reprint on SF-535e). The display asks you to enter the copy quantity (1 to 99). 3. If you need two or more copies, enter the desired number and press Start/Enter. 4.
Automatic Dialling How To Enter a Name Using the Number Keys As you perform various tasks, you will need to enter names and numbers. For example, when you set up your machine, you have to enter your name (or your company’s name) and telephone number. When you store a one-touch dial or speed dial, you also enter the telephone numbers and names.
For example, to enter an ‘R’, press 7 (labelled PRQS). Each time you press 7, the display shows a different letter–first ‘P’, then ‘Q’, ‘R’, ‘S’, and finally ‘7.’ The letter appears on the display as shown below. NAME:R 2. When the letter you want appears on the display, press another number key labelled with the next letter you want. If the next letter is printed on the same number button, move the cursor right by pressing ❿, then press the button.
Editing Name If you make a mistake while entering a number or name, move the cursor under the incorrect digit by ➛ or ❿. Then, press the correct number to change, or press Search/Delete to delete the number. Inserting a Pause While Entering a Number Some telephone systems require an access code (9, for example) and listen for a second dial tone before dialling an outside number. In such cases, you must insert a pause in the number when setting up a onetouch or a speed dial number.
3. The display asks you to enter a name. For information on how to enter names, see page 3.19. Or, if you do not want to assign a name, skip this step. 4. Press Start/Enter when the name appears correctly or without entering a name. The display asks you to press another one-touch number. 5. To set another one-touch number, press the desired one-touch button and repeat steps 2 through 4. Or, to return to Standby mode, press Stop. Editing a Number for One-Touch Dialling 1.
Using Address Label A One-touch label sheet is included with your machine. As you store numbers in one-touch dial buttons, make a note of the numbers on the label to remind you which number is stored in each position. 1. Remove the clear cover and label. 2. Write information on the label and replace the label and cover. You may want to use pencil in case you wish to change these numbers later. Speed Dialling You can store up to 80 numbers in 2-digit Speed Dial locations (01-80).
5. Press Start/Enter when the name appears correctly or simply without entering a name. The display asks you to select another location. 6. To store more speed dial numbers, repeat steps 2 through 5. Or, To return to Standby mode, press Stop. Editing a Number for Speed Dialling 1. Press and hold Speed(#) for 2 seconds. 2. Enter the 2-digit location number where the phone number you want to edit has been stored, then press Start/Enter. The display shows the number. Sxx:05512637522 3.
Storing Automatic Dialling Number Using the Phonebook on Your Computer (SF-535e only) When you install the printer’s software on your computer, the Phonebook feature is automatically installed. With the Phonebook feature, you can set up one-touch dial or 2-digit speed dial numbers in your computer and download the information to your SF-535e machine. Before using the Phonebook feature, you must install SmarThru programme in your computer. Refer to the chapter 2, “Installing Samsung Software.” 1.
5. If necessary, press Read to get the numbers currently stored in your SF-535e machine. The one-touch or speed dial numbers will be uploaded and displayed in the Remote Control Panel dialogue box. 6. Select the desired Phonebook number in the Phonebook list and click Edit. The Edit dialogue box will appear. 7. Enter any name and number, and click OK to save the information you just entered. 8. Repeat steps 6 and 7 to store more numbers. 9.
Searching for a Number in the Memory There are two ways to search for a number in the memory. You can either scan from A to Z sequentially, or you can search using the first letter of the name associated with the number. Searching Sequentially through the Memory 1. Press Search/Delete on the front panel. PRESS ➛, ❿, A-Z 2. Press ➛ or ❿ to scroll through the memory until you find the name and number you want.
Advanced Fax Broadcasting This feature will allow documents to be sent to multiple locations. After sending, the documents are erased from the memory. 1. Load your document face down with the top edge first going into the document feeder. And adjust the resolution and contrast, if necessary. For details, see page 3.8. 2. Press Advanced FAX on the front panel. The display shows the first menu; BROADCASTING. 3. Press Start/Enter to access the Broadcasting menu. 4.
7. The document will be scanned into memory. The display shows the memory capacity and the number of pages being stored. The machine begins sending the documents in order of the numbers you entered. Notes: • If ‘MEMORY FULL’ occurs while scanning into the memory, the display will show: JOB❿CANCEL❿DONE Press ➛ or ❿ to select the option you want. If you select Cancel, broadcasting is cancelled. If you select Done, your machine performs broadcasting only with the pages already scanned.
6. If you want to send to more than one location, repeat steps 4 and 5. Note: You cannot use Group dial numbers for another fax number. Or, To send to one location or when you complete the last fax number setting, press Start/Enter. 7. The display asks you to enter a name. If you want to assign a name to the transmission, enter the name. If not, skip this step. For details on how to enter the name using the number keypad, see page 3.19. 8. Press Start/Enter.
Priority Fax When the priority fax is enabled, a high priority document can be transmitted ahead of reserved operations. The document is scanned into the memory, then transmitted when the current operation is concluded. In addition, a priority transmission will interrupt a broadcast operation between stations (i.e., when transmission to station A ends, before transmission to station B begins) or between redial attempts. 1. Load the document face down. If necessary, adjust Resolution, or Contrast.
Polling What is Polling? Polling is used when one fax machine requests another to send a document. This is useful when the person with the original document is not in the office. The person to receive the document calls the machine holding the original and requests that the document be sent. In other words, it “polls” the machine holding the original. Polling Transmission You can program the fax machine to send documents in your absence when polled by a remote fax machine.
7. Press ➛ or ❿ to highlight YES or NO, then press Start/Enter. If you want to store the document in the bulletin board memory, select YES. More than one remote station can poll that document from your machine. If not, the document will be automatically erased after being polled by a remote machine. 8. The machine stores the document in memory. The display counts the number of pages being stored in memory and the memory capacity remaining.
Adding Documents To a Scheduled Operation You can add documents to the delayed transmission previously reserved in memory. 1. Load the document face down, and adjust Resolution, or Contrast, if necessary. For details, see page 3.8. 2. Press Advanced FAX on the front panel. The display shows the first menu; BROADCASTING. 3. Press ➛ or ❿ until ‘ADD SCHEDULE’ appears, and press Start/Enter. The display shows the operation, time and name currently reserved in memory. 4.
Additional Functions Sending a Flash Some special phone services require a switch-hook signal for proper operation. For example, if you have call-waiting, you can put a call on hold and take a second call on the same line by pressing Recall(R or Flash)/Status. 1. When you are on the telephone and hear the call waiting signal, press Recall(R or Flash)/Status once. The first caller is on hold and you are speaking to the second caller. 2.
Forwarding Received Faxes You can forward all faxes which you receive during the specified period to a specified remote station. This can be useful when you are out of your work station and want to receive your faxes through another station. Setting Time and Destination for Forwarding Faxes To forward the received fax, you must define the remote fax machine where the fax is to be sent and the start time and end time of a period when the Fax Forward feature operates. 1.
Toll Save Fax The Toll Save Fax feature will save your toll by storing the document in memory and sending it at the specified time during the toll save time slot, which is a period of time when your toll for the telephone call is reduced. Setting Time for Toll Save Fax 1. Press and hold down Toll on the front panel. The display asks to enter the time when the fax is to be sent. TIME 01:30 The current time or the time you have set previously 2. Enter the time in 24-hour format using the number keypad.
5. If you want to send to more than one location, repeat steps 3 and 4. Note: You cannot use Group dial numbers for another fax number. Or, to send to one location or when you complete the last fax number setting, press Start/Enter. 6. The document will be scanned into memory. The display shows the memory capacity and the number of pages being stored. 7.
Sending Confirmation Shows the fax number, the number of pages, elapsed time of the operation, the communication mode, and the communication results. You can print the this confirmation report in one of the following ways according to your setting in System Setup(see page 3.3): • Automatically after each transmission (ON) • Automatically only if an error occurs during transmission (ERROR) • No report printed at all (OFF). You can print this report manually.
Group Dialling (for Multi-Address Transmission) Multiple one-touch and speed dial numbers can be registered as a group. By using the group number, you can send a document to multiple parties in a single operation. The machine will dial the remote numbers in stored sequence. If the number is busy, the machine will dial the next stored number. After dialing all of the stored numbers, the unit will automatically redial any number that was busy.
5. The display asks you to press a one-touch button or to enter a 2-digit speed dial number that you wish to include in the group. 6. Press a one-touch button where the fax number you wish to include in the group is stored. Or, Enter a 2-digit speed dial location where the fax number you wish to include in the group is stored. 7. Press Start/Enter. The display shows the fax number which was stored in the selected location. 8. Repeat step 6 to 7 to enter additional numbers into the selected group. 9.
Editing Group Dial Numbers You can edit one-touch or speed dial numbers stored for group dialling. 1. Press Setup on the control panel. The display shows the first menu; FAX NAME/NUMBER. 2. Press ➛ or ❿ until you find ‘GROUP DIAL SETUP’, then press Start/Enter. 3. Press the one-touch group dial button used for the group dial number you want to edit. 4. Press ➛ or ❿ to select the option you want, then press Start/Enter. Select MEMBER ADD to add a number, and enter as many numbers as needed.
Memo
4 chapter Samsung SF-535e machine allows you to send or receive a document as a e-mail message without PC.
About the E-mail Fax The E-mail fax function allows you with Internet electronic mail access to send or receive faxes right from your SF-530 series without going to the PC. • You can send your document as an e-mail message as though sending to a regular fax machine. Your document is sent to the recipient’s e-mail box in the TIFF format which is a format designed specifically for faxes as an attachment. • You can have your e-mail messages delivered to your machine.
Configuring E-mail Information To receive or send a e-mail through your SF-530 series, you must configure e-mail information about the Internet gateway you use for email transmission and reception. You have two options to configure e-mail information: • Auto Setup: You can select one of the predefined ISP (Internet Service Provider) servers. Using this option, you cannot delete the registered information. • Manual Setup: You can manually register information of any ISP servers.
Notes: • When entering text, press 0 to enter symbols or special character sets for e-mail address. The available characters are @, .com, ., /, .co.kr, .net, .org, .org.kr, +, -, ,, ‘, , #, &, 0. • If you does not enter the parameter for any item and press Start/Enter, your machine sounds a error beep and prompts to enter. • If you enter Stop while entering, the display confirms your selection. Press Start/Enter to stop entering, and the information you have entered will be erased.
• SMTP SERVER: Enter the domain name of the SMTP server. • YOUR NAME: Enter your name. • MAIL ADDRESS: Enter your e-mail address. Notes: • When entering text, press 0 to enter symbols or special character sets for e-mail address. The available characters are @, .com, ., /, .co.kr, .net, .org, .org.kr, +, -, ,, ‘, , #, &, 0. • If you does not enter the parameter for any item and press Start/Enter, your machine sounds a error beep and prompts to enter.
Deleting E-mail Information You can delete registered information only using the Manual Setup option. 1. Press E-mail on the front panel and hold down for about 2 seconds. The display shows the first menu; SETUP E-MAIL. 2. Press Start/Enter to access the Setup E-mail menu. 3. Press ➛ or ❿ until you find ‘MANUAL SETUP’ and press Start/Enter. The display asks you to select the memory cell for your e-mail information showing the first available cell number. 4.
4. When the Remote Control Panel dialogue box opens, click the E-Mail Setup tab. Select the desired memory cell for the e-mail information. Gets the e-mail information stored in the SF-535e. Stores a new information or edits the selected information. Downloads the e-mail information to the SF-535e. Deletes the selected e-mail information. Deletes all the e-mail information. 5. If necessary, press Read to get the e-mail information currently registered in your SF-535e.
8. Repeat steps 6 and 7 to store more numbers. 9. When you have finished, you must click Write to download the information to your SF-535e. 10. Click Exit. Setting Default ISP If you set your e-mail information to your default ISP, your machine automatically use it when you receive or send an e-mail. Doing so saves you selecting e-mail information manually. 1. Press E-mail on the front panel and hold down for about 2 seconds. The display shows the first menu; SETUP E-MAIL. 2.
Setting up E-mail Address Book You can save the frequently used e-mail address in your machine into the 19 one-touch button on the front panel so that you can easily select e-mail address when sending an e-mail fax. Storing a E-mail Address 1. Press E-mail on the front panel and hold down for about 2 seconds. The display shows the first menu; SETUP E-MAIL. 2. Press ➛ or ❿ until you find ‘SETUP ADDR. BOOK’ and press Start/Enter. PRESS ONE-TOUCH 3. Press the desired one of 19 one-touch buttons. 4.
Setting up E-mail Address Book on Your Computer Using the Phonebook programme on your PC, you can easily set up email address book. You can download your input to the SF-535e machine and get addresses from SF-535e to the PC. Before using the Phonebook feature, you must install SmarThru programme in your computer. Refer to the chapter 2, “Installing Samsung Software.” 1. Start your Windows. 2. Click the Start menu, and select Programs from the Start menu. 3.
5. If necessary, press Read to get the e-mail addresses currently stored in your SF-535e. The addresses will be uploaded and displayed in the Remote Control Panel dialogue box. 6. Select the desired address number in the list and click Edit. The Edit dialogue box will appear. 7. Fill in each of the input fields, and click OK to save the address you just entered. 8. Repeat steps 6 and 7 to store more addresses. 9. When you have finished, you must click Write to download the address book to your SF-535e.
Sending an E-mail Fax 1. Load your document face down with the top edge first going into the document feeder. And adjust Resolution and Contrast, if necessary. For details, see page 3.8. 2. Press E-Mail on the front panel. The display shows ‘E-MAIL SEND’ briefly. 3. If you did not set the default ISP, the display shows the available information. E01:HANSEM Press ➛ or ❿ until your name appears and press Start/Enter.
Receiving an E-mail Fax 1. Pull the paper output tray completely and make sure that the print media is loaded in the paper input tray. 2. Press E-Mail on the front panel. The display shows ‘E-MAIL RECEIVE’ briefly. 3. If you did not set the default ISP, the display shows the available information. E01:HANSEM Press ➛ or ❿ until your name appears and press Start/Enter. If you have set the default ISP, it is automatically selected and you cannot see the display above.
Setting Automatic E-mail Reception You can set your machine to receive the e-mail fax automatically at specified interval. 1. Press E-mail on the front panel and hold down for about 2 seconds. The display shows the first menu; SETUP E-MAIL. 2. Press ➛ or ❿ until you find ‘E-MAIL AUTO POLL’ and press Start/Enter. 3. Press ➛ or ❿ to select ON, then press Start/Enter. Selecting OFF does not automatically receive e-mail faxes. 4.
5 chapter Read this chapter to learn how to select and load print media and how to use the print settings.
Print Media Selecting Print Media The type of media you select affects the performance and print quality. Selecting Media Types Most photocopy paper, postcards, index cards, transparencies, envelopes, and labels will work your printer, particularly paper that is marked for use in laser printers. For the best results, use one of the papers developed especially for an laser printer. What to Consider • Desired outcome. The paper you choose should be appropriate for the project.
Paper that Might Not Work • Highly textured stock, such as linen, may not print evenly because the toner can bleed. • Extremely smooth, shiny, or coated papers not specifically designed for laser printers can jam the printer and repel toner. • Multi-part forms, such as duplicate or triplicate forms can wrinkle and jam; the toner is also more likely to smear. • Paper in poor condition — with tears, dust, wrinkles, curled or bent edges, or that doesn’t lie flat can jam the printer.
Using the Automatic Paper Input Tray You can stack paper or transparencies in the automatic paper tray to feed automatically. The automatic tray can hold a maximum of 150 sheets of plain paper. The maximum capacity may be reduced depending on the thickness. For best results, adjust the paper settings each time you change paper (see page 5.10). Note: If you experience feeding problems, try printing one at a time from the manual input tray. See page 5.6. 1.
• For transparencies: - Hold the transparencies by the edges and avoid touching the print side. - Fan the stack of transparencies to prevent feeding failures. Be careful not to scratch or leave fingerprints on the print sides. 3. Load the print material into the paper tray. Load only as much paper as will fit beneath the lip protruding from the paper-length adjuster. Neatly stacking the paper before loading will help prevent print problems. Do not mix types.
• Load letterhead paper face up with the top of the page going into the tray first. LET TE RHE AD 4. Slide both paper adjusters to fit against the paper’s edges. Ensure the paper line flat in the tray. Print Side Up Most papers prints better on one side than on the other. This is especially true for coated or specially treated paper. The print side is usually indicated on the paper package. Be sure to insert the paper into the paper tray of the printer with the print side up. Printing 5.
Using the Manual Paper Input Tray To load a single envelope, card stock, or specialty paper, use the manual paper input tray. When you use the manual input tray, you must feed one piece of media at a time. Manual feeding is helpful when printing on heavy paper or when experiencing paper jam with the automatic paper input tray.
• Load a sheet of the label with the adhesive backing facing away from you. • Load a sheet of the card stock with print side up, short edge first. 2. In your computer, start printing of the document. the display on the front panel displays ‘PC PRINTING...’ and ‘PRESS START.’ 3. Press Start/Enter to start manual feeding. If you have more than one page to print, press Start/Enter for each page. Start/Enter Printing 5.
Specialty Paper Guidelines • Read all instructions that come with special paper for important information regarding how to achieve the highest print quality. • It is recommended to feed one sheet at a time for special paper types. • For transparency film, follow these guidelines: - Let printed sheets of film dry completely before storing.